Gaps in printing
So I'm kinda out of answers on this issue. Printer has been working fine for a long time now and the issue just appeared.
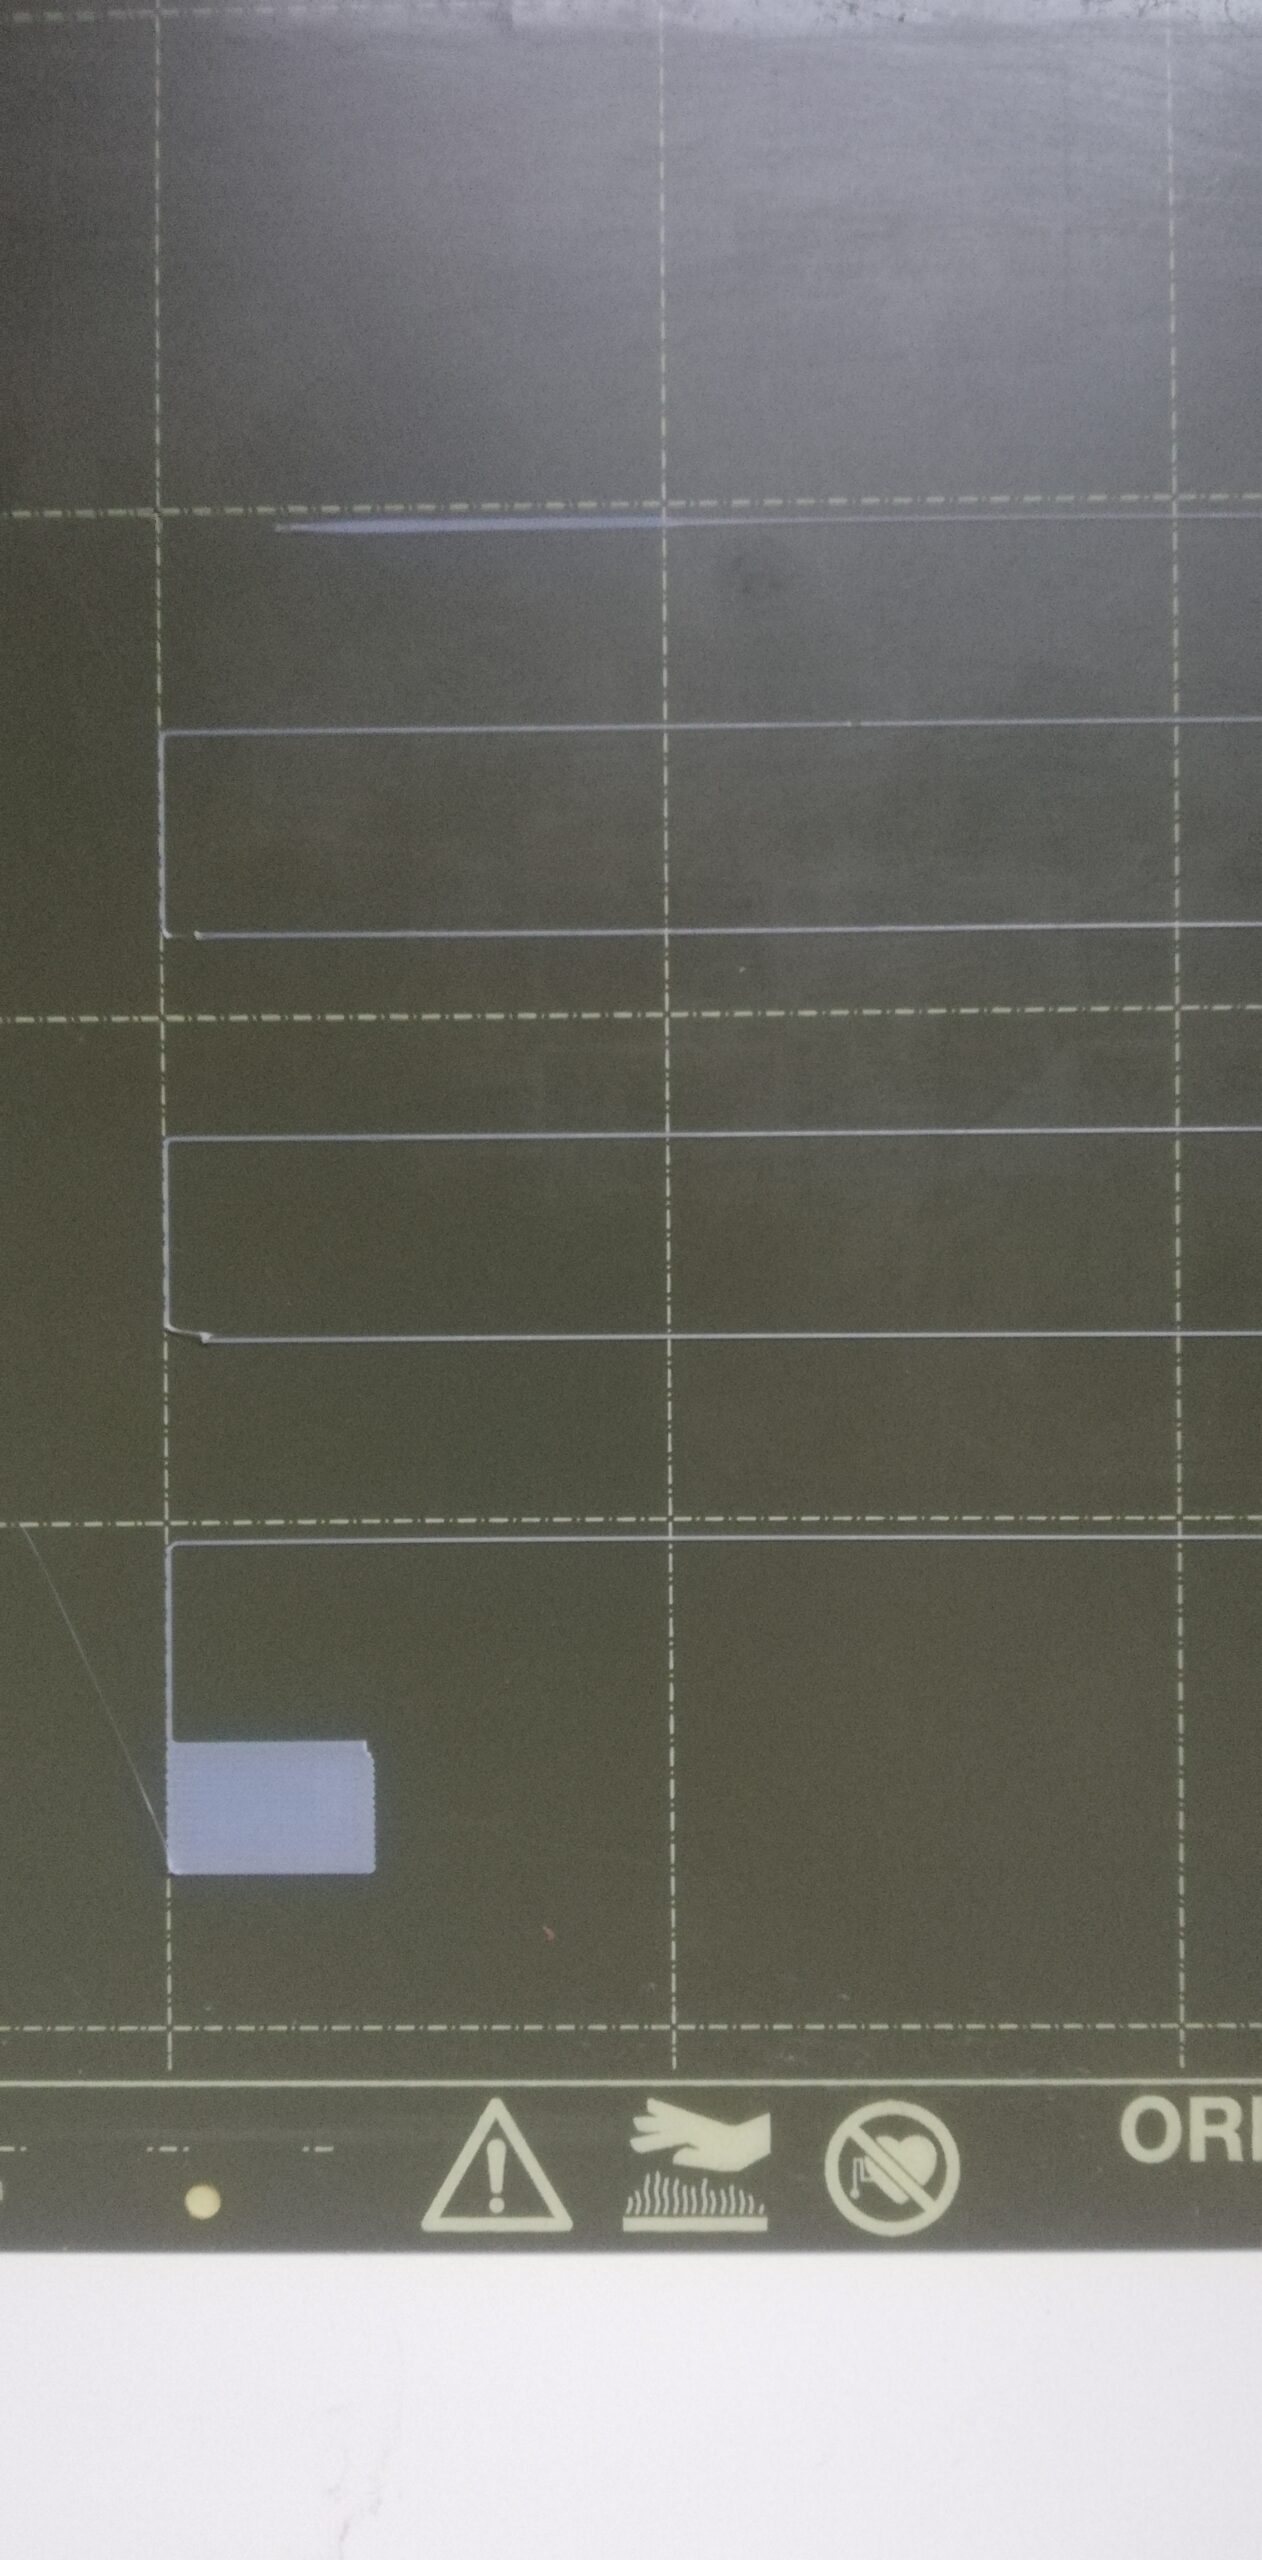
The issue can be seen when printing a calibration example. At the same spot at the X axis there appears a gap and frankly I have no idea why.
There are some marks on one of the X axis bars which could have been caused by insufficient greasing, bit that doesn't explain why there is a missing extrusion part.
I have already changed the nozzle, done cold pulls, etc so by now I don't think it's an extrusion issue in a strict sense. Also, the issue is the same with different filaments.
Any ideas where to look for other issues?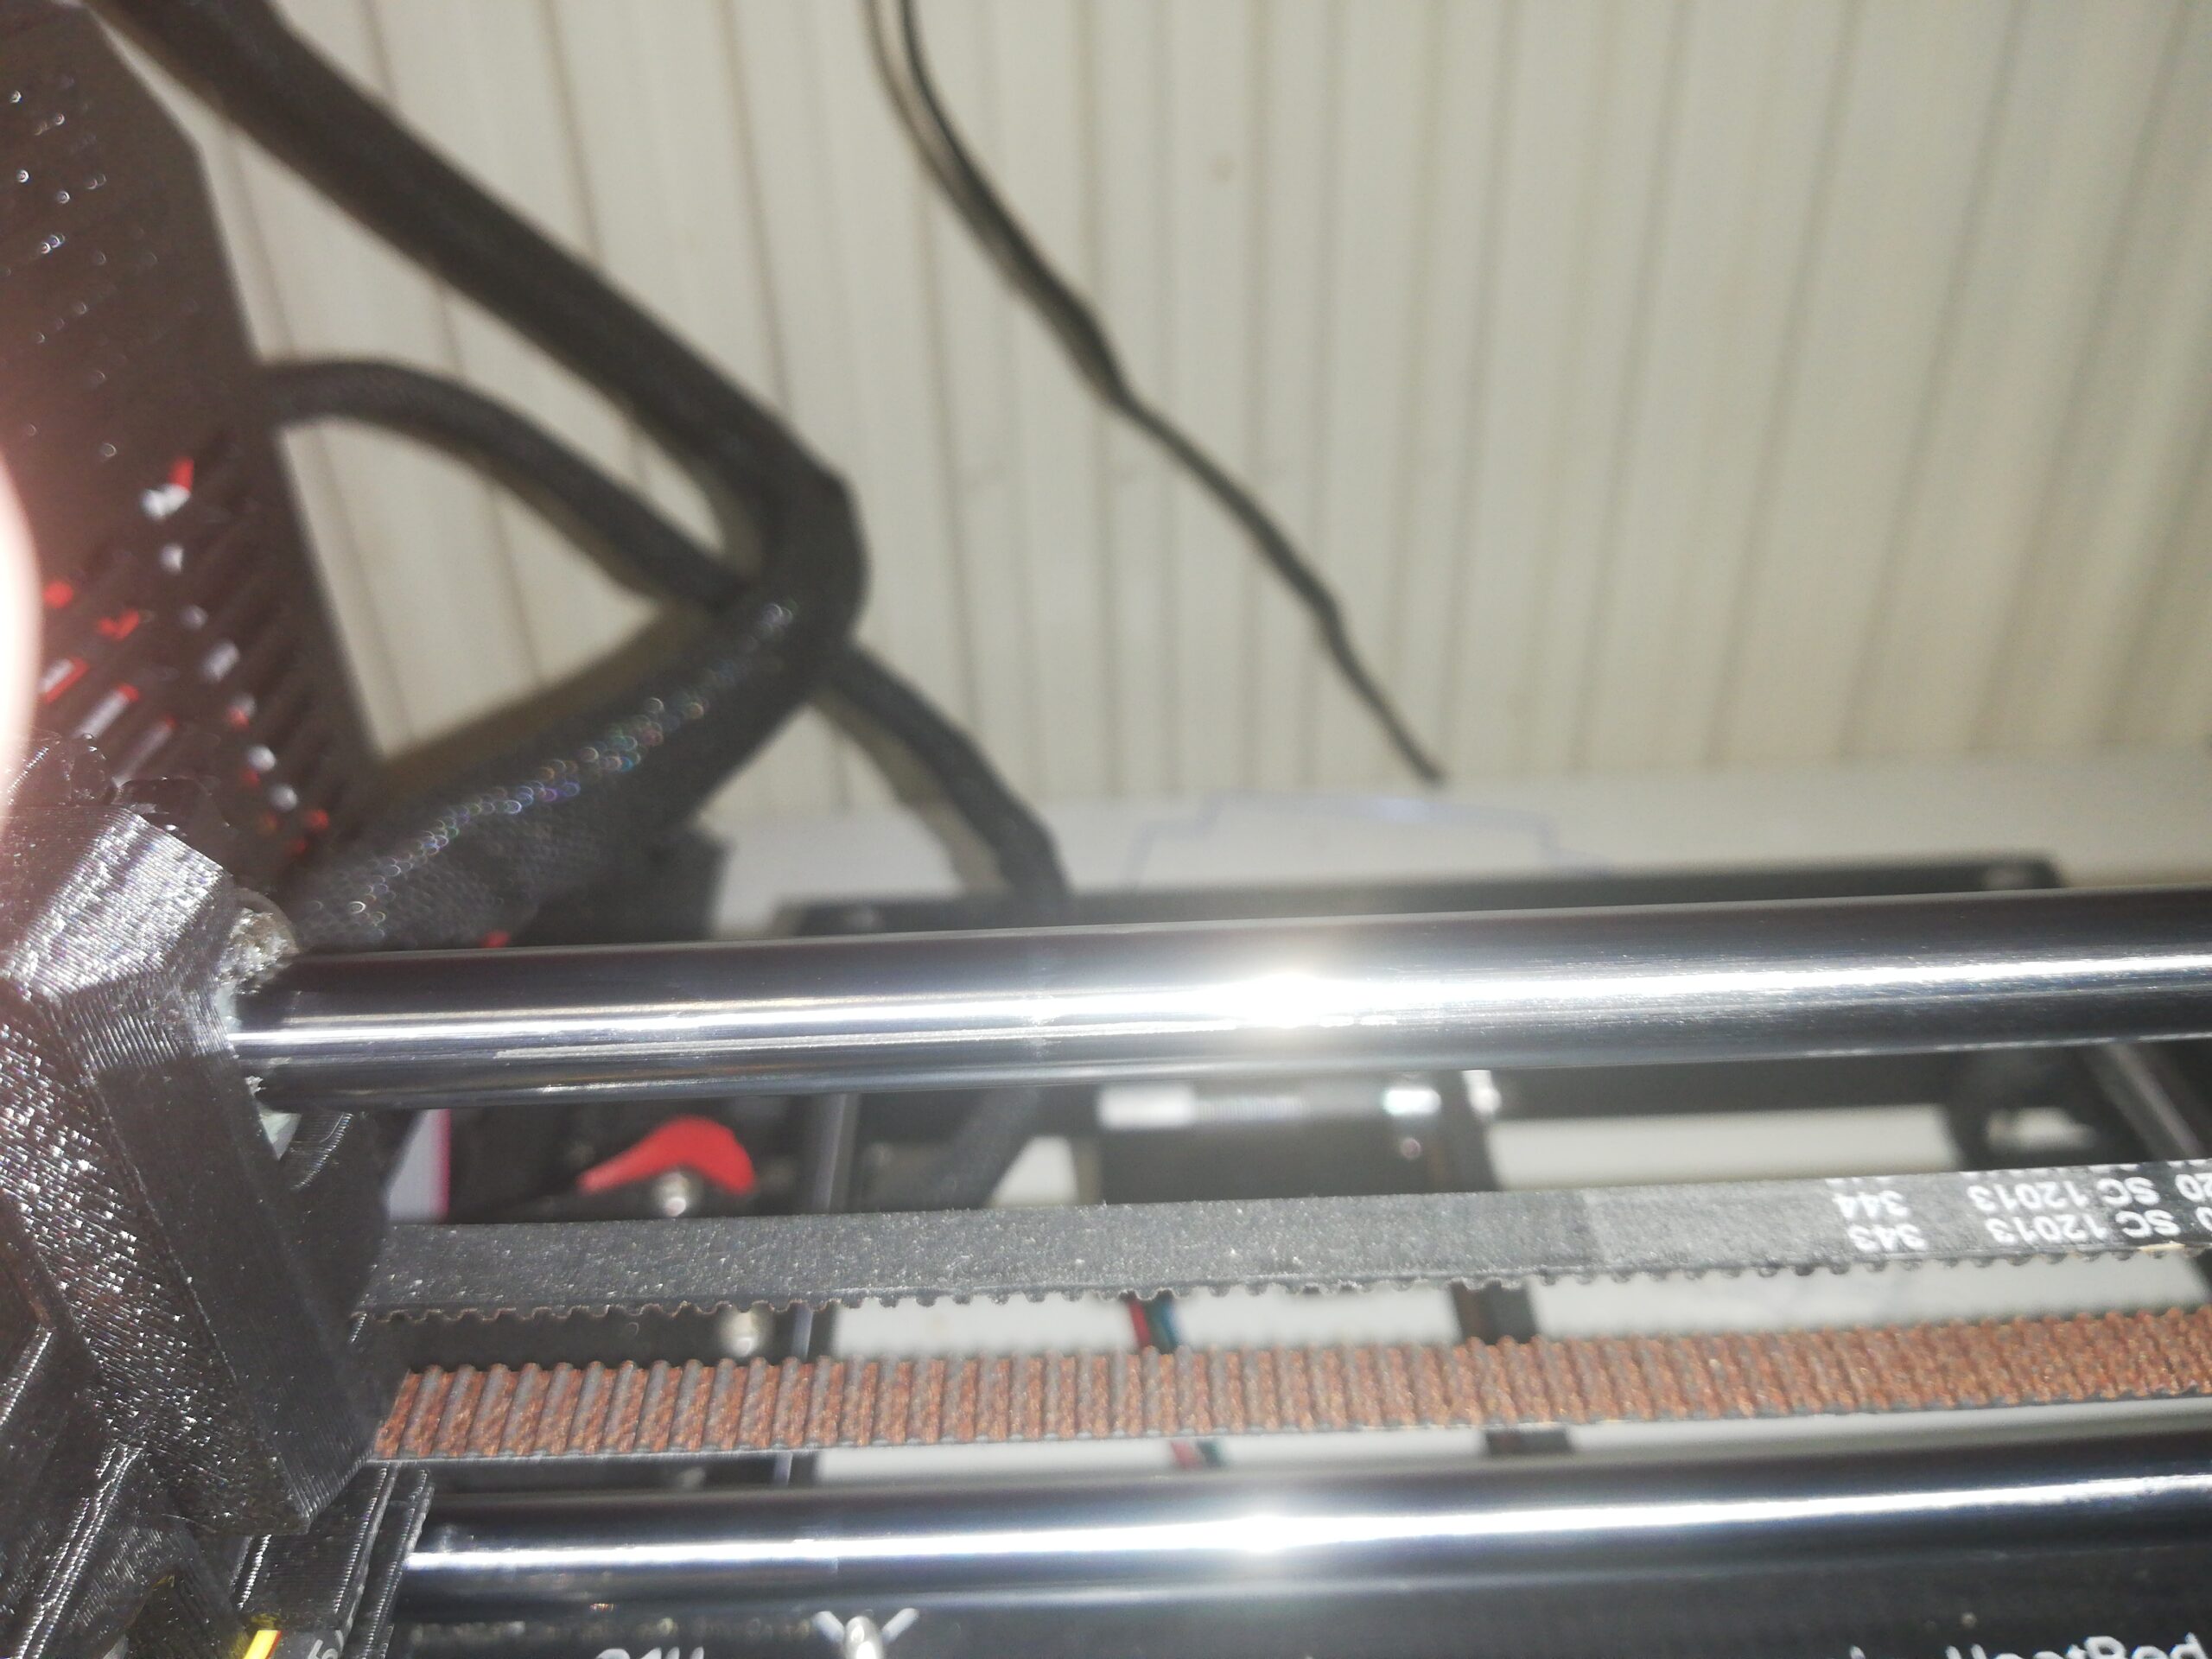
Best Answer by BogdanH:
There's quite noticeable damage on rod and it's position also indicates that bearing wasn't positioned properly during assembly (should be rotated by 45deg). Hard to say if that caused the damage, though.
I don't think it's extrusion issue. Because the "glitch" in print occurs about at position where damage on rod ends (where bearing balls cross damage section on rod).
What I would do is, I would rotate linear bearings on extruder by 45deg (in that case balls won't run over damaged section on rods).
Judging by the smears visible on the print sheet there is a good chance that adhesion will be improved by washing it. Clean the sheet with dishwashing detergent (Dawn/Fairy) and plenty of HOT water, rinse well and dry with a fresh paper towel. Handle by the edges only.
Cheerio,
RE:
There's quite noticeable damage on rod and it's position also indicates that bearing wasn't positioned properly during assembly (should be rotated by 45deg). Hard to say if that caused the damage, though.
I don't think it's extrusion issue. Because the "glitch" in print occurs about at position where damage on rod ends (where bearing balls cross damage section on rod).
What I would do is, I would rotate linear bearings on extruder by 45deg (in that case balls won't run over damaged section on rods).
[Mini+] [MK3S+BEAR]
RE: Gaps in printing
I'll try this when I get around to it. I am pretty sure I assembled it well as it has worked for over a year nearly non-stop, but it doesn't hurt to check this.
As for the bed, I tried clean and with adhesive, no change.
RE: Gaps in printing
Hi,
The rod damage was the culprit of the printing issues.
I got around to take a look disassembling the parts and after extensive testing, it seems that the ball bearing either is slightly broke or insufficiently lubricated as they seemed to be mounted correctly.
I did however turn the metal rod 45º as the damage was already done so before ordering a replacement for both parts, I might as well get some more use out of the current ones.
Turning the rod fixed the issue, so at least the origin of the printing issue has been able to be found.
Thank you everyone for your help !
There's quite noticeable damage on rod and it's position also indicates that bearing wasn't positioned properly during assembly (should be rotated by 45deg). Hard to say if that caused the damage, though.
I don't think it's extrusion issue. Because the "glitch" in print occurs about at position where damage on rod ends (where bearing balls cross damage section on rod).
What I would do is, I would rotate linear bearings on extruder by 45deg (in that case balls won't run over damaged section on rods).
RE: Gaps in printing
Rotating the rod is the incorrect thing to do. At the moment you have bearings positioned so that the rows of balls are located at the 12, 3, 6 and 9 oclock positions. This is evident by the position of the scoring on the rods. The assembly manual instructs you to position the bearings such that the balls are at the roughly 11, 1, 4, 7 positions (45 degrees from where you have them). This results in 2 rows of the balls taking the load rather than a single row.
While rotating the rod will move the damage away from the balls, it wont remove the underlying problem of having everything supported on a single row. Rotate the BEARING 45 degrees as Bogdanh advised. Also make sure that when you do replace any parts that its assembled like that for maximum lifespan.