First Layer calibration not working after replacement of Hotend (MK3S+)
I recently had a lousy printing result, leading to a nozzle and hotend covered with filament residuals. I must say that up to that moment, my printer (kit) delivered flawless results. As I did not want to go into changing the nozzle and cleaning up the heat block, I bought an entire pre-assembled hotend; only the PFTE tube was missing, which I took from the spare parts of the kit. Assembly and swap were pretty straightforward, self-test and calibration without problems. However, since then, I cannot print a proper first layer any more. I have ripples all over; see the enclosed pic.
What I tried so far: I aligned the idler, checked the idler of filament residuals, and checked the alignment through the open idler door, and all seems to be good. I tried to loosen or tighten the idler door screw, but no change. Filament loads, Filament sensor works, Pinta Sensor works. I ran out of ideas. I can exclude a clogged nozzle because it is a brand-new Prusa V6 E3D. The Filament I tried in the pic is PLA, though the results with any other (new) filament are the same. I sense that it has to do with the extruder, but
Best Answer by Diem:
Your first layer is way too high. You need to lower it until it squished into a sheet.
If the value goes boyond -2 then you may have nudged your (super)PINDA out of position, look at step 16 of:
https://help.prusa3d.com/guide/how-to-replace-superpinda-mk3s-mk3s_179920
Cheerio,
Your first layer is way too high. You need to lower it until it squished into a sheet.
If the value goes boyond -2 then you may have nudged your (super)PINDA out of position, look at step 16 of:
https://help.prusa3d.com/guide/how-to-replace-superpinda-mk3s-mk3s_179920
Cheerio,
RE: First Layer calibration not working after replacement of Hotend (MK3S+)
As I did not want to go into changing the nozzle and cleaning up the heat block, I bought an entire pre-assembled hotend
That looks to me like a quite expensive luxury 😀
A dirty heat block from the outside does not influence your printing result.
When it is heated up, you can wipe off plasic from the outside with a thick piece of cotton from an old T-shirt.
And to clean the nozzle inside, do a cold pull.
The Prusa PLA silver delivered with the printer works very well for this.
Set the hotend temperature in Settings to 88 or 89 °C and let it cool down to this Temp. and pull slowly - works excellent for me.
RE: First Layer calibration not working after replacement of Hotend (MK3S+)
I agree with Diem. It's more likely than not that a new hotend will significantly affect the height of the nozzle. This test looks like a nozzle way too high.
Formerly known on this forum as @fuchsr -- https://foxrun3d.com/
RE: First Layer calibration not working after replacement of Hotend (MK3S+)
Thank you for your answer. Here is what I did: I removed the steel sheet, moved the Extruder/nozzle down until it touched the heatbed (not squishing - I had a sheet of printer paper in between), then moved the extruder to the centre of the x-axis, lowered the Pinda and moved it up, till I could move a (Prusa Kit) zip-tie under (again not squishing the Pinda into the zip tie). I then did a Z calibration and two rounds of first-layer calibration print. First round, I started at -1000 and ended at -1.400, finally showing better results at -1.400. I then did a second print, this time beginning with -1.400. You can see the result below:
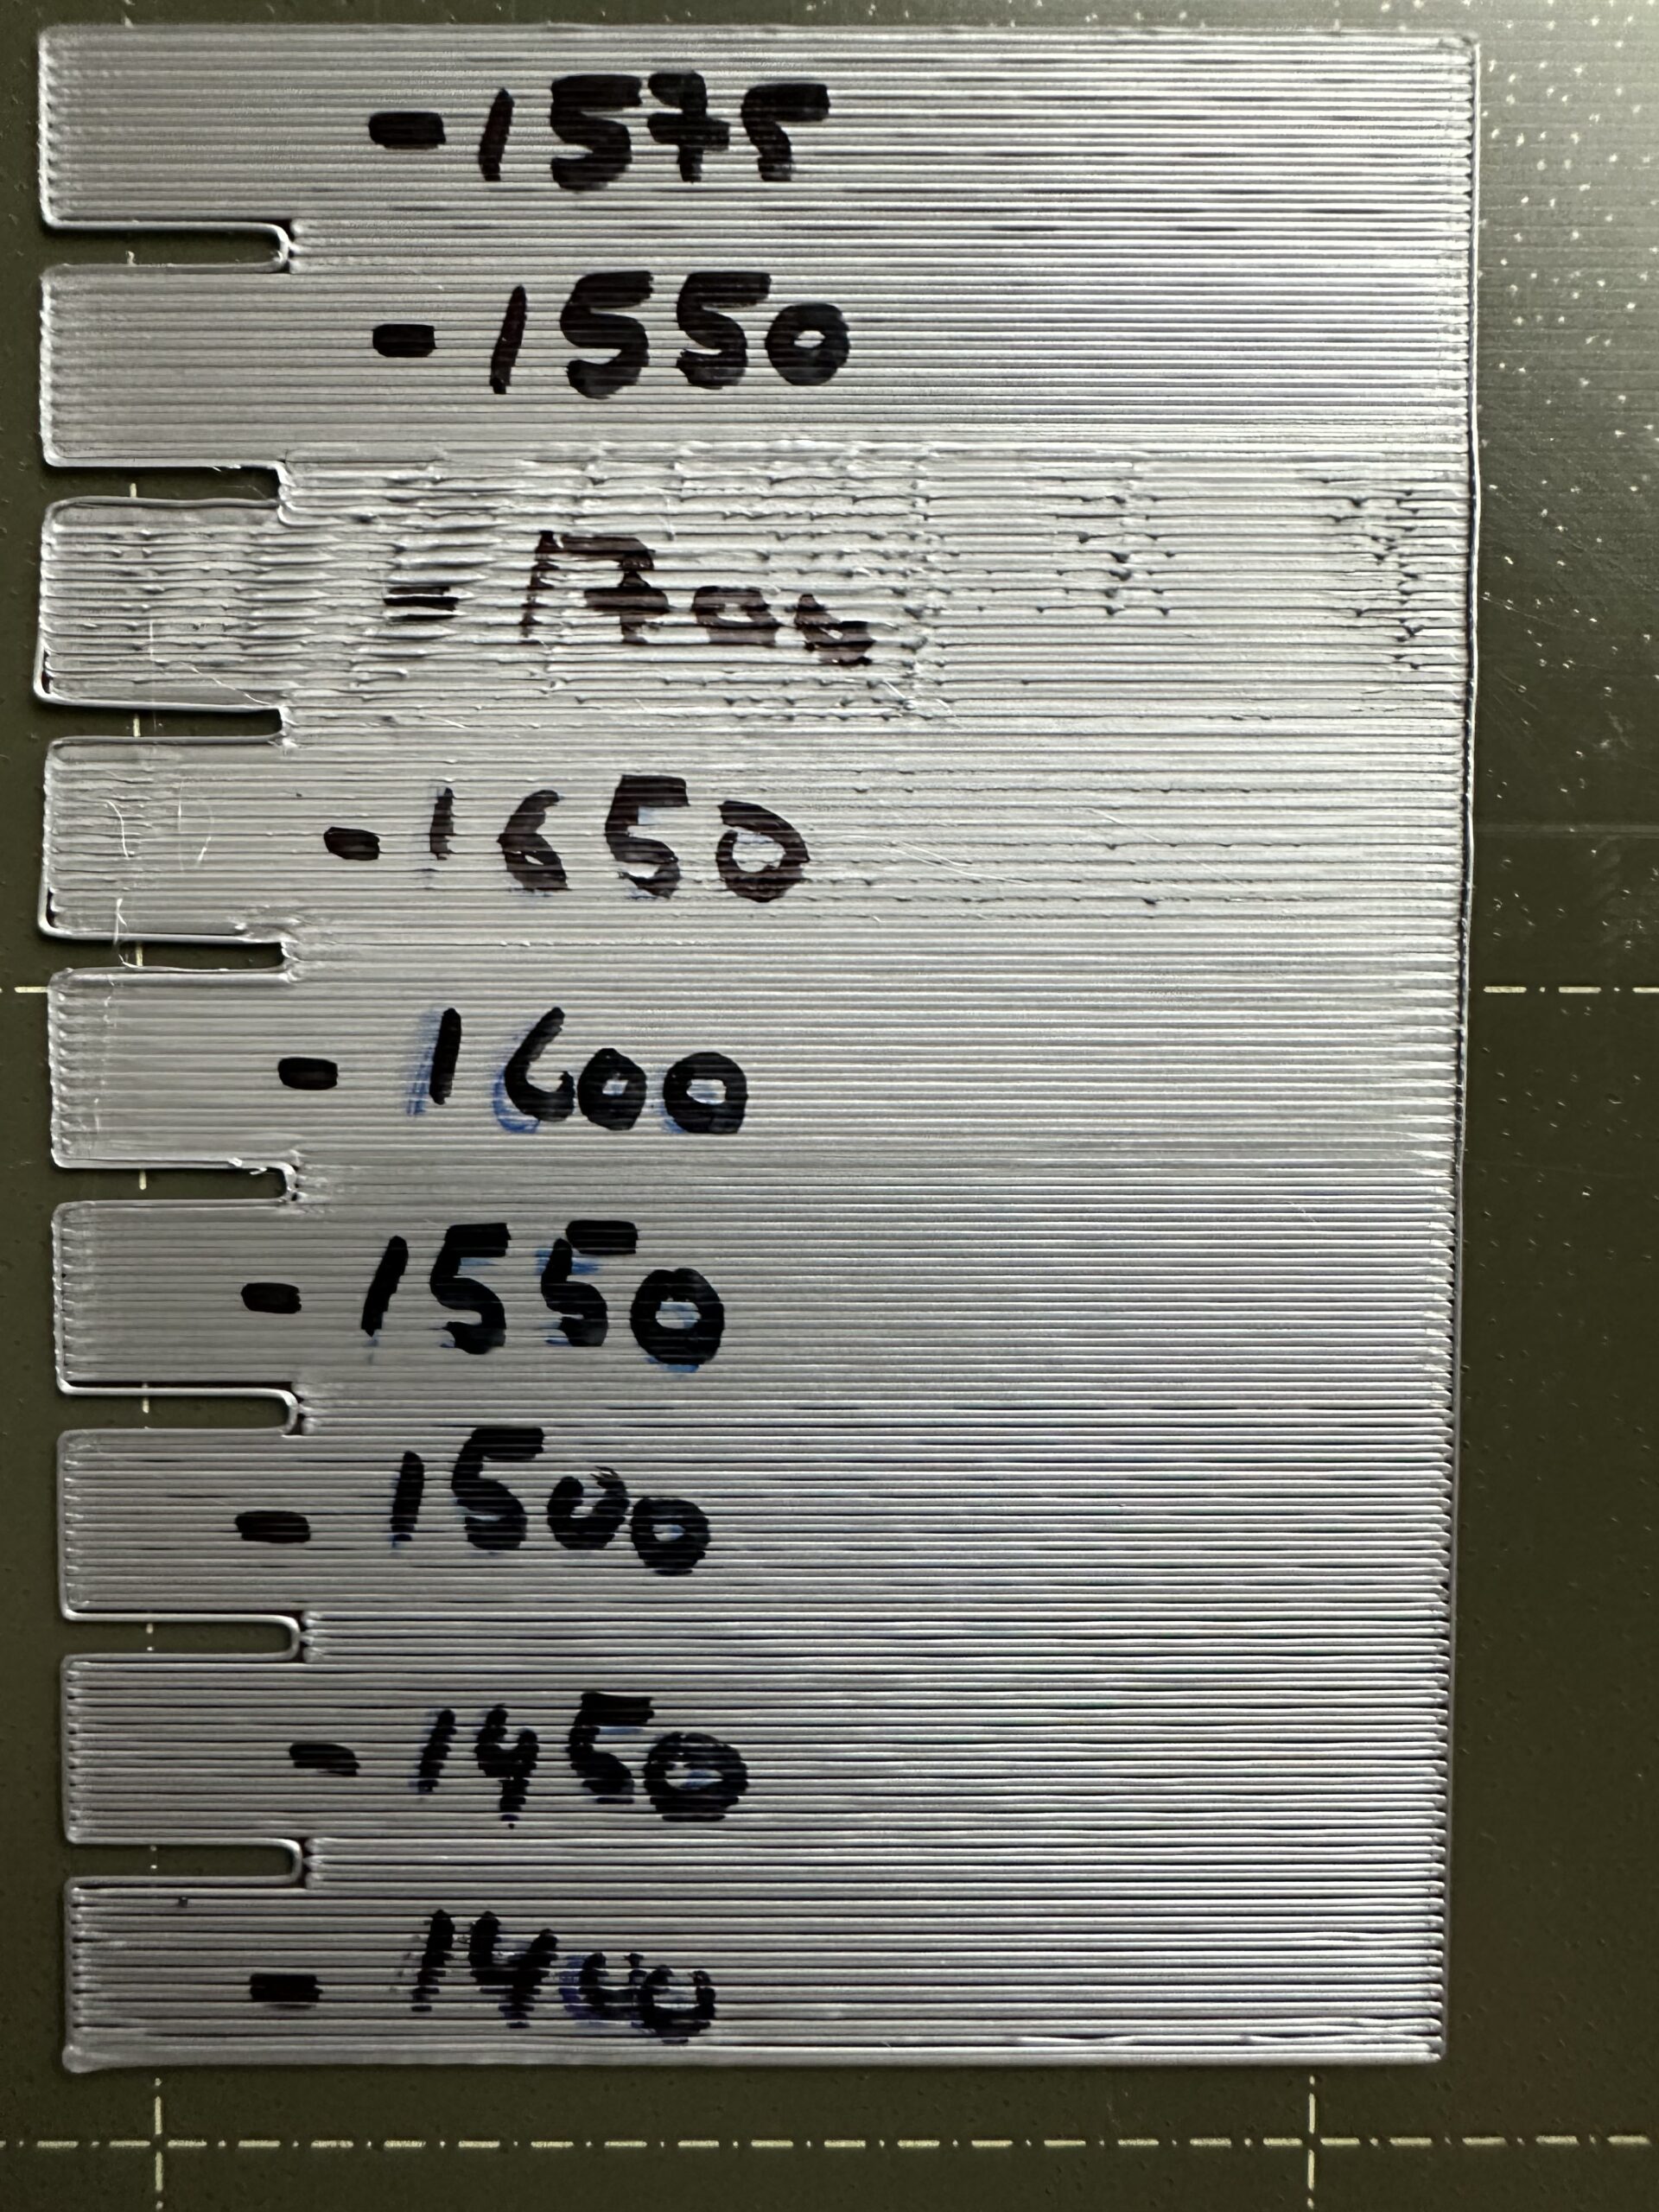
It seems that -1.600 would be the result, but it is probably still subject to further fine-tuning. I never had a Z-Correction number so small. I probably would have needed to get the Pinda sensor even higher. I measured the zip-tie with a calibre, and it showed 1.18 mm. I could pull the zip tie from under the Pinda with only a little force. Shall I leave it like this or do another round of calibration, starting with the Pinda Level?
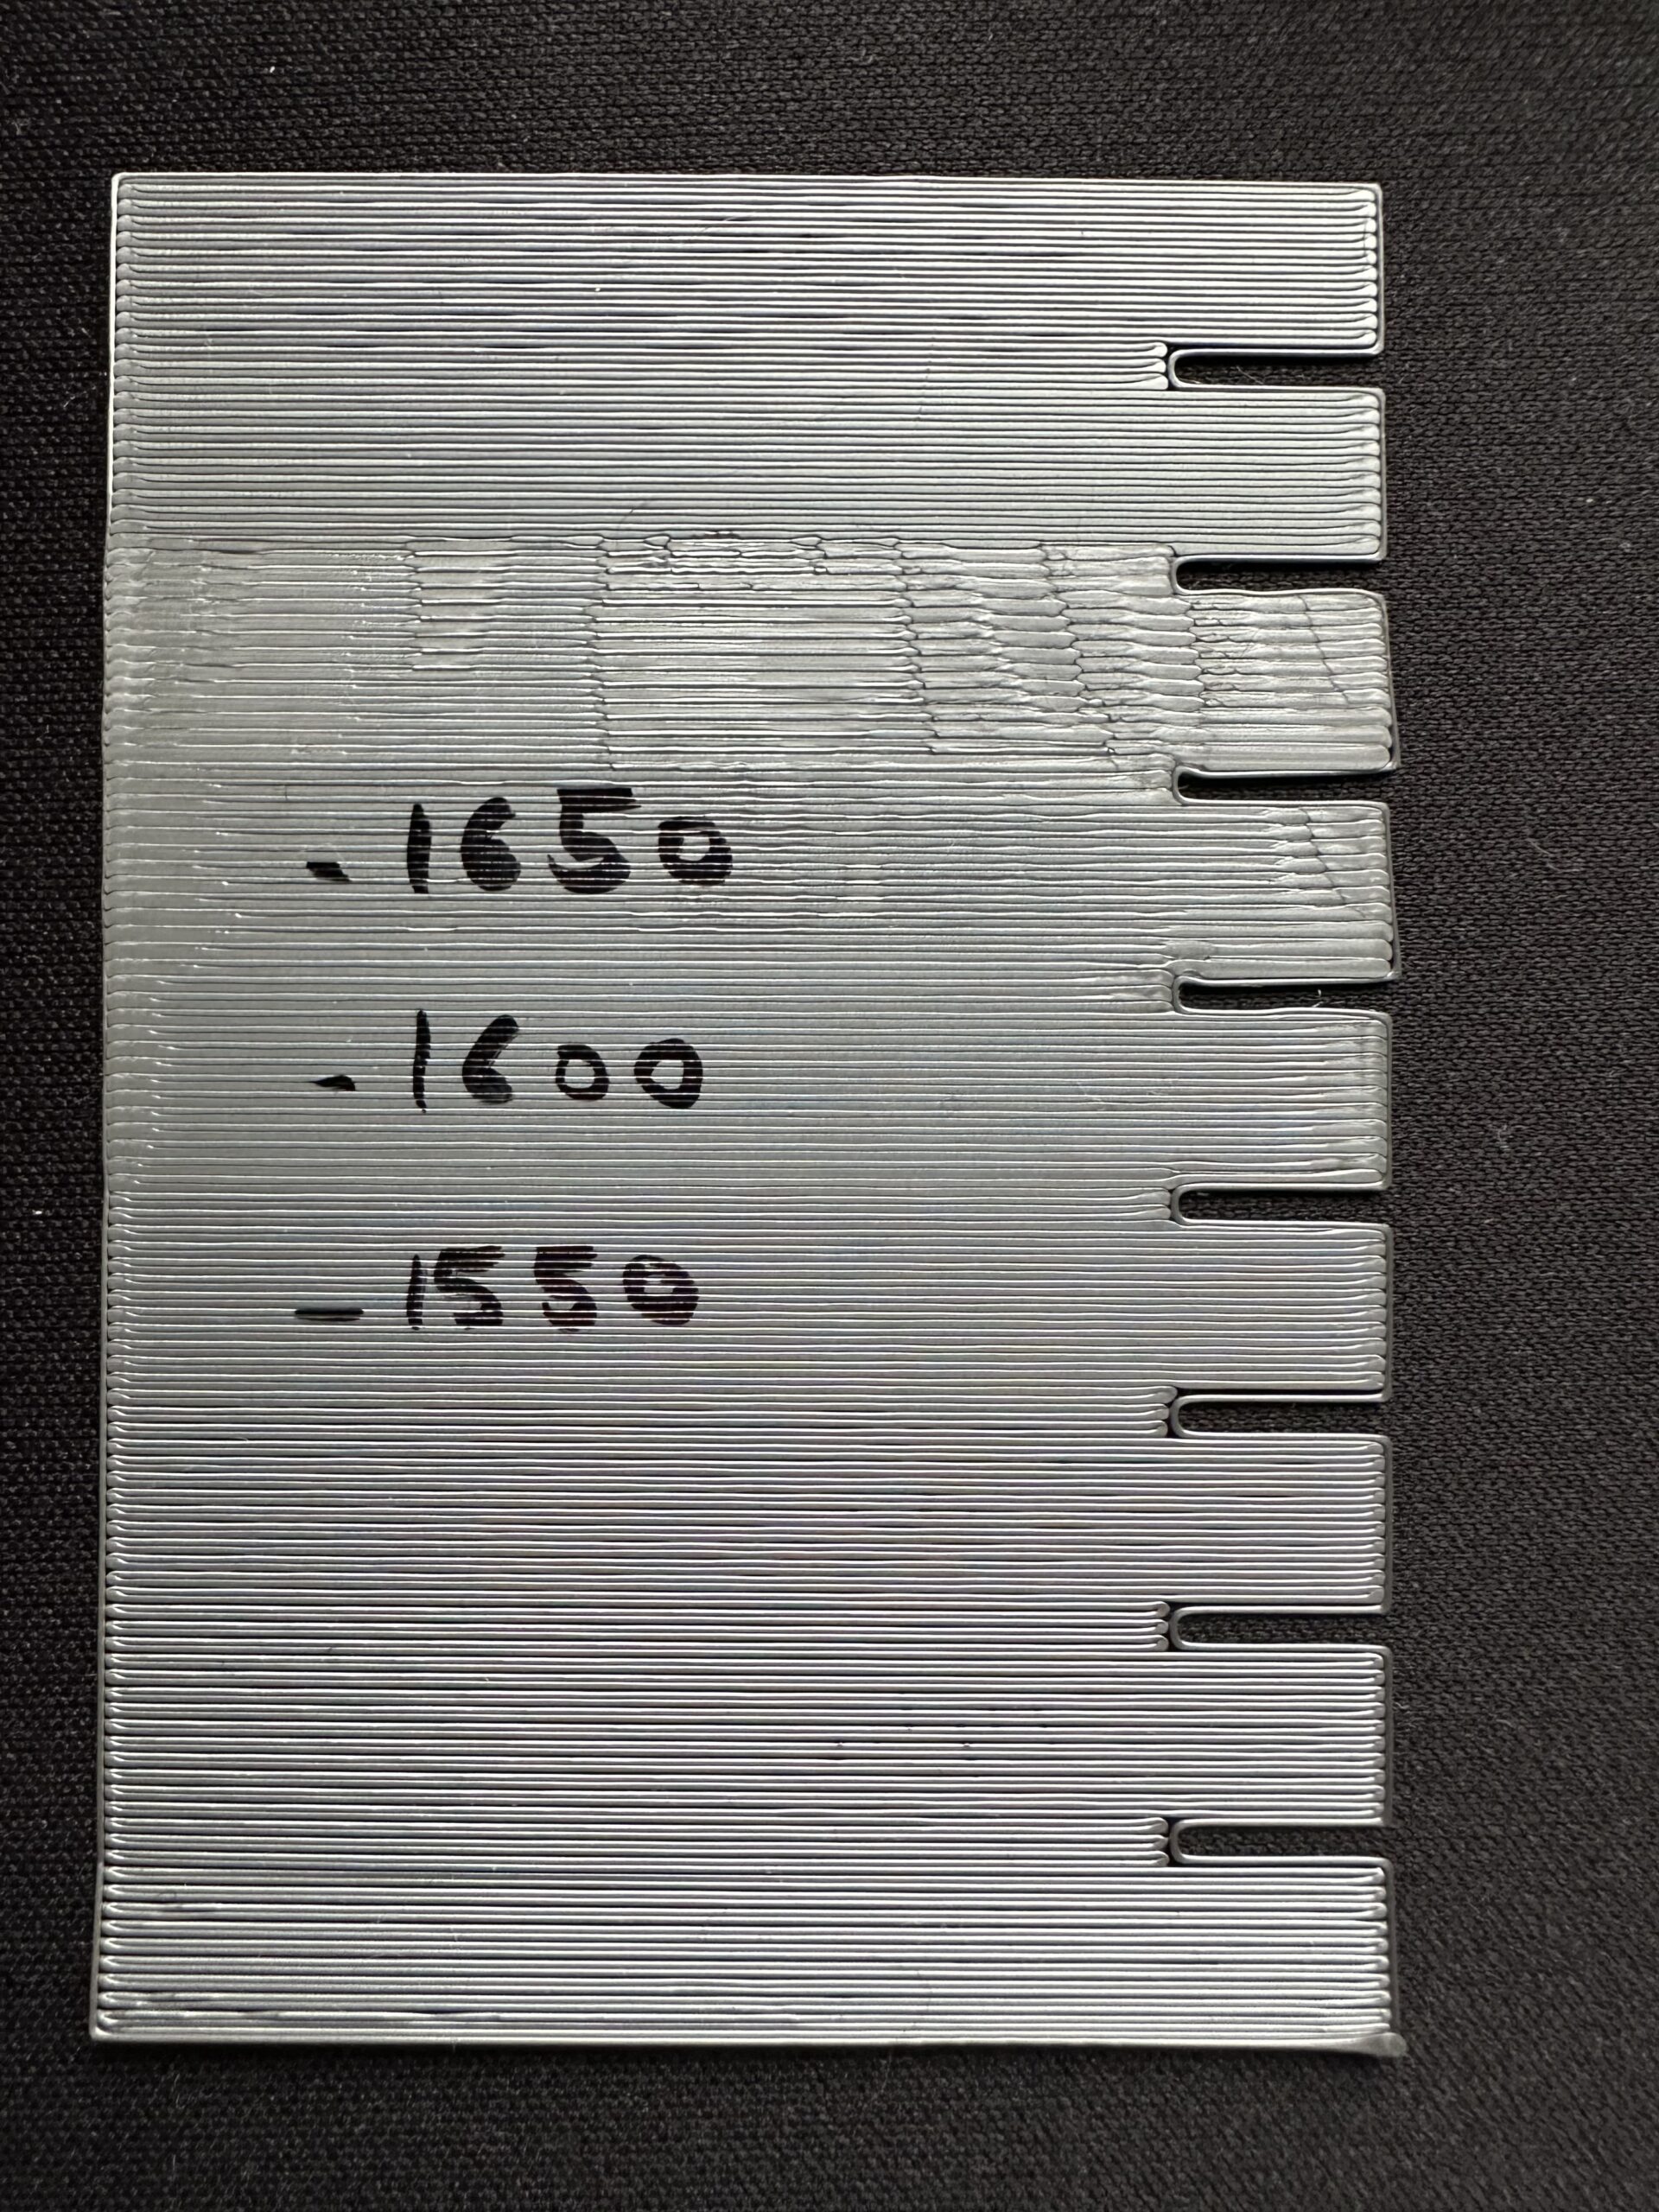
Here is another photo from the bottom of the print (to me, -1.550 looks best):
You are definitely in the ballpark, try it with a few simple prints before committing to a big job.
Cheerio,