Einsy board replacement
Quick question. Our newest fully assembled Mk3S+ had the Einsy board go bad in just a few weeks and they got a warranty replacement out to me here at the end of our long, long supply line. Just wondering if there's any tips, tricks, etc to the job. The work doesn't bother me and I plan to just run the installation processs backwards and then forwards again. Just that it takes a very long time to get parts to us here and it's used in important work and I don't want to make any screw ups that would leave us dead in the water while chasing a part! If I'm missing anything in the plan or you have any sage advice thanks in advance!!!
RE: Einsy board replacement
My suggestion would be to label everything not obvious before you disconnect it from the old board. If you never assembled a kit, the power connections might be easy to get wrong. It may not matter if you eyesight is good, but you might want to think about how to work on it. The front side of the Einsy board is to the left (looking from the front of the printer) so it is a bit awkward working on it with the frame partially in the way. I remember trying to get a good view at times, and keep wanting to position my head where the frame was. I really wish they would have designed it so the board was flipped front-to-back so access was easier.
RE: Einsy board replacement
In jobs like that I take high res photos with my good camera. Then more photos as I remove each connector and connection.
That way I can do an A-B comparison on reassembly at each steps if I get confused. Also plenty of paper notes.
REPAIR, RENEW, REUSE, RECYCLE, REBUILD, REDUCE, RECOVER, REPURPOSE, RESTORE
RE: Einsy board replacement
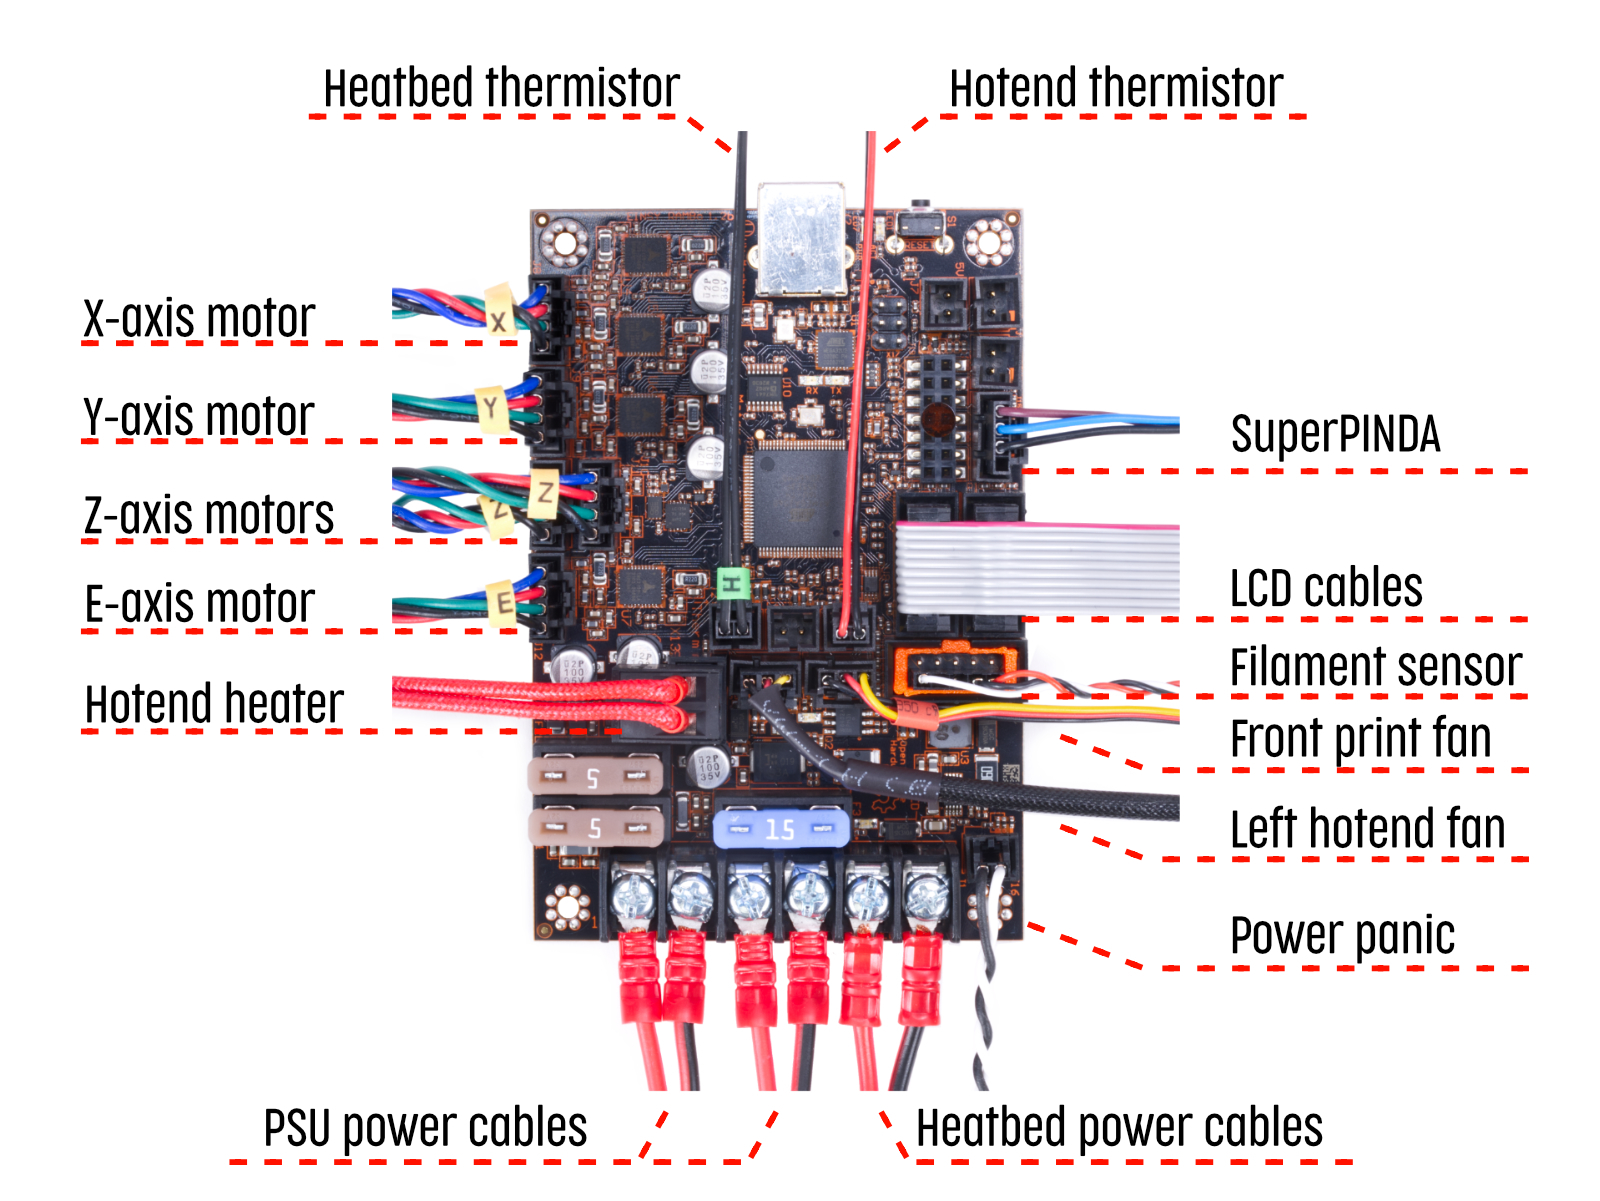
Removing the door to the Einsy box will make it easier to see and to work on it. If memory serves, all you have to do is unscrew/remove the top tab and the door will lift off. Have a good lighting source at hand.
Be extra careful disconnecting/pulling the plugs from the sockets. Some have tiny, easily broken tabs on them and some are very difficult to remove.
Label the wires as you unplug them. If you can print the picture of the board with the legends from the assembly manual, you can use that as a reference when reassembling.
Triple check the IR filament sensor connection in step 36. Be sure it’s plugged into the lower row of pins in the correct orientation.
https://help.prusa3d.com/guide/8-electronics-assembly_174100
Good luck. Let us know if you have additional questions.
Cheers