After upgrade MK3 -> MK3S: Calibration failed. Check axes and run again.
Hi everybody,
my printer was originally a MK3, fully operational for about 2 years. I recently upgraded it to an MK3S.
After the building part I upgraded the firmware to 3.9.1 as instructed by the manual anyway (not the specific version, but the MK3S firmware).
Now when doing the initial calibration or when explicitely running just the Z-calibration I get the "Calibration failed. Check axes and run again." message.
The thing is: I don't really understand what it's complaining about. After all it had been working fine before the hardware upgrade. And during that upgrade I don't remember making ANY change to the axes. Just reviewed the upgrade manual again. It's really just the extruder block and the belt that I touched. ( https://help.prusa3d.com/en/guide/1-introduction_54032)
I've read a couple of other posts dealing with the error message, but none of the suggested solutions seem to apply to my situation:
- I don't see any cables hitting others parts, no relevantly at least.
- I've tried to do a factory reset (option "all"). I've read about a separate data clear procedure somewhere, but it wasn't elaborated how that worked.
- I triple checked all cables connected to the EINSY board.
- Moved the extruder block to the top, so I mean along the Z-axis all the way to the top. Turned off the printer. Tried to repeat Z-calibration.
In general sounds and behaviour seem unchanged in comparison to the old and working MK3 setup. All axes seem to be even and parallel.
Does anybody have further suggestions on what I could try?
Here's a video showing the procedure:
Best Answer by JoanTabb:
It looks like the E3Dv6 Extruder assembly is not fitted properly in the retaining collar inside the extruder housing, it is projecting way too far out of the extruder...
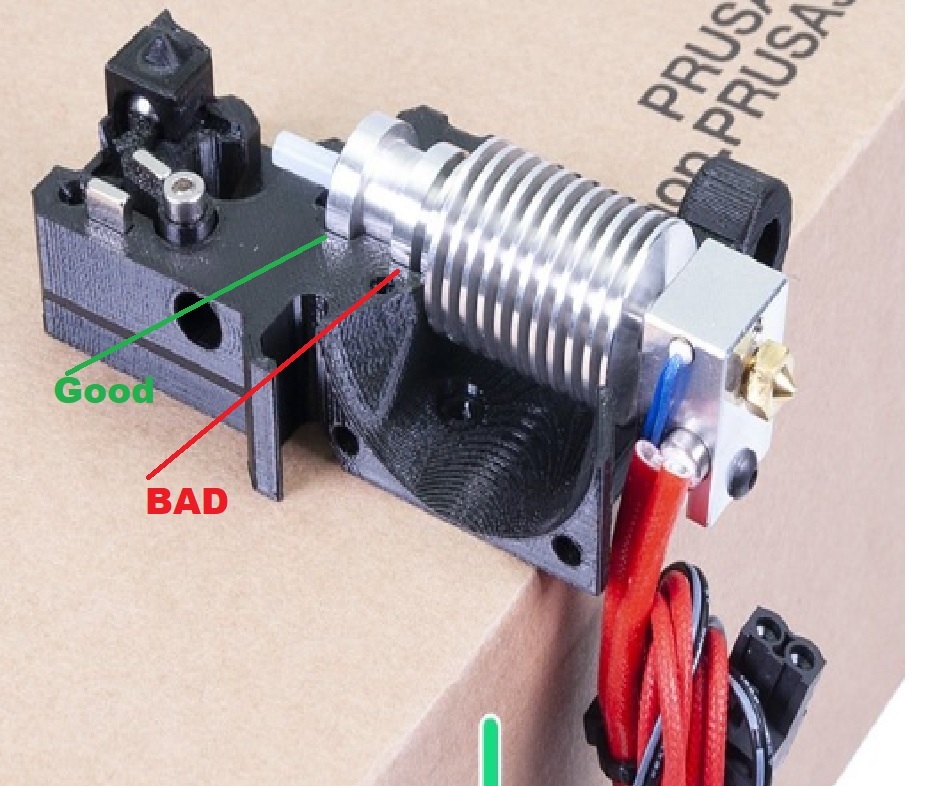
the top of the aluminium heatsink should locate in the collar labelled Good, in Green,
I think it is located in the area labelled BAD in red... this will reduce your available Z height
Your picture, below, shows the lower fins of the heatsink projecting below the Extruder housing where as the bottom of the bottom fin should be level with the bottom of the housing
Regards Joan
RE: After upgrade MK3 -> MK3S: Calibration failed. Check axes and run again.
Did you do a xyz calibration? Like the printer was new.
RE: After upgrade MK3 -> MK3S: Calibration failed. Check axes and run again.
@peter-m26
Yes, that's what I meant with initial calibration. From the steps it performs it fails at the exact same step (after "put paper on the heatbed").
RE: After upgrade MK3 -> MK3S: Calibration failed. Check axes and run again.
Hi everybody,
my printer was originally a MK3, fully operational for about 2 years. I recently upgraded it to an MK3S.
After the building part I upgraded the firmware to 3.9.1 as instructed by the manual anyway (not the specific version, but the MK3S firmware).
Now when doing the initial calibration or when explicitely running just the Z-calibration I get the "Calibration failed. Check axes and run again." message.
The thing is: I don't really understand what it's complaining about. After all it had been working fine before the hardware upgrade. And during that upgrade I don't remember making ANY change to the axes. Just reviewed the upgrade manual again. It's really just the extruder block and the belt that I touched. ( https://help.prusa3d.com/en/guide/1-introduction_54032)
I've read a couple of other posts dealing with the error message, but none of the suggested solutions seem to apply to my situation:
- I don't see any cables hitting others parts, no relevantly at least.
- I've tried to do a factory reset (option "all"). I've read about a separate data clear procedure somewhere, but it wasn't elaborated how that worked.
- I triple checked all cables connected to the EINSY board.
- Moved the extruder block to the top, so I mean along the Z-axis all the way to the top. Turned off the printer. Tried to repeat Z-calibration.
In general sounds and behaviour seem unchanged in comparison to the old and working MK3 setup. All axes seem to be even and parallel.
Does anybody have further suggestions on what I could try?
Here's a video showing the procedure:
Before you try a lot, you should like to try the firmware you used before. The 3.9.1 is relatively new and surely still contains some bugs.
It is also important to note that the MK3 and MK3S firmware are different.
Only if it turns out that after installation of the previously used firmware the same problems still exist, you can continue to search for errors.
Statt zu klagen, dass wir nicht alles haben, was wir wollen, sollten wir lieber dankbar sein, dass wir nicht alles bekommen, was wir verdienen.
RE: After upgrade MK3 -> MK3S: Calibration failed. Check axes and run again.
Check pinda probe adjustment, try lower and higher setting.
RE: After upgrade MK3 -> MK3S: Calibration failed. Check axes and run again.
I had a similar error and have to concur that the culprit was the PINDA probe.
Stay safe and healthy, Phil
RE: After upgrade MK3 -> MK3S: Calibration failed. Check axes and run again.
Hi,
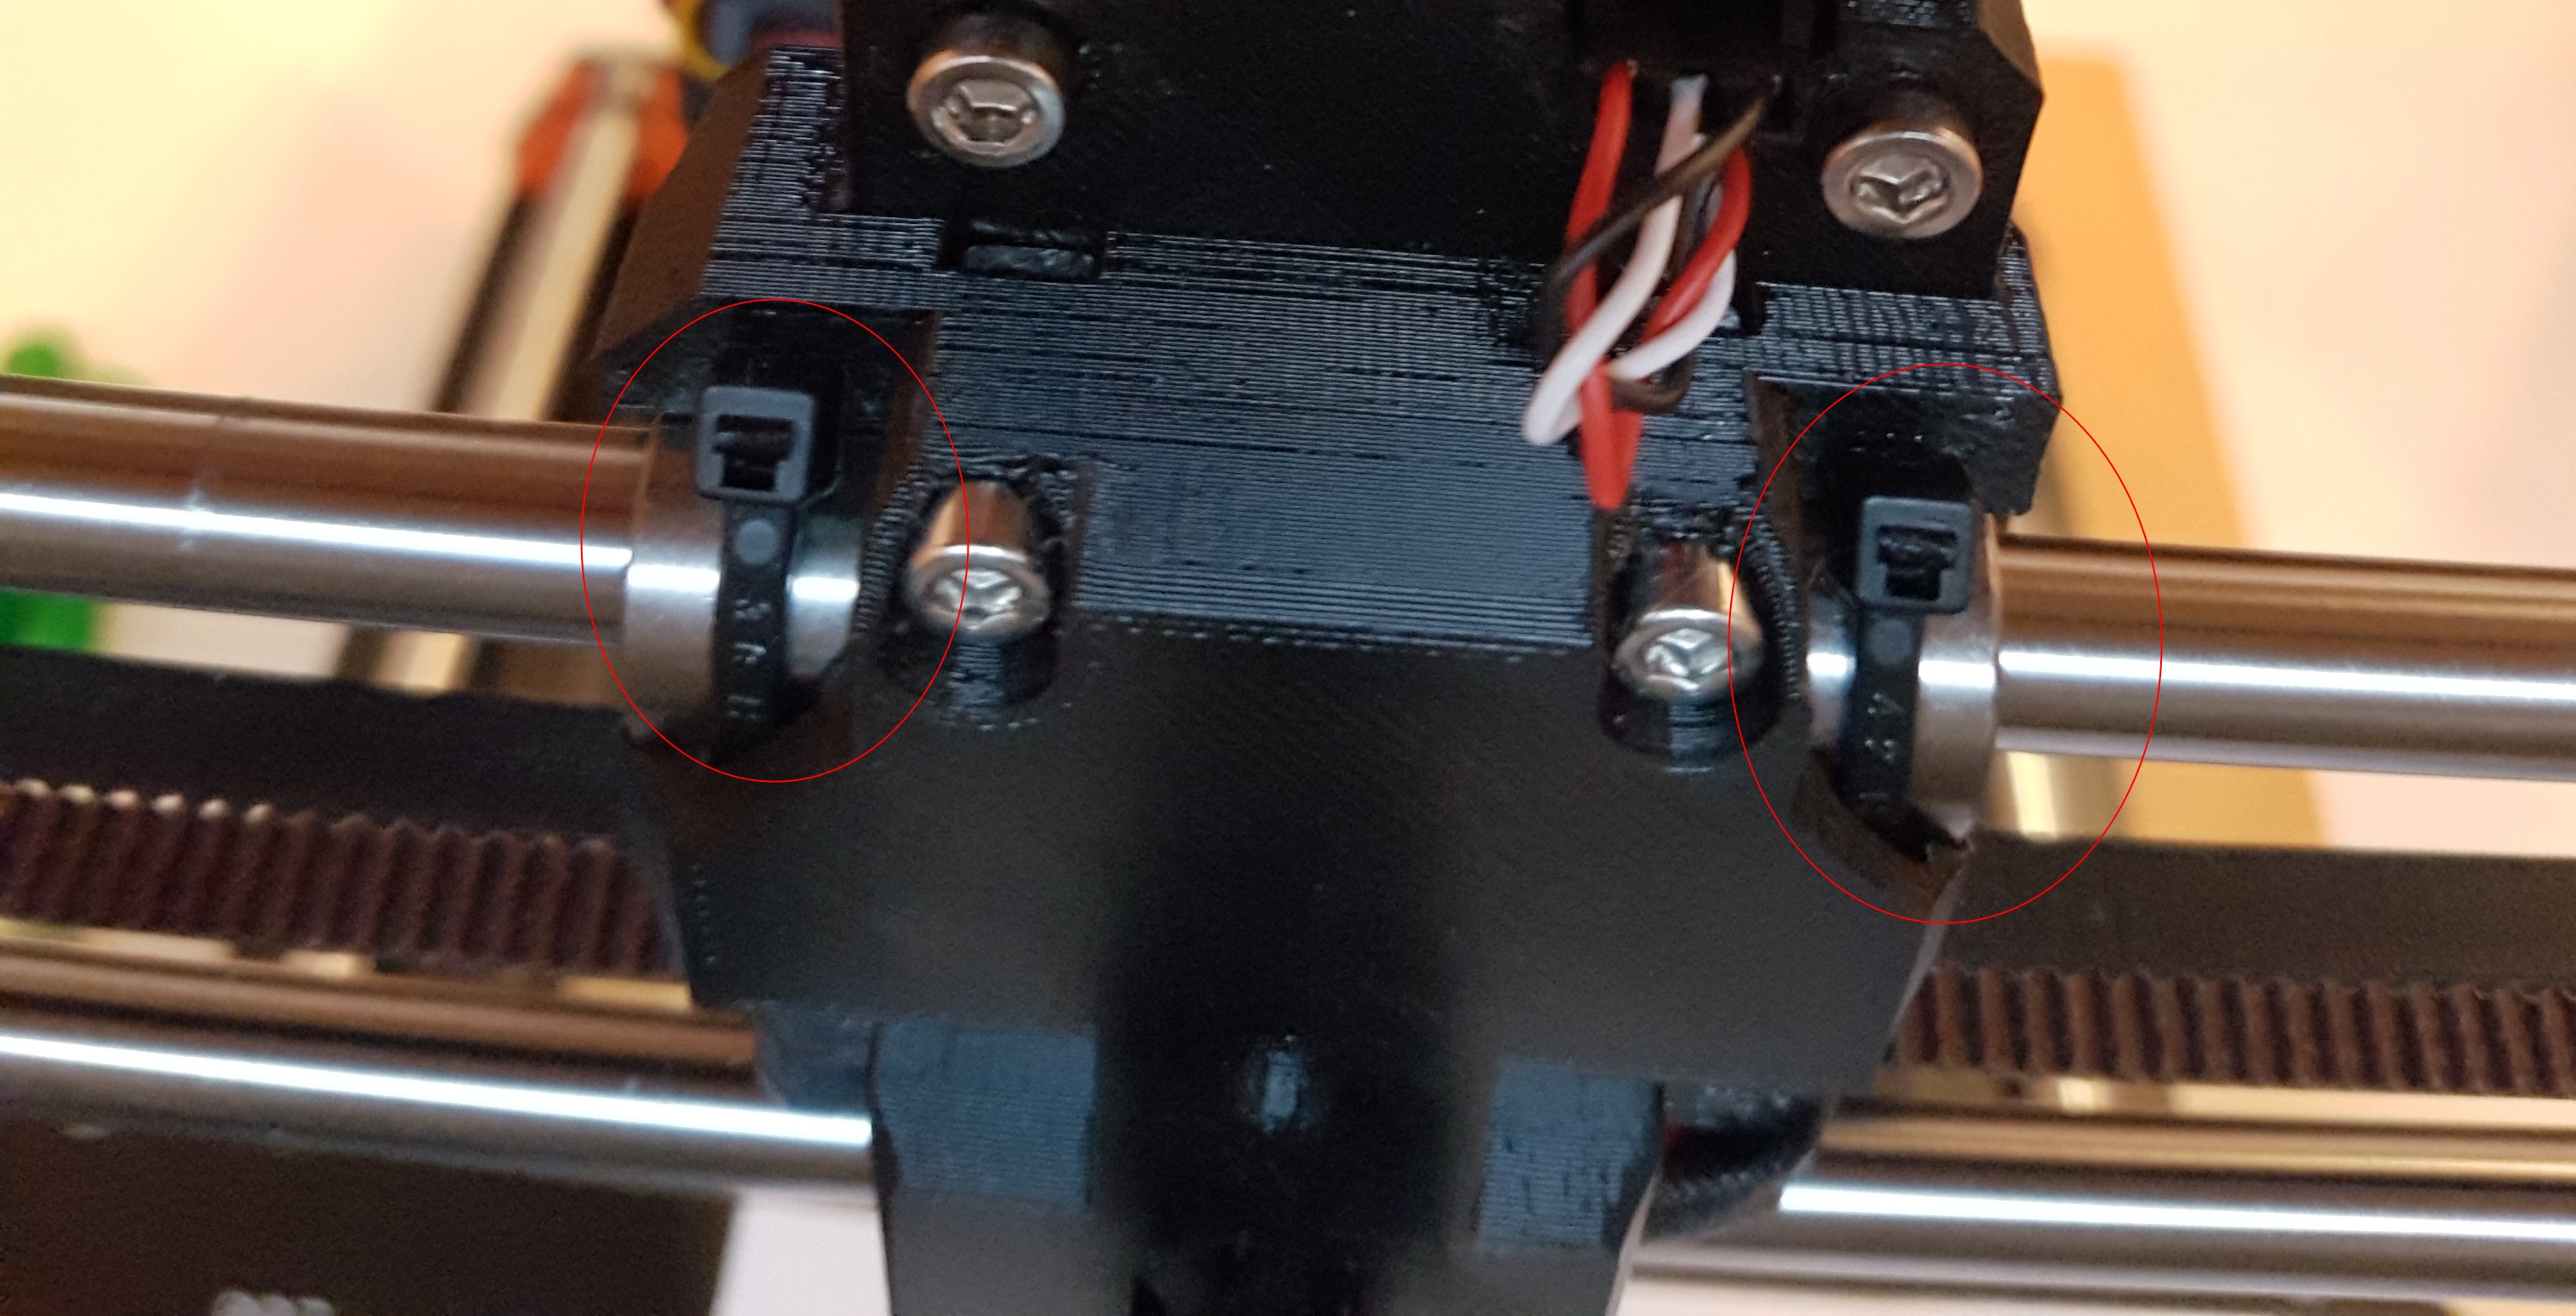
Had the same problem. Turned out to be the cable ties were hitting the electronics case cover and not allowing it to complete the x-axis home, so positions were off and calibration failed. Take a look at the cable tie heads and see if they are on the wrong side, the case side is wrong. Once I moved them so they were on the other side, the problem disappeared and calibration completely correctly.
Good Luck,
G.,
RE: After upgrade MK3 -> MK3S: Calibration failed. Check axes and run again.
I have flashed the printer with firmwares 3.8.0, 3.9.0 and 3.9.1, all with the same results. I did factory resets in between.
Also I altered the position of the pinda probe, but the one I had seems to be the best one already. When going a tick down it's about the same height as the nozzle. When going 1 tick up the nozzle will hit the heatbed during calibration. In any case the result stays the same 🤔.
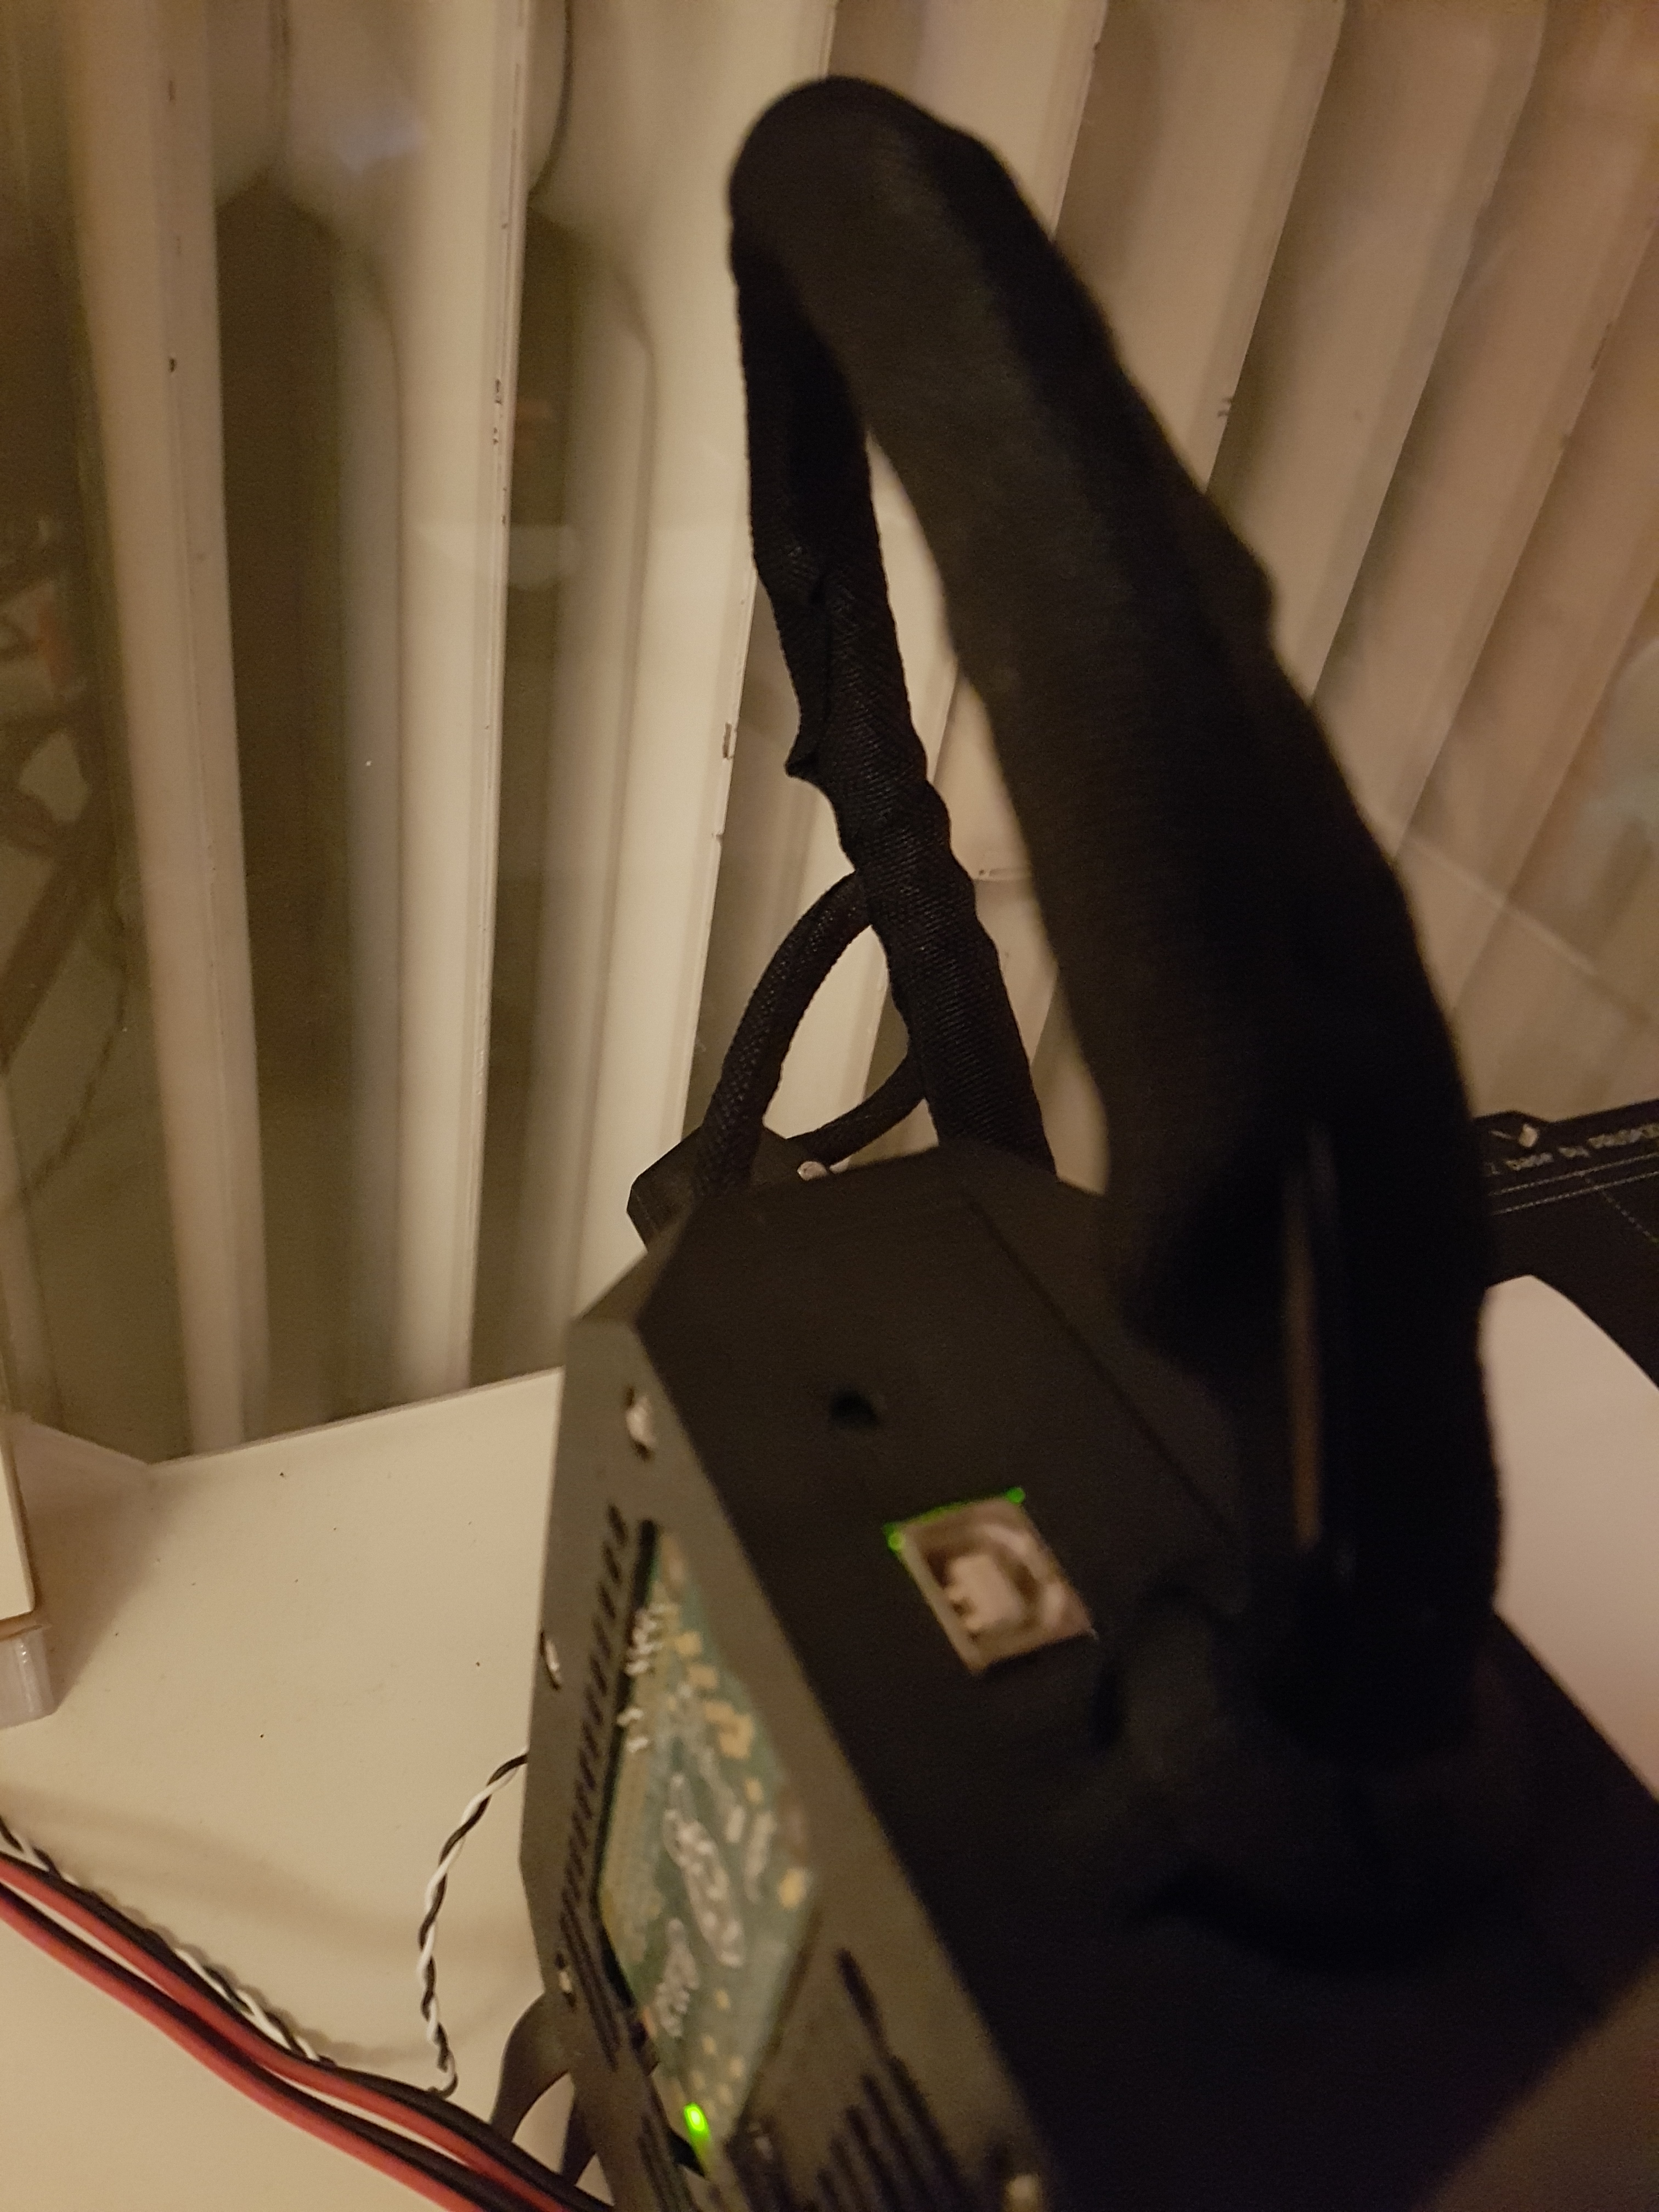
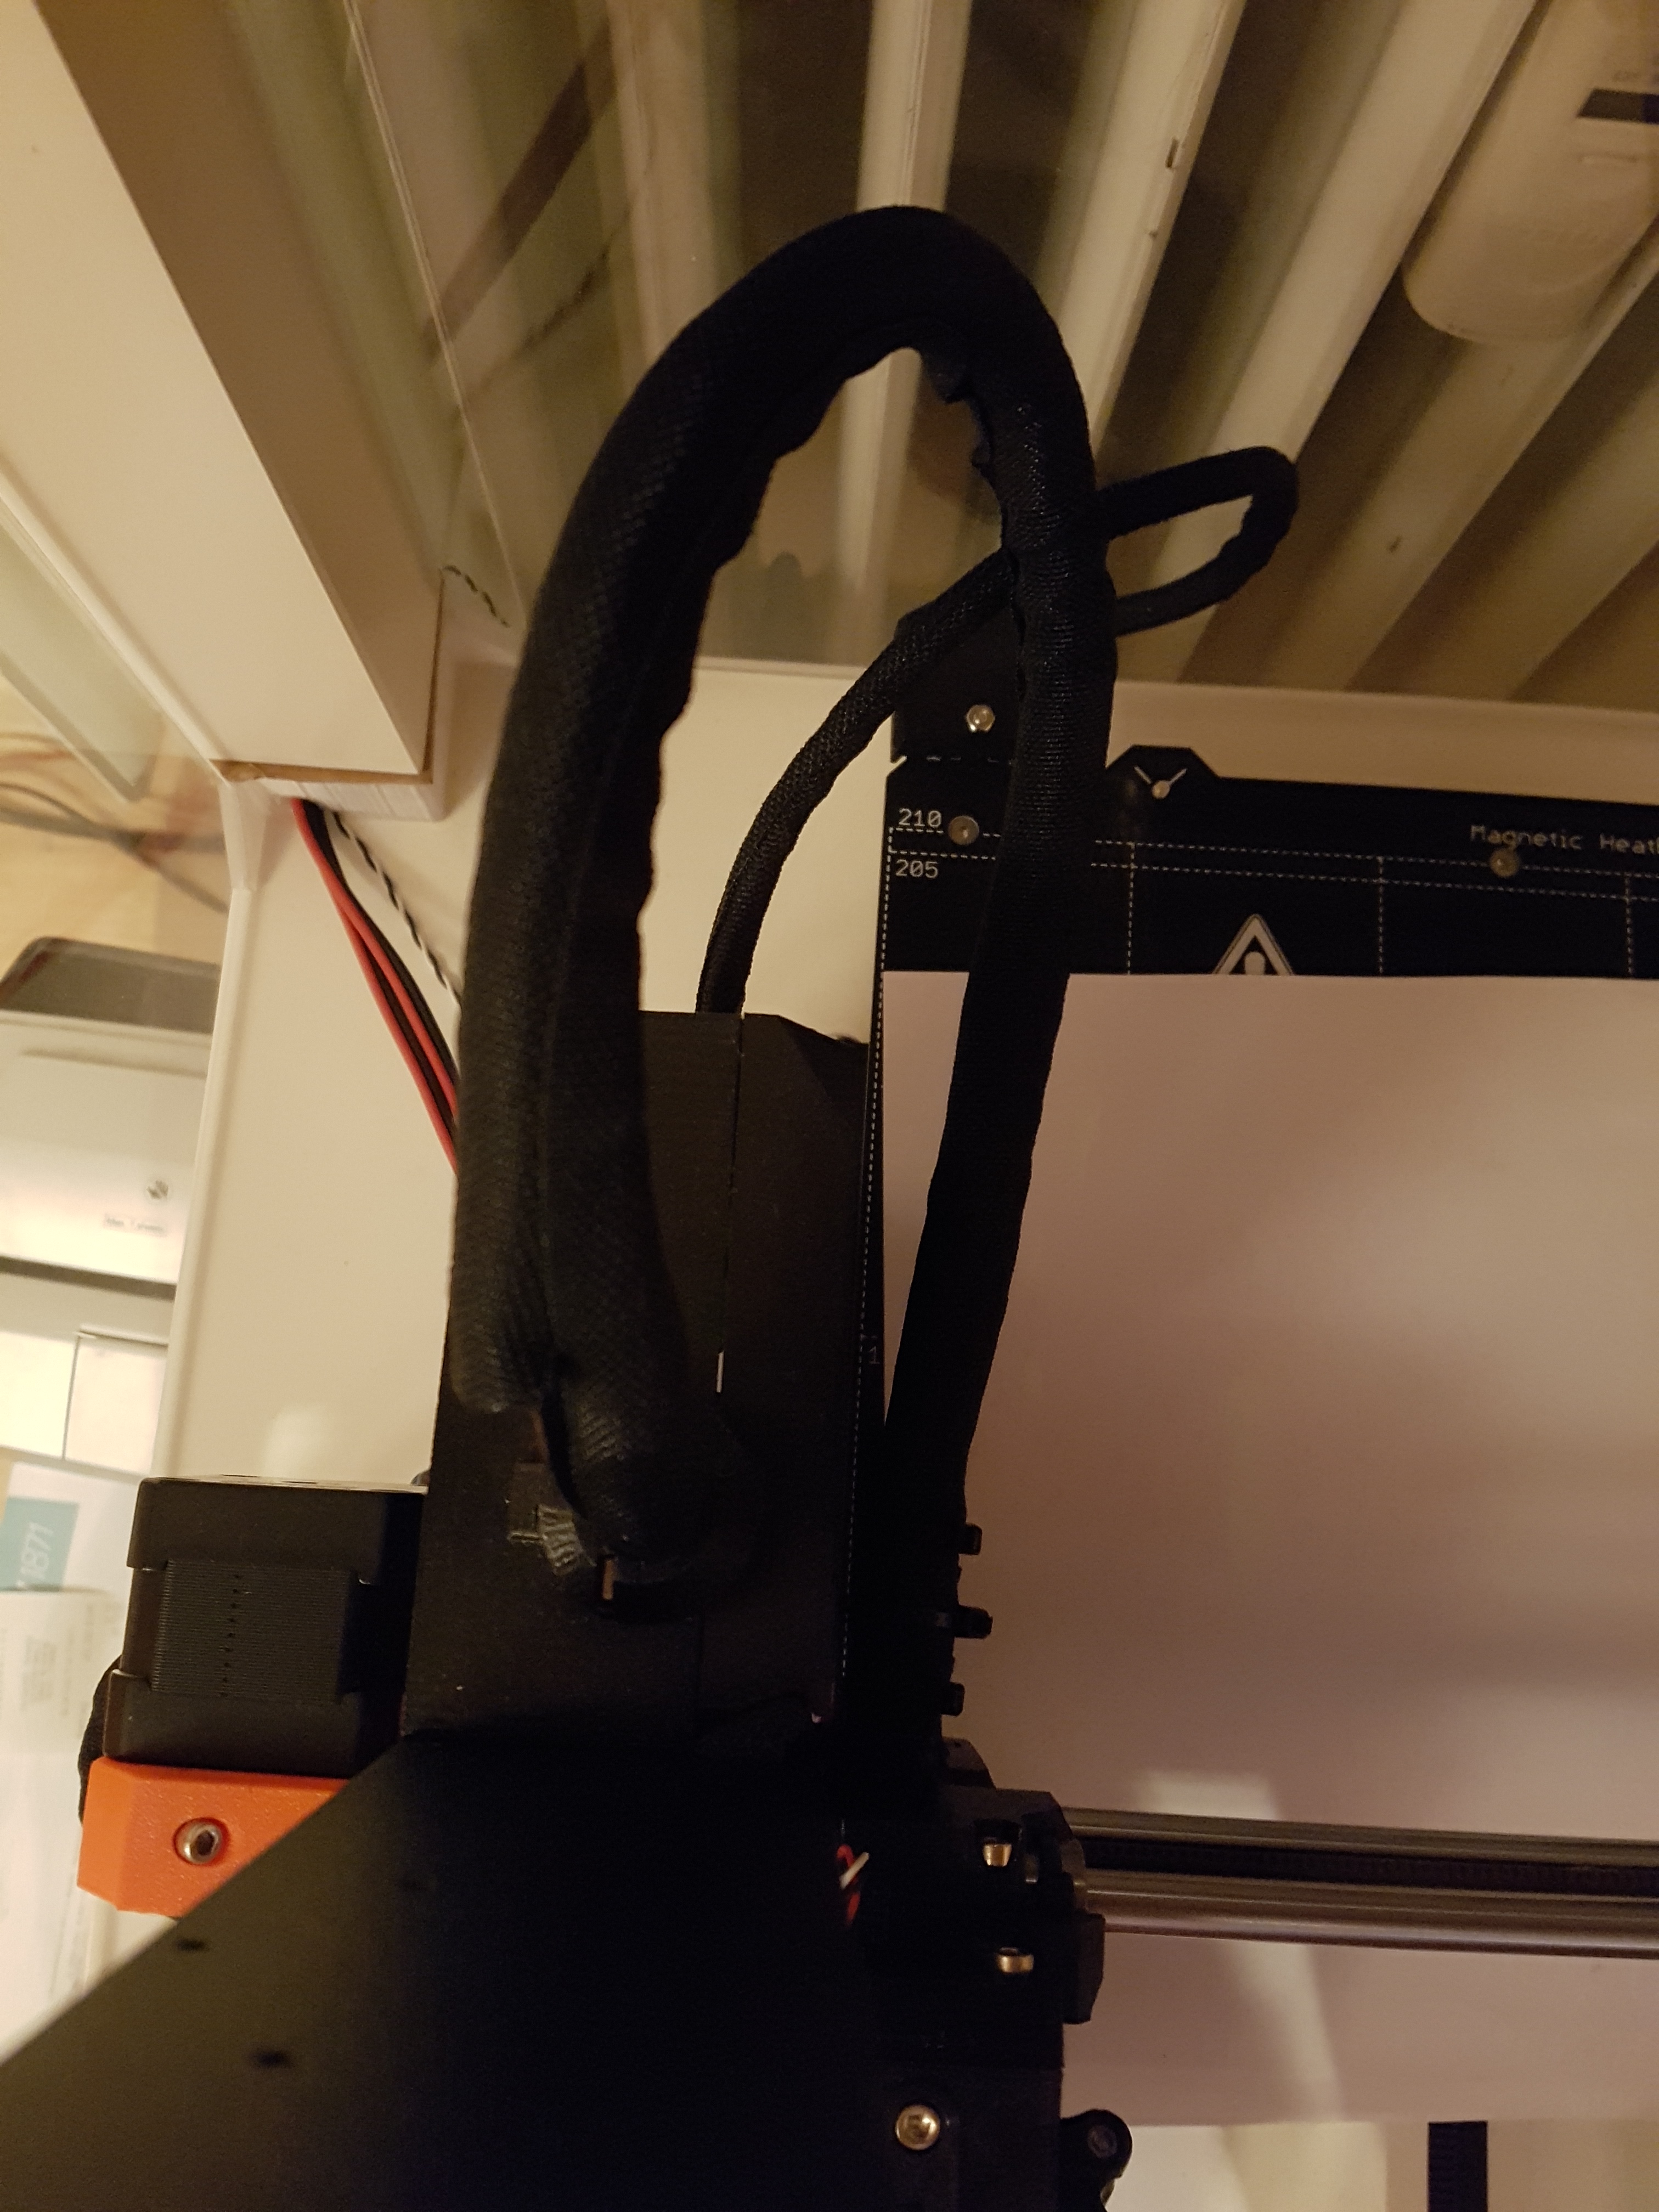
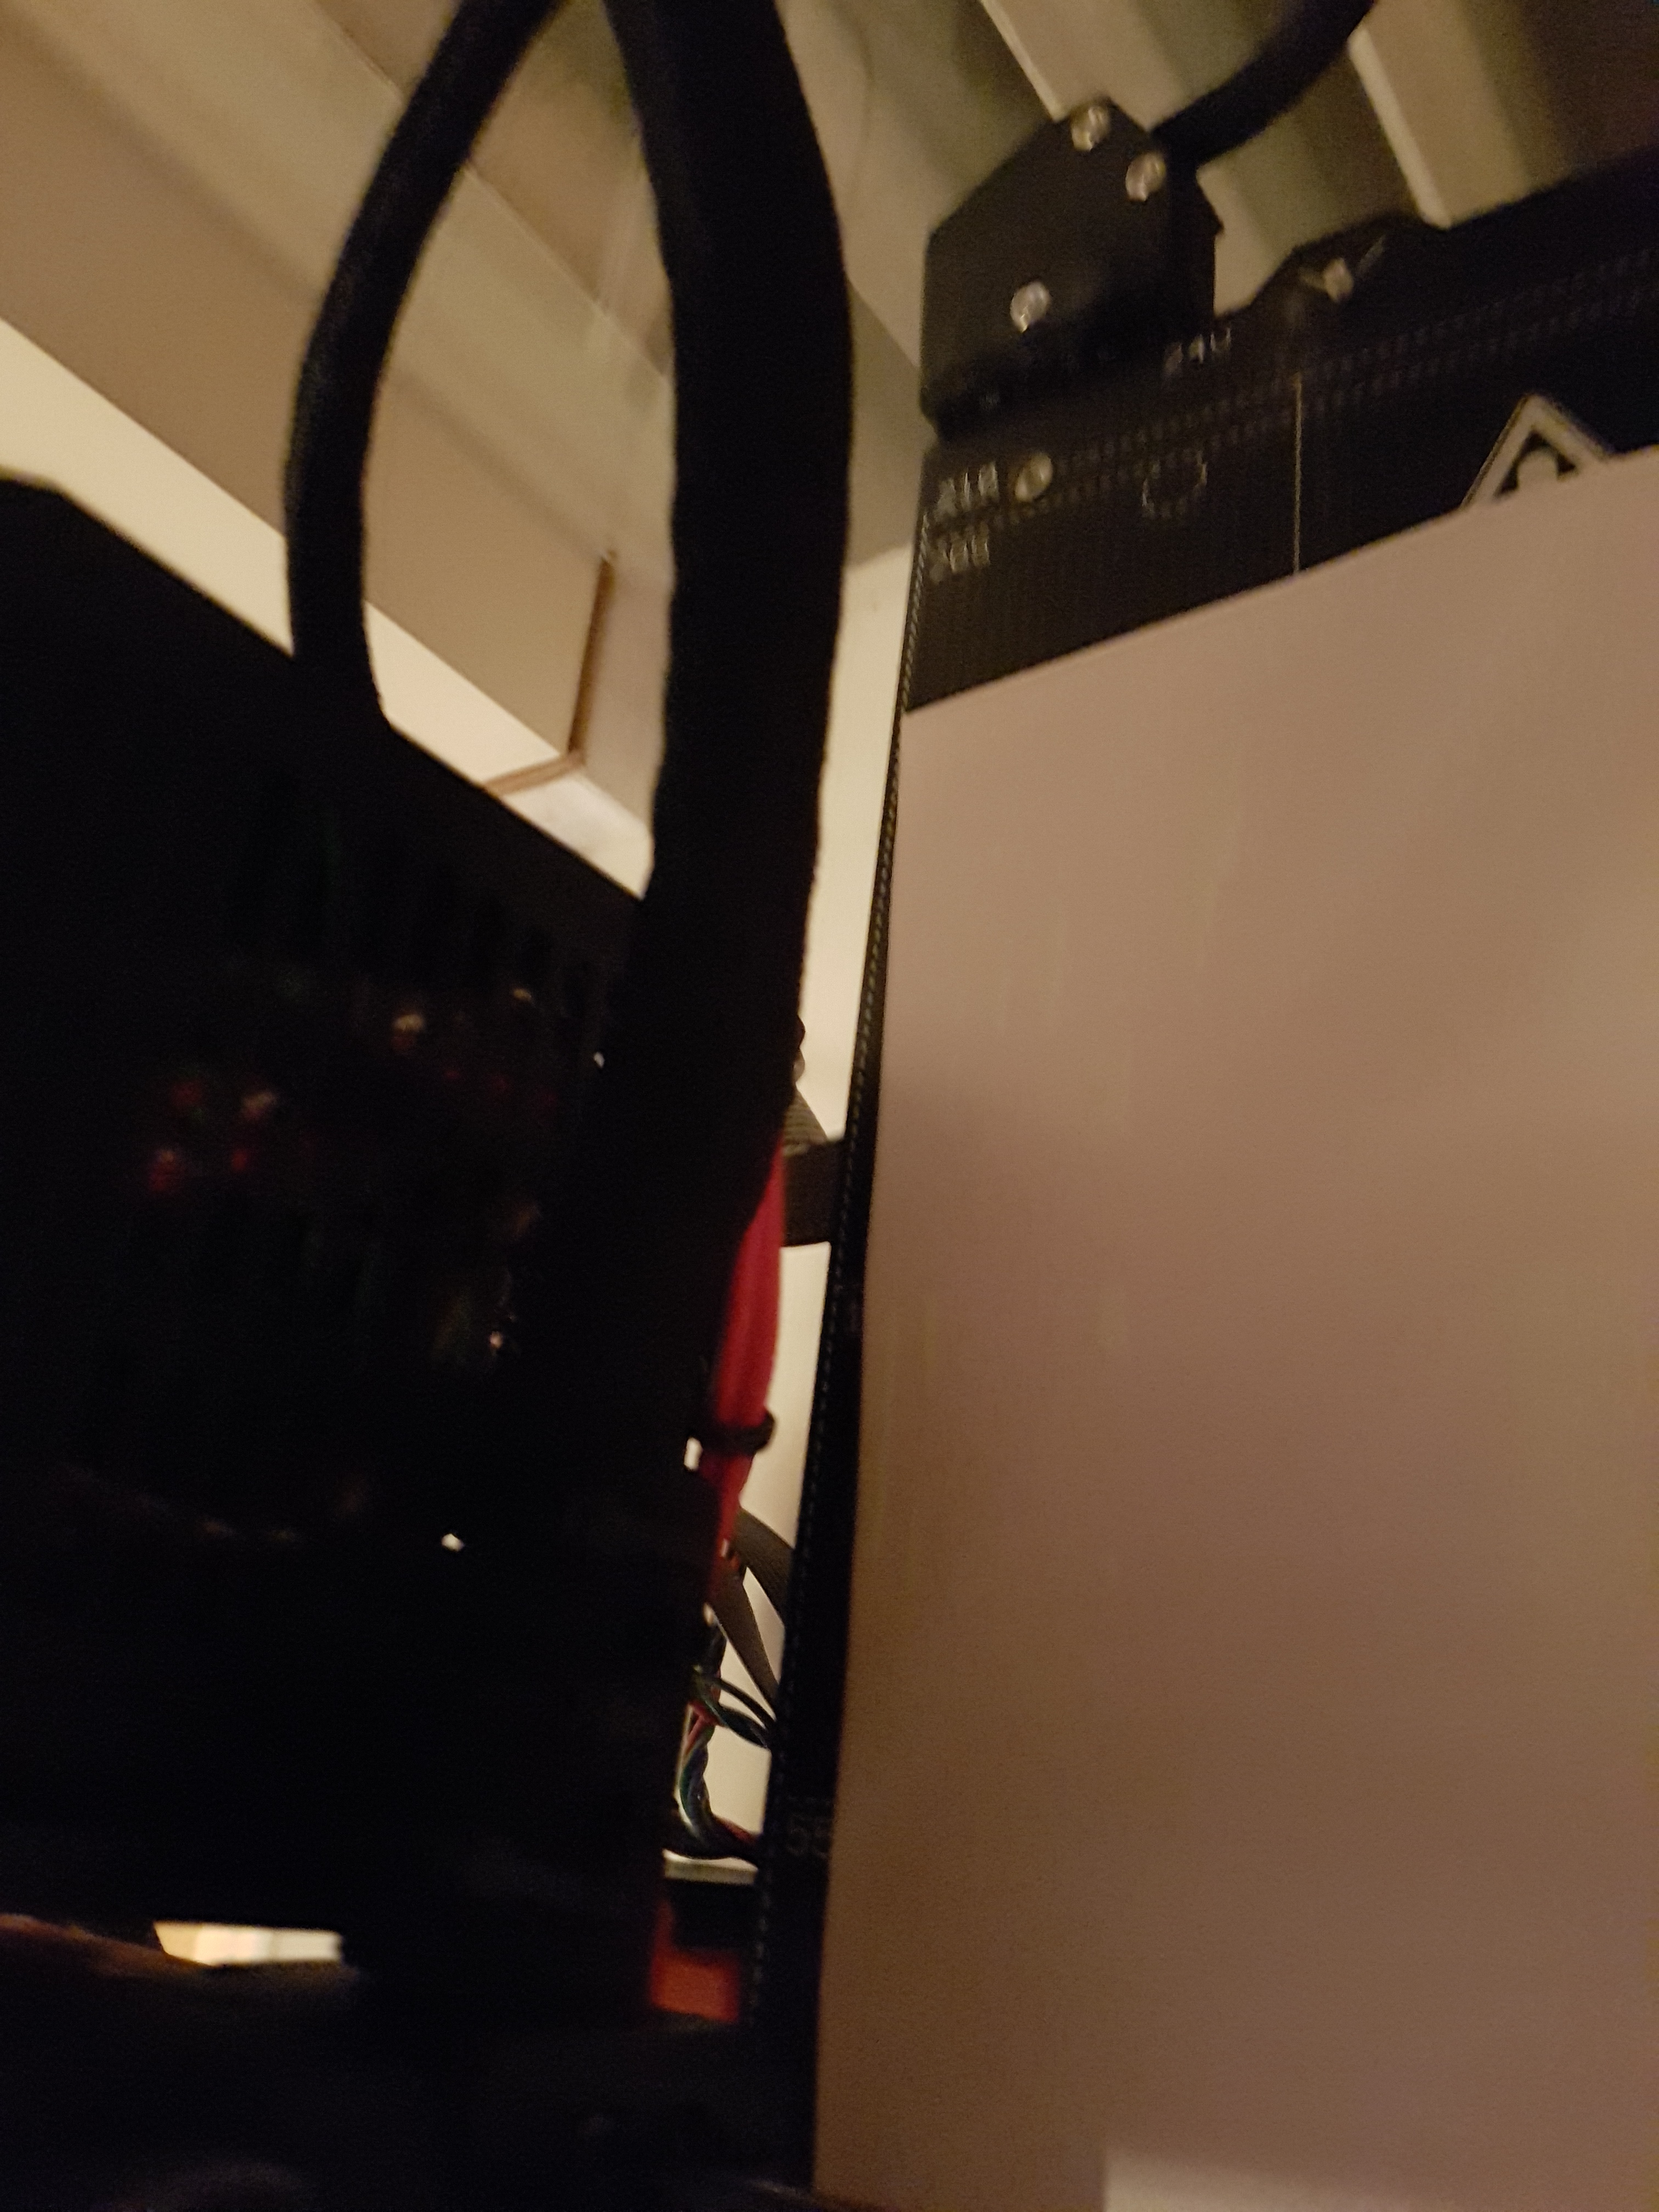
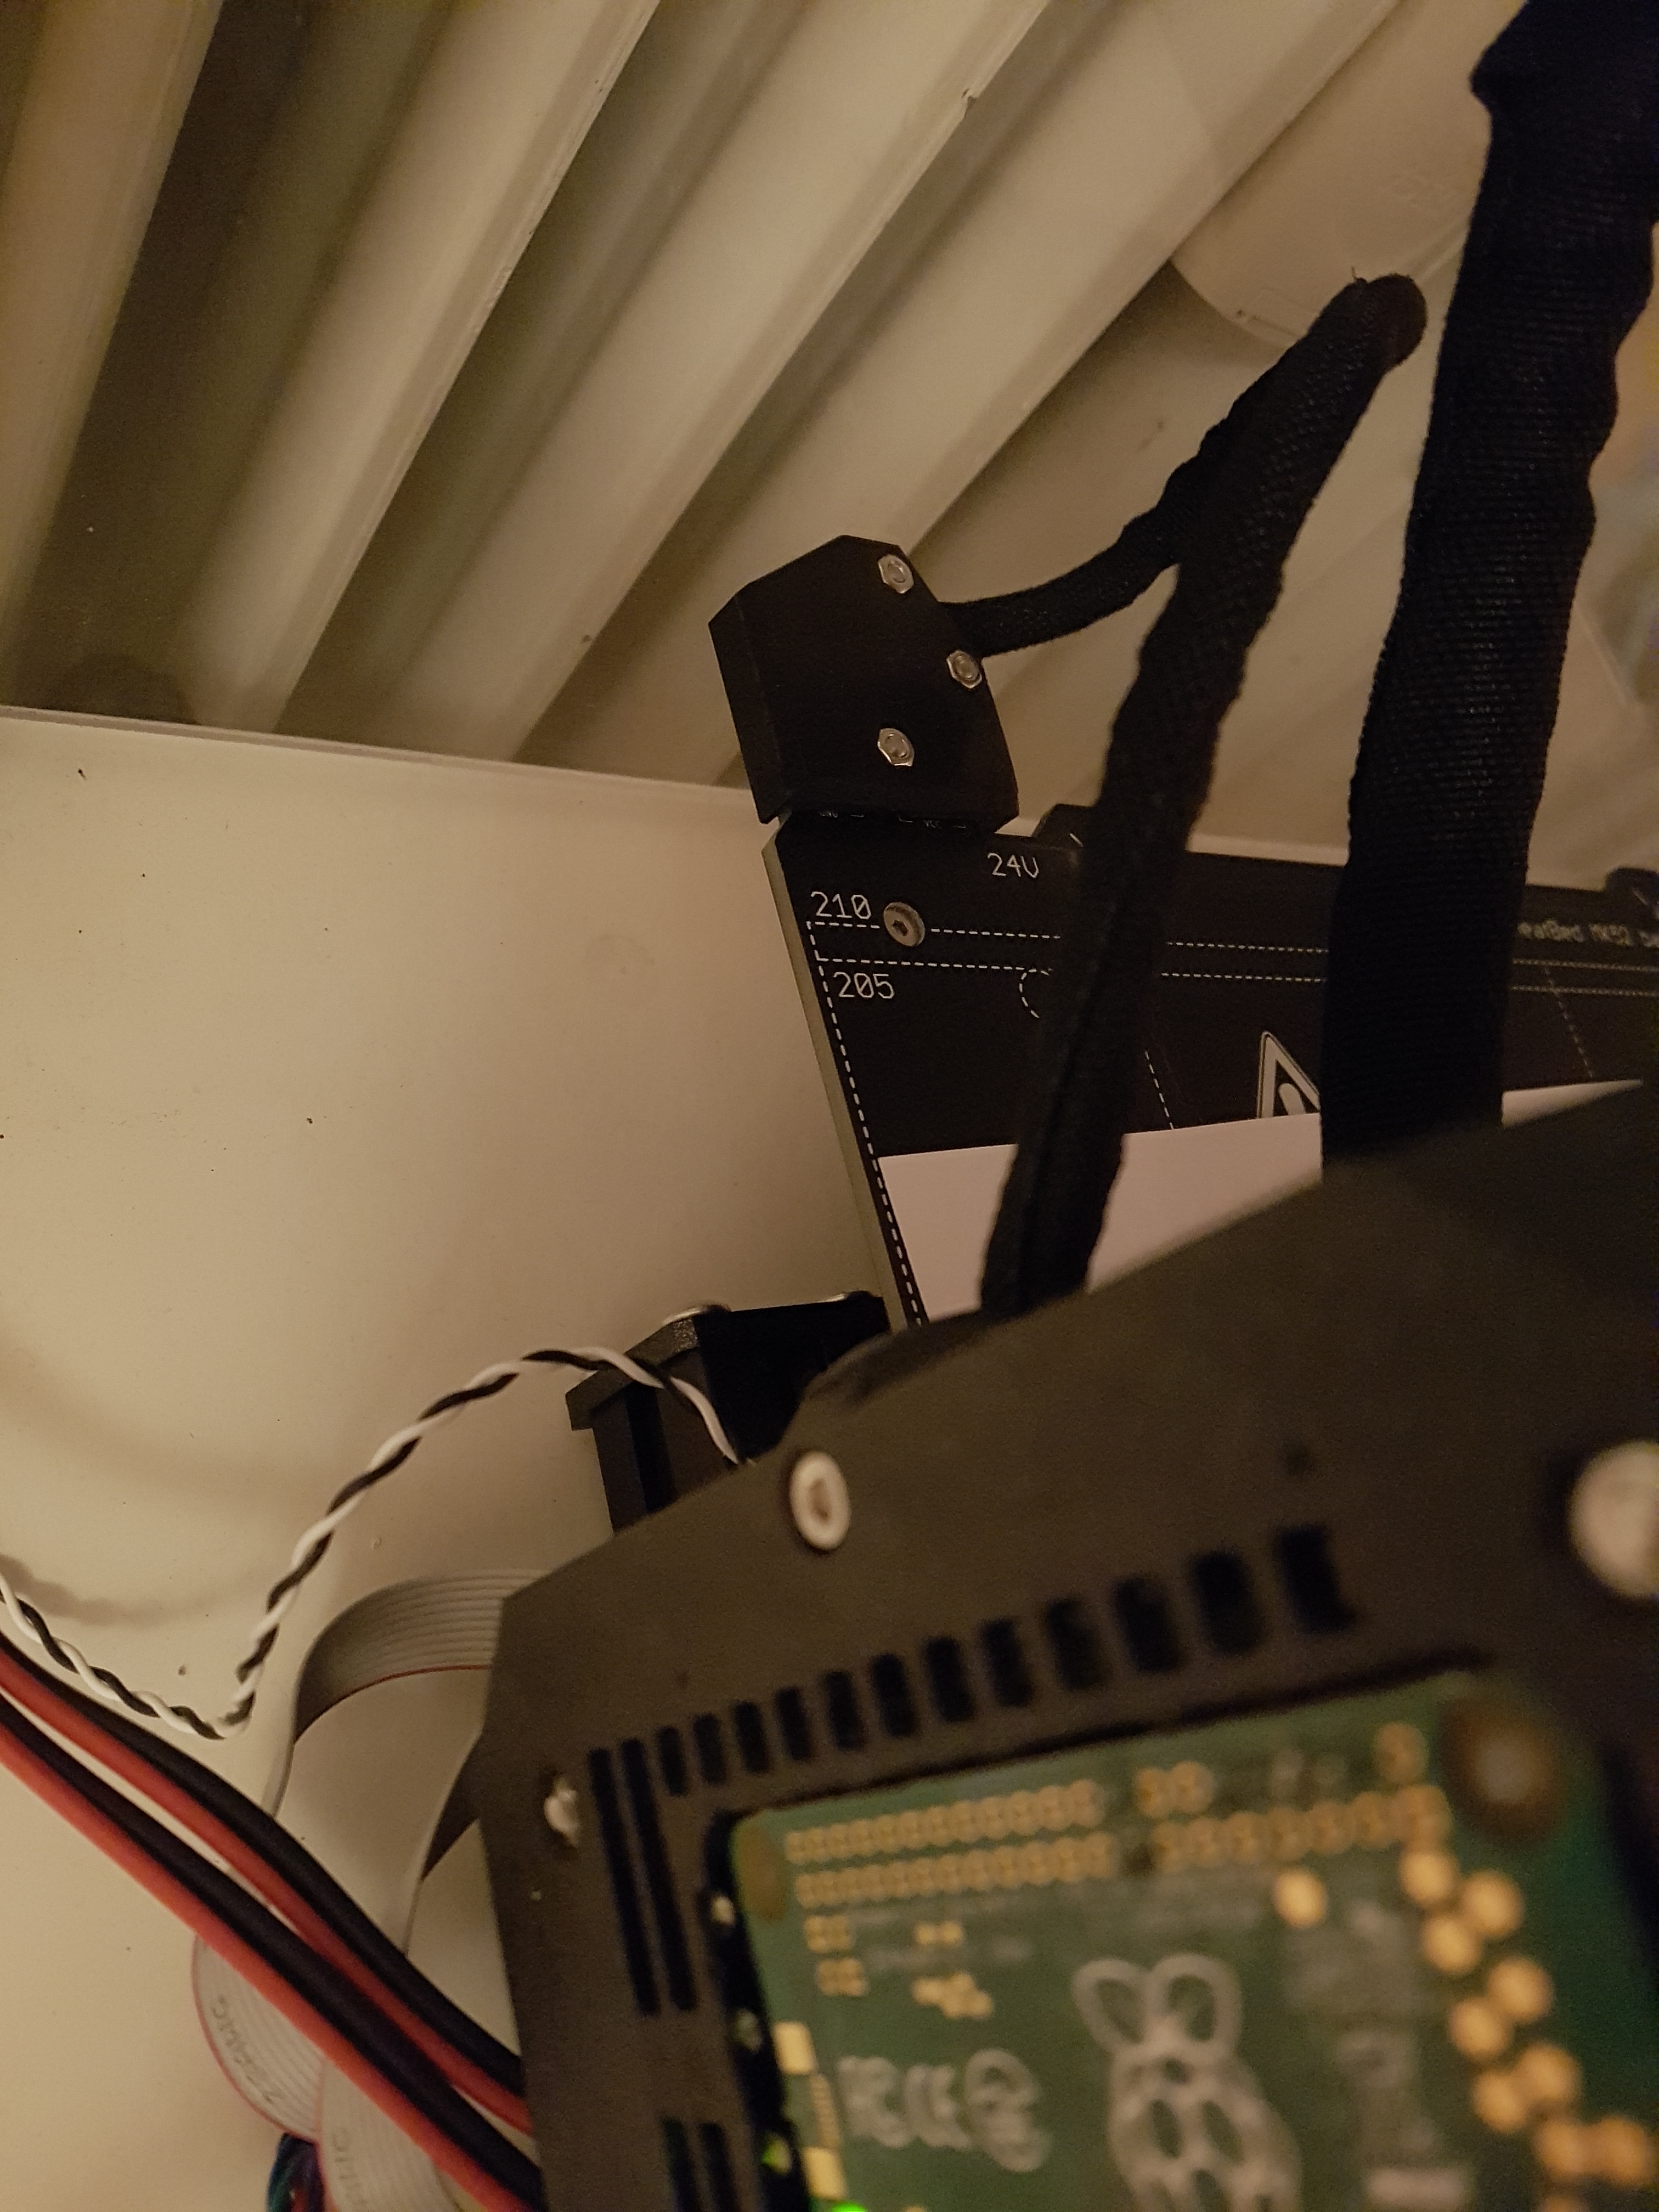
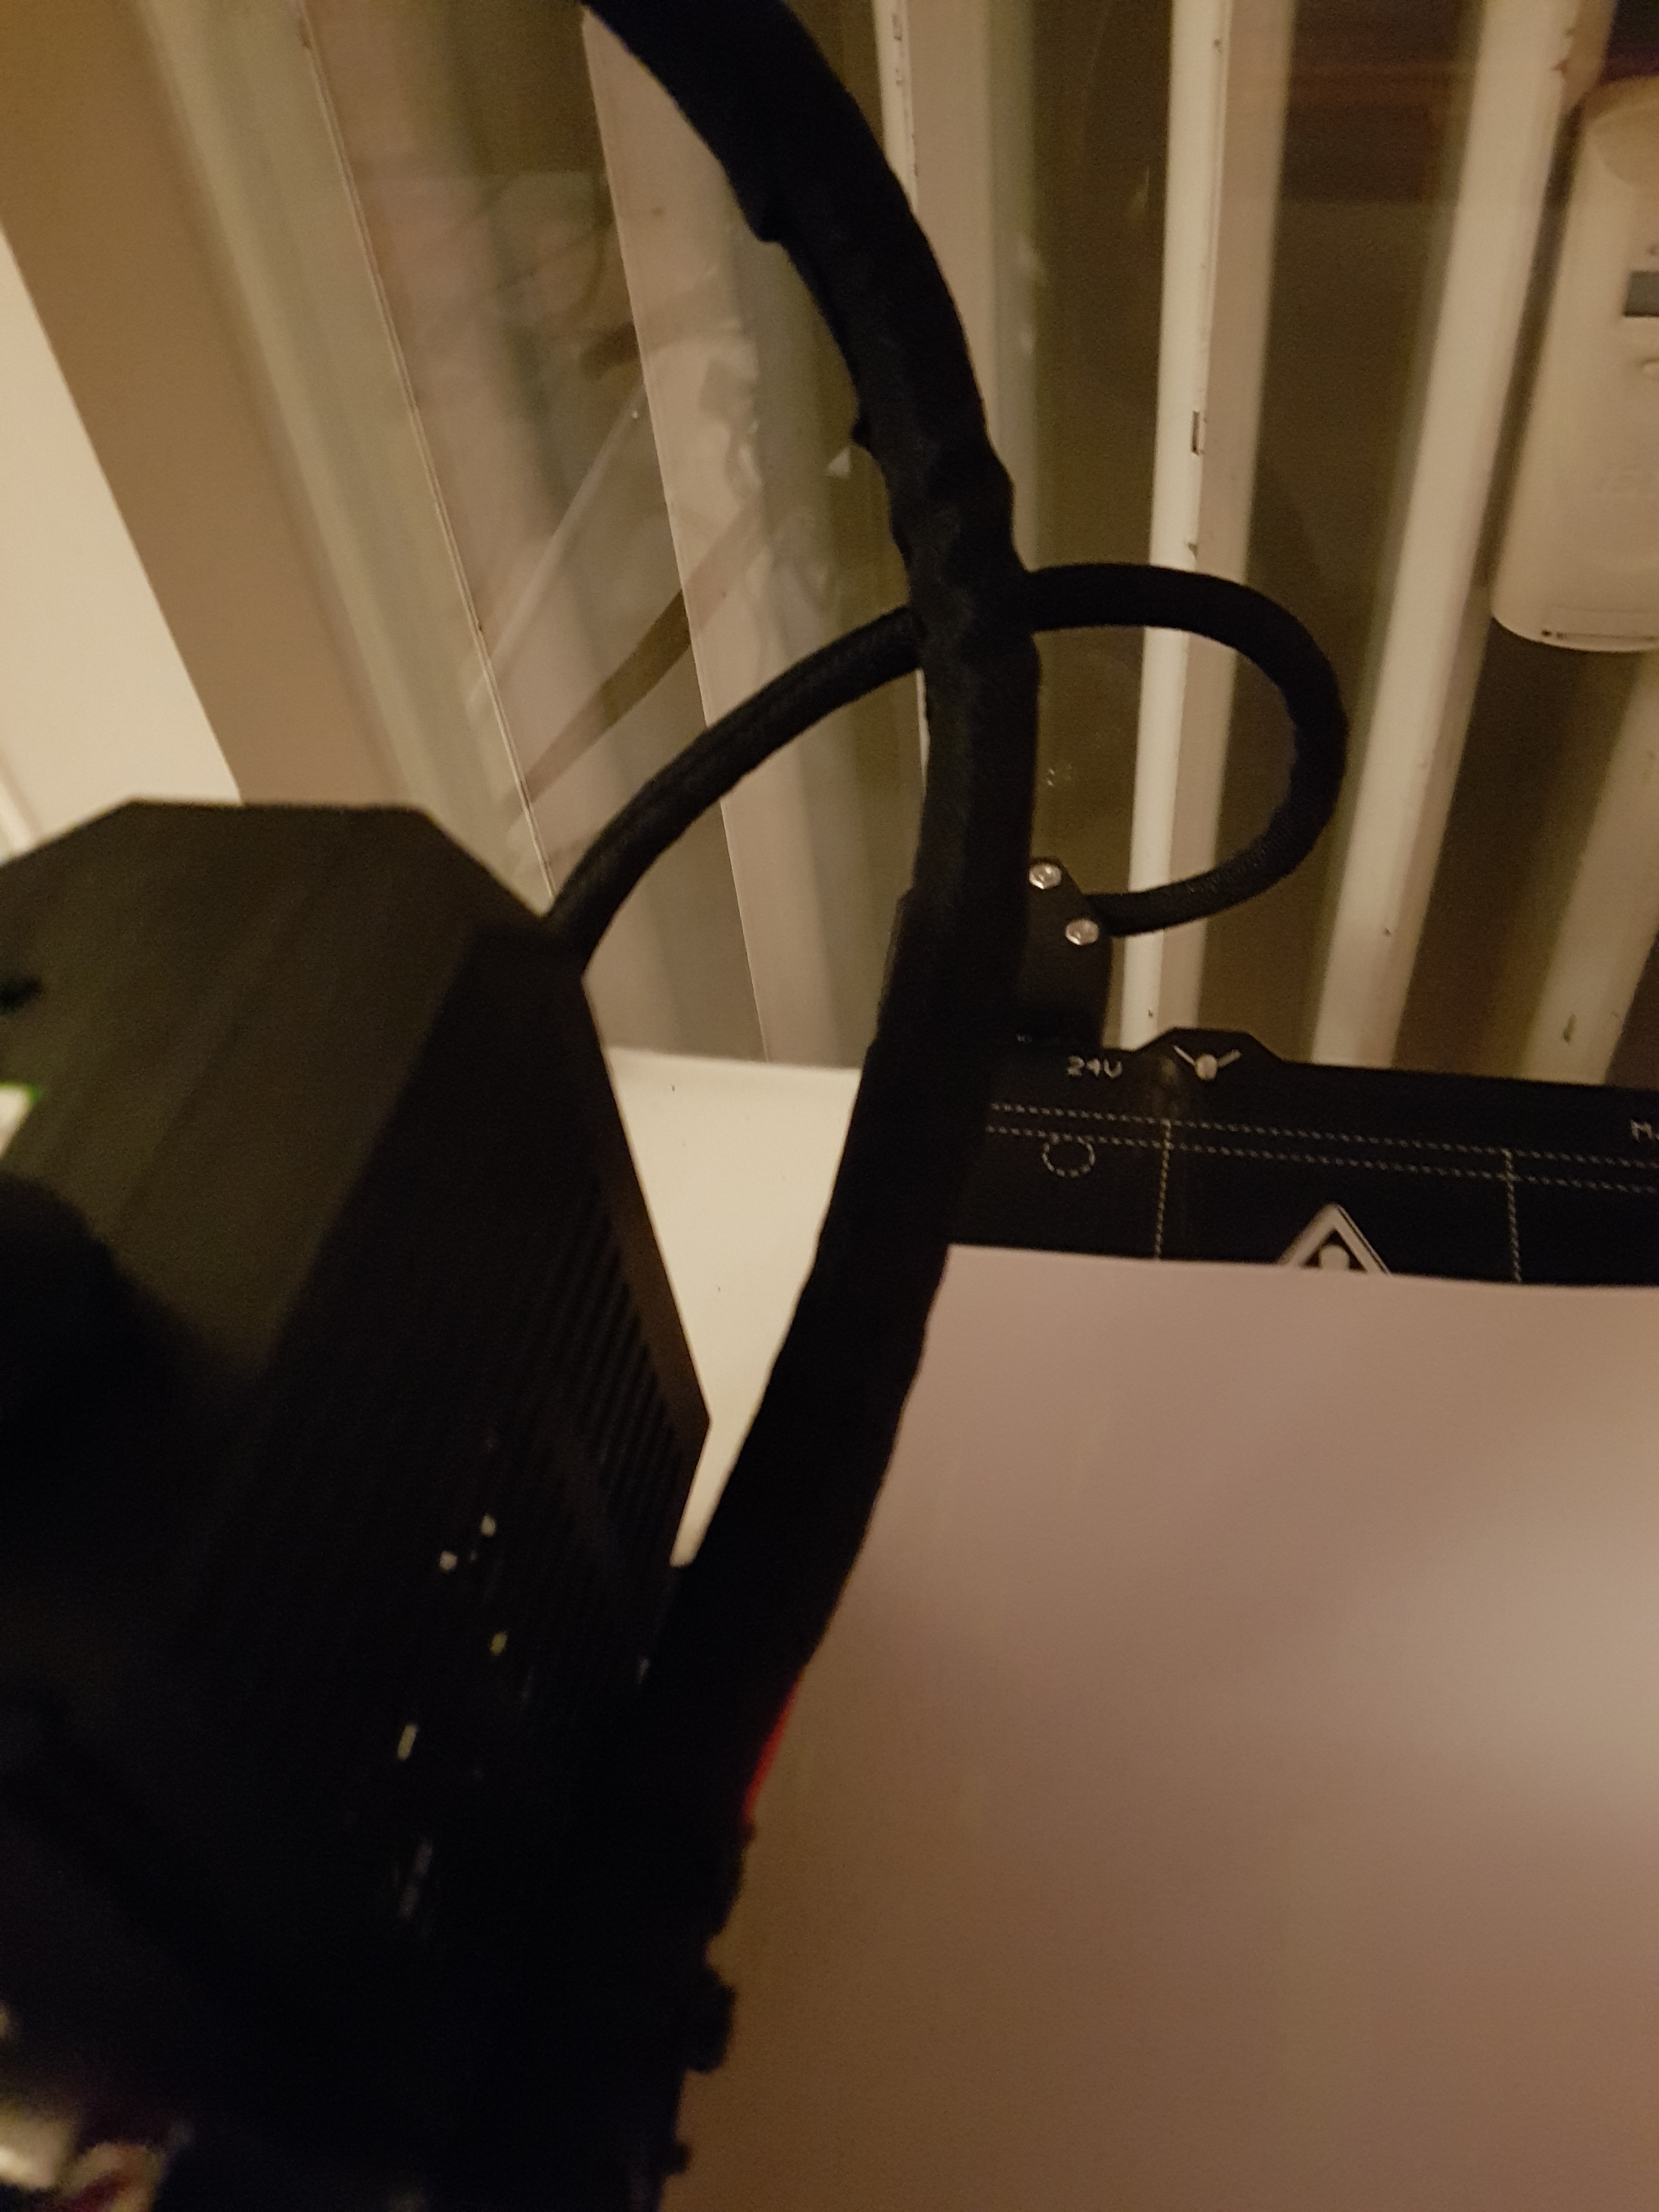
Here's of a picture of the printing head in its position when the error is displayed. It or its cables do not seem to be in undesired contact with anything (not the heatbed cable nor the glass at the back).

Does anybody know what that error actually means? I mean there must be one or many conditions that trigger it.
RE: After upgrade MK3 -> MK3S: Calibration failed. Check axes and run again.
@jens-s7
So it is at least impossible that it is not due to the firmware.
You wrote that you have worked on the belt. Check the belt tensions - too tight or too loose.
Another possibility would be a defective sensor. Does it react when a metallic object approaches in the range of about 2mm?
Maybe you have an inclined position of the X-axis?
If you do not find anything here either, I would turn to the Prusachat.
Statt zu klagen, dass wir nicht alles haben, was wir wollen, sollten wir lieber dankbar sein, dass wir nicht alles bekommen, was wir verdienen.
RE: After upgrade MK3 -> MK3S: Calibration failed. Check axes and run again.
By looking directly at the PINDA probe squarely in front with the nozzle almost touching the bed, is the bottom of the probe parallel to the base? Check from the side as well.
I have no idea why my PINDA mount on the extruder body got skewed, but it did. I lost 5mm and the probe failed to center on the bed. I did however do a copperhead mod, and I believe that the corner warped. When I get a break I'll print a new one. Meanwhile, I adjusted the firmware to 205 as opposed to the 210, I lost 5mm but everything else works okay.
Just a degree or two off and the height reference changes.
Stay safe and healthy, Phil
RE: After upgrade MK3 -> MK3S: Calibration failed. Check axes and run again.
By looking directly at the PINDA probe squarely in front with the nozzle almost touching the bed, is the bottom of the probe parallel to the base? Check from the side as well.
I have no idea why my PINDA mount on the extruder body got skewed, but it did. I lost 5mm and the probe failed to center on the bed. I did however do a copperhead mod, and I believe that the corner warped. When I get a break I'll print a new one. Meanwhile, I adjusted the firmware to 205 as opposed to the 210, I lost 5mm but everything else works okay.
Just a degree or two off and the height reference changes.
The PINDA probe seems to be perfectly vertical to the headbed.
Sorry for the delay.
@jens-s7
So it is at least impossible that it is not due to the firmware.
You wrote that you have worked on the belt. Check the belt tensions - too tight or too loose.
Another possibility would be a defective sensor. Does it react when a metallic object approaches in the range of about 2mm?
Maybe you have an inclined position of the X-axis?If you do not find anything here either, I would turn to the Prusachat.
When the extruder block is "in the air" there's a red LED on the pinda probe. Just before it's about to the headbed the LED turns off (and the block stops with the nozzle not touching the bed). That's how it's supposed to be, isn't it?
When looking up the sensor value in "support" it's 1 when metal is close, else it's 0.
The belt seems to be as the upgrade installation want it to be. It's not overly tight, I can bring it in contact with only little power, but it remains parallel to the heatbed if not touched.
I also just held a sprit level to the X-axis rods. There doesn't seem to be anything wrong.
RE: After upgrade MK3 -> MK3S: Calibration failed. Check axes and run again.
Move the extruder to the left. Does ANYthing on the rat tail touch the Einsy case. Anything. Cable textile, cable tie, cat hair, human hair, air... if yes, fix it. If nothing on the back is touching the Einsy case, examine the frame for the same sort of contact, if any, fix it.
Now, carefully examine the extruder to X support. The extruder plastic and the support plastic must be touching. If the fan, fan screws, or any part of the extruder touches before the frame plastic to support plastic, fix it.
E.g., The fan screws not being tight will cause an error - the heads bump into the lead screw.
Next, power off the printer. Push the extruder far left (home). Now lift the printer until the extruder slides left to right. It should slide the entire length of the X axis until it bumps into the right support.
If the extruder isn't free to move, then your bearings are being pinched or your belt is so tight you are damaging the stepper motor. Loosen the belt tension screw until you see belt slop, and loosen the screws on the extruder case near the bearings and try again. If it fails with the extruder screws loose, you probably didn't clean and grease the bearings when you installed them, do it now.
After this ... well, it should work.
RE: After upgrade MK3 -> MK3S: Calibration failed. Check axes and run again.
One other thought, if it is an interference problem, make sure the filament sensor wires can't touch the frame as the extruder is moving vertically, and that nothing else is even close to touching. The X axis should/must be able to contact both upper stops without interference.
RE: After upgrade MK3 -> MK3S: Calibration failed. Check axes and run again.
Hello jens-s7
welcome in the club 😉
I also realize a similar problem after the upgrade MK3/S/MMU2. Originally I did not performed any test after the upgrade, since all was working well. After some months I upgraded the firmware so I decided to do a factory reset.
Then, and only there, I realized that the printer did not passed the Wizard any more. Differently than your, my MK3/S passes that Z control, and then it starts probing all the calibration points. Then I always got the infamous "XYZ Calibration Failed. Please consult the manual".
The printer was PRUSA assembled, and I just updated the extruder. No mod at all on axis.
I spent hours with PRUSA trying to fix it, but we did not find anything wrong. I replaced also the PINDA, but I got the same results.
At this point they offered to get back the printer and fix at PRUSA, but I put this option on hold, as last chance, since this moment with pandemic around and general mess, it is not a good moment.
However with all I have done, I looked at you video and I have not seen what I would expect to see. The correct process stating to Prusa is:
- Turn the printer off
- manually bring down the nozzle at the center of the bed (with not magnetic plate) in a way that it barely touch a paper below.
- unscrew the PINDA and put one of the standard black plastic fastener below the PINDA. The PINDA should be exactly touching it.
- block the PINDA again with the screw. Do not move anything.
- Turn on the printer
- Perform a FACTORY RESET
- Start the Calibration Wizard.... and record it.
You may see what my printer does HERE. The video is dark, because PRUSA asked me to do it dark to see how the PINDA led was working.
regards
RE: After upgrade MK3 -> MK3S: Calibration failed. Check axes and run again.
Before I answer in more detail to your question I have 2 questions about your suggestions:
Next, power off the printer. Push the extruder far left (home). Now lift the printer until the extruder slides left to right. It should slide the entire length of the X axis until it bumps into the right support.
I'm not sure I understand that correctly. That sounds a bit like it should slide to the right by itself through shere gravity when I tilt it to the right. If you mean it can move freely that it can.
The extruder plastic and the support plastic must be touching
What do you mean with support plastic?
I'd like to measure how strong the belt is being pulled to be able to compare it with your's. Unfortunately I haven't come up with an idea on how to achieve that without additional equipment.
I've adjusted the pinda probe several times. Also I have tried to start the calibration from the center or elsewhere. With or without factory reset. The same result every time.
Here are a couple of pictures to show the position at the time of the error message. There is absolutely no contact with anything. Since that is not visible on the pictures: I can slide a sheet of paper between the EINSY case and the extruder block; so there's room as well.
@antimix: I understand you were not able to get yours fixed so far?
RE: After upgrade MK3 -> MK3S: Calibration failed. Check axes and run again.
Yes, powered off, gravity should pull the extruder across the rods to the other side. Same with the bed front to back.
Extruder must contact support frame (orange to black). This is the X HOME position all other moves are based on.

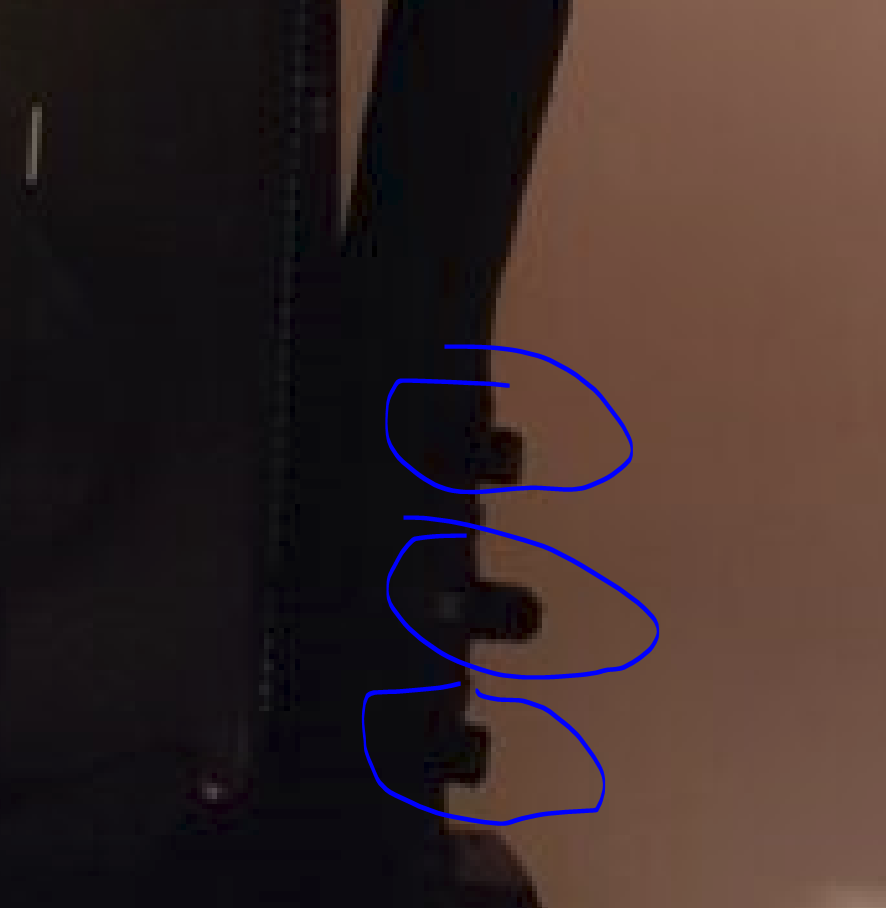
These cable tie tails will cause a failure. Tails must point upwards or downwards. not to the sides.
RE: After upgrade MK3 -> MK3S: Calibration failed. Check axes and run again.
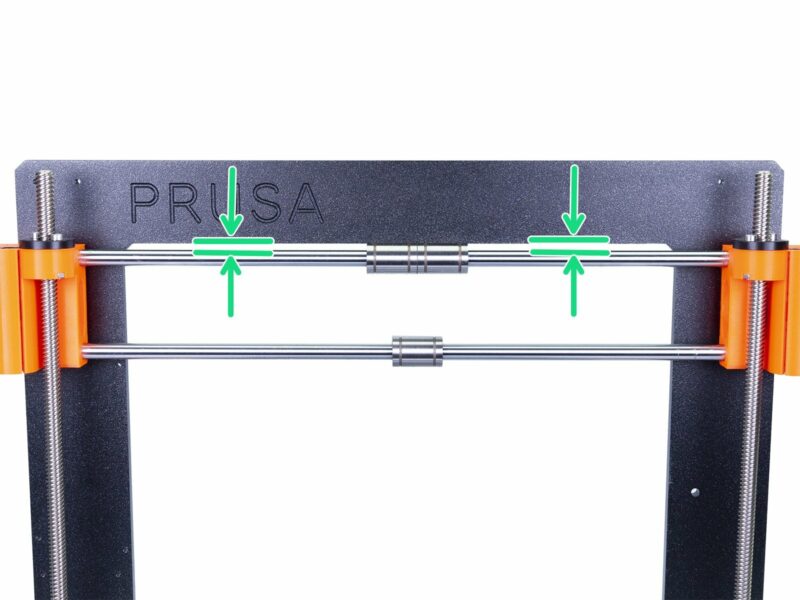
Is your X-Axis rod perfectly parralel to the frame as in the picture? If not are the screws on the trapezoidal nut in the correct positon on both sides so that no screws are touching the top part? You might even try to loosen the base frame screws on the front plate as in Step 7 of the manual. Do you have the PSU mounted correctly? Your video shows that the calibration routine is completing, the skew is out of specs so you need to recheck the frame, PSU, and the Z-axis installation. When I first built my MK3S the skew was out of tolerance so I had to redo the previous steps until the skew went down. On your support position of the LCD panel, you can view the results of the XYZ calibration, what does it read? The explanation is at this address: https://help.prusa3d.com/en/article/xyz-calibration-details_2272 .
Stay safe and healthy, Phil
RE: After upgrade MK3 -> MK3S: Calibration failed. Check axes and run again.
Yes, powered off, gravity should pull the extruder across the rods to the other side. Same with the bed front to back.
Extruder must contact support frame (orange to black). This is the X HOME position all other moves are based on.
These cable tie tails will cause a failure. Tails must point upwards or downwards. not to the sides.
Extruder plastic and support plastic ARE touching when I move the extruder block all the way to the left.
I have loosened the belt a bit, it's softer now. However this didn't really change how easy the carriage can be moved left or right. I could only image it's about the zip ties surounding the bearings. To have an idea how firm thosoe should be: Should I be able to turn those easily? Because mine are relatively firm.
Is your X-Axis rod perfectly parralel to the frame as in the picture? If not are the screws on the trapezoidal nut in the correct positon on both sides so that no screws are touching the top part? You might even try to loosen the base frame screws on the front plate as in Step 7 of the manual. Do you have the PSU mounted correctly? Your video shows that the calibration routine is completing, the skew is out of specs so you need to recheck the frame, PSU, and the Z-axis installation. When I first built my MK3S the skew was out of tolerance so I had to redo the previous steps until the skew went down. On your support position of the LCD panel, you can view the results of the XYZ calibration, what does it read? The explanation is at this address: https://help.prusa3d.com/en/article/xyz-calibration-details_2272 .
My PSU is not attached to the frame because I have the printer inside the IKEA table case. But there's that replacement part for stabilisation attached.
Just to be on the safe side I've manually screwed both Z-rods to the top to make sure it's parallel. In addition I have measured it with a sprit level. That's even.
RE: After upgrade MK3 -> MK3S: Calibration failed. Check axes and run again.
Zip ties can't apply enough force to be of concern - unless you used a zip-tie gun. Even then I wouldn't worry too much. But the position of the cable tie tails in your earlier photo must be adjusted so they do not interfere with motion. Did you fix them?
If loosening the extruder back screws (the two in the photo above, and the ones under the lower bearing) a full turn or two had no effect, then it's something else.
Did you clean and grease the bearings before installing them? If not, try adding drops of light machine oil on the rods, work the extruder back and forth to get oil past the grease seals and into the bearings. Or, take the axis apart and properly lubricate the bearings with good grease.
RE: After upgrade MK3 -> MK3S: Calibration failed. Check axes and run again.
New attempt today to fix the XYZ Calibration failed issue.
- I dismounted and rearranged the back cable from the extruder to avoid possible unwanted contacts during home.
- I re-tensioned the X belt, more tight.
- I discovered a nut ring attached to a magnet behind the bed, and I removed it.
- I re-aligned the PINDA again.
- I removed the MMU for now, since I work better without it.
- I rechecked and tight all the power screw on the Mainboard box.
UPPER FAN Screw
Close-up FAN Lower Screw


Then I rerun the Configuration Wizard, and it failed at the end as usual.
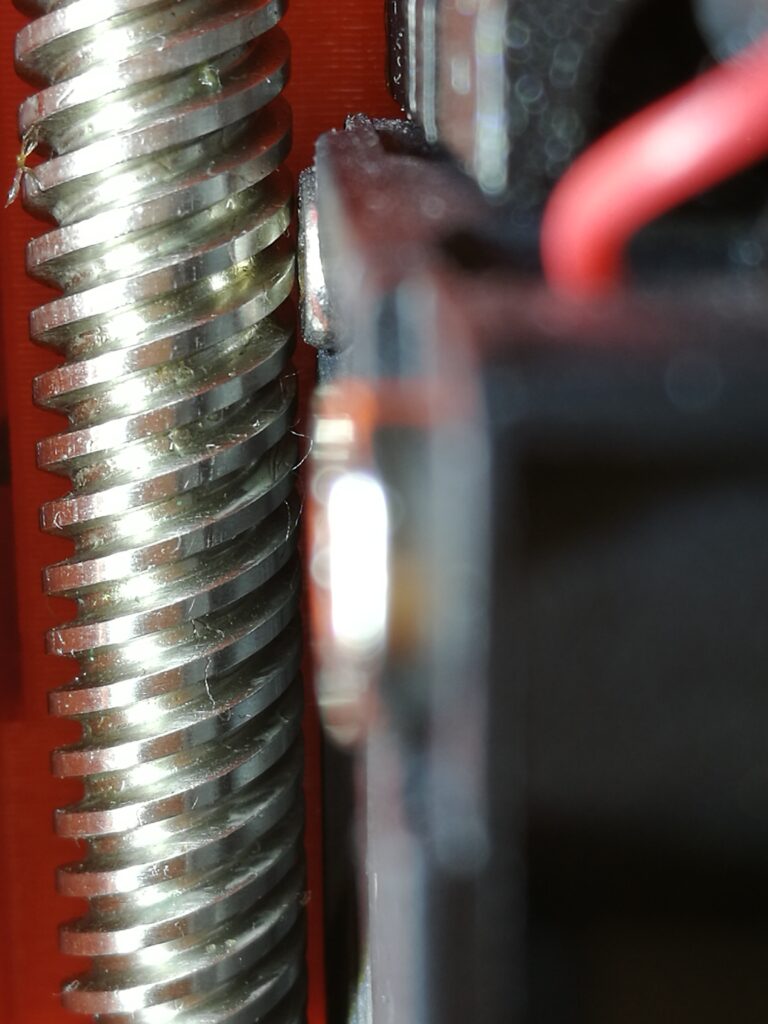
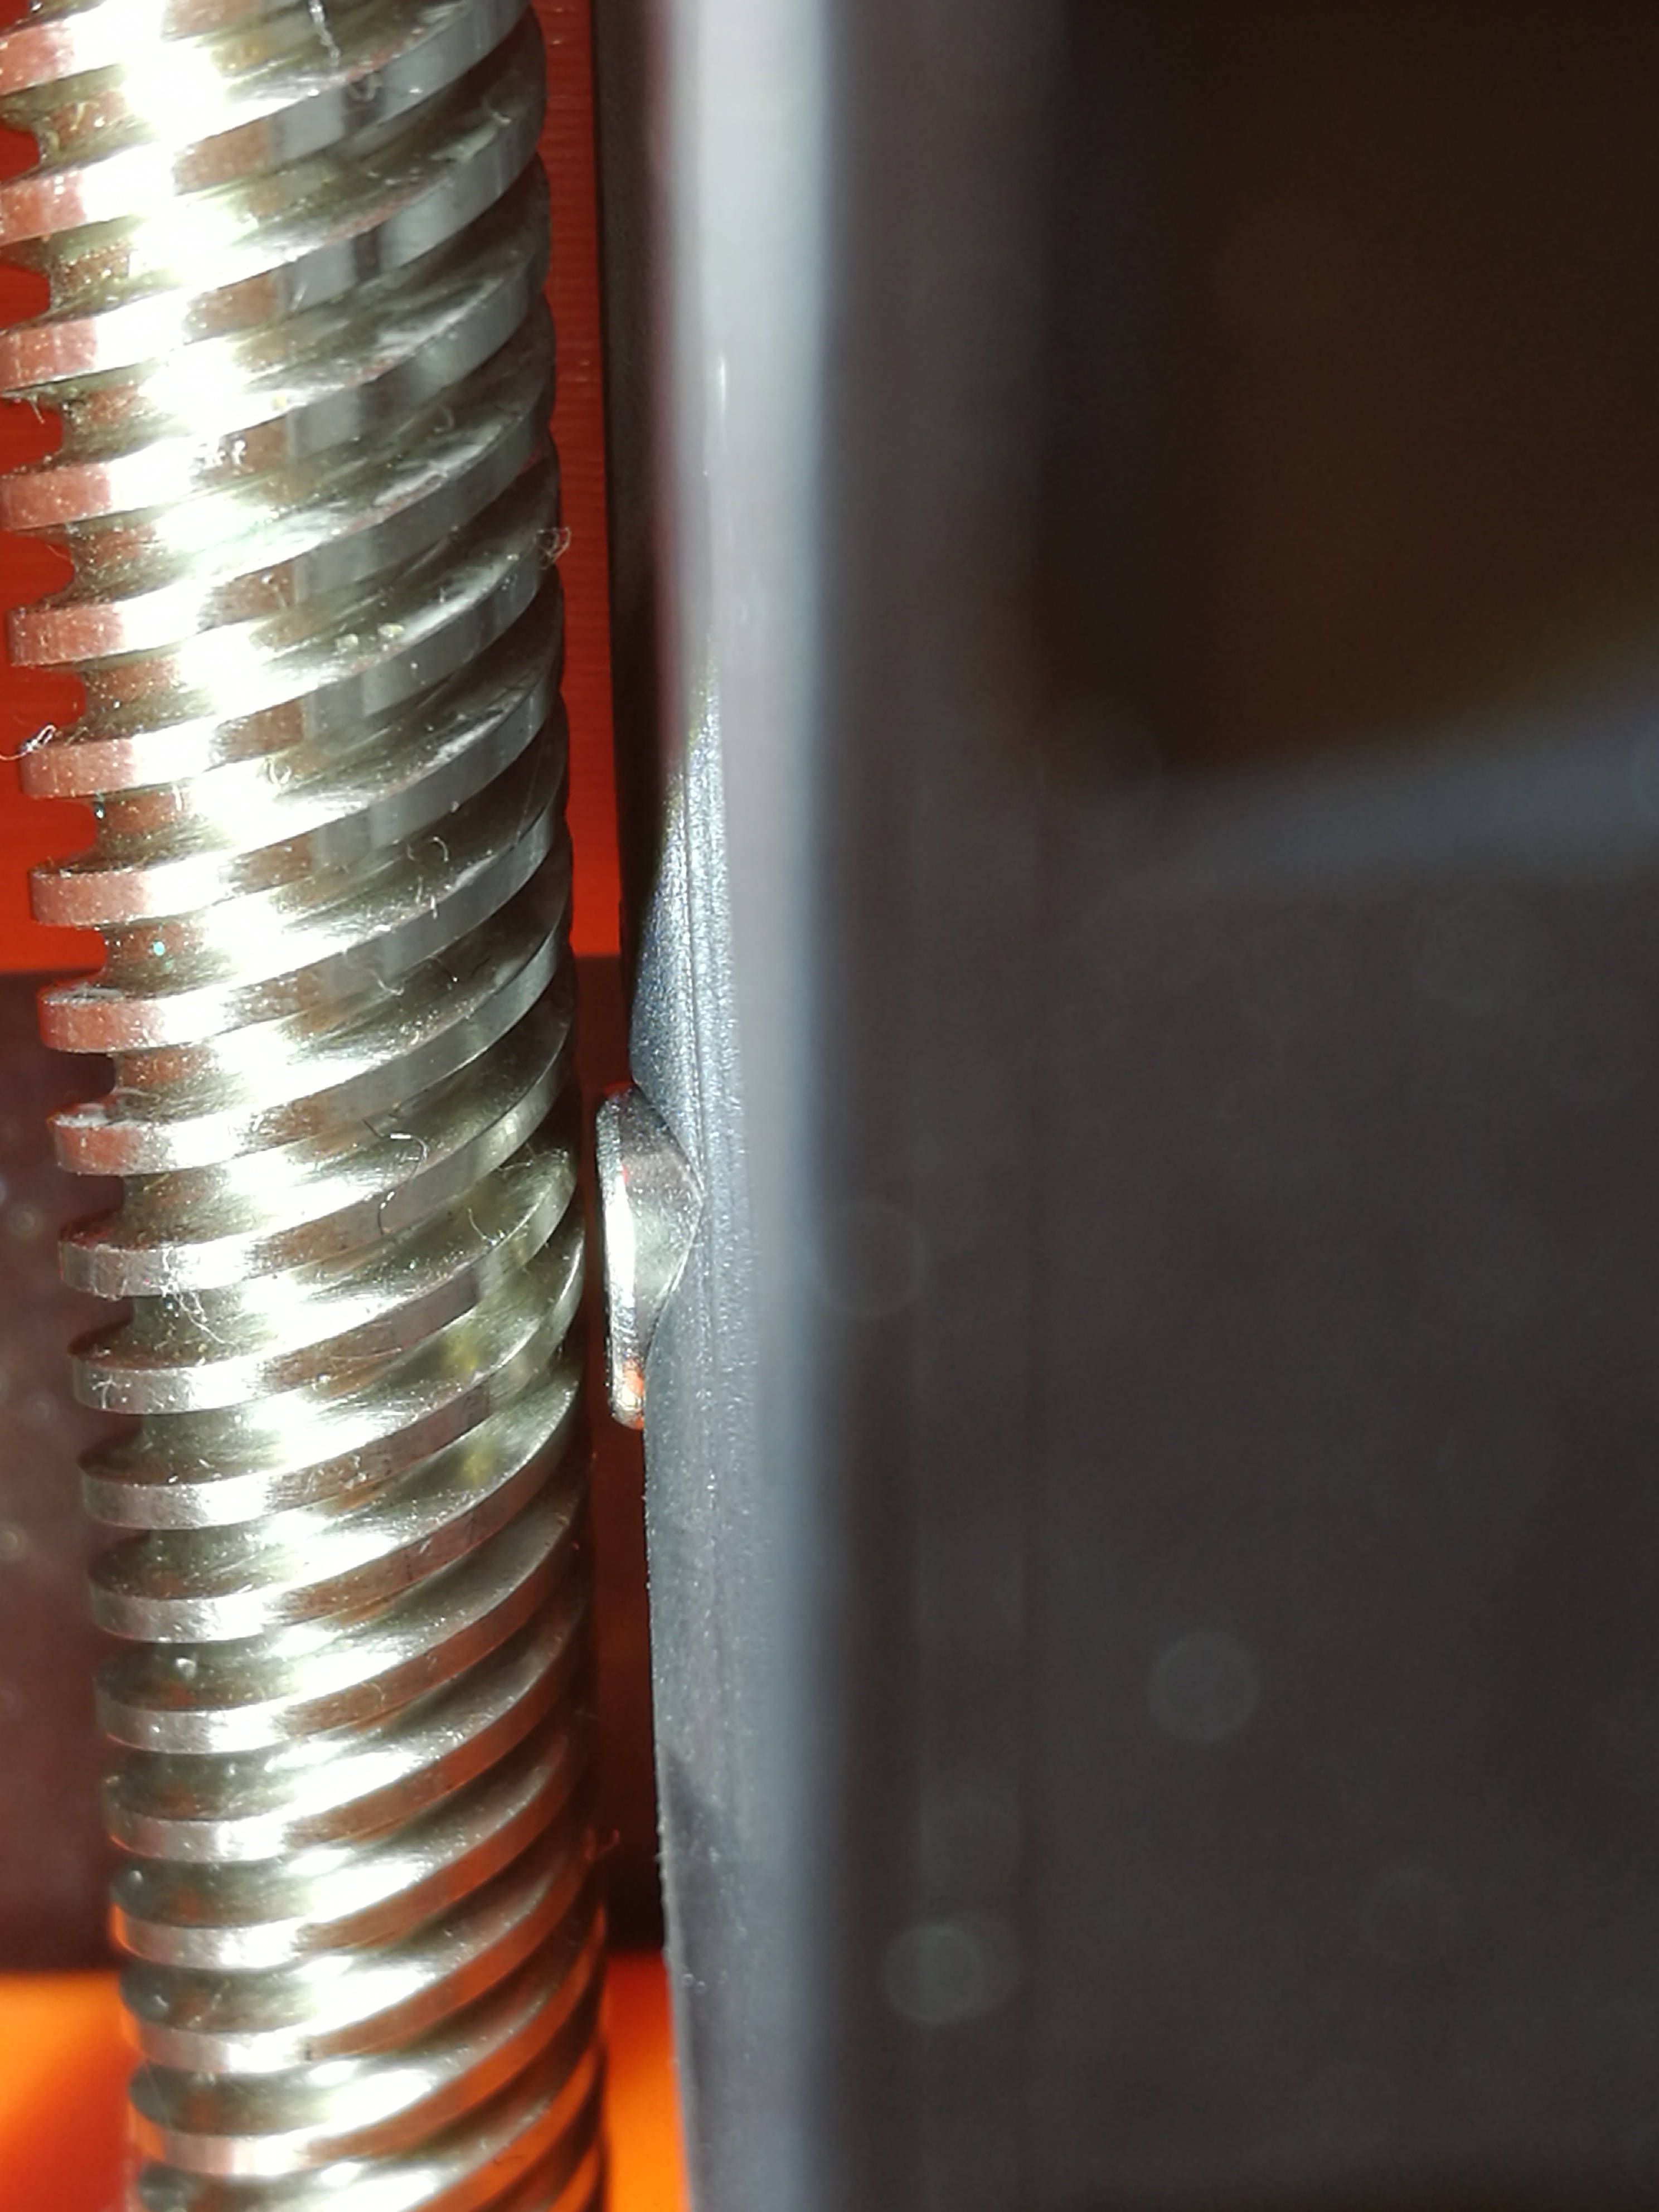
The screws of the Extruder FAN are almost aligned to the surface of the FAN, and no more than 1 mm is out, so currently at home position, the "hit" is really the lower FAN screw against the threaded bar. You can see closed up pictures above.
This make me notice that in a Prusa MK3 the real home regulation is the bottom screw of the FAN: the more is unscrew, the far the PINDA will be from the left bar.
So I realized that if the firmware, during the alignment test, expects to find the first circle area, say at 120 steps, they are 120 steps from home position, and "home" depends from the bar hit, and the bar hit depends on how this small screw is protruding from the FAN border!!!
How is your screw ? How many mm the screw is out respect the FAN border ?
Regards