Why is the First Layer via the First Layer Calibration better than my?
Hi,
I want to reach a really good bottom and top layer with my mk3s+ for PLA Silk. First I reduced the extrusion factor a bit (0.98) because the top layer was rough and it becomes much better. Although I determined the optimal extrusion factor for this filament with 1,02 by measuring the wall width from the test cube. Why is that at all?
Now I try to reach the same for the first/bottom layer. My question is now, why is the first layer via the First Layer Calibration in my printer much better than my one? Does anyone know the settings of the First Layer Calibration?
Z Offset = -1,3
First Layer Calibration

Prusa PLA Settings
My Settings:
Retraction: 2mm ; 0,4mm ; 400mm/sec
Extrusion factor: 0,98 ; 1,00 ; 1,02 (no difference)
Temp: 215°
Linear enhance: M900 K0.05
Extrusion Width: 0,42 ; 0,45 (no difference)
Adhesion on the bed is good, but not robust in xy direction.
Thanks!!!
Best Answer by FoxRun3D:
Ist there a .3mf file from the First Layer Calibration model out there?
As neophyl said:
forget the built in calibration anyway, you need to figure out just why the settings you are using aren't working for you.
I use this https://www.prusaprinters.org/prints/105404 to calibrate my first layer, larger and easier to interpret than the built-in method, and you can check many different Live Z values in one print, so much faster than the standard method. There are more options like this out there too.
RE: Why is the First Layer via the First Layer Calibration better than my?
Retraction: 40mm/sec
RE: Why is the First Layer via the First Layer Calibration better than my?
2mm retraction is too much on a mk3 for a start. 0.8mm is default.
Also this changing of extruder multipliers is one of the last things you should tune. Start out by actually measuring the real world diameter of your filament at several places and at several angles. Get a reasonable average and then enter that into the filament profile. Every extrusion calculation the slicer makes is based on the filament diameter. If it is not accurate then the calculated extrusion will also be off. I very rarely have to change EM from 1 once the actual filament diameter is made accurate.
Temperatures of 215 are on the low end for silk filaments. They tend to require hotter temps.
I've printed quite a lot of a specific brand called MKOEM silk silver and for me it works great. However for that particular brand the filament diameter is 1.7 not 1.75 and the temp needs to be 225-230.
Also what speeds are you running at ? is your extruder moving fasterr on your prints as opposed to the calibration ?
From your pictures the looks to be a difference in squish of the filaments, were they performed at different times ? The pinda sensor is temperature dependent, performing a calibration or print from a 'cold' start will get you different results to doing it from a known good 'warm' temperature. Getting into the habit of preheating your printer before a printing session (and accepting the extra time this takes) results in a far more consistent first layer.
RE: Why is the First Layer via the First Layer Calibration better than my?
Hello Neophyl,
thanks for your hints!
But I think I worded my post a bit misleadingly. All three images are printed one after the other with the same Silk Filament from Giantarm.
1. Straight from the printer First Layer Calibration
(very good result)
2. With the Original Prusa settings (Prusa PLA Filament, Printer, Print), but printed with Giantarm's Silk PLA
(bad)
3. With my extended standard PLA settings (Filament, Printer, Print)
(middle)
I forgot to mention temperature, tested at 200-230°, but no real difference. But it doesn't play a role here because the first layer calibration also uses lower temperatures.
The retract works well for me, I have practically no stringing and does not play a role here, since the result is even worse in picture 2 with de Prusa Original settings (min. Rectract).
What I'm particularly interested in now, how does the mk3s+ First Layer Calibration do it so well, what settings do they use?
Thanks...
RE: Why is the First Layer via the First Layer Calibration better than my?
What's your nozzle? How old?
Formerly known on this forum as @fuchsr -- https://foxrun3d.com/
RE: Why is the First Layer via the First Layer Calibration better than my?
Hi fuchsr,
My mk3s+ is around 1/2 year old. But why are you asking, all 3 prints are done at same time, on the same printer and filament?
Standard nozzle: 0,4mm
Speed: 25-45mm/sec for top and bottom layer
Ist there a .3mf file from the First Layer Calibration model out there?
RE: Why is the First Layer via the First Layer Calibration better than my?
No there is no '3mf' for that. Its not sliced, its built into the printers firmware. If you want to see what it is doing then you will have to download the Mk3 firmware from github and figure out where that routine is and decode what it is doing.
Forget the built in calibration anyway, you need to figure out just why the settings you are using aren't working for you.
Why don't you save one of the projects that are not successful for you (File>Save As) then take the resulting 3mf file. ZIP it up and attach the zip file here. Must be zipped or the forum will just silently not attach it. That way people can see your settings and maybe spot something.
Silk filament shouldn't really be using a standard prusa pla profile for a start. You should be using one designed for silks.
RE: Why is the First Layer via the First Layer Calibration better than my?
your own prints are definitely printing too high, there's barely any squish on the skirt. It could be local low spots that mesh leveling can't compensate for. But I've never trusted the firmware first layer calibration. I only use it to get a rough Z-offset, then run my own test print to get the correct Z-offset
RE: Why is the First Layer via the First Layer Calibration better than my?
Ist there a .3mf file from the First Layer Calibration model out there?
As neophyl said:
forget the built in calibration anyway, you need to figure out just why the settings you are using aren't working for you.
I use this https://www.prusaprinters.org/prints/105404 to calibrate my first layer, larger and easier to interpret than the built-in method, and you can check many different Live Z values in one print, so much faster than the standard method. There are more options like this out there too.
Formerly known on this forum as @fuchsr -- https://foxrun3d.com/
RE: Why is the First Layer via the First Layer Calibration better than my?
Thanks for all your suggestions!
I solved the problem with the help of fuchsr's model, namely how I print both a nice bottom and top with my setup.
1. Determine the correct extrusion factor using the Prusa test cube model. For the Giantarm Silk and my mk3s+ it's 0.98. In other words, the wall thickness in vase mode corresponds to the slicer settings, in my case 0.45mm. Probably because the filament thickness is 1.75-1.77mm. The difference can be clearly seen on the top surface, which is otherwise very rough. Of course you can simply change the filament thickness in the slicer instead of the extrusion factor.
2. Only then determine the z-offset for the first layer, because the extrusion factor changes the optimal z-offset, at least for me. For me, this moves from -1.35mm to -1.42mm. Although only 6 hundredths, the difference is enormous.
3. Only a few hundred decide between an interlayer adhesion or not and thus a beautifully smooth and dense underside.
4. Since only a few hundredths decide and the print bed also deviates a little, it is best to test at the place where you will print afterwards.
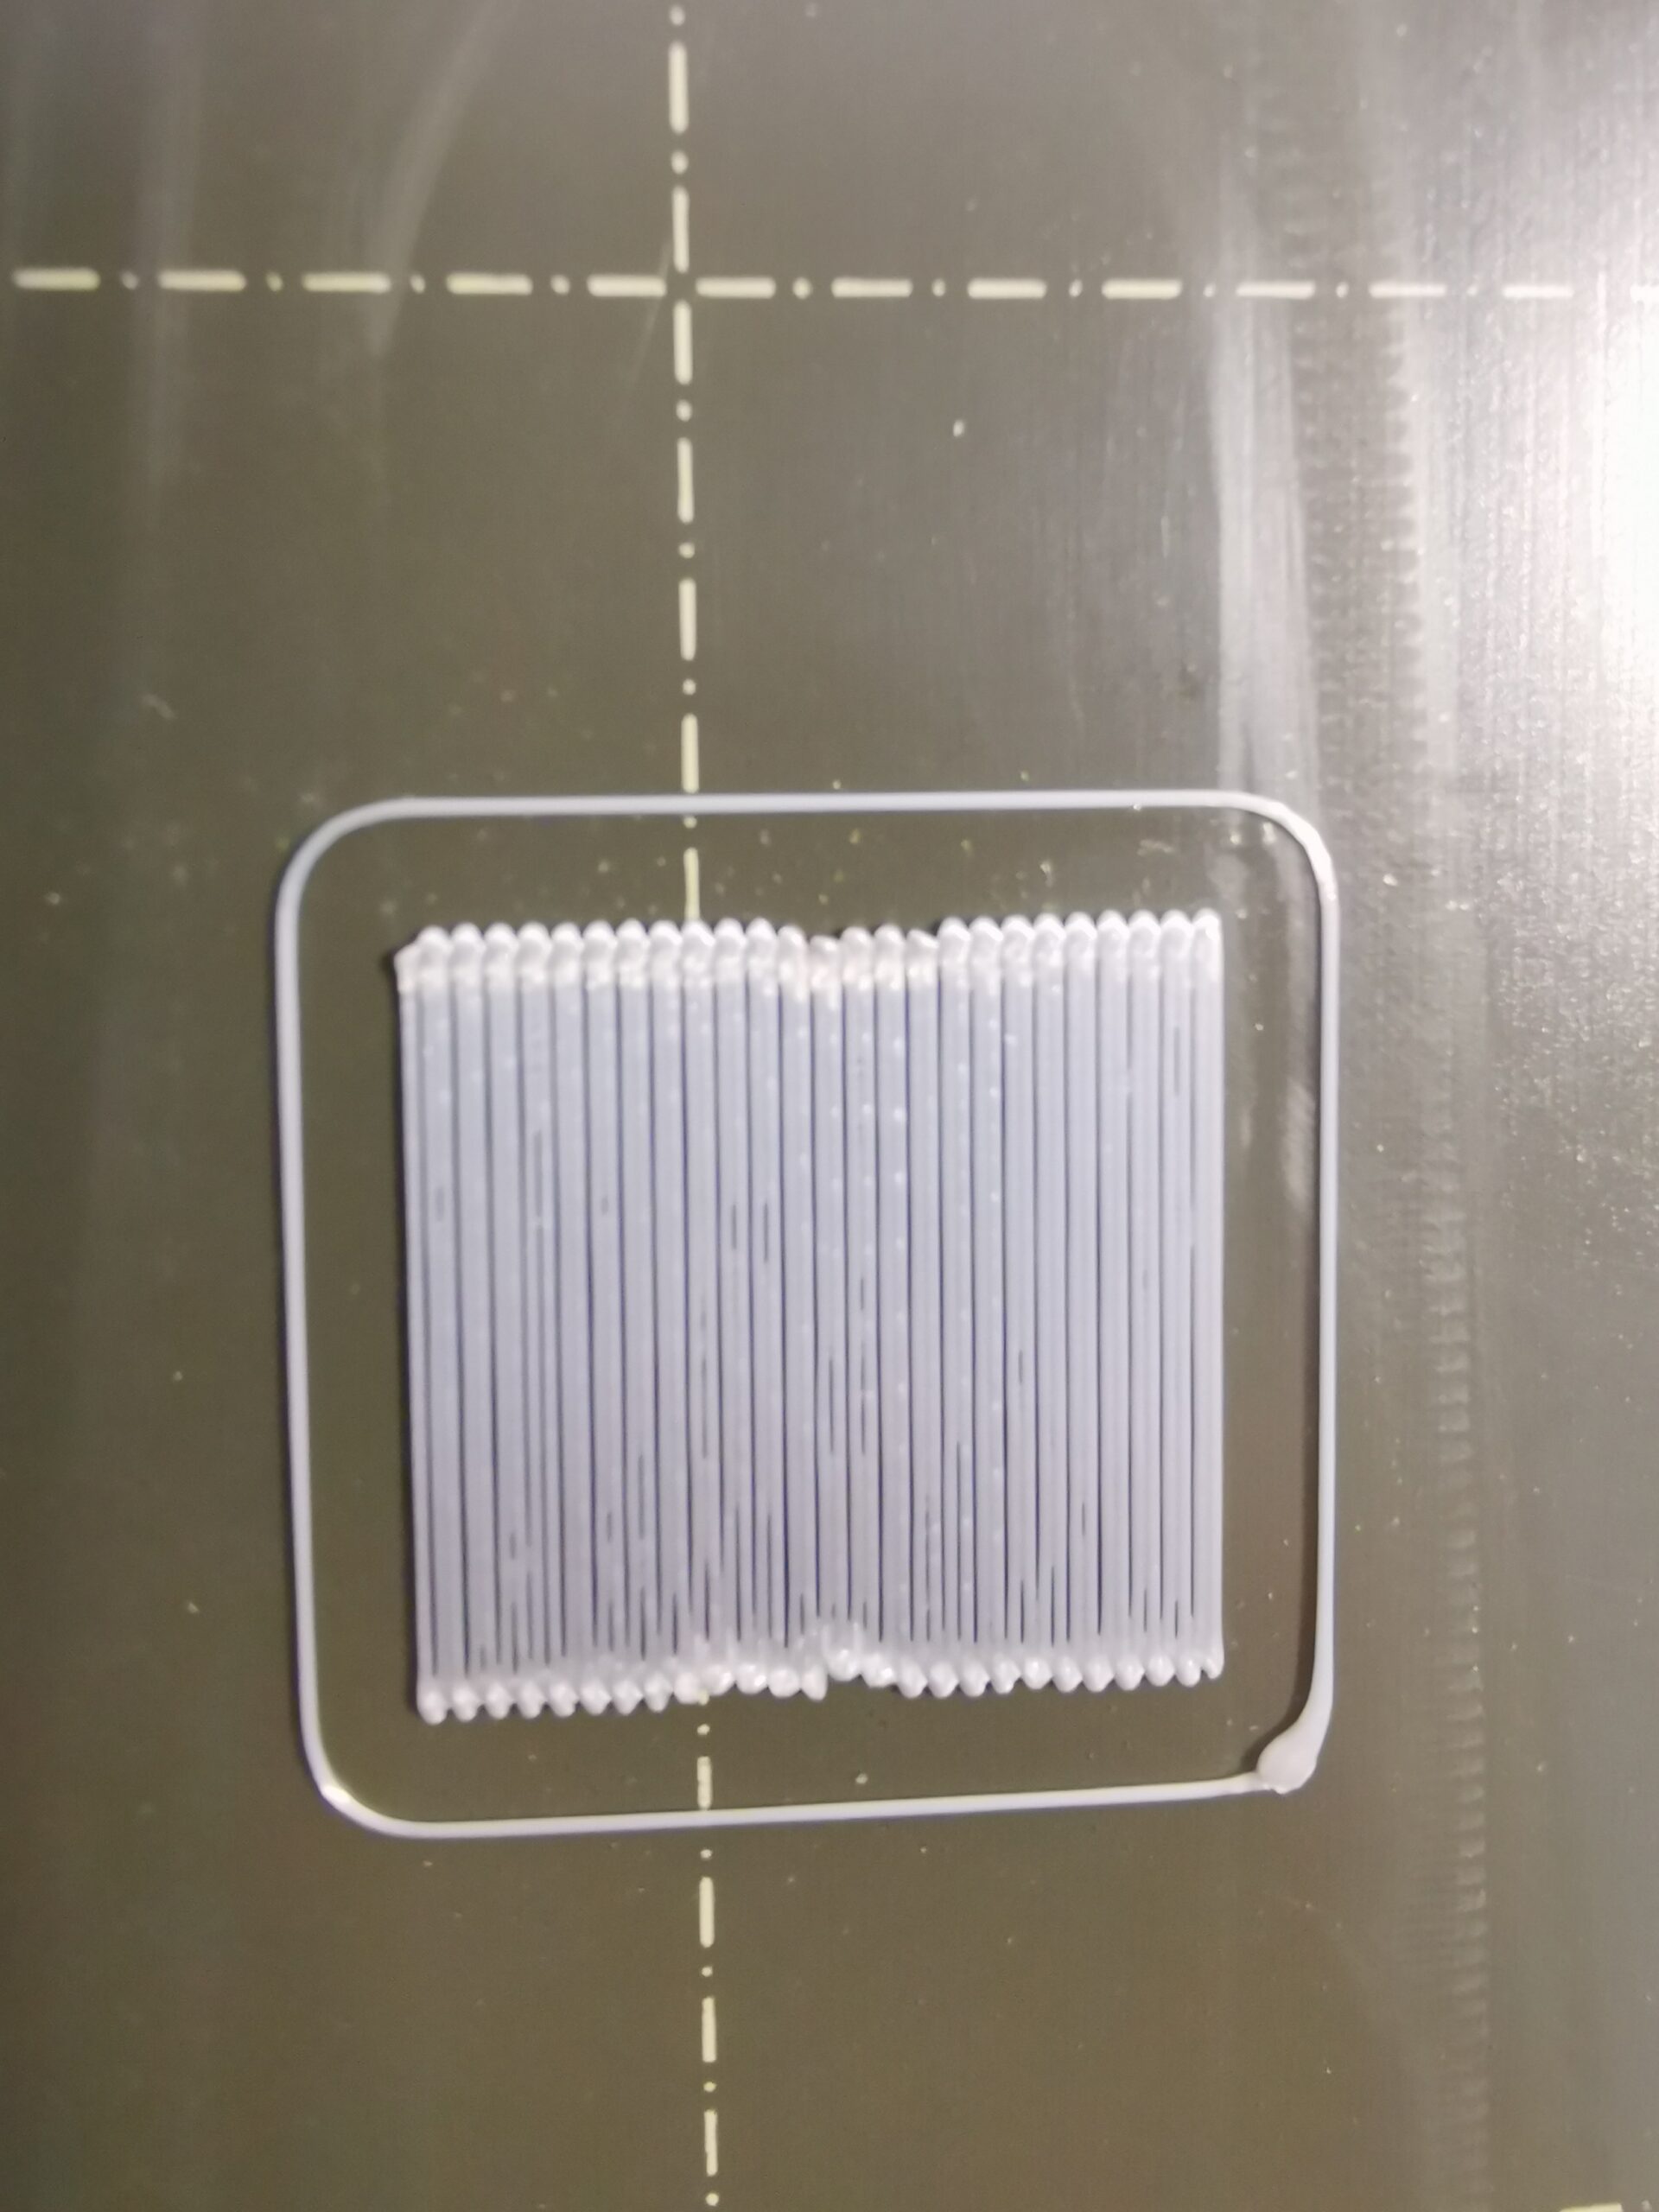
From right to left -1.39...-1.47 in hundredth steps. On the right you can see holes (nozzle too far away), on the left it gets rougher and rougher (too close)
