How to make the bottom layer dense ? I'm getting holes
What and where should I set on the Prusa Slicer to get the bottom layers solid uniform ?
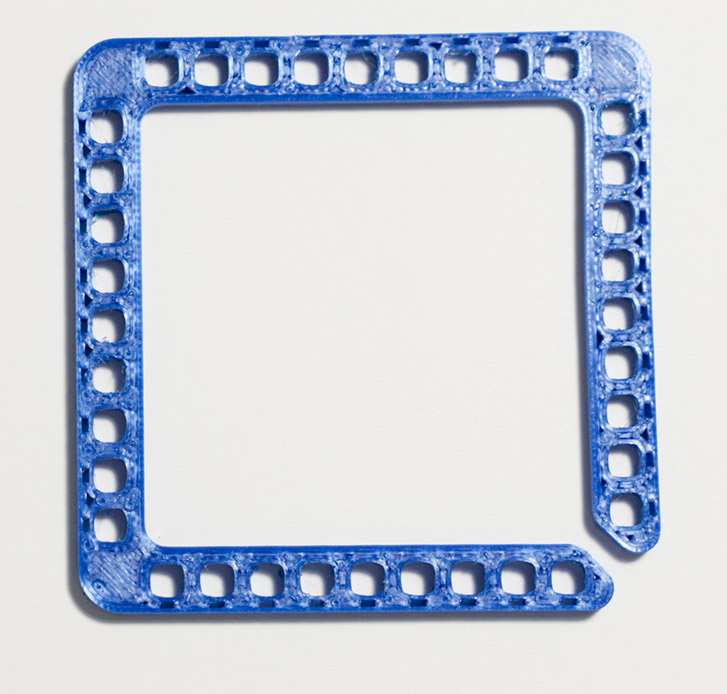
see image of what I'm getting.
the whole part is 5cm by 5 cm.
I use i3 Mk3s+
pla
0.15 quality
attached the Gcode file if someone can have a look
.
RE: How to make the bottom layer dense ? I'm getting holes
Usually we prefer a 3mf file, not a gcode file.
In Prusaslicer, go to File/Save project as, to create the 3mf file. Zip compress it (right click Compress on Mac and Win11, right click Send to/Compress on Win10) to turn it into a .zip file, which you can attach to a post on this forum. The forum software does not accept .3mf files, it has to be a .zip file.
The 3mf file contains not only the STL but also all your settings.
Having said that, this looks like bad first layer calibration aka Live Z.
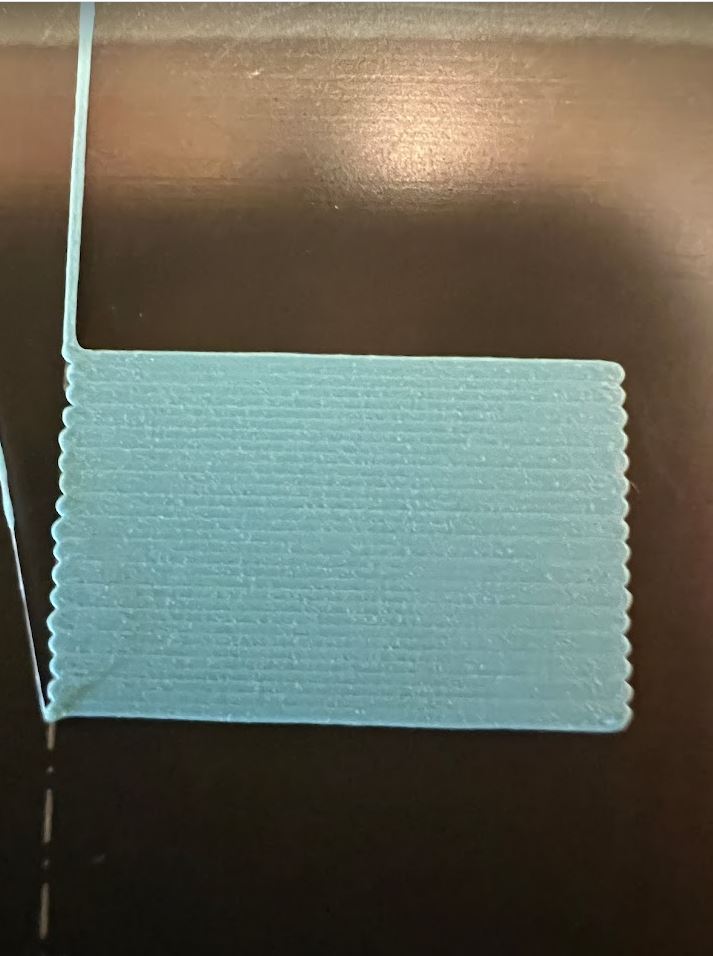
To properly adjust my first layer (Live Z calibration), I use the built-in first layer calibration wizard in steps of -0.100 until I get a good zig zag pattern with the corners sticking and a reasonably looking square. I then switch to this calibration strip https://www.printables.com/model/105404 for fine-tuning in steps of -0.020 or even -0.010. The larger format makes it easier to read the results, compared to the in-built wizard, plus you can try up to 8 different Live Z settings in one print. It's a variation of this method https://forum.prusa3d.com/forum/original-prusa-i3-mk3s-mk3-assembly-and-first-prints-troubleshooting/life-adjust-z-my-way/.
A good Live Z should be somewhere around -1.00. But absolute values mean nothing, they depend on printer and sheet. A Live Z in the -1 range gives you enough wiggle room up and down, to adjust for different sheets and filaments.
Textured and satin sheets are thinner than smooth sheets and require lower (more negative) Live Z. Even within one type (e.g. smooth) two sheets may differ in enough in thickness due to manufacturing tolerances to warrant different Live Z.
Also, any change to the hotend may require readjusting Live Z (including something as simple as a nozzle change).
Formerly known on this forum as @fuchsr -- https://foxrun3d.com/
RE: How to make the bottom layer dense ? I'm getting holes
Thanks for the detailed reply, I already did the first layer calibration, and thought it was looking fine. it looks like the "resolution" of the first layers just isn't dense enough. I'm attaching the file as you suggested , maybe something is hiding in there in the settings ... I'm no expert. only been printing 3 months or so.
RE: How to make the bottom layer dense ? I'm getting holes
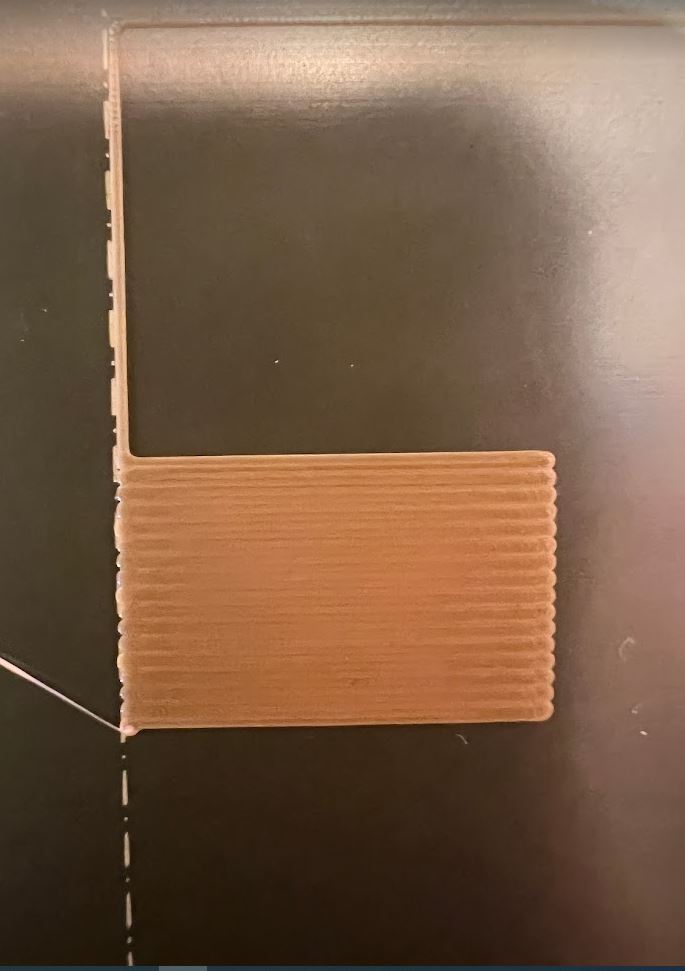
I don't see anything wrong in the 3mf file, so I don't think it's a software issue. That first square above looks pretty good. The second seems a bit low, plus the vertical line leading to it is jagged and not clean.
The second main cause for insufficient adhesion is a dirty steel sheet. Take it to the sink, and thoroughly scrub it with plenty of hot water and fragrant-free dish washing soap. Rinse and dry. Don't touch the sheet surface with your fingers.
Beyond that, I'm out of ideas. Underextrusion caused, for example, by a partial clog, should be visible in the calibration square. You said you've been printing for 3 months. So I would contact Prusa Support via the chat button on shop.prusa3d.com. They're 24 x 7 and one reason you paid the big bucks for a Prusa.
Formerly known on this forum as @fuchsr -- https://foxrun3d.com/
RE: How to make the bottom layer dense ? I'm getting holes
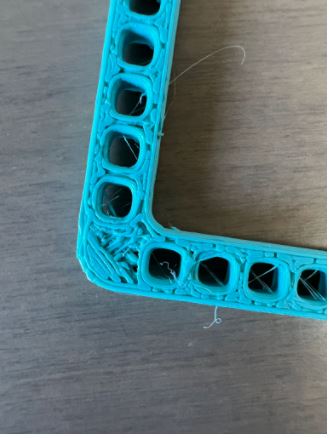
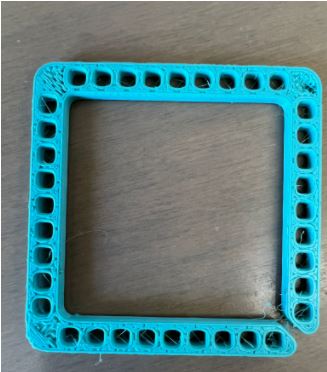
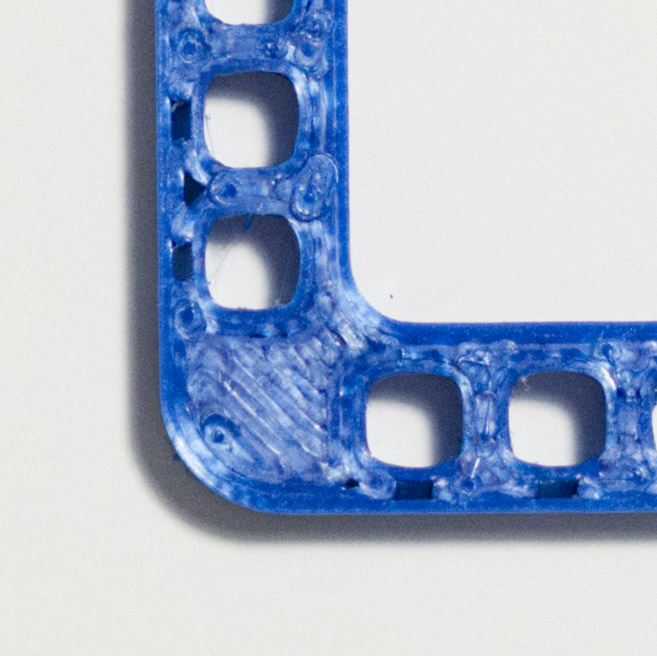
Yoola, this is a very small part and the walls of those circular holes are very thin. Not easy to achieve a neat and solid looking print. The gaps between the perimeter of the holes and the external perimeters are already present at the preview screen, Using a 0.25 nozzle surely would improve the results but, with the standard 0.4mm nozzle, I guess that only Swiss_Cheeese, our forum wizard, would be able to get a great looking print.
I printed the part using mostly the settings of your project. I only changed to 3 the vertical perimeters and enabled ‘detect thin walls’. As you see, it’s better than your print but not by much.
As Fuchsr says, maybe you need to clean again the PEI surface.
RE: How to make the bottom layer dense ? I'm getting holes
Not easy to achieve a neat and solid looking print.
True. There's opportunity to improve the design or play with extrusion width to get rid of the gap infill. I was mostly looking at the corners. They should print cleanly, and in your print it looks that way. For me the bad corners pointed to something more basic that needs to be fixed first (such as cleaning the sheet).
Formerly known on this forum as @fuchsr -- https://foxrun3d.com/
RE: How to make the bottom layer dense ? I'm getting holes
wow ! thanks for doing this effort @artur5 ! I will look into it more thoroughly tomorrow. and thanks @fuscher I will take the sheet to the kitchen and give it a wash 🙂
RE:
This is more of an aside, than a suggestion, because as far as I can tell PrusaSlicer is already highly optimised for the printers.
There's a bit of gcode that already over-extrudes slightly for the initial layers. Under Printer Settings -> Custom G-code -> Start G-code there is one line which reads:
- M221 S{if layer_height<0.075}100{else}95{endif}
So for the first 3-5 layers, you will be running the extruder with a 100% extrusion multiplier, then dropping back to 95%. Oddly, this 95% seems to have been chosen as the optimal EM for the MK3 setup.
But... I do not think this is relevant in the OP's case. What is happening just looks totally weird. First layer looks good. Only time I've seen something happen on my own printer is when I was using a 0.8 nozzle and had forgotten to compensate for this in the slicer, so the printer was only outputting a volume of plastic appropriate for a 0.4 nozzle.
RE: How to make the bottom layer dense ? I'm getting holes
Hi Helmuth,
I believe you have misunderstood the Command:-
M221 S{if layer_height<0.075}100{else}95{endif}
I believe this means that
if the layer height chosen, in 'Print settings> Layers and Perimeters' is less than 0.75 then ALL Layers are printed at 100% Flow rate, AND
if the layer height chosen, in 'Print settings> Layers and Perimeters' is 0.075 or greater then ALL Layers are printed at 95% Flow rate
regards Joan
I try to make safe suggestions,You should understand the context and ensure you are happy that they are safe before attempting to apply my suggestions, what you do, is YOUR responsibility.Location Halifax UK
RE: How to make the bottom layer dense ? I'm getting holes
Hi yoola,
terribly challenging part that is. There was a similar discussion just recently: https://forum.prusa3d.com/forum/original-prusa-i3-mk3s-mk3-how-do-i-print-this-printing-help/thin-walls-not-slicing/
I guess you started to set yourself up for problems when you designed the model. (Trust me most of us amateurs have been there, I have a huge wardrobe full of those t-shirts)
With thin walled parts it all comes down to design them with extrusion width in mind. If your designed wall is 1mm and the extrusion width is 0.45 (default setting in the slicer for o.4mm nozzle) it becomes a problem. Two extrusions are not enough, three is too much. The Slicer seems to be able to compensate for that to a certain degree but not always. So if you can do that with that specific part, you could try to have a bit of a play with the wall thickness in the original design.
I gave it a bit of a go in a few dry runs on the slicer. The best I could come up with was to reduce the extrusion width to 0.42 and that resulted in smaller gaps around the holes. I haven't attempted a print with those settings. Given the small size of the part it might be worth a go just to see if the result is good enough for you.
In some cases I have given up on trying to achieve the perfect print as long as the part does the job it's meant to do. I nobody can see it I don't care much about how it looks 😉
If there is no way you can change the part and it has to look good then I'm afraid you have to use a smaller nozzle. 0.25mm sliced it quite nicely.
RE: How to make the bottom layer dense ? I'm getting holes
Yoola, this is a very small part and the walls of those circular holes are very thin. Not easy to achieve a neat and solid looking print. The gaps between the perimeter of the holes and the external perimeters are already present at the preview screen, Using a 0.25 nozzle surely would improve the results but, with the standard 0.4mm nozzle, I guess that only Swiss_Cheeese, our forum wizard, would be able to get a great looking print.
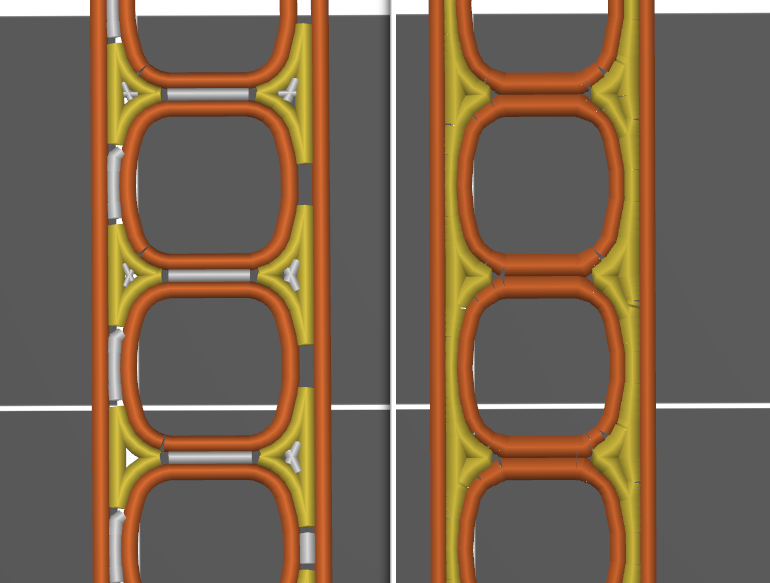
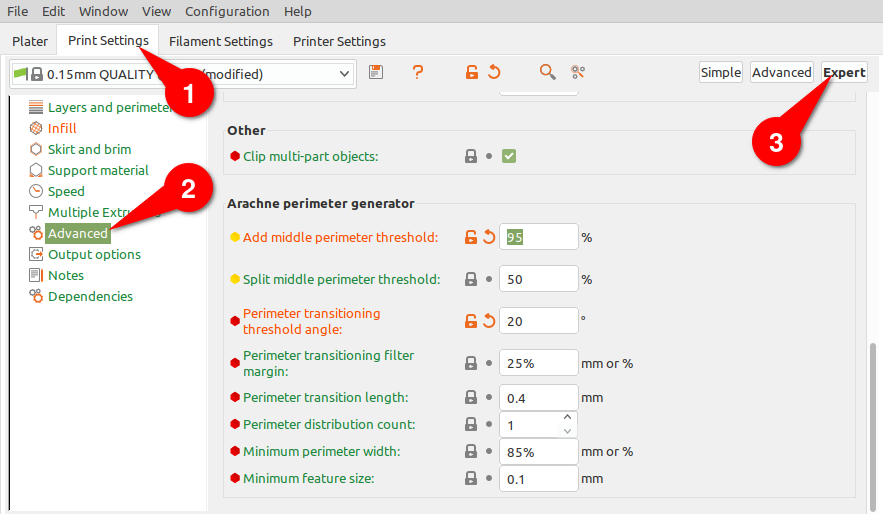
The PrusaSlicer Alpha has a setting that comes to mind which might help. The Arachne perimeter generator (ported from Cura) will extrude thicker lines for the perimeter where a gap in infill may occur. Here's a quick attempt to show how the traditional slicer looks vs the Arachne generator. I have no idea how the final output will look, I'm only looking at what the slicer shows.
RE: How to make the bottom layer dense ? I'm getting holes
In some cases I have given up on trying to achieve the perfect print as long as the part does the job it's meant to do. I nobody can see it I don't care much about how it looks
I've done something similar when printing stuff that gets mounted to a sheet of plywood for work. I printed a bunch of these brackets out and left them in the lab for the technician to mount. I think he was a little surprised when he picked it up and saw the gyroid infill. I saved a few hours of printing by not having bottom layers, and the print is still FAR stronger than it needs to be. 🙂