RE: Bad print quality and inconsistent top layer finish after disassembling the extruder.
I have recently had some problems with my Prusa I3 MK3 S. I had a failed print on which the nozzle dug into the build plate. After that i noticed that the heatblock is quite wobbly and that there is filament leaking from it. So I disassembled the extruder and re-tightened everything and after that the heatblock didn't move anymore. But the print quality is quite a bit worse than before. I noticed several issues which I didn't have before:
- The top surface finish is noticeably matter than before (for PETG atleast). Furthermore the top surface finish is quite inconsistent where it is matte and where it is shiny. I know there are some workarounds to get it shiny again (slower print speed for the top layer, higher temperature) but I feel like there is something else that is causing this which I should fix. Maybe the temperature sensor is not working correctly?
- My nozzle is oozing a lot more. Before I could simply start a print and walk away. Now if I start a print the nozzle oozes enough filament that once it starts printing it has accumulated so much plastic around the nozzle that the print is pretty certain to fail.
- My printed parts (PETG) make some cracking sound when I apply some force to them. Parts that I printed before dont make any sound when force is applied. This makes me think that my parts might be a lot weaker than before.
- On the finished print there are some blobs of plastic where they shouldn't be. My best guess for this is that the nozzle keeps oozing filament when moving and this causes more filament on certain spots than there should be.
- Supports are impossible to remove cleanly. The top layer of the supports merges together with the print and doesn't come off nicely.
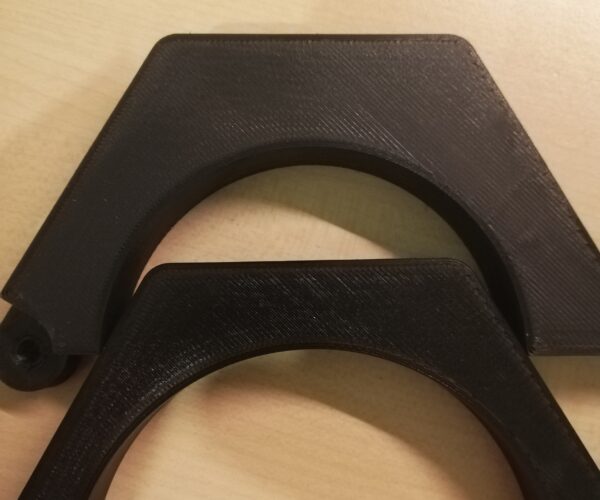
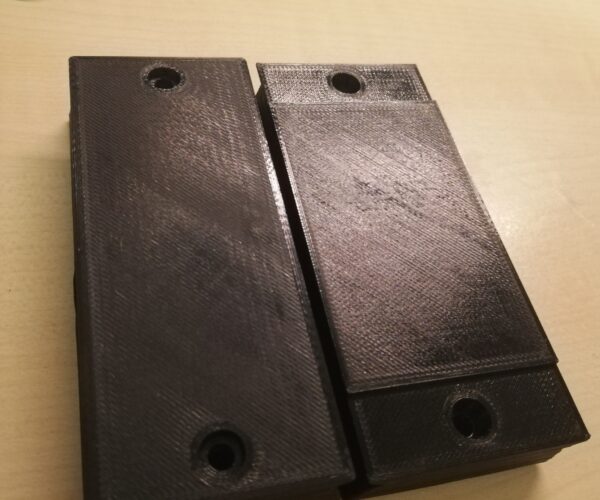
Below you can see two images which compare a print from before to after. In the first image the right part is before and the left part is after. On the second image bottom is below and top is after. You can see how the surface finish on the "after" prints is quite a bit matter than before.
We need to eliminate one possible cause of confusion: Several of these symptoms *might* also be caused by damp filament.
Please dry the filament and repeat the test prints, then we can look at remaining issues.
Cheerio,
RE: Bad print quality and inconsistent top layer finish after disassembling the extruder.
I tried a different spool (same manufacturer tho) and the problems persisted. I also tried to dry the first spool but that also didn't help.
OK: thinking about those blobs; take a careful look at your hotend. Are there signs of molten filament running down from the top of the heater block?
tried to dry the first spool
What method are you using?
Cheerio,
RE: Bad print quality and inconsistent top layer finish after disassembling the extruder.
OK: thinking about those blobs; take a careful look at your hotend. Are there signs of molten filament running down from the top of the heater block?
I just checked and there is infact molten filament on top of the heater block. I disassembled the heater block/nozzle/heatbreak twice now in an attempt to fix this leakage and I thought it is now sealed properly but apperently it's not. I am quite sure I got the assembly correct (nozzle flush against heatbreak and small gap between nozzle and heater block). What else could be causing this? Maybe the threads in the heatbreak are damaged which makes it impossible to to seal the gap between nozzle and heatbreak?
What method are you using?
I used a heated spool holder.
What else could be causing this? Maybe the threads in the heatbreak are damaged
It won't be the threads. If it's coming up tight then either there is some 'grit' aka burned filament debris getting between the faces or one of the faces is scratched. The hotend pressures are high enough to exploit any mismatch. If at any time there is moisture in the filament while the faces are not properly closed then varying live steam pressure also contributes.
I used a heated spool holder.
Probably OK to keep filament dry but perhaps not enough to dry out already wet material. Try a well controlled fan oven or better a food dehydrator.
Cheerio,
RE: Bad print quality and inconsistent top layer finish after disassembling the extruder.
It could very well be 'grit' as you describe it since the threads and the face of the heatbreak were full of plastic the last time I disassembled it. I tried to clean it but maybe it wasn't good enough. What would be the best way to get rid of all that plastic?
I also noticed a white discoloration of the plastic parts around the heater block. It comes off by whiping it, but might that be an issue aswell?
What would be the best way to get rid of all that plastic?
If it's likely to be a mix of plastics you are going to have to do it the hard way, heat and wipe.
I also noticed a white discoloration of the plastic parts around the heater block. It comes off by whiping it, but might that be an issue aswell?
It's normal, no problem.
Cheerio,
RE: Bad print quality and inconsistent top layer finish after disassembling the extruder.
Regarding the oozing and re-assembly of the hot end:
The description that Pruse offers is somewhat misleading and had me confused for quite few attempts. It can be done easier this way:
First of all get everything nice and clean. Use an appropriate screw to clean out the thread on the heater block (longer than the block) by running it all the way through from both sides, hopefully pushing out all left overs from the thread. If you were printing acetone soluble materials it might help soaking the whole block in it for a while and then do the screw thing again.
Then, contrary to what Prusa describes, insert the nozzle first and leave a really decent gap between nozzle and block, probably just shy of a mm. The whole procedure is not about the gap but about the tight seal between nozzle and heat break (sorry sounds obvious, but it took me a long time to finally understand this).
Insert the heat break from the other side and tighten it enough to lock the nozzle in place. If it doesn't reach the nozzle, give the nozzle a little twist.
The trick is not to insert the heat break randomly and hoping the resulting gap for the nozzle works out. By inserting the nozzle first you set the gap and then lock it in with the heat break.
When you then install everything and do the hot tensioning there should be enough gap left, or more precisely the seal between heat break and nozzle should be good.
hth
Hansjoerg

