Z-Axis adjustments
Is there a way to adjust the Z-axis during a normal print?
I've had to cancel every print so far because they print comes off the bed and starts getting entangled in itself. I hit cancel - is there away to then lift the Z-axis? I thought this was done by turning the knob, but that doesn't seem to be working.
reply
Your main issue is first layer and so it would make no point you'd change Z-offset during the rest of printing. The only thing I can say is, repeat first layer calibration until pattern sticks well to bed. Pay attention on final rectangle which (after detaching from bed) should be solid filled and smooth on touch. I recommend using some bright (white) filament for that, because you can easily see eventual gaps (which shouldn't be there) while printing calibration pattern.
In case you reach -2.00 Z-offset and filament still doesn't stick to bed as it should, then pull up PINDA sensor for about 0.5mm and start fresh (Z-offset=zero) first layer calibration.
[Mini+] [MK3S+BEAR]
images for first layer help
Is there a way to adjust the Z-axis during a normal print?
I've had to cancel every print so far because they print comes off the bed and starts getting entangled in itself. I hit cancel - is there away to then lift the Z-axis? I thought this was done by turning the knob, but that doesn't seem to be working.
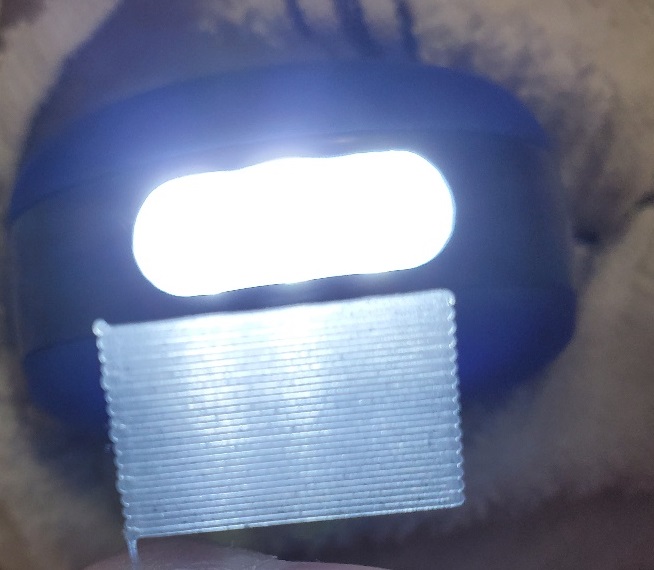
Can you post an image of the rectangle from your first layer test? I would post an image attached to the bed and one removed and held up to a light. This will allow us to better help you.
--------------------
Chuck H
3D Printer Review Blog
For some reason I am obliged to enter rubbish here
Agreed; this is a first layer problem.
The nozzle clipping the print is often due to poor adhesion, one end lifts off the bed into the path of danger.
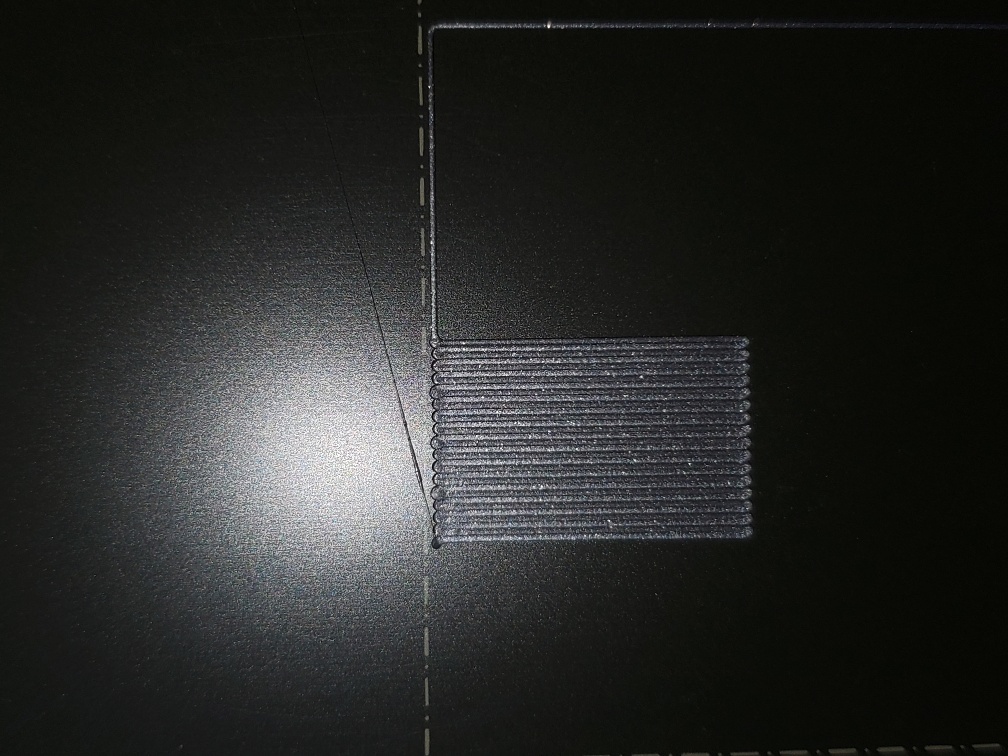
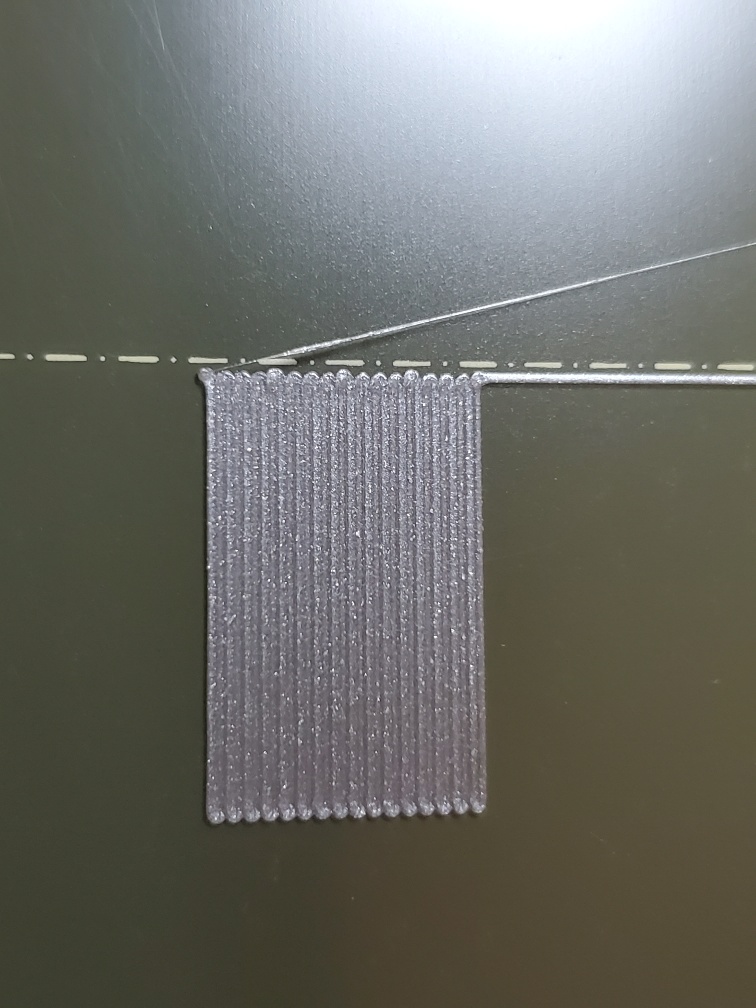
Re-run your first layer Z calibration. At the end of the calibration you are aiming to print a single layer *sheet*. It should be possible to peel it off in one and fold it without the threads seperating. If it breaks into lines it is too high, not squished enough. If it is a single sheet but with wavy lines or drag marks on it you are too low.
For most people it pays to use 7x7 mesh bed levelling.
Many beginners have problems with the built-in first layer calibration routine. There are alternatives, see this page by a regular poster here: http://projects.ttlexceeded.com/3dprinting_mk3_live_z_calibration.html
and look at this thread: https://forum.prusa3d.com/forum/original-prusa-i3-mk3s-mk3-assembly-and-first-prints-troubleshooting/life-adjust-z-my-way/
Also clean the sheet with dishwashing detergent (Dawn/Fairy) and plenty of HOT water, rinse well and dry with a fresh paper towel. Handle by the edges only. Fingerprints contribute to a huge proportion of this sort of issues.
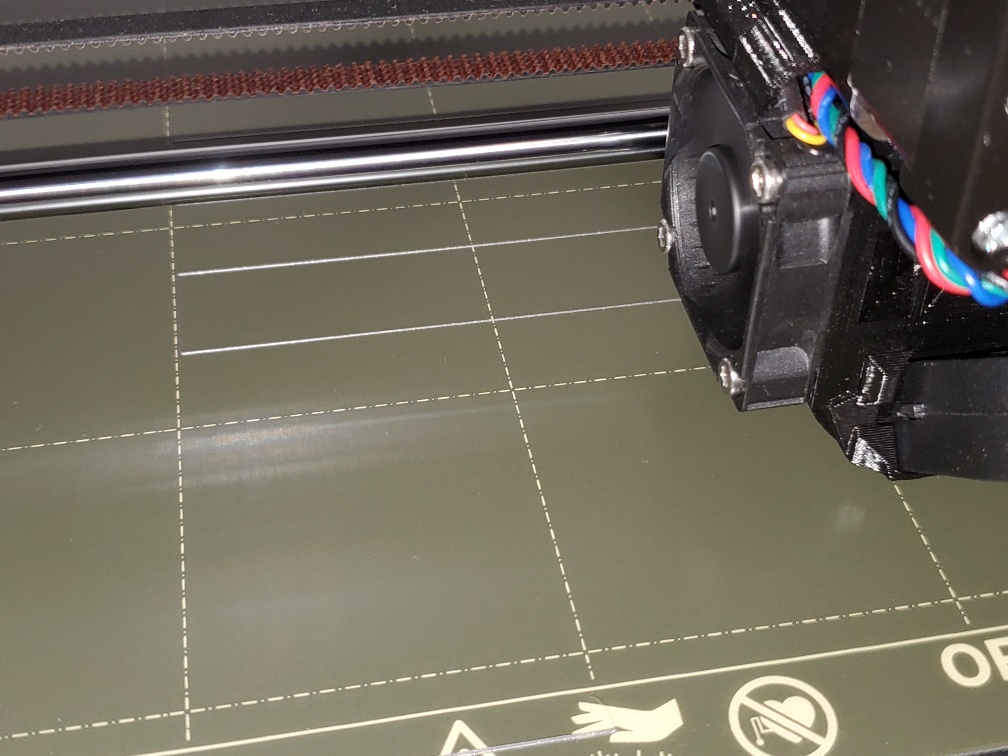
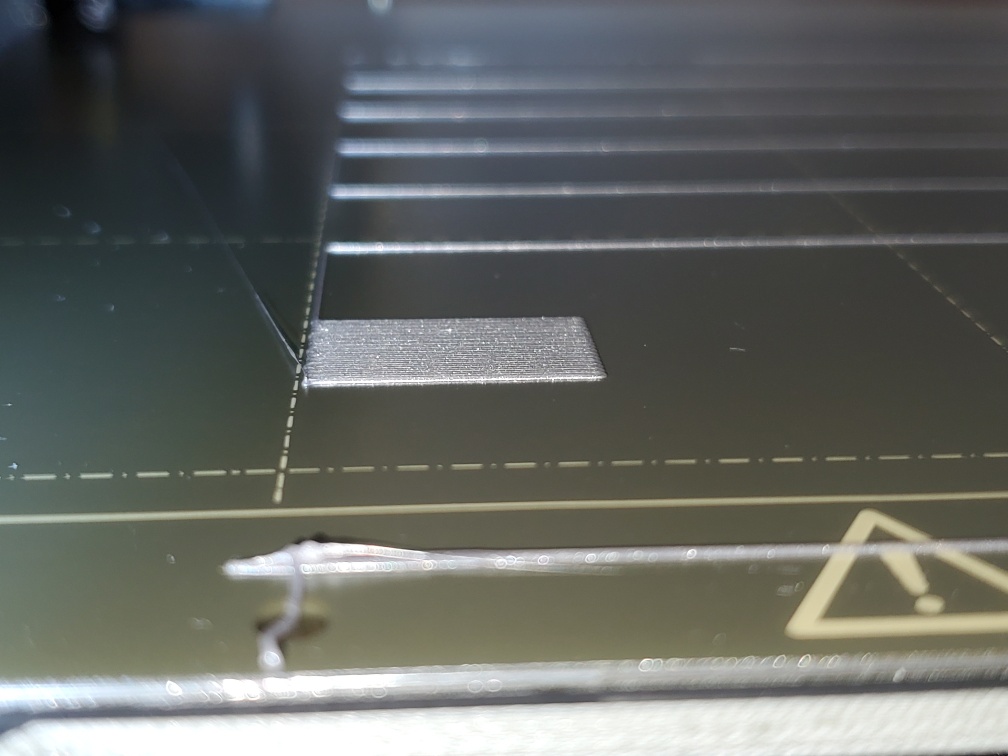
Tonight's testing session
Ok guys, I am back taking a few test runs tonight based on your earlier input. Thank you for your suggestions - very much appreciated.
Between each test run - I will clean the sheet with the dw soap procedure then wipe down with 91% isopropyl alcohol.
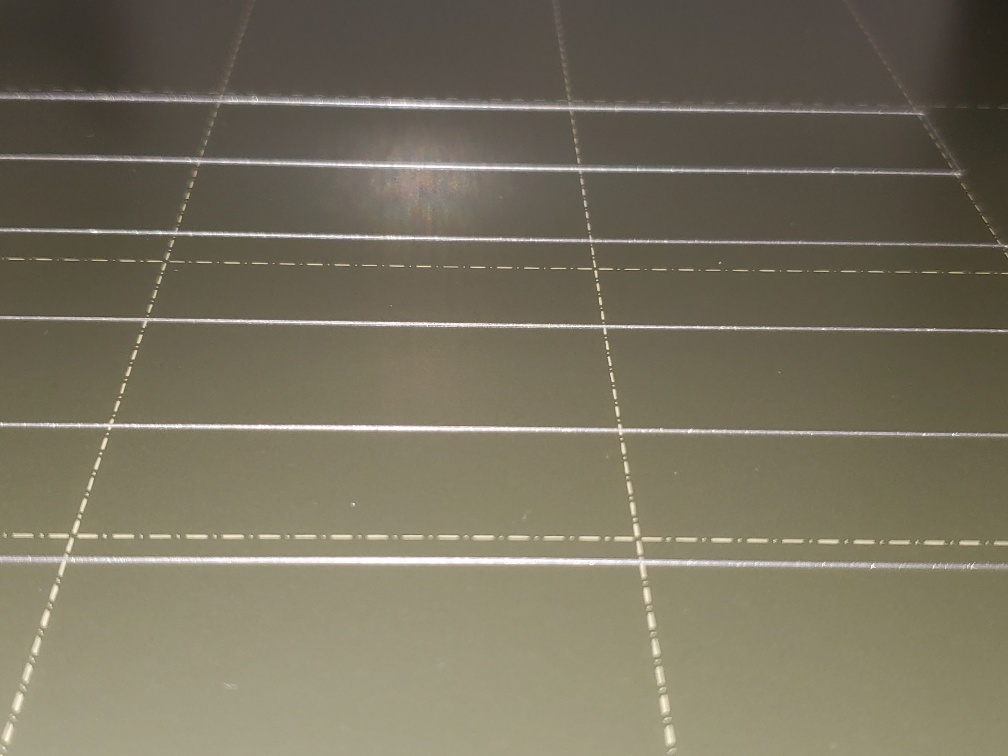
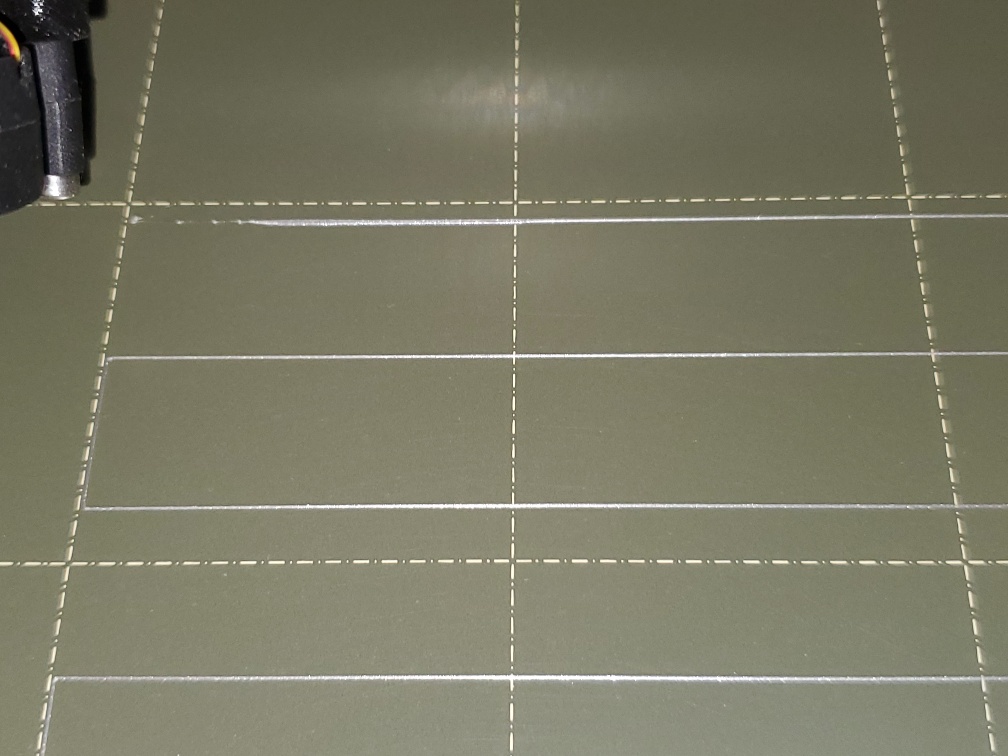
A change I made before running the First Layer Calibration tonight, was that I flipped the sheet over - using the other side. Both sides are smooth. The second change was setting the 7x7 mesh test. While the print was running I lowered the Z-axis from around -1.030 to -1.202, I did this fairly early in the test - so the majority of the print should be at that height. I am attaching several pictures for your review. Let me know if you want another test.
I've included a shot of the square with some backlighting from a flashlight. It was stuck pretty good to the sheet - maybe that's a good sign? Here are the photos: