XYZ calibration fails with pre-assembled mk3
Hi all,
My name is Rick, first time 3D printer, and I received my pre-assemled mk3 two days ago. After giving it a nice, prominent place in the office, I followed the guidelines from the book and tried to unload the filament, still left from the prusa test. It did not come lose, but a video on youtube showed how to open up the extruder and simple remove the filament with the clogg at the end. Problem solved and I started printing. Two succesful prints and I fell instantly in love with my mk3!
I had some appointments during the day, so I unloaded the filament for proper storage and all went peachy this time. When coming back in the evening, I decided to kick the printing up a notch, but still nothing crazy. One of the two prints was 1 piece of a 3D puzzle. Because I was confident that I could give it a go with 5 pieces at once. The first layer seemed to print well, but all of a sudden one piece get pulled off of my spring steel coated printing bed, while the other pieces stuck nice and tidy. I aborted the print, cleaned with isopropyl alcohol, just to be sure and gave it another try with 1 piece again. The same issue happened again.
I might have been a bit impatient here, but I tried to recallibrate and see if that could solve the issue. I used the wizzard and all went well, until it came to the XYZ callibration. The first point was very iffy, but it passed. On the second point the nozzle gets too low and I get the error message "XYZ calibration failed. Please consult the manual".
I tried to manually do the mesh bed leveling, followed by the Z calibration and they both pass. Then I tried the XYZ callibration and same problem as before.
For the mesh bed leveling and Z calibration I tested with printing bed attached, like described in the book. The XYZ calibration was tested without, also as described. I looks like it is only off by a little bit. I have no damage to the mesh bed.
- Does anyone have an idea how I have been able to print perfectly a couple of hours before printing became impossible? Nothing happened in between with the printer.
- Does anyone have an idea why the XYZ calibration failed, since the printer was pre-assembled by Prusa and worked fine for my first two prints.
- Last but not least: what could I do to solve this issue and continu printing.
Many, many thanks!
Best, Rick
Re: XYZ calibration fails with pre-assembled mk3
Hey Rick - kind of in the same boat as you are. Got about a half dozen prints off just fine, now everything spaghetti-monsters to hell. Done all the recalibration and whatnot, still nothing reliable. I'm eager to see some tips and tricks myself.
Re: XYZ calibration fails with pre-assembled mk3
On the picture my first puzzle piece and the second puzzle piece I tried to print.
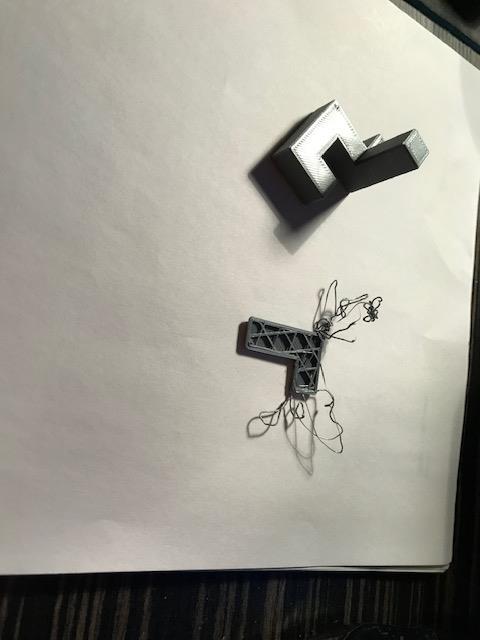
I tried several times, but all with the same result. I regret redoing the calibration now, since I cannot get past the XYZ.
I could fiddle with the hardware and try to fix the issue, but since I received it two days ago, it worked fine and it was assembled by prusa professionals and all tests passed, I can hardly believe that should already be necessary.
Re: XYZ calibration fails with pre-assembled mk3
I wouldn't be happy if a 'professionally' built printer was off at all in the 'skew', if your axes aren't perpendicular I'd be disappointed.
Check to see how secure the 'U' bolts holding the bed to the rails / bearings are - can you move them - securing of these bearings correctly (or not) can cause some really bizarre issues and they can definitely be a cause of poor 'skew'.
Once you have done the XYZ, then done the steel plate 'Z Reference' heights which you say you have the next step is to do the live Z - the First layer calibration.
I'd suggest you check the pinda to nozzle height - should be in the book, when you have done that run the calibration wizard again.
The live Z calibration that is pretty much the last step is pretty vital but the mechanism in the printer is next to useless unless you have zoom vision. Just run through all the steps and do your best when it asks you to load PLA and it does the live Z calibration - watch Prusa's vid on the subject.
When you've done this there are much better mechanisms to set the Z height
Re: XYZ calibration fails with pre-assembled mk3
first you bought an assembled printer get on the chat support or arrange for a senior tech to call you
but if you want to work away on it this is my advice
keep your nozzle clean build up can prevent the pinda from getting close enough to work.
extrude some plastic before you start a print
preheat to the temp of the plastic in use I like about 5 min of preheat at this point
extrude either with load filament command or steppers extrude raise the Z about 1/2 or 3/4 of the way up first if the plastic comes straight down with out loops you should be ok but with things still hot I hit the nozzle and heat block with a soft brass brush... the e3d silicone blue cover will reduce the chance of the filament being picked up and it helps with stable temp in the block as well
Re: XYZ calibration fails with pre-assembled mk3
Many thanks for your replies!
My initial thought was to buy a pre-assembled printer, so I could start with joy and the learning curve would not be as steep. Before trying out all advices, I decided to do my homework on the printer and additional checking.
I started to notice that every time my bed moved over the y-axis, I noticed a slight shock in the middle. So I suspected that belt was not tight enough. I ran the self test and checked the belt status:
That probably explains a lot about the shock in the middle of moving the bed over the y-axis and maybe also why the XYZ test keeps fails. Although it is still beyond my comprehension why an individual mesh bed levelling test finds all points perfectly. But that might me the newbie in me.
What I did was the following:
In the end I could barely (did not dare to) tighten the screws anymore. I made sure I tightened both screws the same way. It brought my Y-value down to 307, so that is not a significant improvement. I estimate 3 full turns of both screws.
Therefor my questions:
I still do not understand how this could happen. I have had two perfect prints, everything worked fine. A few hours later I repeatedly tried to go for another print and everything fails miserably. I live by myself, so no kids with interests in new shiny machines who could have messed things up.
Even if this is not the cause of the XYZ failure, I think this issue should be fixed first. All ideas are welcome!
Many thanks in advance!
Kind regards, Rick
Re: XYZ calibration fails with pre-assembled mk3
You need to slacken off the Y and then remove it from the carrier underneath the printer - the belt has either slipped or isn't in there far enough.
follow this chapter in the assembly manual from step 33 >
https://manual.prusa3d.com/Guide/2.+Y-axis+assembly/507?lang=en
You need to slacken off the idler (opposite end to the stepper motor) but not undo it completely. Personally I'd also remove the two lower screws from the stepper and allow it to pivot toward the centre of the bed a little, then insert the belt into the carrier in the centre of the bed baseplate - make sure you put the belt into the correct slots the correct way up. Then replace the stepper bolts - this should tighten the belt a fair bit. You may not need any more tension but if you do then tighten up the idler evenly but don't go all gorilla on it.
If I read correctly your calibration isn't actually failing - at the end of the 'wizard' does it say something like 'will be corrected' or axes are perpendicular - this is the skew.
That said I'd be aiming for around 260 on each axis, Prusa recommend 240 plus or minus 40 so anything > 280 is outside the recommendations and for a pre built printer a bit surprising. I personally think that both X and Y need attention on your printer (my X is 263 and my Y is 264) - did your printer come with the new X axis parts ? in the new version parts the X axis extruder mount has an additional screw for assisting with tensioning (although if correctly built I don't think this screw is necessary).
Re: XYZ calibration fails with pre-assembled mk3
Initial problem
My calibration was failing during the XYZ calibration. It hits the paper, so I abort. Since it barely hits the paper, I allowed it once to go on. It got passed the first point, not hitting the actual bed. The second point did give an error message: "XYZ calibration failed. Please consult the manual. It does not reach the end of calibration.
When I read the part of the manual it refers to, it basically means there is something wrong with (one of) the axis or the nozzle is not clean. Since the nozzle is clean and according to the self test the belts of my X and Y axis are too loose... 1 plus 1 makes 2. But maybe that is a premature conclusion of me being new to all this.
Latest try-out
I removed the Y-axis belt and placed it back. It is much tighter than before and also much tighter than the belt of the X-axis. Yet the belt status of X = 284 and that of Y = 303. So even though the belt much too tight in my opinion, the value hardly changed. That being said, when the bed moves into forward position (Y-axis), there is still a small twitch in the middle. Strange enough this only applies on a forward motion. When moving backwards, it is fine.
But it does not make sense too me. That belt should not be any tighter.
In regards to the new X-axis parts
I received my pre-built mk3 last Tuesday, so I expect it to be the latest model. When looking at the extruder mount, I cannot find a screw that might tighten the X-axis belt. But I do not know where to look for it. If it is not at plain sight, than I might have overlooked it. But like you said, it should not be necessary, since it is build correctly by the people of prusa.
Might be significant
In the beginning I did get another error message "External SPI Flash W25X20CL not responding." which I totally forgot about. I found it back in my browser history. But after a reboot, the message was gone and I have been able to pull off two perfect prints, so I did not think much of it anymore.
But I am starting to believe my problem is software/motherboard related.
Any thoughts are appreciated!
All the best, Rick
Re: XYZ calibration fails with pre-assembled mk3
Belt status is updated only during XYZ calibration and your numbers are too high.
On the Z part it is normal for the nozzle to rub the paper up to a point - depends how clean it is as to how much it does this.
Re: XYZ calibration fails with pre-assembled mk3
Are you sure about the status update? The prusa bible says "You can check the belt status under LCD menu - Support - Belt Status after successfully running a selftest". The selftest is a single test that can be run outside the wizard, seperately from the XYZ calibration.
But even now the belt of my Y-axis is tighter, I cannot get passed the XYZ calibration. I did get to the third point before it failed with the same error message, but I don't know if that is luck or that it has something to do with the belt adjustment. I will try to adjust some more and see if that helps. If not, I will contact prusa's hotline.
Re: XYZ calibration fails with pre-assembled mk3
Sorry yes - post self test - numbers are still too high if you've run that again.
Re: XYZ calibration fails with pre-assembled mk3
I finally got passed the XYZ calibration, basically by applying the first thing normal people would do: slightly lower the PINDA probe. Pardon my French, but bloody hell! I did not expect that to be necessary, two days after receiving my pre-assembled printer. Anyway: victory!. A skew of 0.01 is nothing to complain about either.
That did not fix my belt status of course. I might ask prusa for a 250,- euro reimbursement. 😛
Again, I would have prefered a smoother start, but in the end it is all part of the hobby/fun.