Will not calibrate
I have put the printer together and updated to the latest firmware. I am giving all the details which some may not matter but maybe it might help find the problem.
After I put it together it did not want to pass the self test in the X-axis 50% of the time I ran it, it moved freely in both directions and nothing is in the way each time it failed. Now I would say it is a rare event to fail the self test, nothing was changed other than me moving the x- axis and making sure the connections were good. When I passed the self test the first time I then ran the calibration that was prompted right after. It failed at the first of 4 points. It did this 70% of the time. Now it usually gets to point 2 but so far has failed 100% of the time here. I now have ran the XYZ calibration test 100 times with the same result: failure, cannot find calibration point. The manual does not have much information to give me.
My questions are:
1. What is the calibration test looking for in each point and how does it find it?
2. Does the paper have to be completely white, any writing or colored paper throw off the results, thickness of paper?
3. How do you need to place the paper on the heat bed, it either won't cover the entire print area and hangs over the Y axis on each end or you need to trim to fit between the stand but barely covers the y axis. I have moved the paper over when it went from the X to the Y axis and same result.
Any advice is appreciated helping me track down this issue. As a note I also have an octopi (print) hooked up and updated to the latest firmware. I have ran the test with/and without it being connected and have the same results. The Octopi does see the printer and says connected, this is how I updated to the most recent firmware.
more details
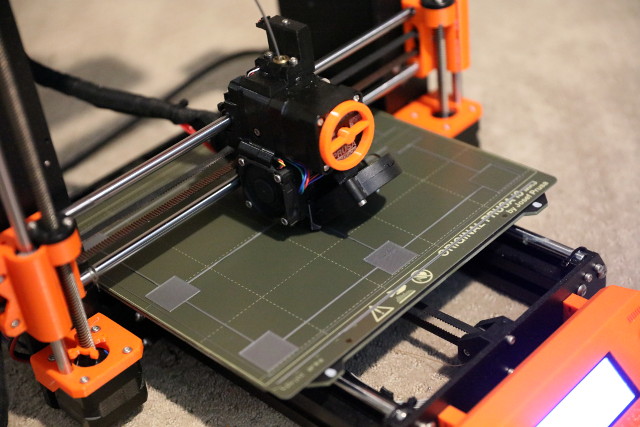
I should have added this is a MK3S+ printer, I did not see a link to edit my post.
Passing initial calibration
It sounds like there are some carriage tightness issues if you are not 100% passing an X axis test.
Calibration points are the magnets under the bed. The printer thinks it knows where they are relative to the home, and looks for them during calibration. If the carriage movement is constrained in any way during the tests, the nozzle will not be positioned correctly based on where the calculated calibration point should be. Several things can cause this - usually over-tightened bearing holders on the back of the extruder body, over-tightened or misaligned Y carriage rods/bearings (the S+ uses clips and should not have the tightness problem).
The paper does not need to be pure white, writing won't matter, and does not need to be exact size. It is used to protect the nozzle when the "touch the bed" step is performed to zero out the Z motion.
now calibrated
I can't read directions, printer now is calibrated. I had the double sided steel plate on for the PINDA adjustment. I was able to do the self test and XYZ calibration and pass both. I printed a dice, looks okay except the bottom was a bit different, my Z axis is probably off. I have a -1.225 already dialed in and probably will have to move the PINDA a bit higher if I want it perfect.
Dont shoot for perfect
The # attached to your live Z is not a function of a perfect PINDA or SPINDA height adjustment. Think of the PINDA adjustment as just a level set. Get it close enough. Then you go for a personal live-Z - each steel sheet type will have a different one The live Z for a given sheet is a refinement of the PINDA setting. The number that your read is dependent on your own printer - my number will not match yours when both printers are perfectly calibrated (there really is not such at thing, but there is "pretty close")
You will/may find that if you change the color of a brand, your live Z will need to swing 20 to 30 microns (the live-Z numbers are near-micron aligned). Changing brands - most likely will need a live-Z calibration adjustment.
Some folks say their specific steel sheet will need a live-Z difference for each side of the sheet (by manufacturing tolerance, should not be occurring - but I am not disputing what different people have experienced or reported.
My overall old-guy rambling (aka advice) is get ready to need to gain confidence with a live-Z value for a given set of filaments and steel sheets you want to run. Be ready to spot a live-Z problem as the skirt goes down. A Z problem shows first in the rounded corners that a good skirt would have. Watch for "skippy" corners that have strings that take direct-line shortcuts around what should have been a larger, rounded corner. Watch also for blobbing - globs of plastic that seem to be left behind after the print-head. The skippy issue indicates your live-Z is too far from the surface of the PEI membrane on your steel sheet. The Globbing issue indicates your live-Z is too near the surface of your steel sheet.
Don't try and seek out an absolute number as "good value". All of our printers are far enough off - but still perfectly self-aligned and capable of high quality 3-D prints - so as to not be comparable in a settings "normal" range, but rather need to be seen as a self-leveling system that allows you to establish your personal Z-baseline and then dial-in "excellence" by mastering control of a live-Z that works for your own situation.
It is now pitch dark. If you proceed you will likely fall into a pit.
For the Prusa printer I swear by those multi-square single-layer test prints. There are also some almost-full test prints out there as well, but those take a lot more time.
I posted one a few days ago (somebody had issues finding one, of all things) and I'll gladly repost or email to anyone who needs one.
I've settled on a technique where on the smooth sheet I 'tune' for the best looking surface and squish factor, and for the textured sheet I tune to the point that the 'brush strokes' just disappear into the texture on the bottom side of the test print.