Prusa Plate Print Comes with Gaps
I recently finished assembling Prusa i3 M3KS+. After a quite bit of try I was able to get a decent 1st layer calibration using https://www.printables.com/model/251587-stress-free-first-layer-calibration-in-less-than-5 Code.
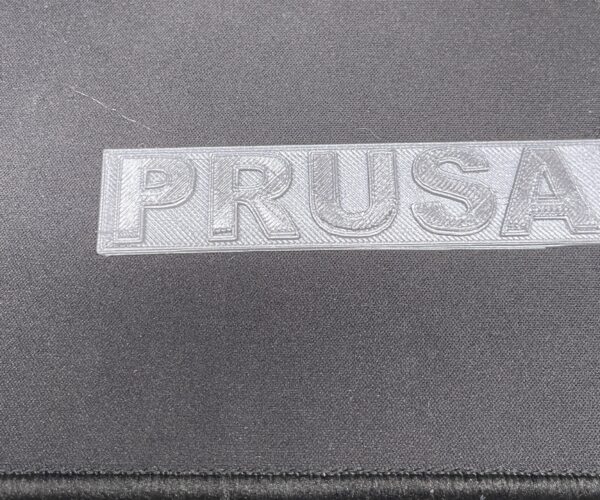
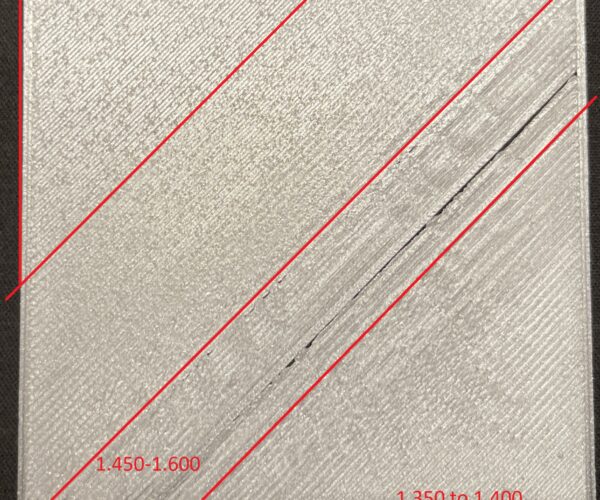
When I printed the Prusa Plate, I noticed gap on the bottom of the alphabets. Also noticed poor adhesion on the very bottom of the plate. What is causing this & how can I fix this issue?
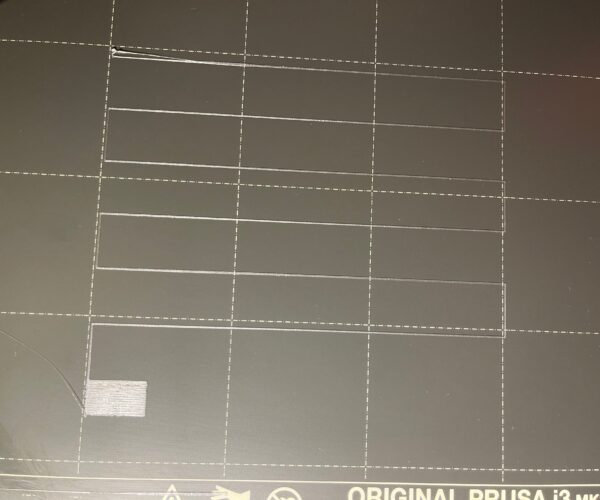
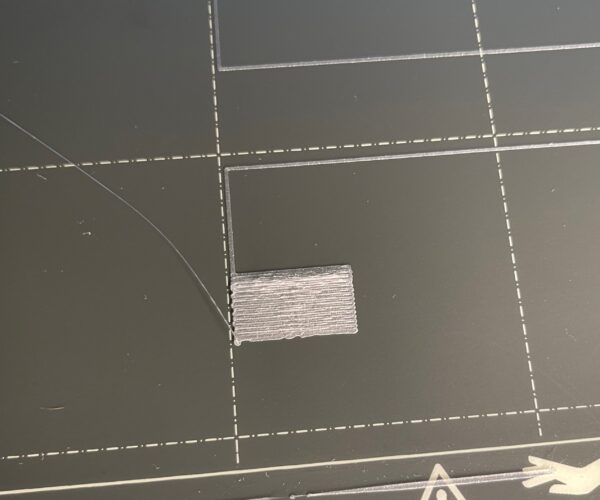
My Z level was set to -1.350mm. I feel that -1.400 mm is too close. Can you let me know if Z -1.350 mm a good Z level or should I change it (See below photo) ?
RE: Prusa Plate Print Comes with Gaps
Welcome to the forums.
The -1.40 actually looks pretty good but why is the print so distorted?
The letters in your Prusa badge almost look under extruded but the fact that all the errors are at the bottom of the letters makes me suspect a Y axis shift.
Check your belt tension, pulley alignment, and grub screws for proper tightness.
Make sure your build plate is clean with no fingerprints or oily residue present.
Run the built in Z layer calibration from the LCD menus and show us a pic of the result ‘on the bed.’
Once the built in calibration is solid, take a look at this thread and download the print files for a good first layer calibration.
Cheers
RE: Prusa Plate Print Comes with Gaps
I would actually continue to dial more negative beyond the -1.40 until you start to get waves, then come back up until it’s smooth again.
RE: Prusa Plate Print Comes with Gaps
Your calibration print looks pretty good to me. It’s possible that you are a tiny bit too negative at the -1.4 as the ‘flag’ at the end of the print looks slightly wavy in some areas.
I’m interested to see what one of the 75x75 prints from life adjust z looks like. You can adjust the live z midway through the print to get a side-by-side comparison of two different values.
Once you’re more familiar with the process, you can actually make 4-5 changes with 1 print. Just jot down your values at each change so you’ll know which one was closest. When I think I’ve nailed it, I’ll print a full square at my ‘final’ value to see if it’s right. Bend it in half and make sure it doesn’t split at any of the seams.
Cheers
RE: Prusa Plate Print Comes with Gaps
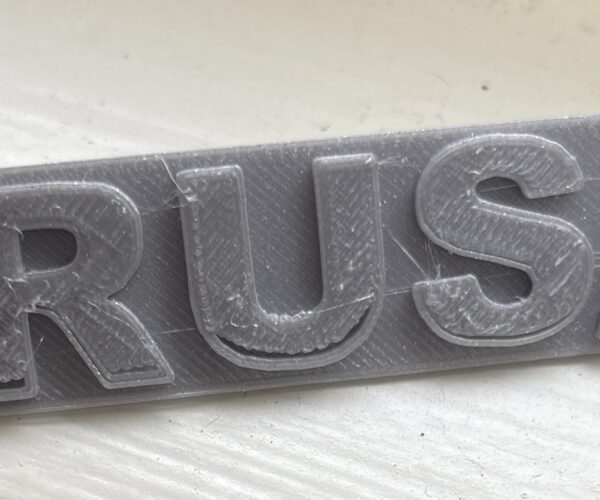
I apologize for the late response. After printing 75x75 print & adjusting the Z level, it appears 1.400 is the optimal height.
After the z and X & Y belts tension adjustment, the Prusa name tag came out much better. However, there still are minor imperfections. Do you recommend any additional remedies? Thank you for your time.
RE: Prusa Plate Print Comes with Gaps
Congrats! It looks like you’ve made good progress.
I wouldn’t spend too much time fussing with minor imperfections with pre-sliced gcode files, which is what you’re printing from the SD card that came with your printer. You’ll learn a lot more and be able to fine tune settings in PrusaSlicer to get the results you expect.
If you really want to use the Prusa sample files for experimenting, you can download the files from the Prusa website and slice them yourself. You can also go to the Printables site and download a model of something that interests you. Start with something simple and make sure there are photos of prints that others have made successfully. I say his because there are many untested and unprintable models on the internet.
Download the .step or .stl or other origin file(s), don’t download any .gcode files. Open your downloaded file in PrusaSlicer and choose the filament you’re using and layer height you want. Slice the model with the default profile and settings and export the .gcode file to your SD card.
Insure your build plate and nozzle is clean and run the print. Examine your final print for flaws and start tweaking from the results. There are many threads here in the forums dealing with materials and slicing issues. It’s a process and it will take time to become familiar with all of the settings your can adjust in PrusaSlicer. After more than a year at this ‘hobby’ I find that there is still more unknown than is known (and fully understood) to me.
Enjoy your printer and the process. There’s a lot to learn but it is very rewarding when it really starts to ‘click.’
Good luck and have fun.
Cheers
RE: Prusa Plate Print Comes with Gaps
Thank you so much; I appreciate your time. I have enjoyed the whole assembly and refinement process. I look forward to advancing my 3D printing habit & contribute to this fantastic community.
RE: Prusa Plate Print Comes with Gaps
Glad I could help. I’ve learned so much from this community and am grateful to all the selfless people who so generously donate their time and knowledge to help others here. The least I can do is to try to pay it forward when I can.
I should have mentioned that your printer will take some time to ‘break-in,’ so to speak. Any newly assembled printer requires a number of hours of print time to get all the parts settled and bedded in. During this period it’s best not to obsess about minor quality issues and focus on learning the machine and the slicer.
After about a month of printing you’ll be ready for some minor maintenance tasks such as checking belt tensions, fastener tightness, and such. There’s a check list in the manual and online. Once you’re done with the initial service and you’re more familiar with everything, you’ll be well on your way.
Spend some time reading through the forum pages; there’s much to be learned from others’ experiences. Enjoy!
Cheers
