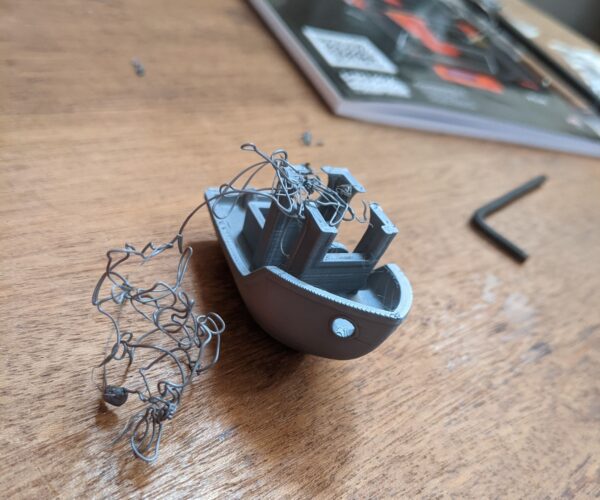
Prints fail when almost complete
I just assembled an i3 MK3S, and everything seems fine, but when I print I seem to have problems. At first, I was having trouble with the first layer adhering to the smooth steel pate. I used the glue stick on subsequent print attempts, which helped the first layer adhere just fine, and the rest of the print seemed to be going fine, but then somewhere around 90% complete, the entire print detached from the print bed and failed. This has happened three times in a row. I can't say exactly why the print is detaching, because I haven't managed to be in front of the printer when it happens. I'm assuming it's simply losing adhesion, then getting dragged across the bed. How can I prevent this? If the glue isn't holding, what's a better option? Especially for long prints; e.g. 11 hours-ish.
RE: Prints fail when almost complete
In the printer change settings of calibration to 7x7.
To print in a good way:
1. A clean bed is important. Clean with dish soap, a few times.
2. The first layer calibration needs to be 100%, see movie.
Normally no glue stick is needed.
Search in forum for more information on cleaning, more user have problems.
RE: Prints fail when almost complete
Hi,
I have quite a similar problem with my first Benchys (see Foto of my Armada attached).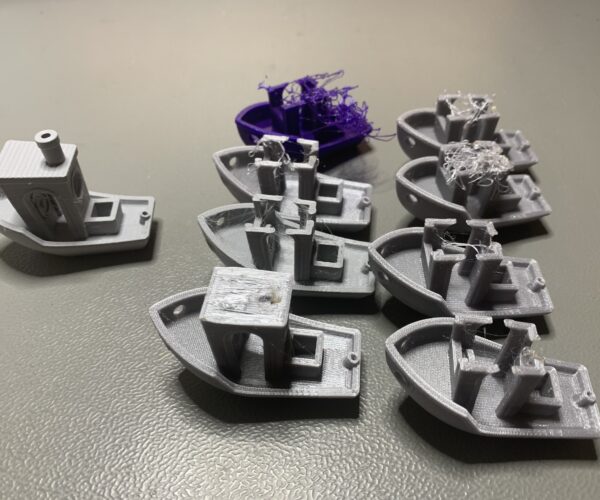
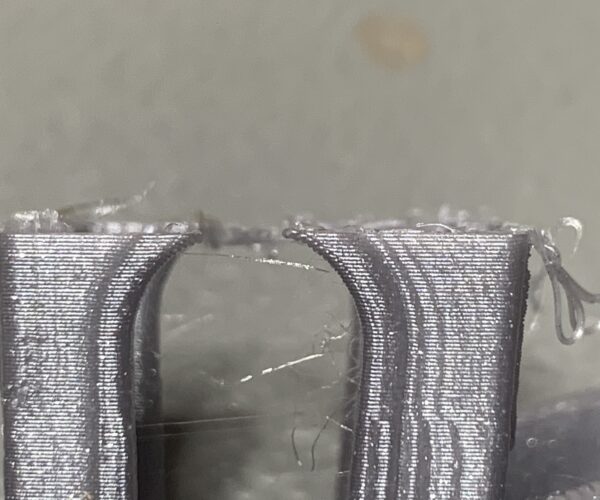
I could see the moment when it failed. Some of the features Bend a little upwards and eventually the nozzle hits this point and knocks the print over, no matter how good it is attached to the Bed. I am still trying to figure out, why this upwards bend happens. I was decreasing the temperature more and more, since I initially thought the problem is stringing and also fillament leaked out of the nozzle, but this did not help...
RE: Prints fail when almost complete
... so I decided to print some temp towers, and somehow, the temperature did not seem to make too much difference. But on the violet material at 180 degree I heard a scratching noise, and I saw the nozzle always scratching at the print. It was just a matter of time, until it would be knocked over. So know I am trying to print at a higher temperarature, hoping, this might help. Once it is done, I can tell you the result.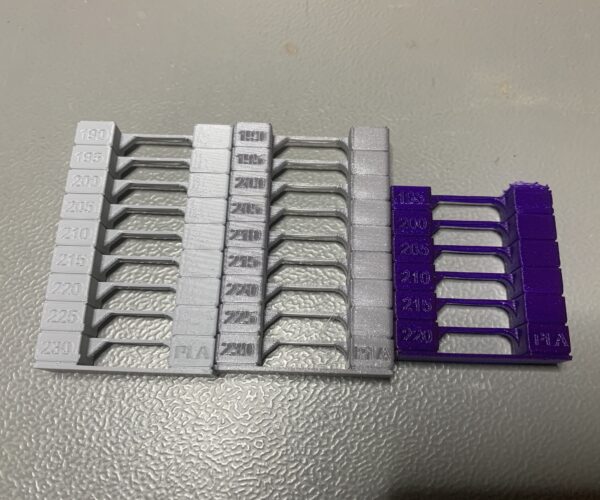
RE: Prints fail when almost complete
I just assembled an i3 MK3S, and everything seems fine, but when I print I seem to have problems. At first, I was having trouble with the first layer adhering to the smooth steel pate. I used the glue stick on subsequent print attempts, which helped the first layer adhere just fine, and the rest of the print seemed to be going fine, but then somewhere around 90% complete, the entire print detached from the print bed and failed. This has happened three times in a row. I can't say exactly why the print is detaching, because I haven't managed to be in front of the printer when it happens. I'm assuming it's simply losing adhesion, then getting dragged across the bed. How can I prevent this? If the glue isn't holding, what's a better option? Especially for long prints; e.g. 11 hours-ish.
Hello all. I have the same issue. I get to about 90% and it disconnects from the plate. It gets the first few layers of the top complete and then bam. My Benchy looks absolutely flawless up until that point. This is my first print, so I am pretty happy that I made it this far. However, I am going to mess with it tomorrow and if I change anything that fixes it, I will post here. I am thinking about doing 2 things: (1) possibly slowing the print down for the first few layers and/or (2) recalibrating my first layer to make sure my hotend is at exactly the right height.
RE: Prints fail when almost complete
Ok, I did to prints with 225 Degree C, and they printed fine. Maybe you try this also? A little bit of stringing and there seems to be ringing, but mainly on one side (e.g. only on the right Eye)
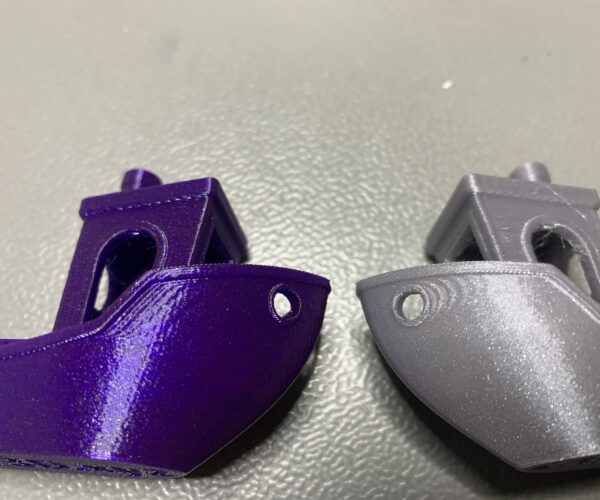
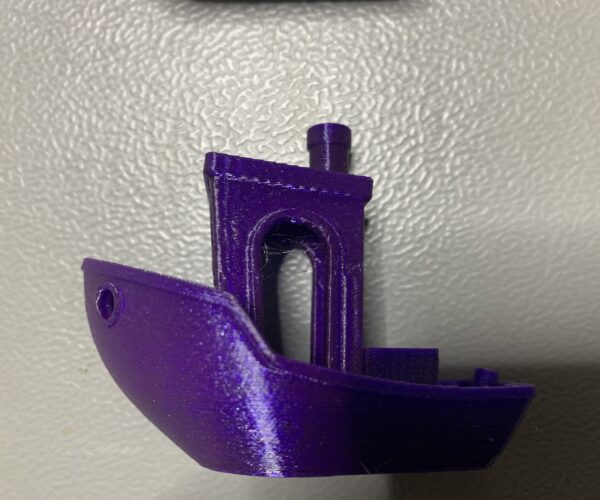 . Does it mean, something is swinging in one direction?
RE: Prints fail when almost complete
Hey All,
So, I made some adjustments and finally got the entire Benchy to print. Basically, what I found was my printer Z-axis was not calibrated at the right height, even though I thought it was based on some of the first-layer test prints. I realized, the tolerance on these prints are too loose and it is too hard to know if you are really in the sweet spot. I ended up using this forum post ( https://forum.prusa3d.com/forum/original-prusa-i3-mk3s-mk3-assembly-and-first-prints-troubleshooting/life-adjust-z-my-way/ ) to help get the z-axis at the right height. What was really helpful are a few things:
1) I knew the print had to be solid. That is, if your print head is too high, the print will come out as individual strands. Even if my print looked solid, I gently pulled on it to see if the strands were stuck together; often they were not. The setting I had for my original print that loosened from the bed was very stranded. No wonder it didn't stick very well. To fix this you'll need to lower the z live adjustment level further - closer to the print bed. I assume this was probably the main cause of my initial issue.
2) Once I got to a point where the prints were solid (the bottom was very smooth (like glass) and shiny and the top was slightly bumpy - feels like a sheet of plastic), I incremented the nozzle lower by 0.050. After each print (which would have 2 z-axis adjustments), I used a digital caliber to measure the thickness. Honestly, this was the most helpful part of figuring out if I was close. Without this measurement, it is just a guessing game. I knew the print was supposed to be .20mm, so I kept printing and adjusting my z-axis until I got close. My initial measurement - the one where my Benchy disconnected - was at .41mm. I was able to get to .22mm. The next lower z-axis setting created a slightly wavy looking pattern.
3) Not sure this helped, but I also realized I was using only 70% Alcohol to clean the bed. I went to CVS and bought 91%. Again, not sure this made a difference, but it is the right percent.
I never changed any other setting around temperature or slowing the print head down. One final note, I noticed that the bottom of the Benchy has a watermark. On the successful print of the Benchy, this water mark was much cleaner and clearer.
Well, I hope this helps.
RE: Prints fail when almost complete
@r8rcr8z
That was a very useful hint for me, thanks! Somehow, I did not see the relevance of the first layer, since it always failed at the end. But with doing a careful adjust of the first layer, I also get decent prints now.
Especially the forum post with the square was super helpful. I do not understand, why Prusa is not using this in their Guide.
But I noticed also, that the calibrtaion print is also printed at 225 Degree... Any idea why?
Unfortunatly, I could not level my bed 100%. In the back, the alignment was not as good as in the front. So I tried this:
https://help.prusa3d.com/en/article/bed-level-correction_2267/
I printed the pattern several times but I was not able to achieve a fully satisfying result. But at least, my prints look ok now.
Does anybody has a hint, why a setting of the first layer intereferes with the print at the end, thousands of layers higher? 😲
RE: Prints fail when almost complete
If the bricks at the bottom of your house aren’t correct your house will collapse. Same principle.
Plastic curling up is caused by it contracting as it cools. If it’s not sticking to the layer below very well then this happens more often. It’s usually seen where there is an overhang like when printing the arches on the benchy where there isn’t much of a layer below those sections . It can happen other places too though. Printing hotter means the plastic generally sticks more, you have to balance that with stringing. Thin wispy strings aren’t a problem as a 2 second pass with a jet flame lighter removes them. They just shrivel right up.
You can also try turning your cooling down from 100% even with pla. Try 70-80%. If your first layer is really good and your bed is really really clean then even if the extruder bumps these raised bits it won’t detach, it will sort of iron them back down to a certain extent. That’s why a good first layer and a properly clean grease free bed is SO important.
if levelling your z then the live z technique mentioned is the best but please ensure you have enabled 7x7 mesh levelling from the lcd menu instead of 3x3. It is much better as it samples 49 points instead of 9. You could also benefit from always do mesh levelling with a pre warmed printer bed. That allows things to stabilise temperature wise before levelling. The current Pinda probe on the mk3 and mk3s are still effected by temperature to a degree.
RE: Prints fail when almost complete
Thank you for your detailed answers. Maybe I have a misunderstanding of the first layer calibration.
Do we calibrate the first layer only, or do we calibrate the height of each layer? Somehow, that would make much more sense I guess?
I have activated the 7x7 mesh leveling. It is better now. But still not for the entire bed, there are only 4 points for fine tuning, this somehow seems to be not enough for my bed.
RE: Prints fail when almost complete
@neuromancer
with 7x7 mesh bed levelling you are automatically adjusting 49 points
which 4 are you having problems with.?
I have not needed to use bed level correction since I started using 7x7 mesh bed levelling
what are you using for first layer calibration?
I use
Life Adjust "z" my way
regards Joan
I try to make safe suggestions,You should understand the context and ensure you are happy that they are safe before attempting to apply my suggestions, what you do, is YOUR responsibility.Location Halifax UK
