Printing a replacement part, and minor 1st print issues
Spent the weekend putting my new (first) kit together. New to 3d printing in general so some terms and such gave me pause, but overall the process went well. Broke a part when tightening one of the last screws (cable clamp at the top of the einsy) which results in one of my questions. The other is trouble printing.
(1) Can I use PLA to print the replacement part? If so any recommendation on settings?
(2) First real prints were a couple benchys. Pics attached hopefully...
.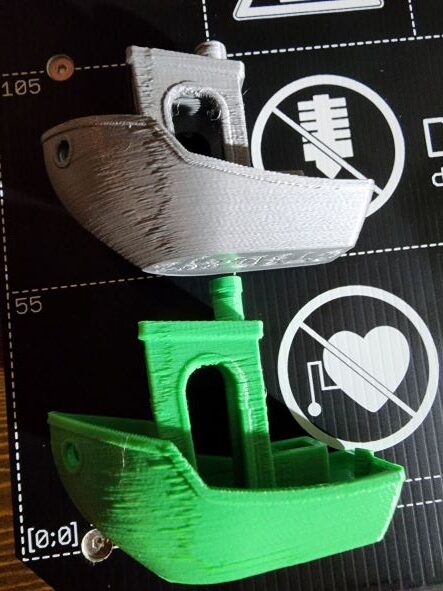
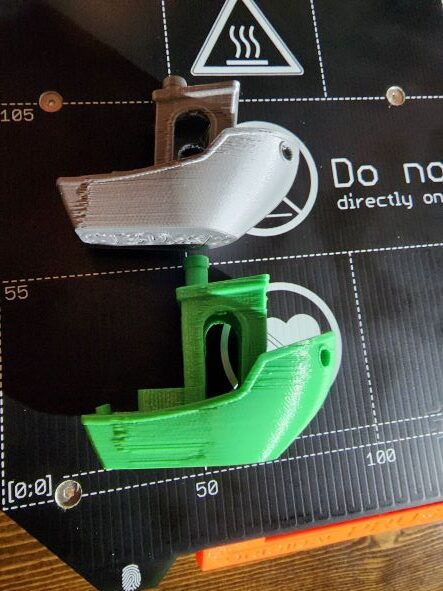
Being new at all this, I am not really sure what to adjust to improve things. I have some ideas but dont want to start fiddling with things too much yet and make things worse. Anyway - all help/tips would be appreciated.
RE: Printing a replacement part, and minor 1st print issues
Just to confirm you weren't printing streight on heated as shown in pics I know may sound dumb question but people probably do
Please help me out by downloading a model it's free and easy but really helps me out https://www.printables.com/@Hello_474427/models
RE: Printing a replacement part, and minor 1st print issues
No was not printing on the heated base. Using the sheet that came with the unit. Just used the base as the background for the pic.
FWIW. printing a calibration cube right now.
RE: Printing a replacement part, and minor 1st print issues
Thought that was the case just making sure 🙂 I caRnt comment till morning I'm in bed right now
Please help me out by downloading a model it's free and easy but really helps me out https://www.printables.com/@Hello_474427/models
RE: Printing a replacement part, and minor 1st print issues
Probably did too much all at once, but pretty sure everything was a valid adjustment. A new benchy print resulted in much better results.
Left it at work though so I will attach a pic tomorrow.
FWIW these are the adjusts - not sure what made the difference though.
- Checked/Tightend all grub screws.
- Checked tension of belts. Using the front panel to measure showed both in the 250s. Adjusted so both are now reading near 270.
- Was using the Benchy gcode on the included sd card. Downloaded and sliced a new file. Orientation on the sdcard had benchy at an angle with the bow pointing toward the right front corner. New slice oriented bench with bow pointing to the right.
Alot to learn, but I am having fun with the effort.
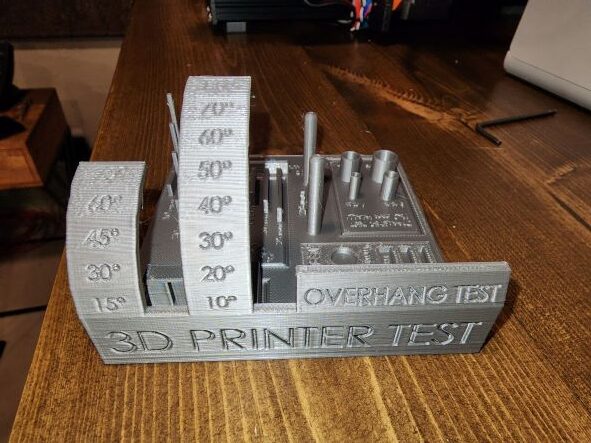
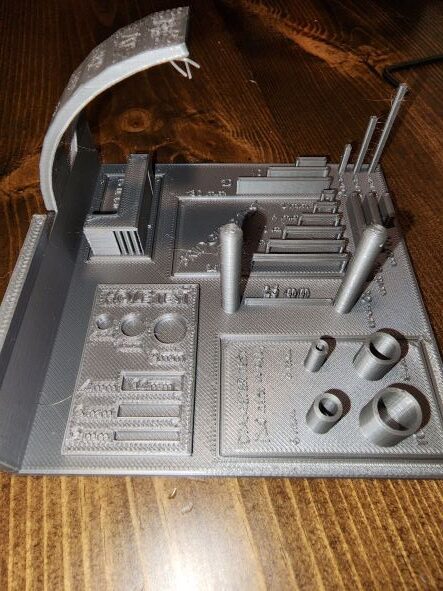
Next up figuring out trash output on the overhang test.
One thing I probably should try is a better table. The one the printer sits on now has a slight shake when the extruder really gets going.
RE: Printing a replacement part, and minor 1st print issues
Any new printer will take time to break in and have all the parts settle together and work in proper harmony. Best to not get too hung up on trying to tweak settings for ultimate quality in the first month. Wait until after you do the first maintenance service to start messing with things too much.
Just enjoy printing the things you want and things will quickly begin to improve with time. As long as you have a good first layer, a clean print sheet, and dry filament, you’ll be good. Stick to default settings for the filament you use and only make small adjustments, one at a time in the slicer to understand the effects of each change.
Enjoy your new printer.
Cheers
RE:
Yah, understood. Kinda the maker's serenity prayer...
...courage to change what must be altered, serenity to accept what cannot be helped should be left alone, and the insight to know the one from the other.
Mostly doing test prints just to get experience and knowledge of how this thing works. Like putting a new set of strings on a guitar though. Need to play with them a bit before they stay in tune and can really start making music.
I left bearings with the oil they shipped in, so after a couple weeks, I plan on cleaning, greasing & adjusting - using what I have learned during the settling in.
RE: Printing a replacement part, and minor 1st print issues
Good analogy re the guitar strings. They take a while to stretch and find their sweet spot, same with the printer.
And just as you can go mad trying to make the strings hold tune before they’re ready, you can go mad trying to make your printer lay down perfect prints before it (or you) are ready.
Start with simple things, not just test prints. Download useful or interesting stuff from Printables.com and load it into PrusaSlicer so you can start learning how everything works together.
Here’s a nice filament guide that I’ve downloaded and printed in PETG. It works well and is an interesting print. I’m sure you’ve found a bunch of stuff as well.
https://www.printables.com/model/5165-prusa-mk3-filament-guide
One suggestion I would make is to read the answer just below the OP in this thread. It will give you links to a good first layer Z calibration routine and very good print sheet cleaning instructions. All good info for a new user to have.
Anyway, enjoy your printer. Have fun and good luck.
Cheers