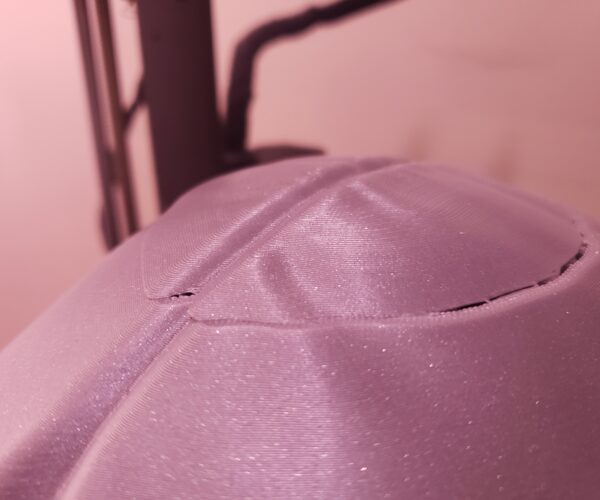
That looks better; follow @joantabb's suggestions and get another mm to play with. Aim to get the centre right and accept something slightly less perfect on the periferals.
There are signs that you need to clean your print-surface, get rid of fingerprint grease...
and there are a couple of points where filament appears to be missing but it's not clear why.
You already have a much better chance of completing a large print.
Cheerio,
RE: Print failed 95% of the way into it's 60 hours 🙁
So in the manual (I assembeld the kit) it mentioned using one of the zipties in order to space the pinda probe from the sheet (which i did) . So the idea here is because I need to go lower than -2 in live Z I need to raise up the pinda probe in order to compensate? Is there something I can use to make sure it's in the right distance, or as @joantabb mentioned, just raise it up a single thread?
Presumably the order of operations is, Reset live adjust Z value, move pinda up a thread, and then readjust the live Z back down to sub -2 in order to get even closer to the bed. Does this sound reasonable?
Yes I have no idea about the missing filament. Between all of these tests, I took 90% iso to the bed (once it was cooled and off the printer)
That part is still a mystery to me
RE: Print failed 95% of the way into it's 60 hours 🙁
Hi Johnny,
The Zip tie, is a 'get most people working' option,
there is a possibility that an error was made first time round...
you could try manually lowering the extruder until it just touches the build plate, and re test the gap between the pinda tip and the build plate, if the gap is less that the zip tie thickness, then you can simply re set the gap to ziptie, and try live Z adjustment again
however is the zip tie distance is still correct, then try re adjusting the pinda height with a zip tie and a couple of sheets of paper...
what ever makes you feel most comfortable.
regards Joan
I try to make safe suggestions,You should understand the context and ensure you are happy that they are safe before attempting to apply my suggestions, what you do, is YOUR responsibility.Location Halifax UK
RE: Print failed 95% of the way into it's 60 hours 🙁
Hey Joan!
I'll give that a shot and see what happens. So my understanding really is that I need my nozzle closer to the bed (hence the lower adjustZ) but to do that I need to move the pinda probe up so that it maintains a safe distance from the print bed.
Is there a recommended distance to have between the pinda and bed? The ziptie like you say is sort of a jump off point, but do we have an exact number anywhere? I have calipers
Is there a recommended distance to have between the pinda and bed?
Not really, just find a position that gives you some room for adjustment. The value will drift a little in time as your nozzle wears.
Cheerio,
RE: Print failed 95% of the way into it's 60 hours 🙁
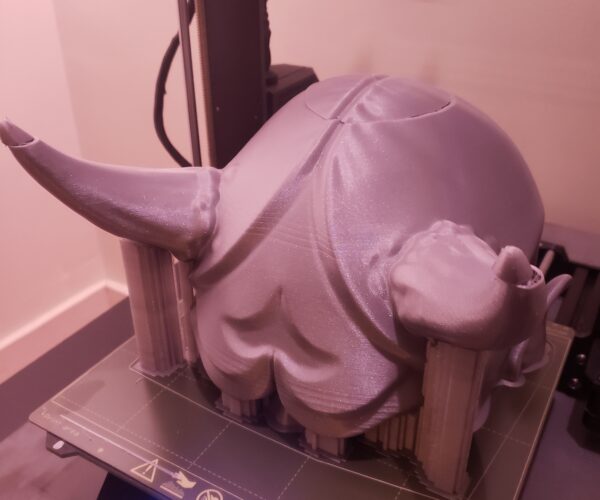
Hey guys! So with your help I did manage to get the print to finish finally. It stuck on pretty good. What I have recognise through the process is that there is a ton of vibrations occurring once I get to a certain height. Here's a video that gives you a pretty good idea, it's very noticable at the 0:27 mark, but the video doesn't really do it justice how loud it got
It seems like it happens mostly in certain areas and never really when doing the outline, more during the infill sections.
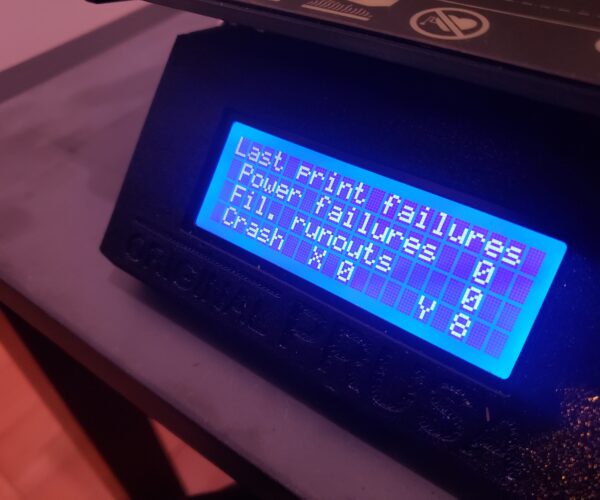
In addition to that, right at like the 99% mark, I obviously had some really large layer shift in the X axis! I'm not really sure what could have happened, it looks like it detected 8 crashes in the Y axis? But im not entirely sure if thats referring to this print or not.
Before attempting this print I did the following:
Realigned the smooth rods of the Y axis, greased the rods with the provided tube, adjusted the tensions on my belts (belt test said X=254, Y=274, which I understand is quite good). My printer is using the provided rubber feet (all 4cm awat from the fronts of the rails) I also have it sat on a 1.5inch paver stone to help reduce noise and vibration. Despite this it did get quite loud towards the end and I obvioulsy had this one very large layer shift, i'm sure it goes without saying but the print itself did not move here, it's just as if the X axis all of a sudden assumed the print was 4 or 5mm to the left all of a sudden.
I think I'll be able to salvage the print somehow, but I would love any advice on how to possibly prevent this or reduce the chance of it happening going forward.
Thank you all for your help!


