Oops, success, oops again ...
Hi,
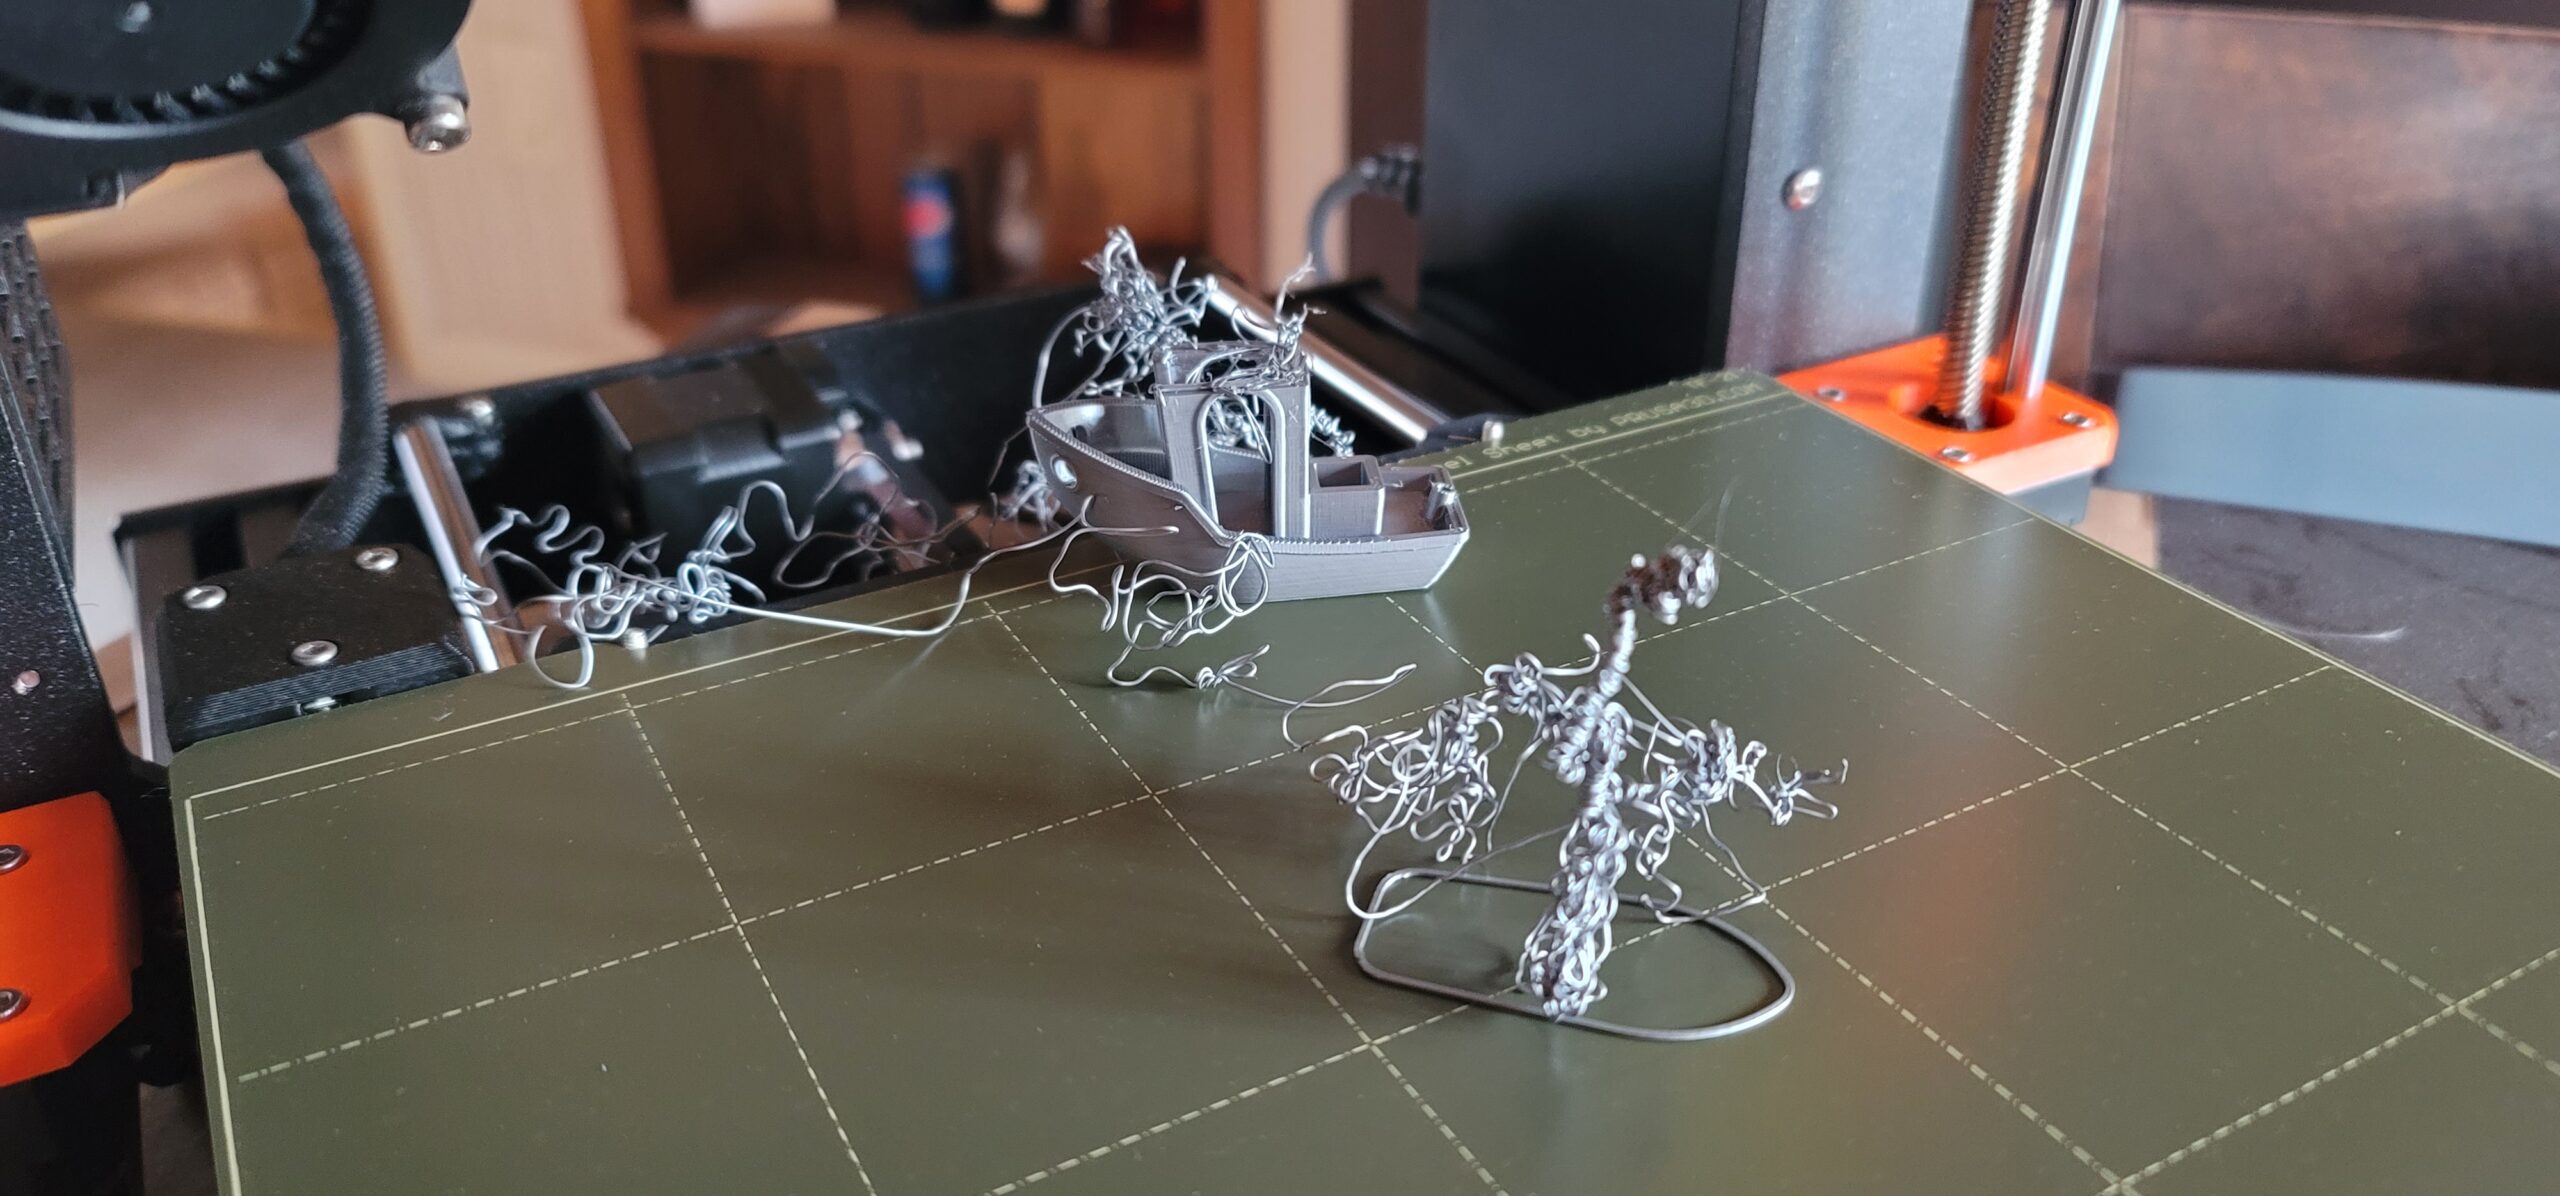
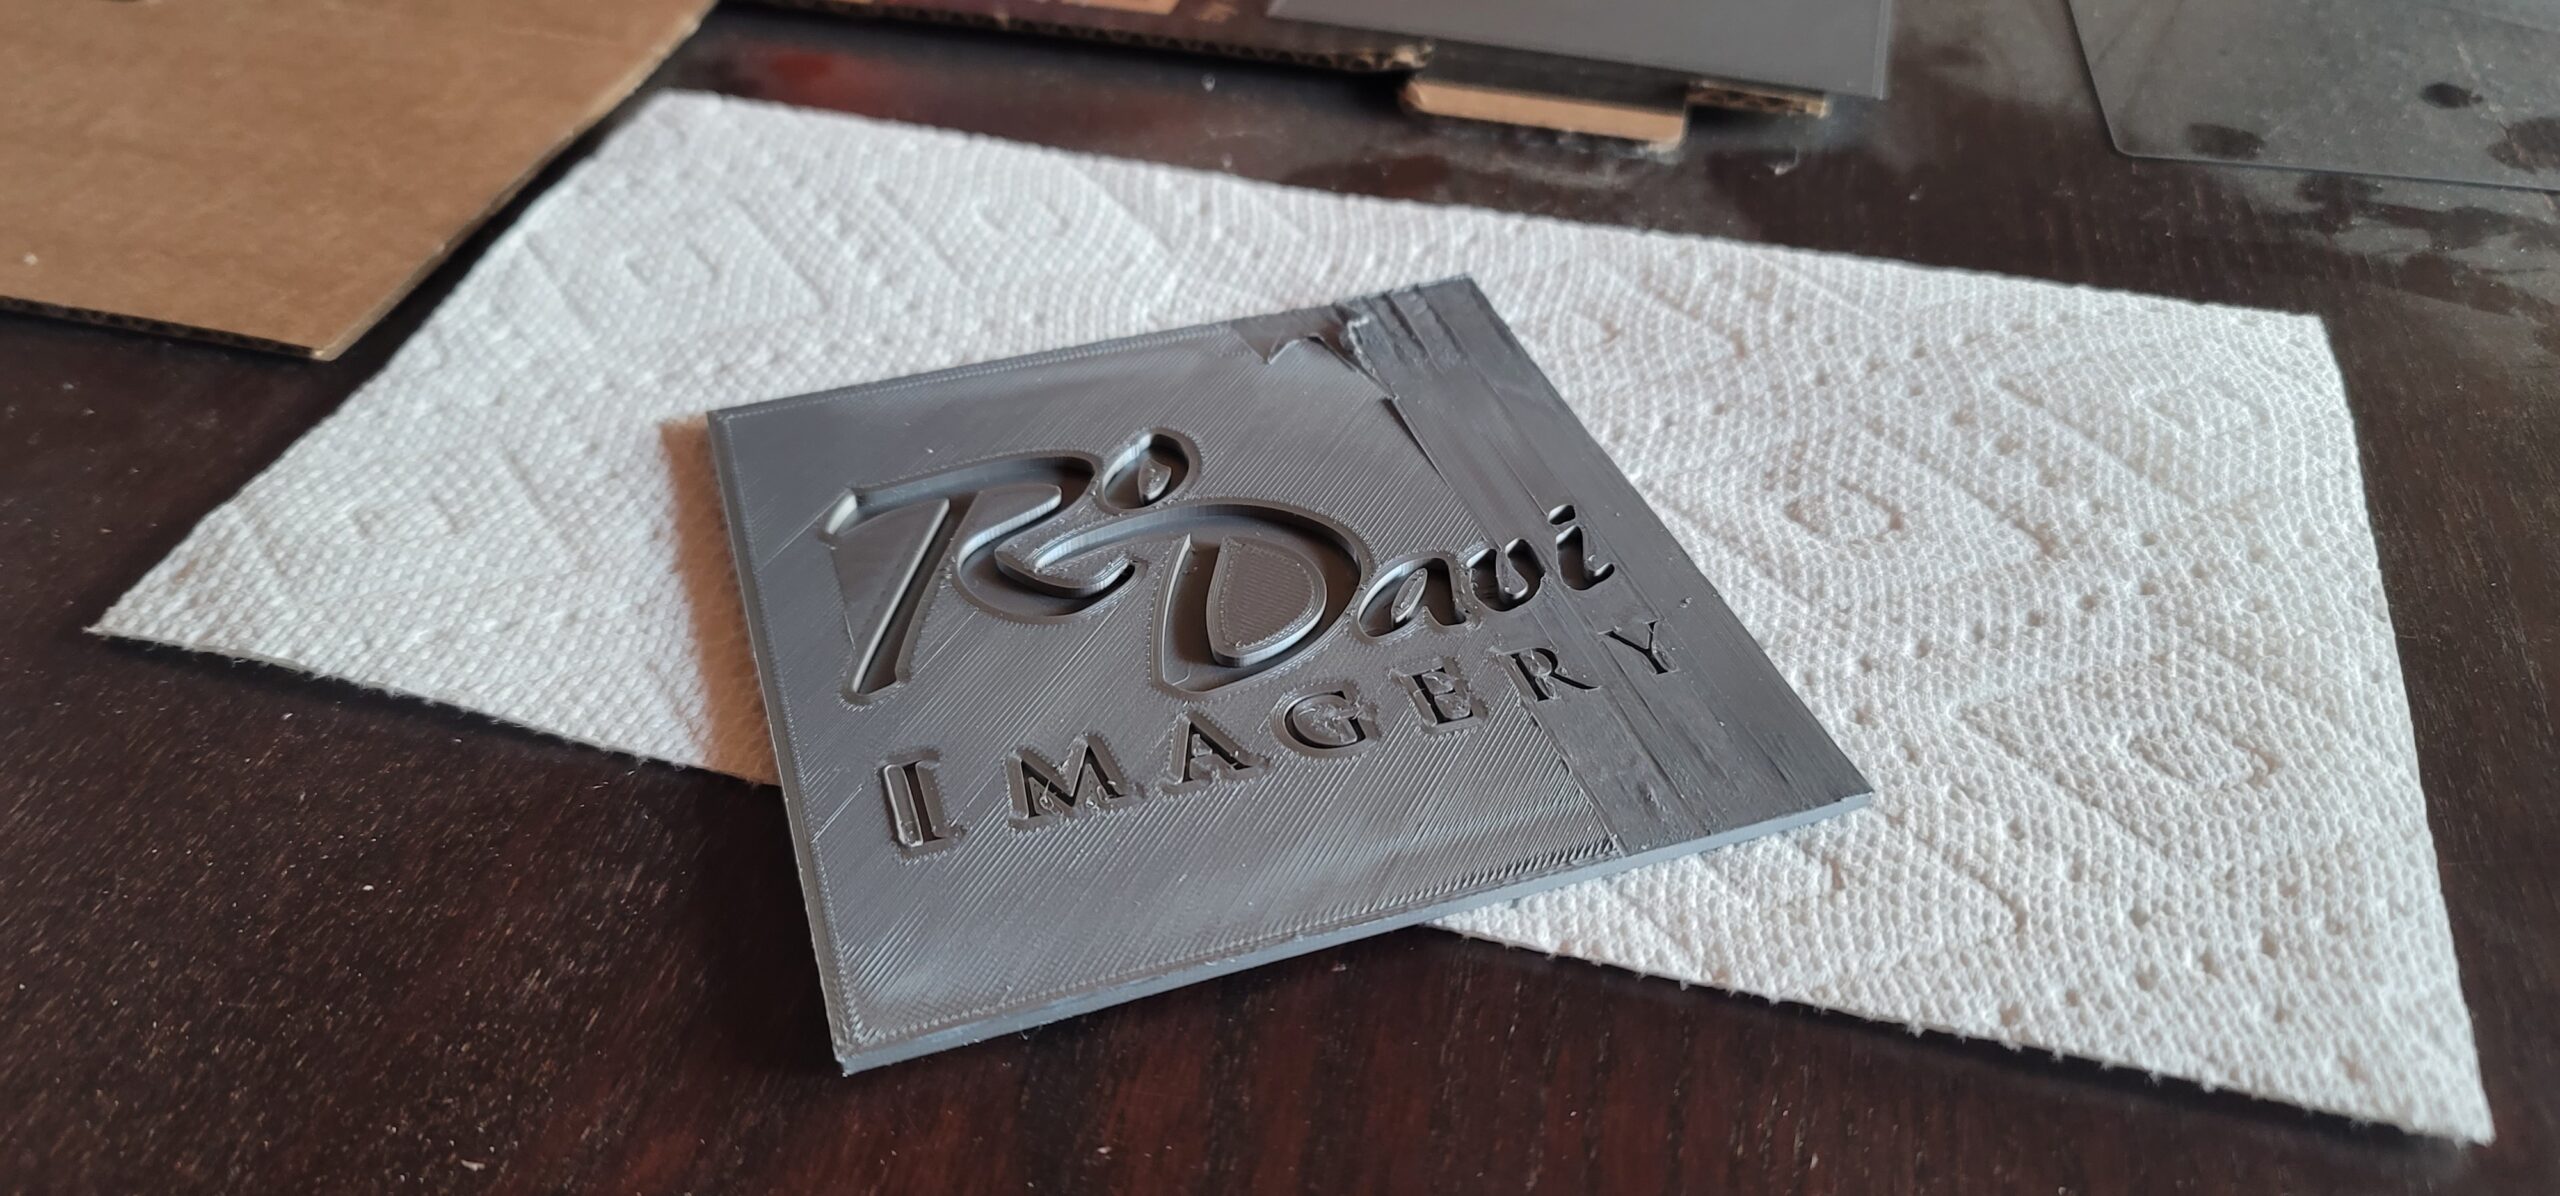
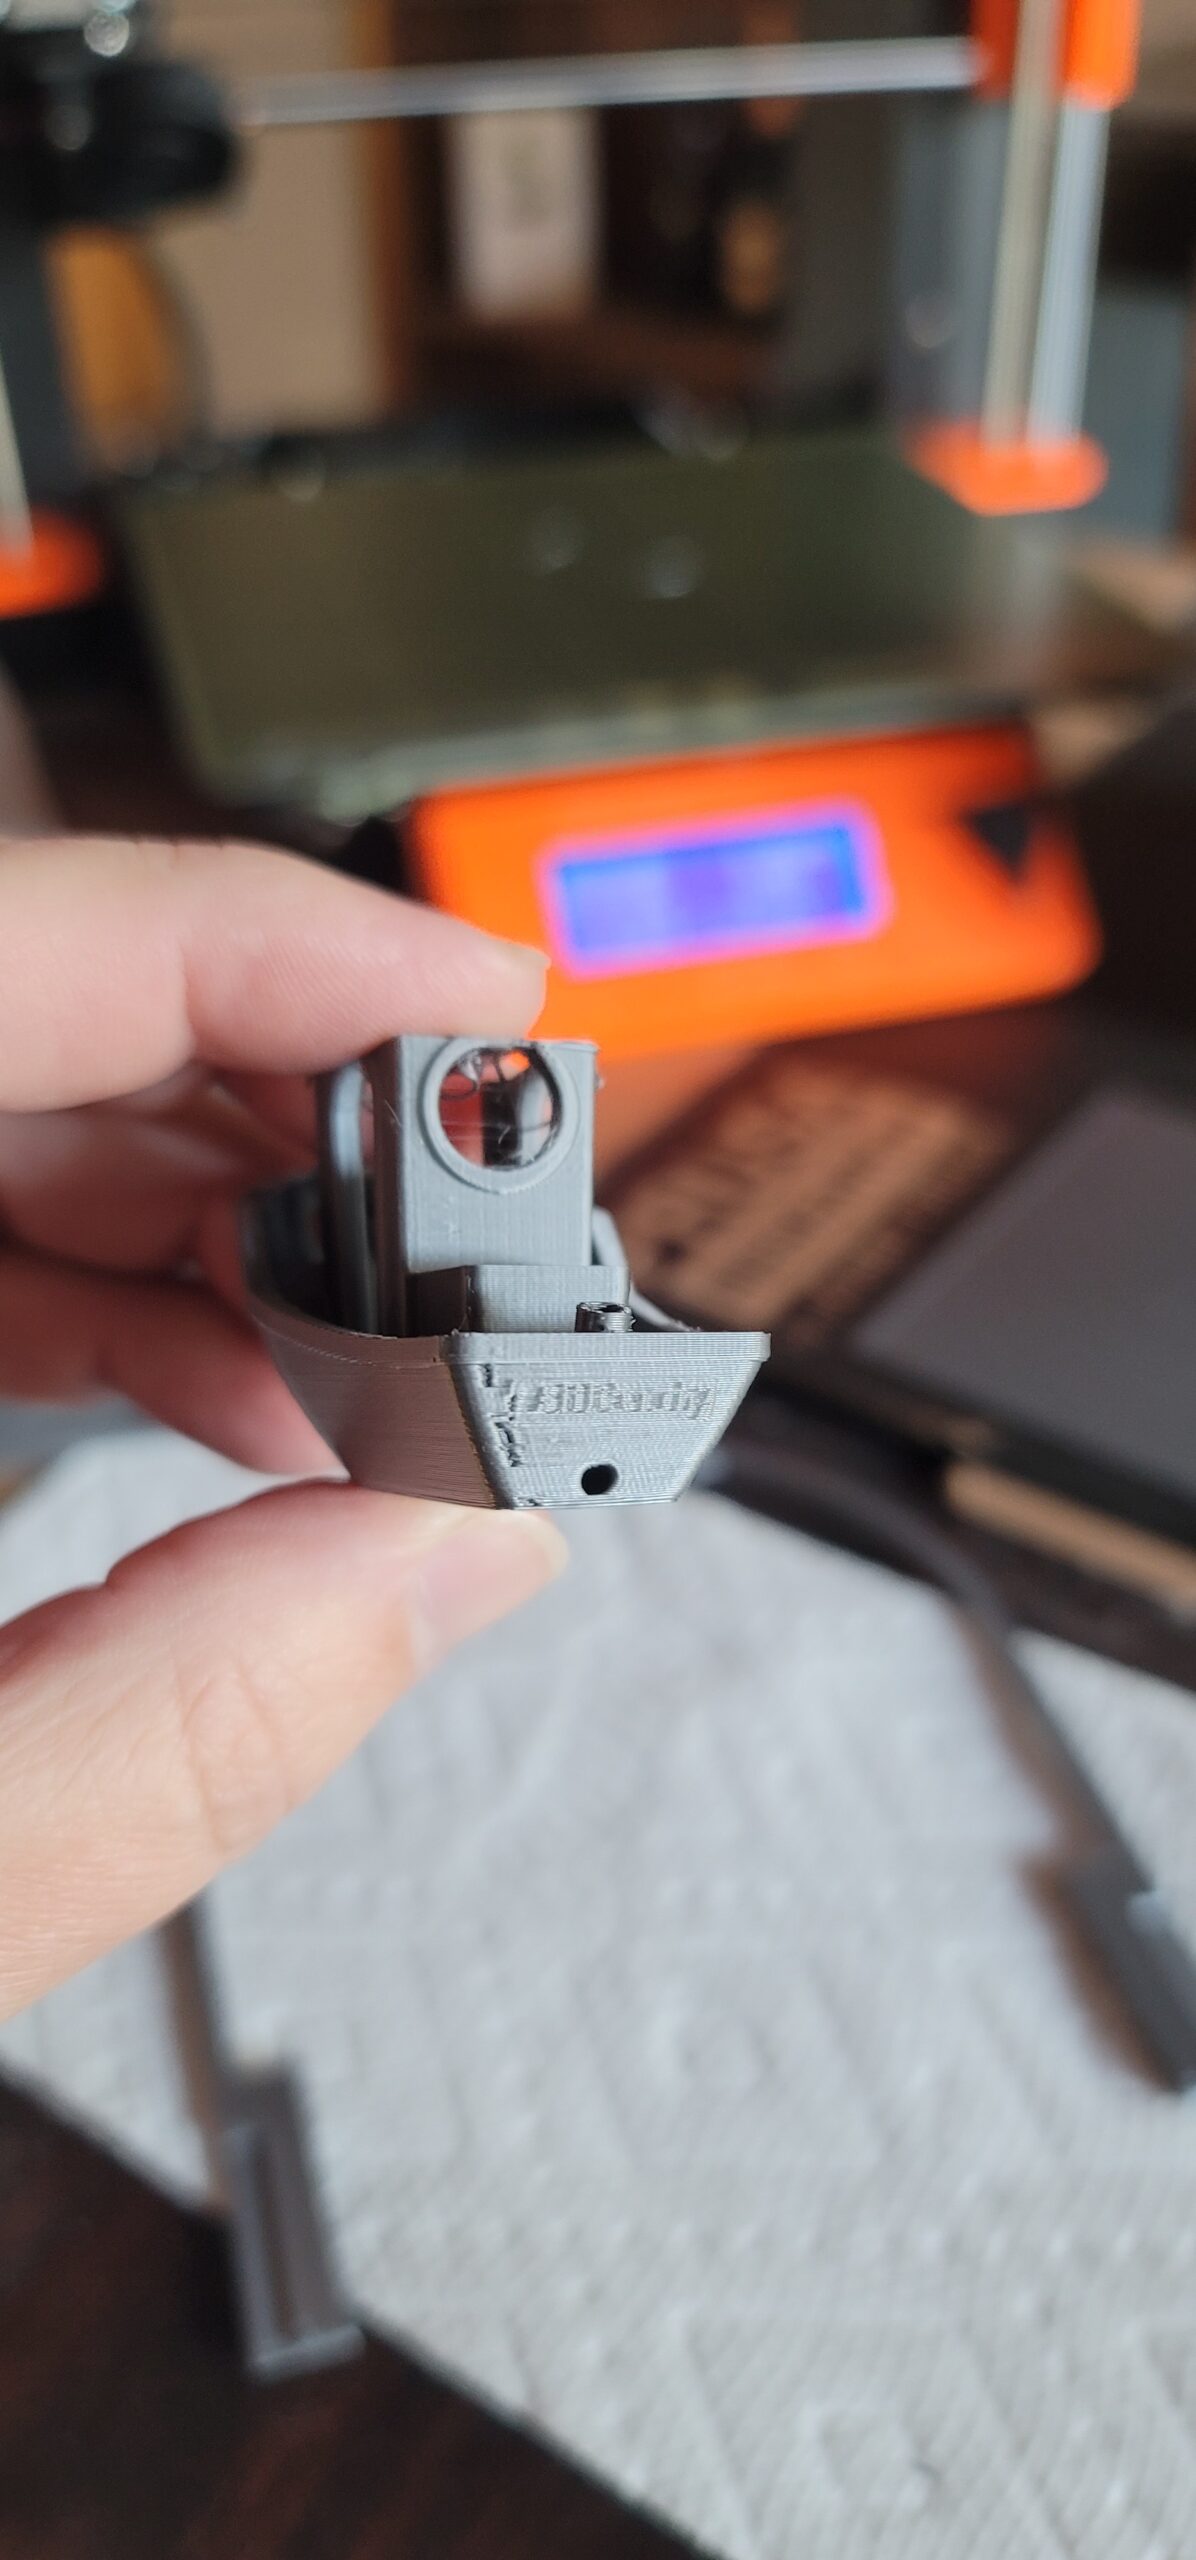
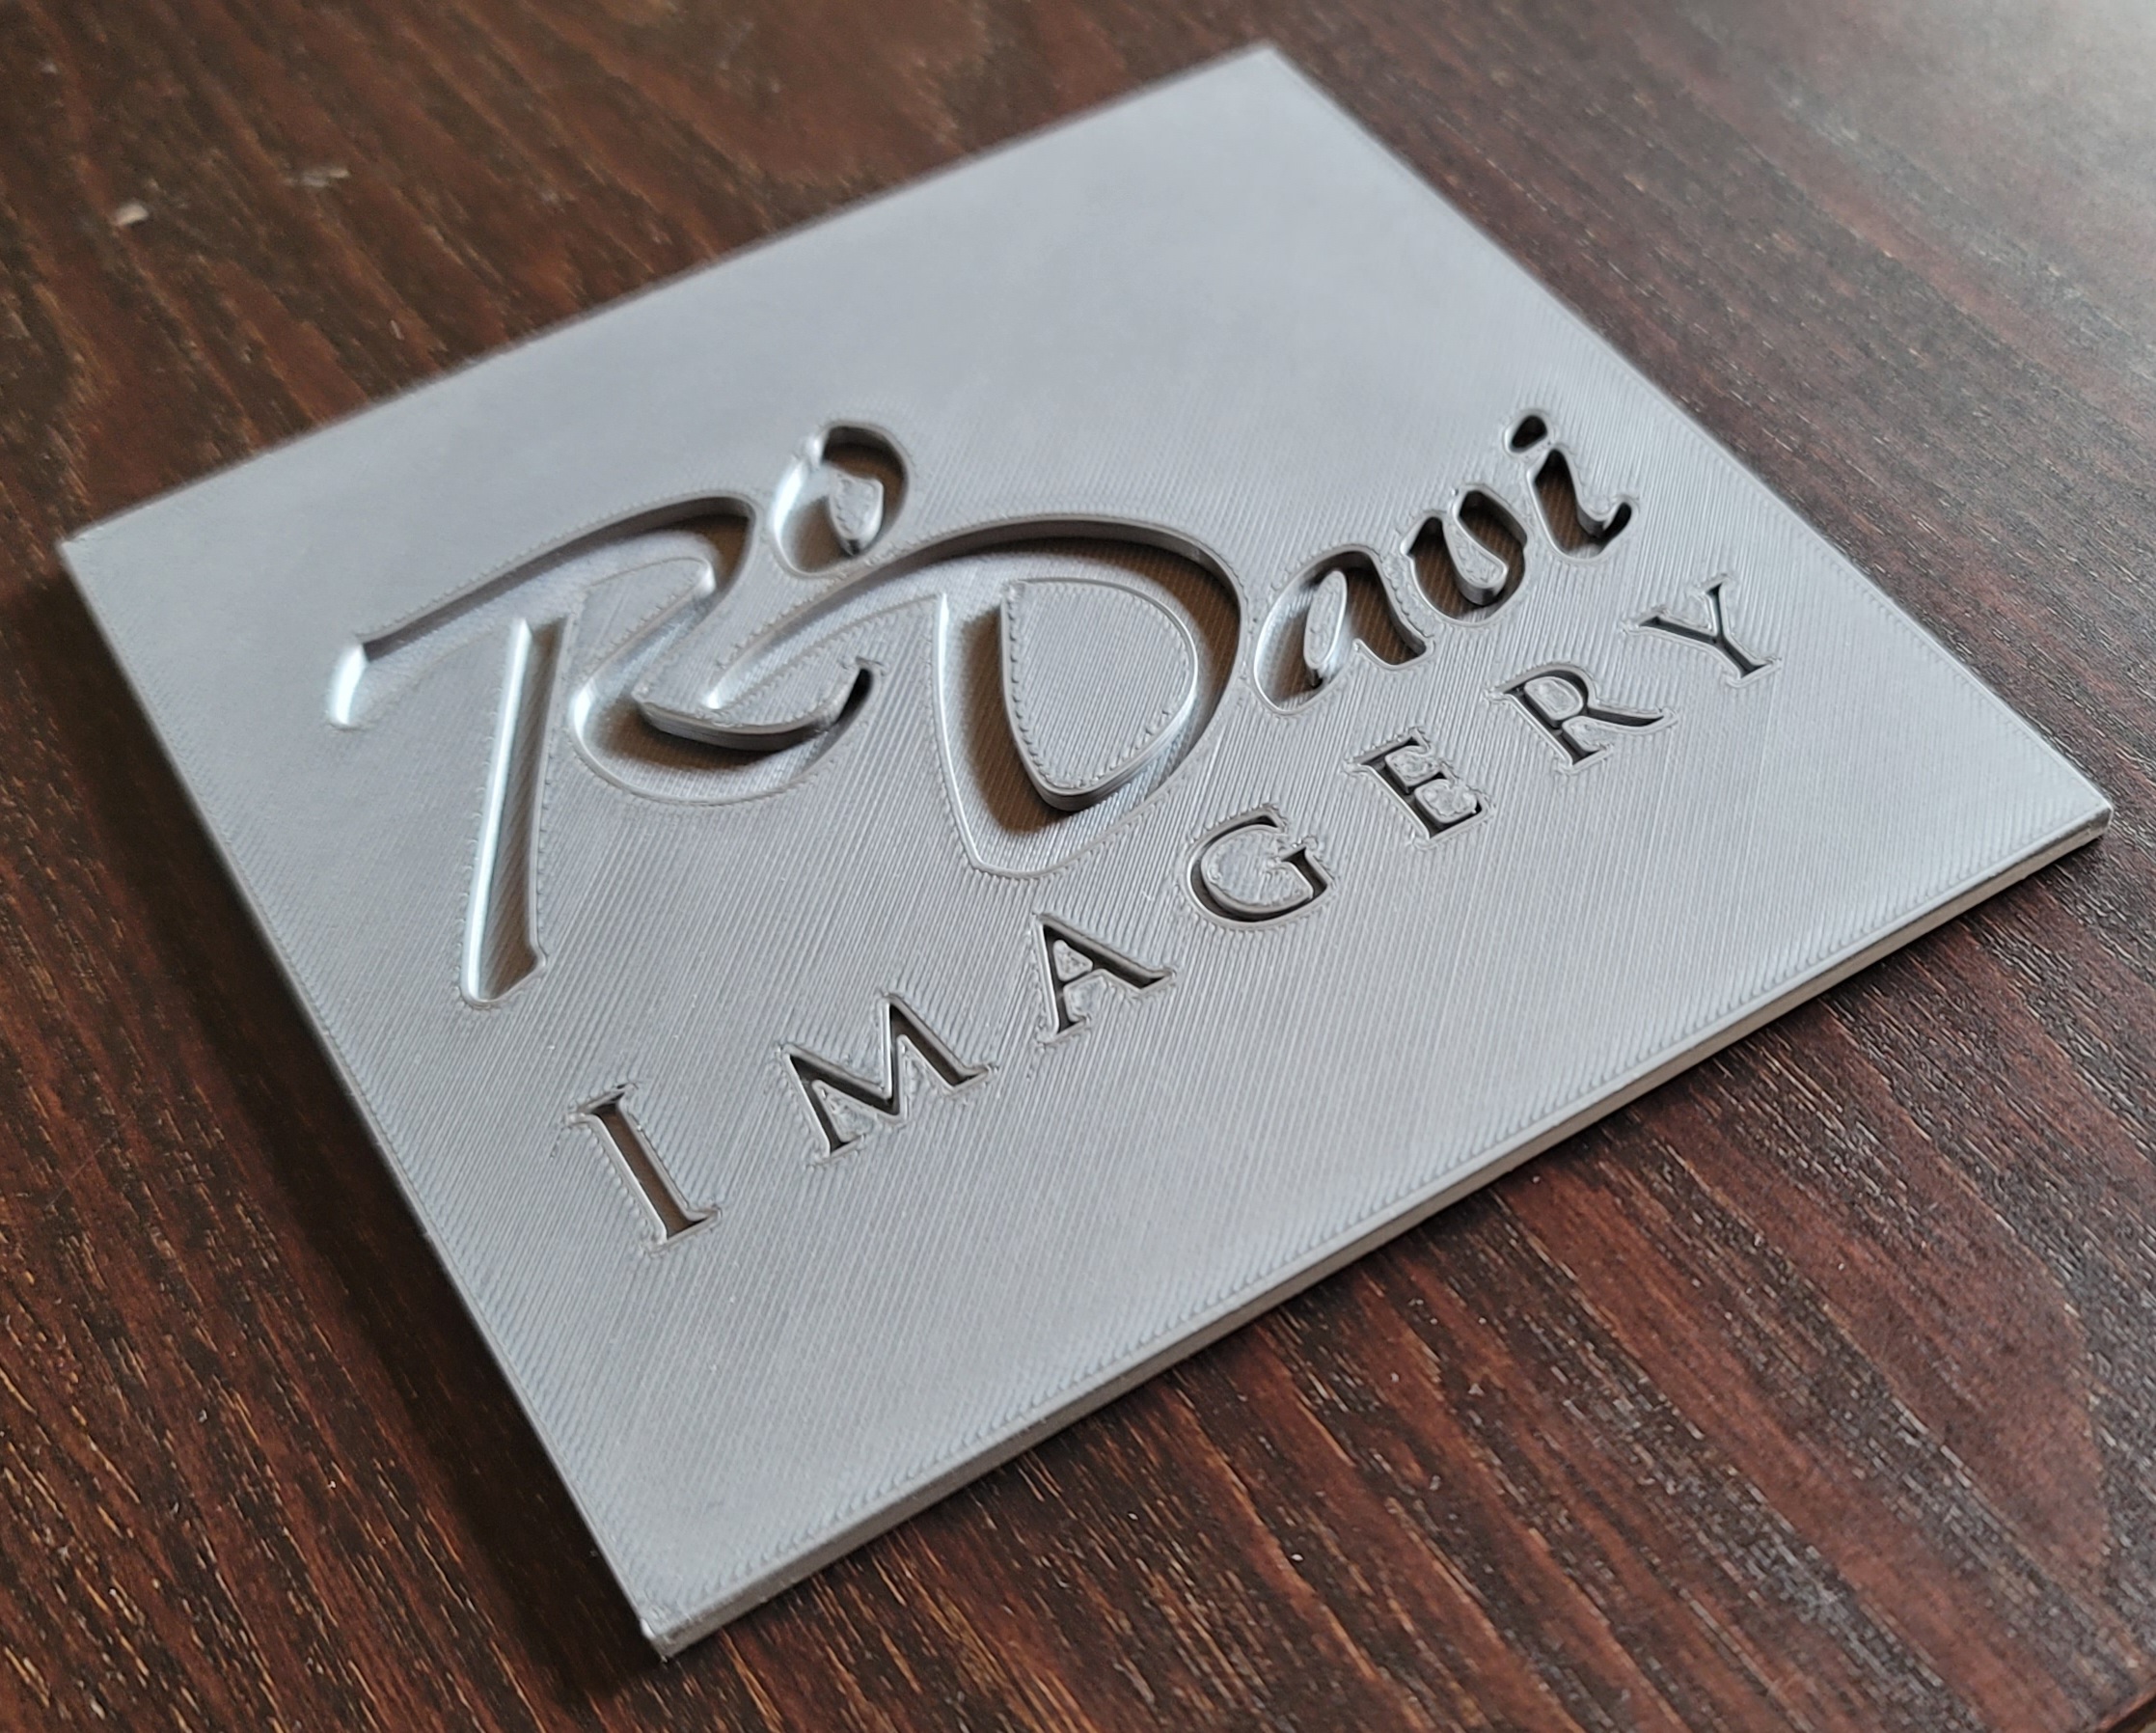
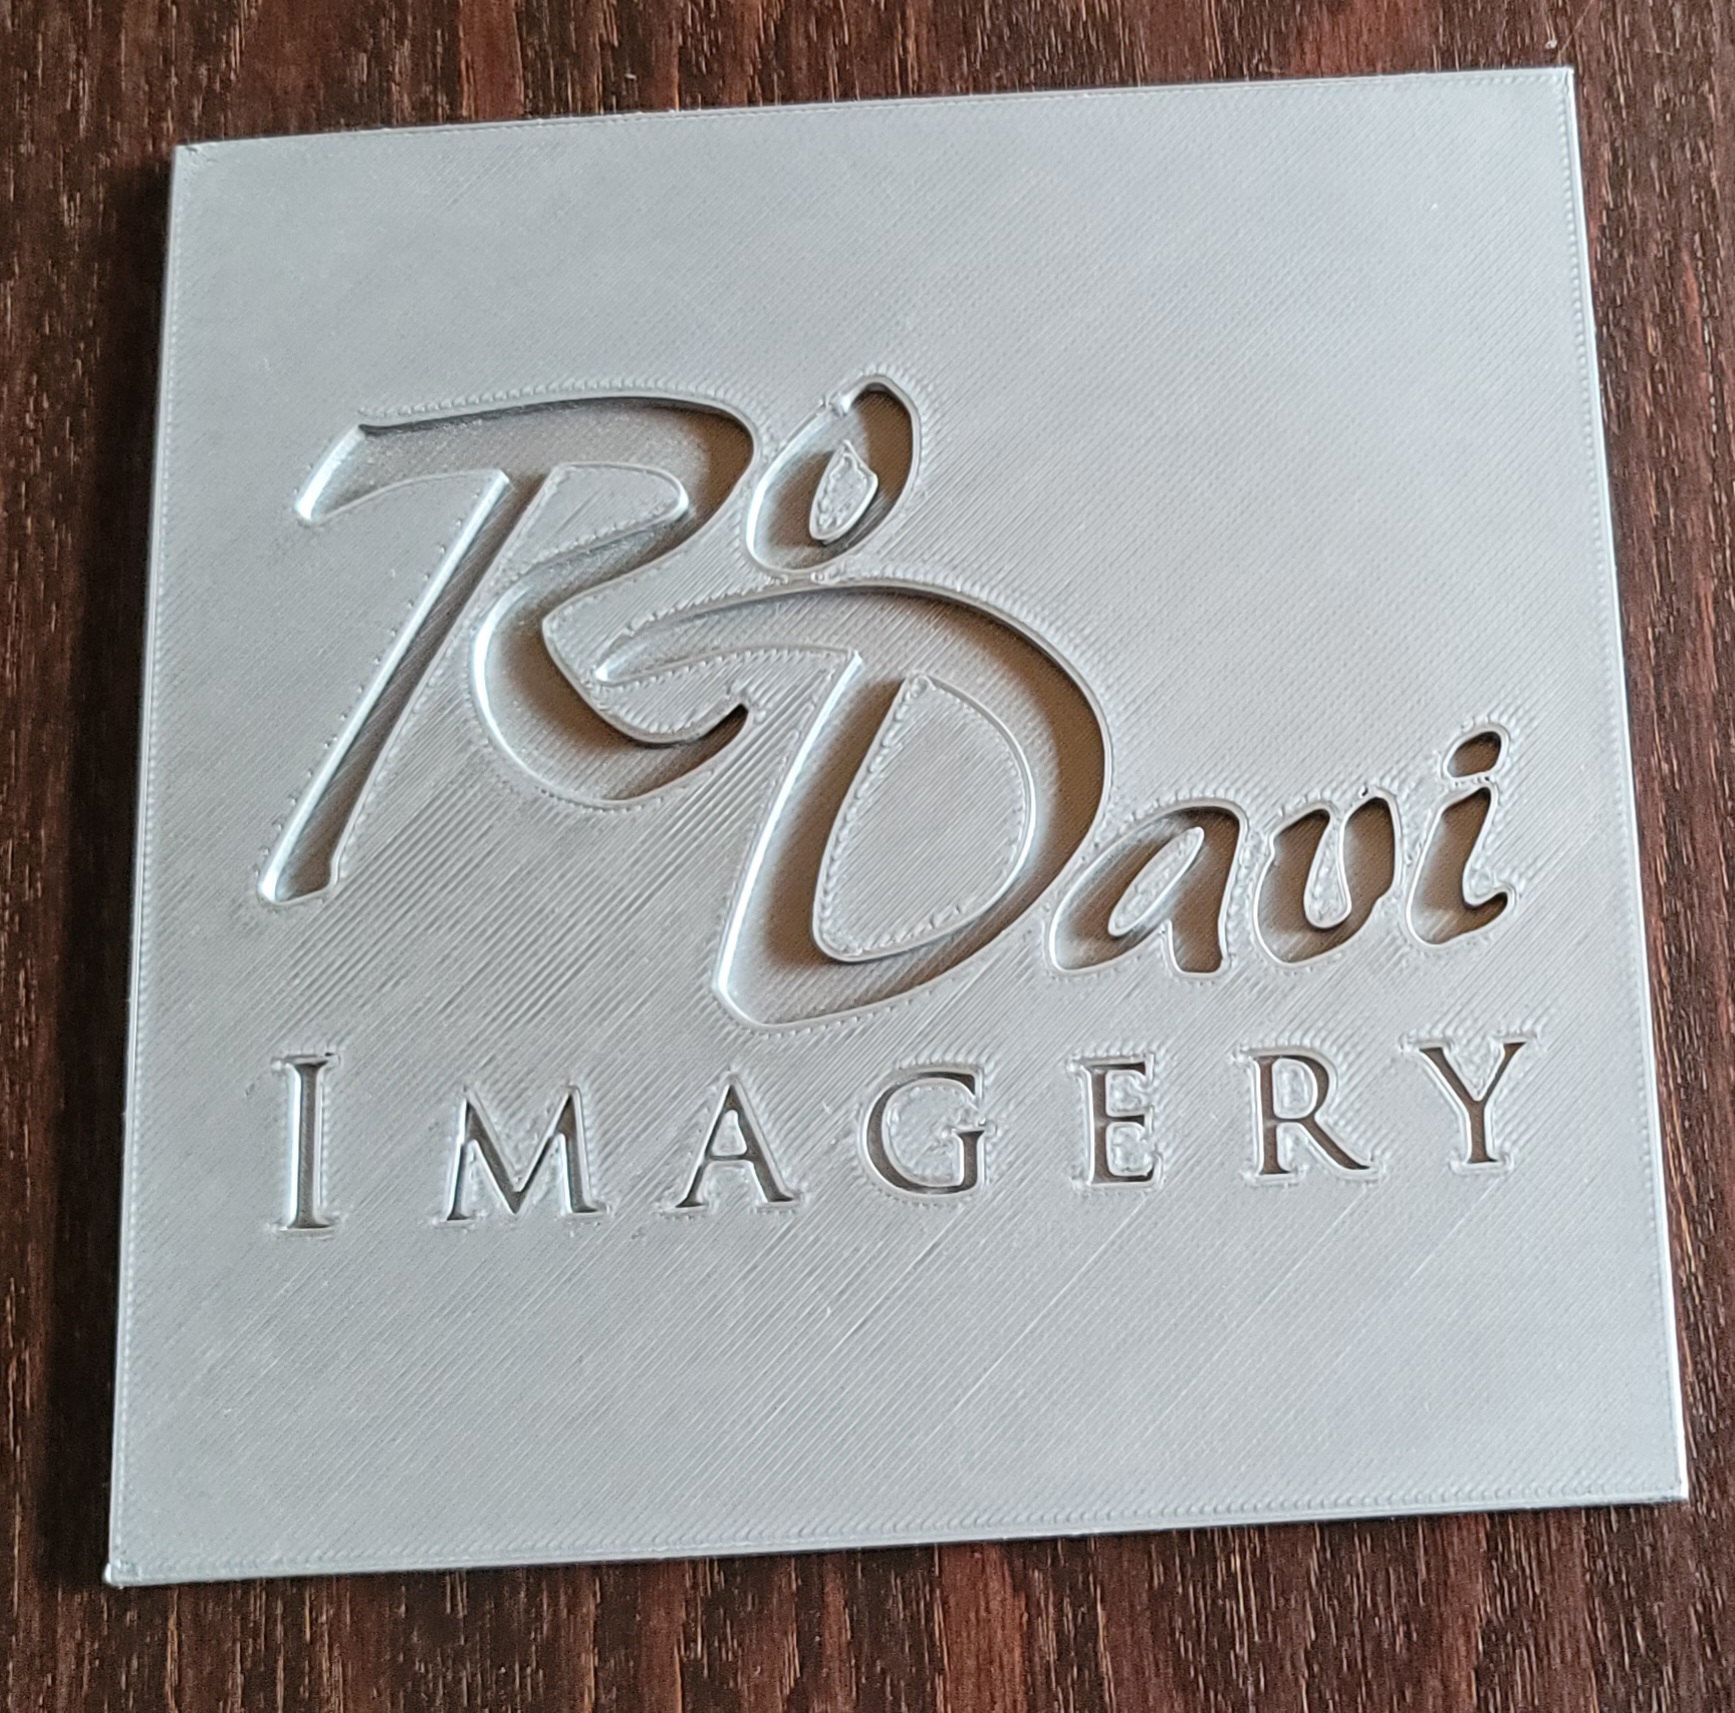
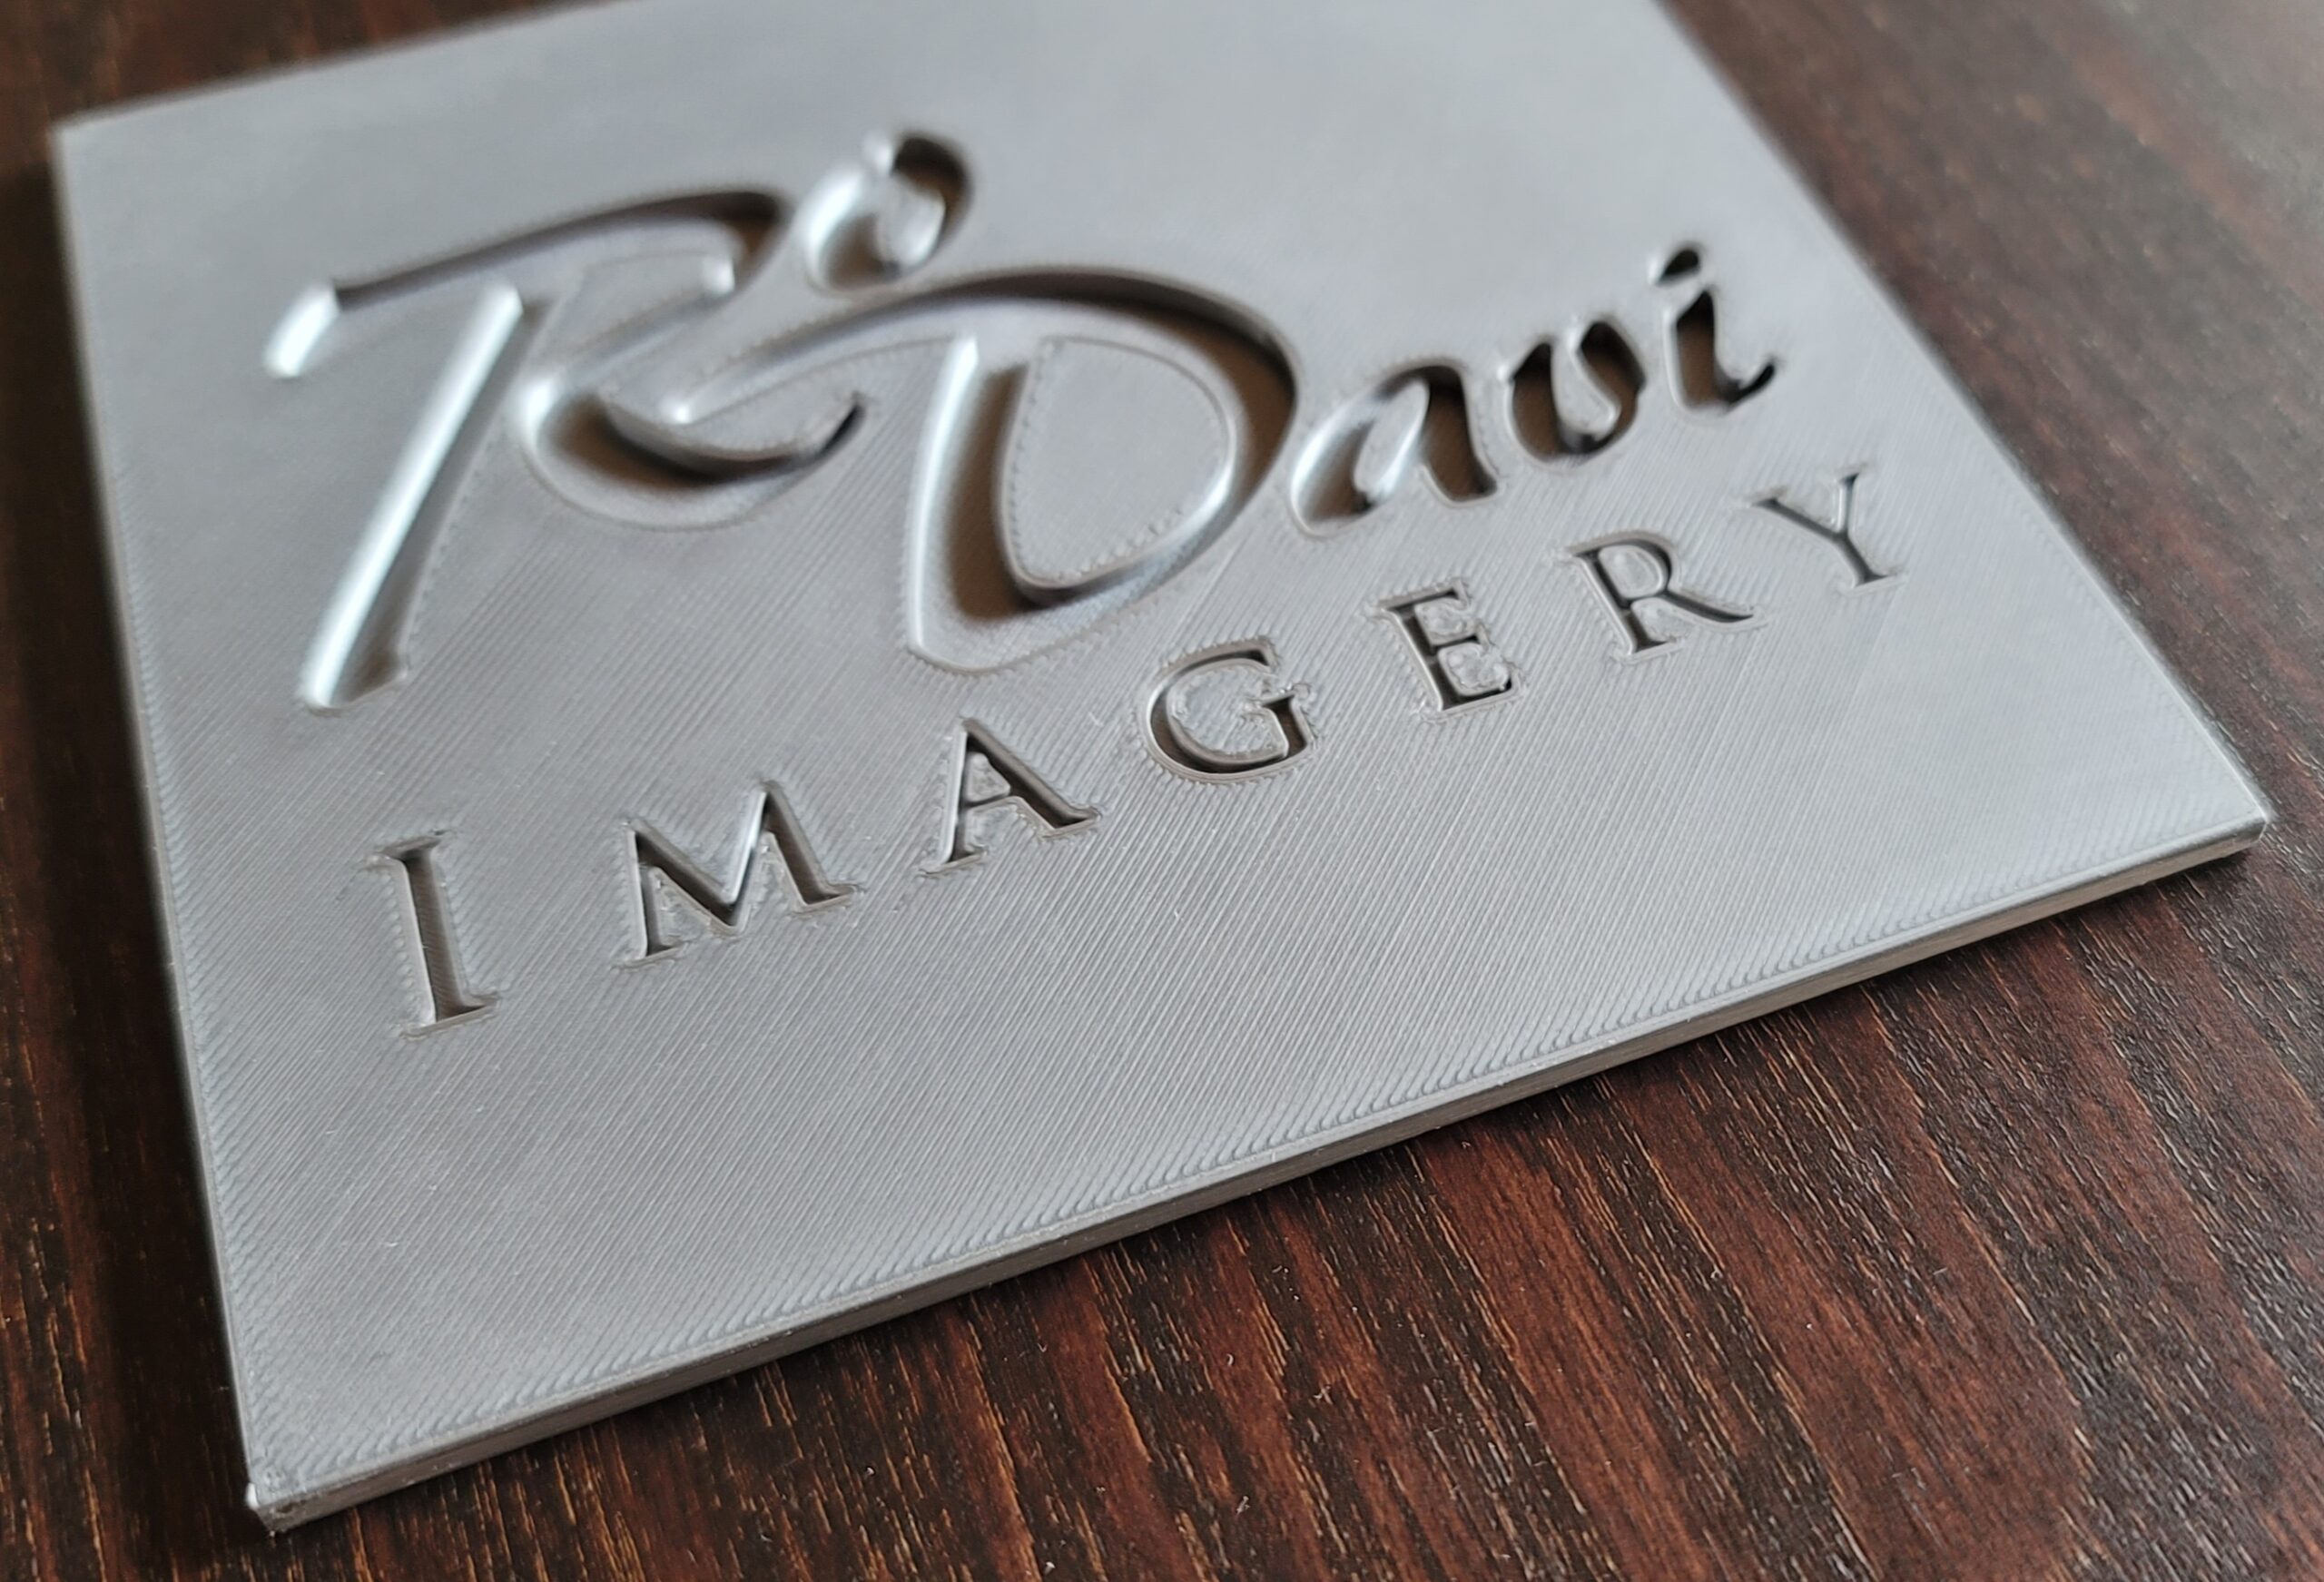
So this is a mess ... after previous advice I went back and reprinted my nameplate but I think I made too many changes at once in the slicing to be sure what the issue is: I went down to .1mm and up to 4 perimeters and turned on ironing. It looks like the print released from the bed at the corners and caught on the nozzle, pushing the print and plate a few cm off of the bed. The parts that ironed before the release look fantastic (bottoms of letters, beside the R).
The problem here might be the same as the problem with benchy, but bear with me a moment.
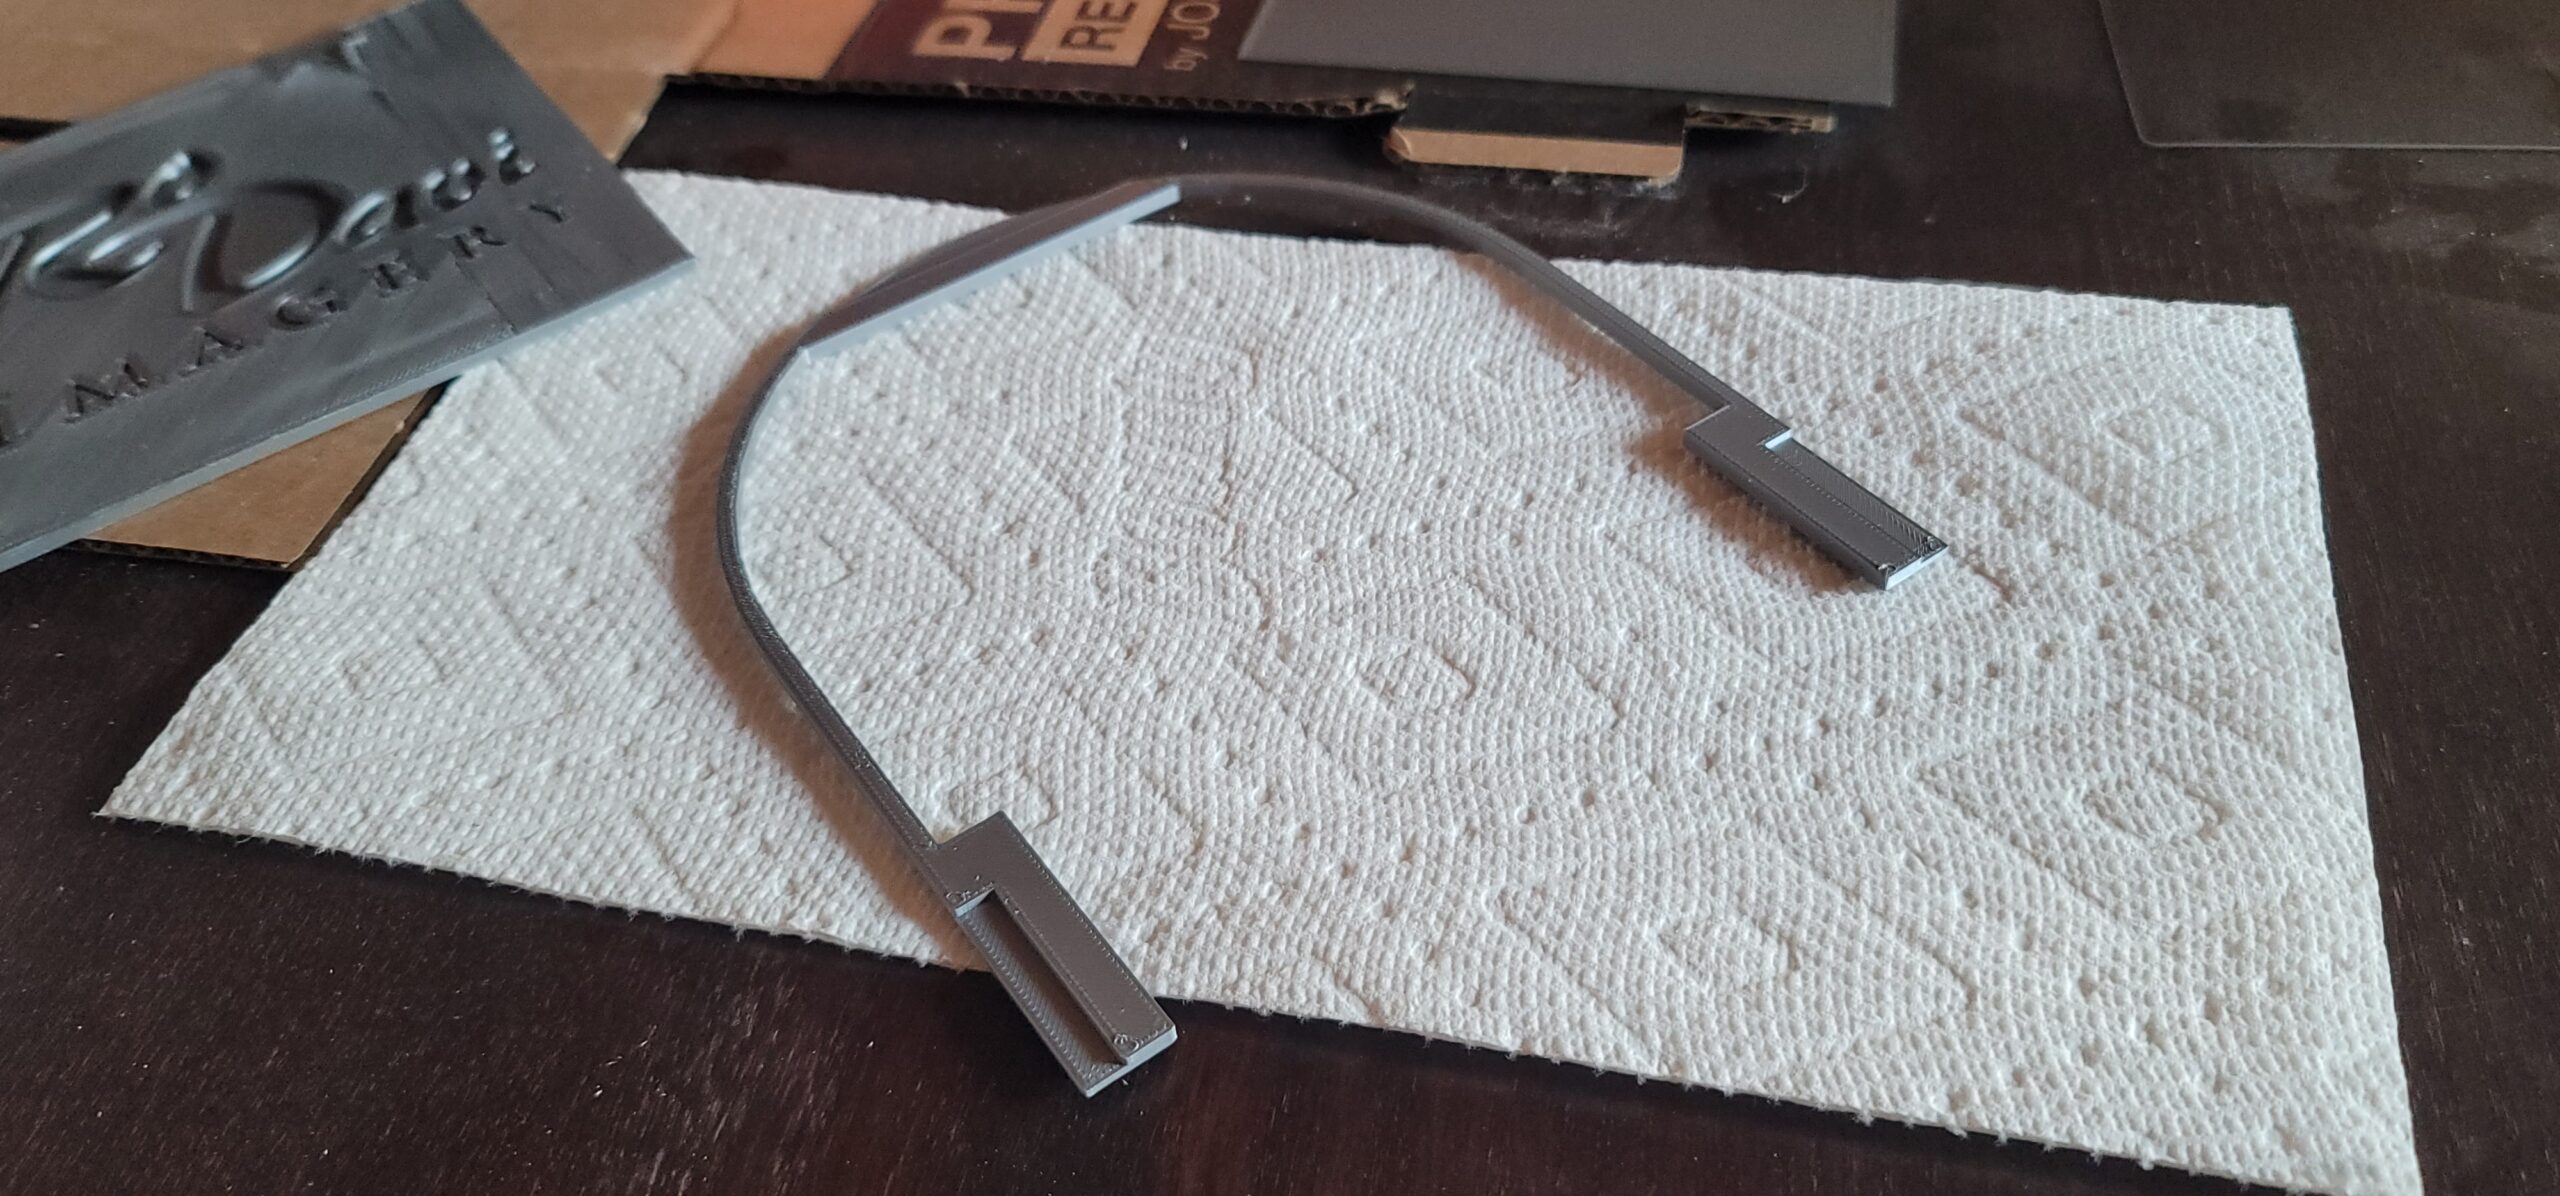
The second print was the "U" which is actually a mounting bracket for the hemidome in my previous post, it printed as expected, though I learned I need to actually allow for tolerances between parts, what do you typically allow, .2mm?
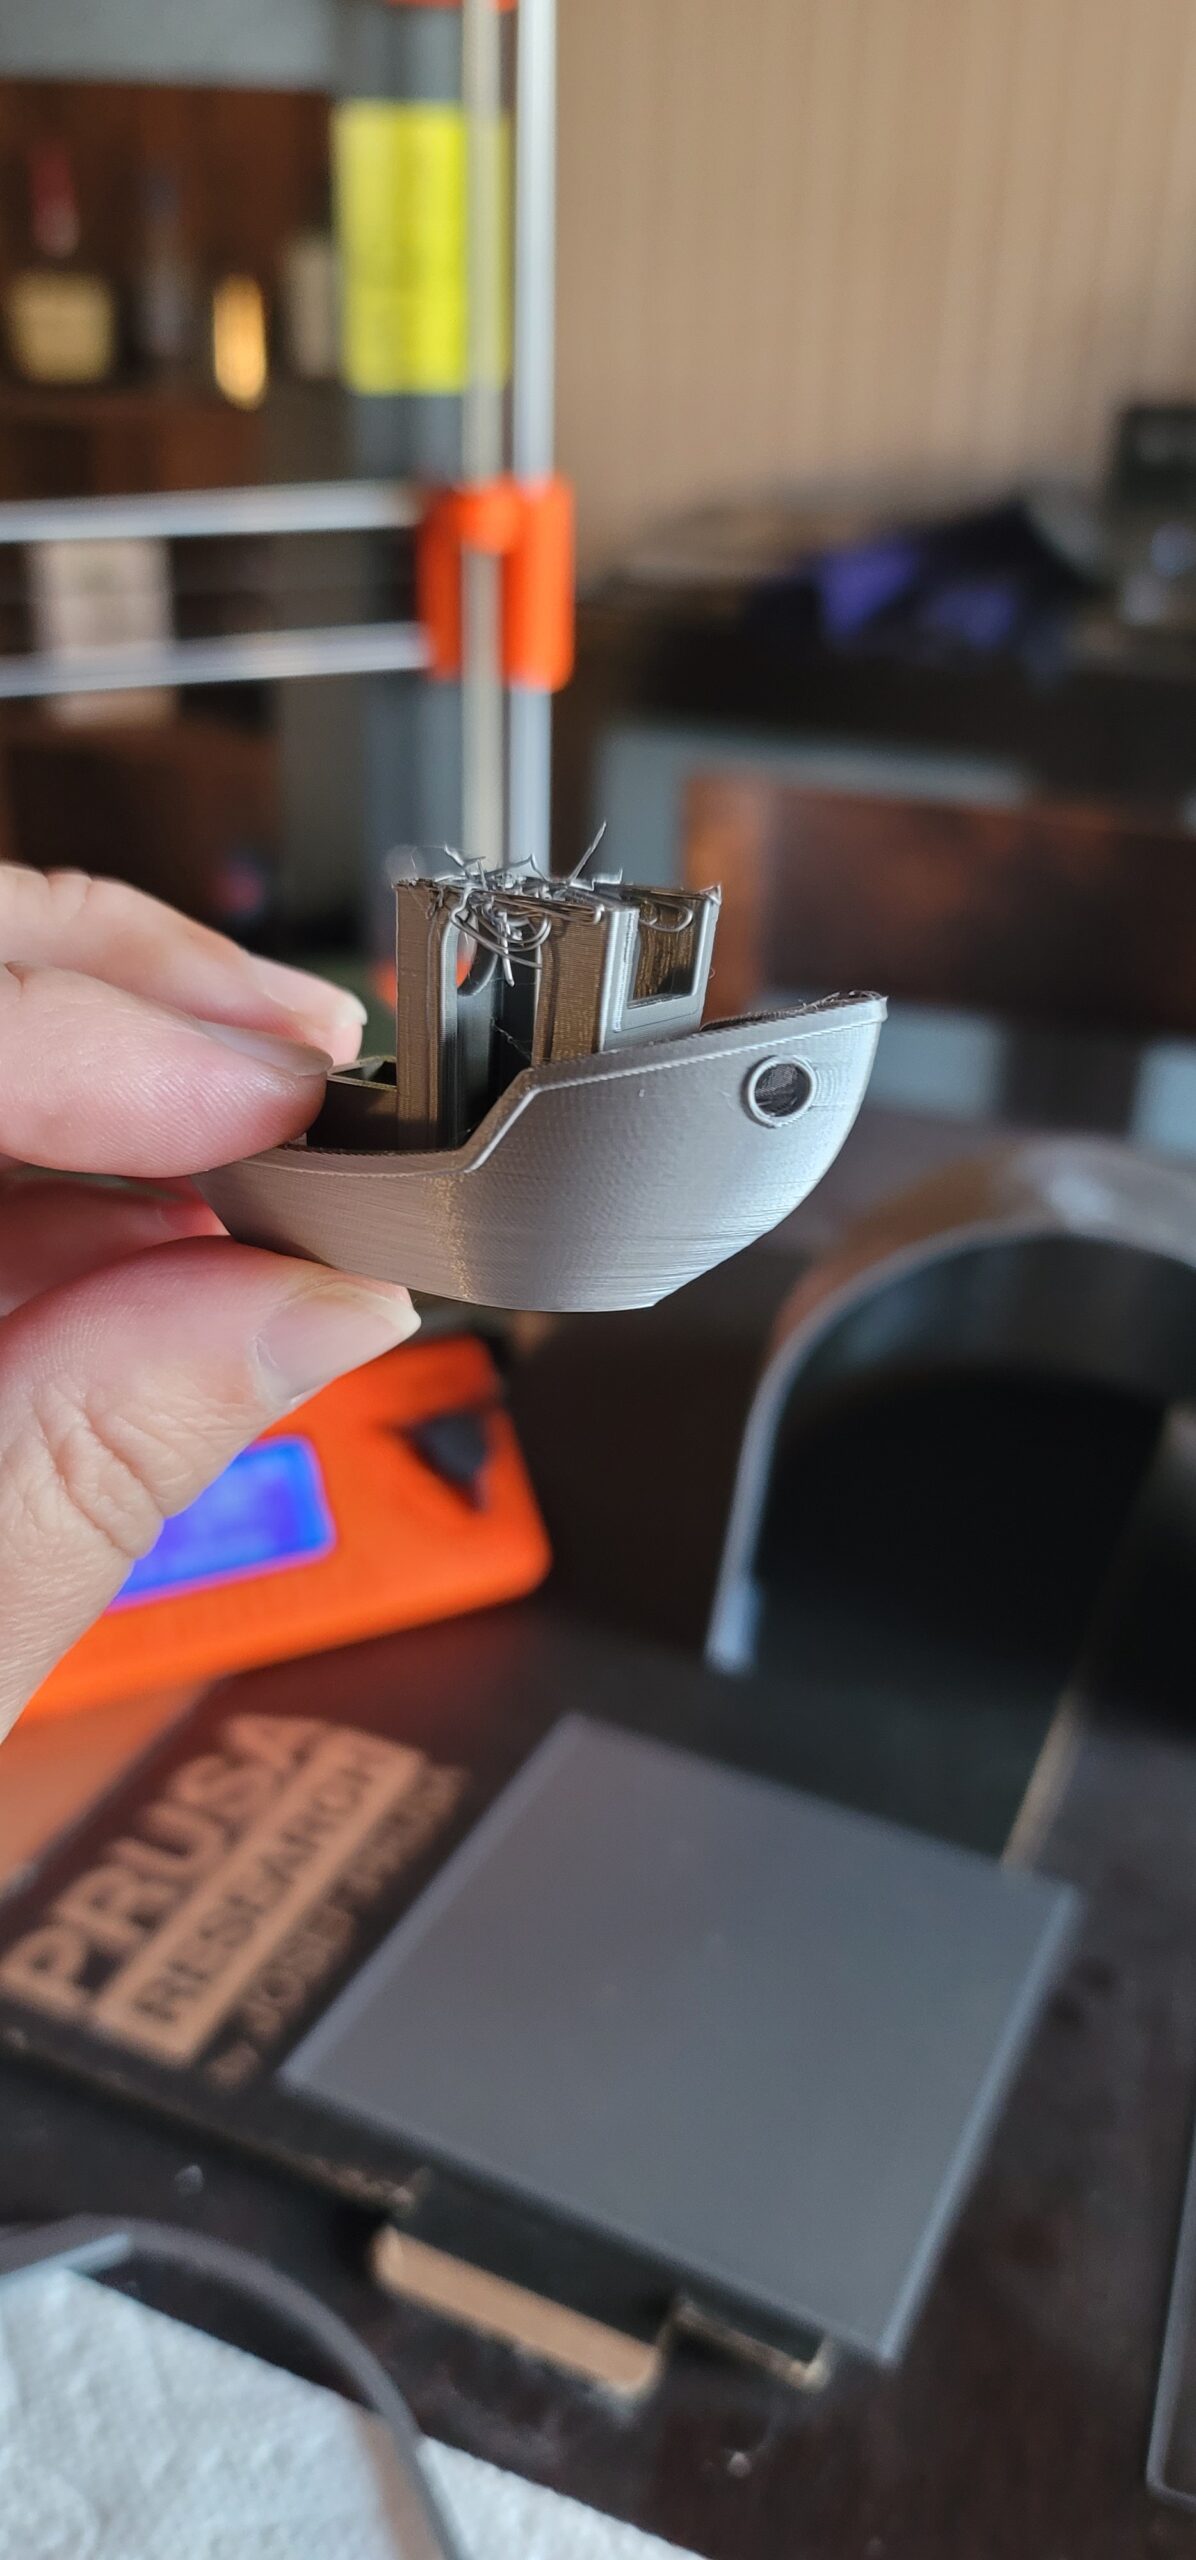
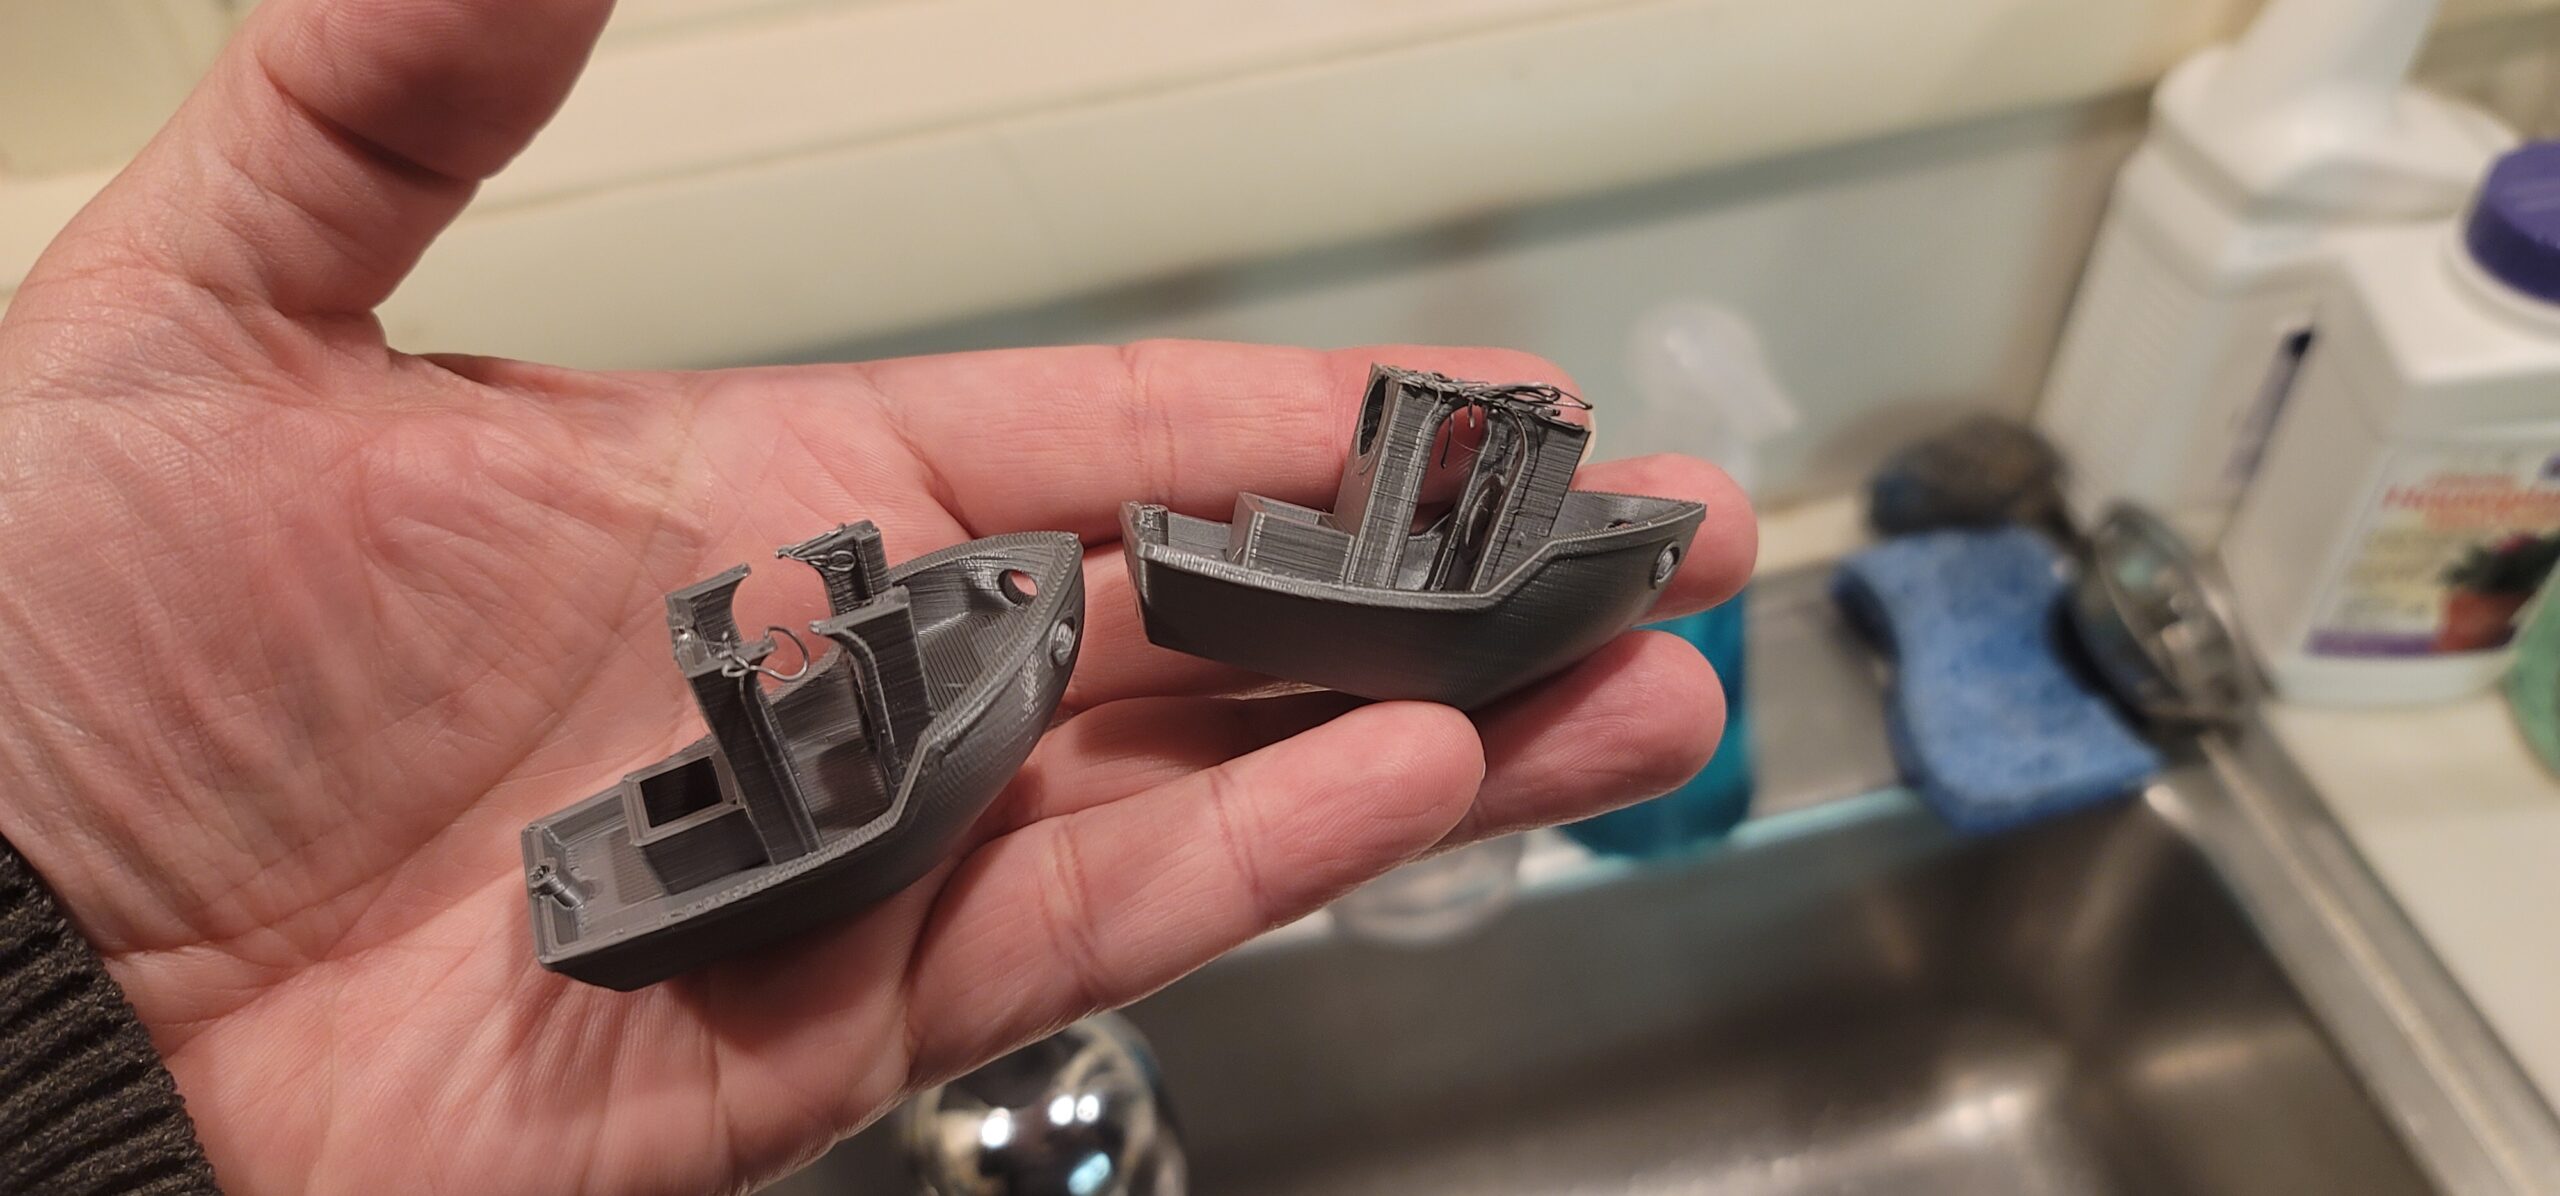
Back to the oops, benchy was printing pretty nicely and then when awry in the last bit. There are also some interesting divots on the back, I had similar on the hemidome.
The printer is still sitting in the room where these were printed and the bed and nozzle are reading 20°C. The room is a little cooler than that. Is part of my problem the bed cooling and the part releasing because the room is too cool? Should I add a custom skirt around the model to hold the heat in better? I would heat the room up more but I'm not in my own place right now...


RE: Oops, success, oops again ...
Actually the bed is down to 16/17°C, the room is 16.7°C
RE:
Looking at the bottom of your benchy, I'd say your first layer calibration is putting your nozzle just a bit too high which could be contributing to some or all of these other issues. The photo below shows what you are aiming for. Notice how the lines of fill snug up to the perimeters.
You seem to be a person who values precision. If you would upload the ZIPPED .3mf file for that nameplate, you could get more specific suggestions on how to tune your slicing. (Save your project as you printed it and post that file. It has to be ZIPPED or it won't post. )
Mk3S+,SL1S
RE: Oops, success, oops again ...
Sadly I did not save the 3mf, but I am pretty sure this contains all the changes I had made. I included the stl and g-code in case that helps since I did not save the project. I realize now the advantages of saving the project files each time, lesson learned.
I adjusted my z live again from 1.25 to 1.3, at 1.31 the small rectangle was pretty hairy, so I backed up to 1.3, and I started another benchy print so we can see how that comes out in a couple hours.
RE: Oops, success, oops again ...
Here's the new benchy next to the first one. You can see the base layer is much more filled in, but it popped off the base a few layers earlier than the previous. There is a very slight bow on the bottom.
I'm slightly frustrated, probably need to read up a lot more, but any advice is appreciated! 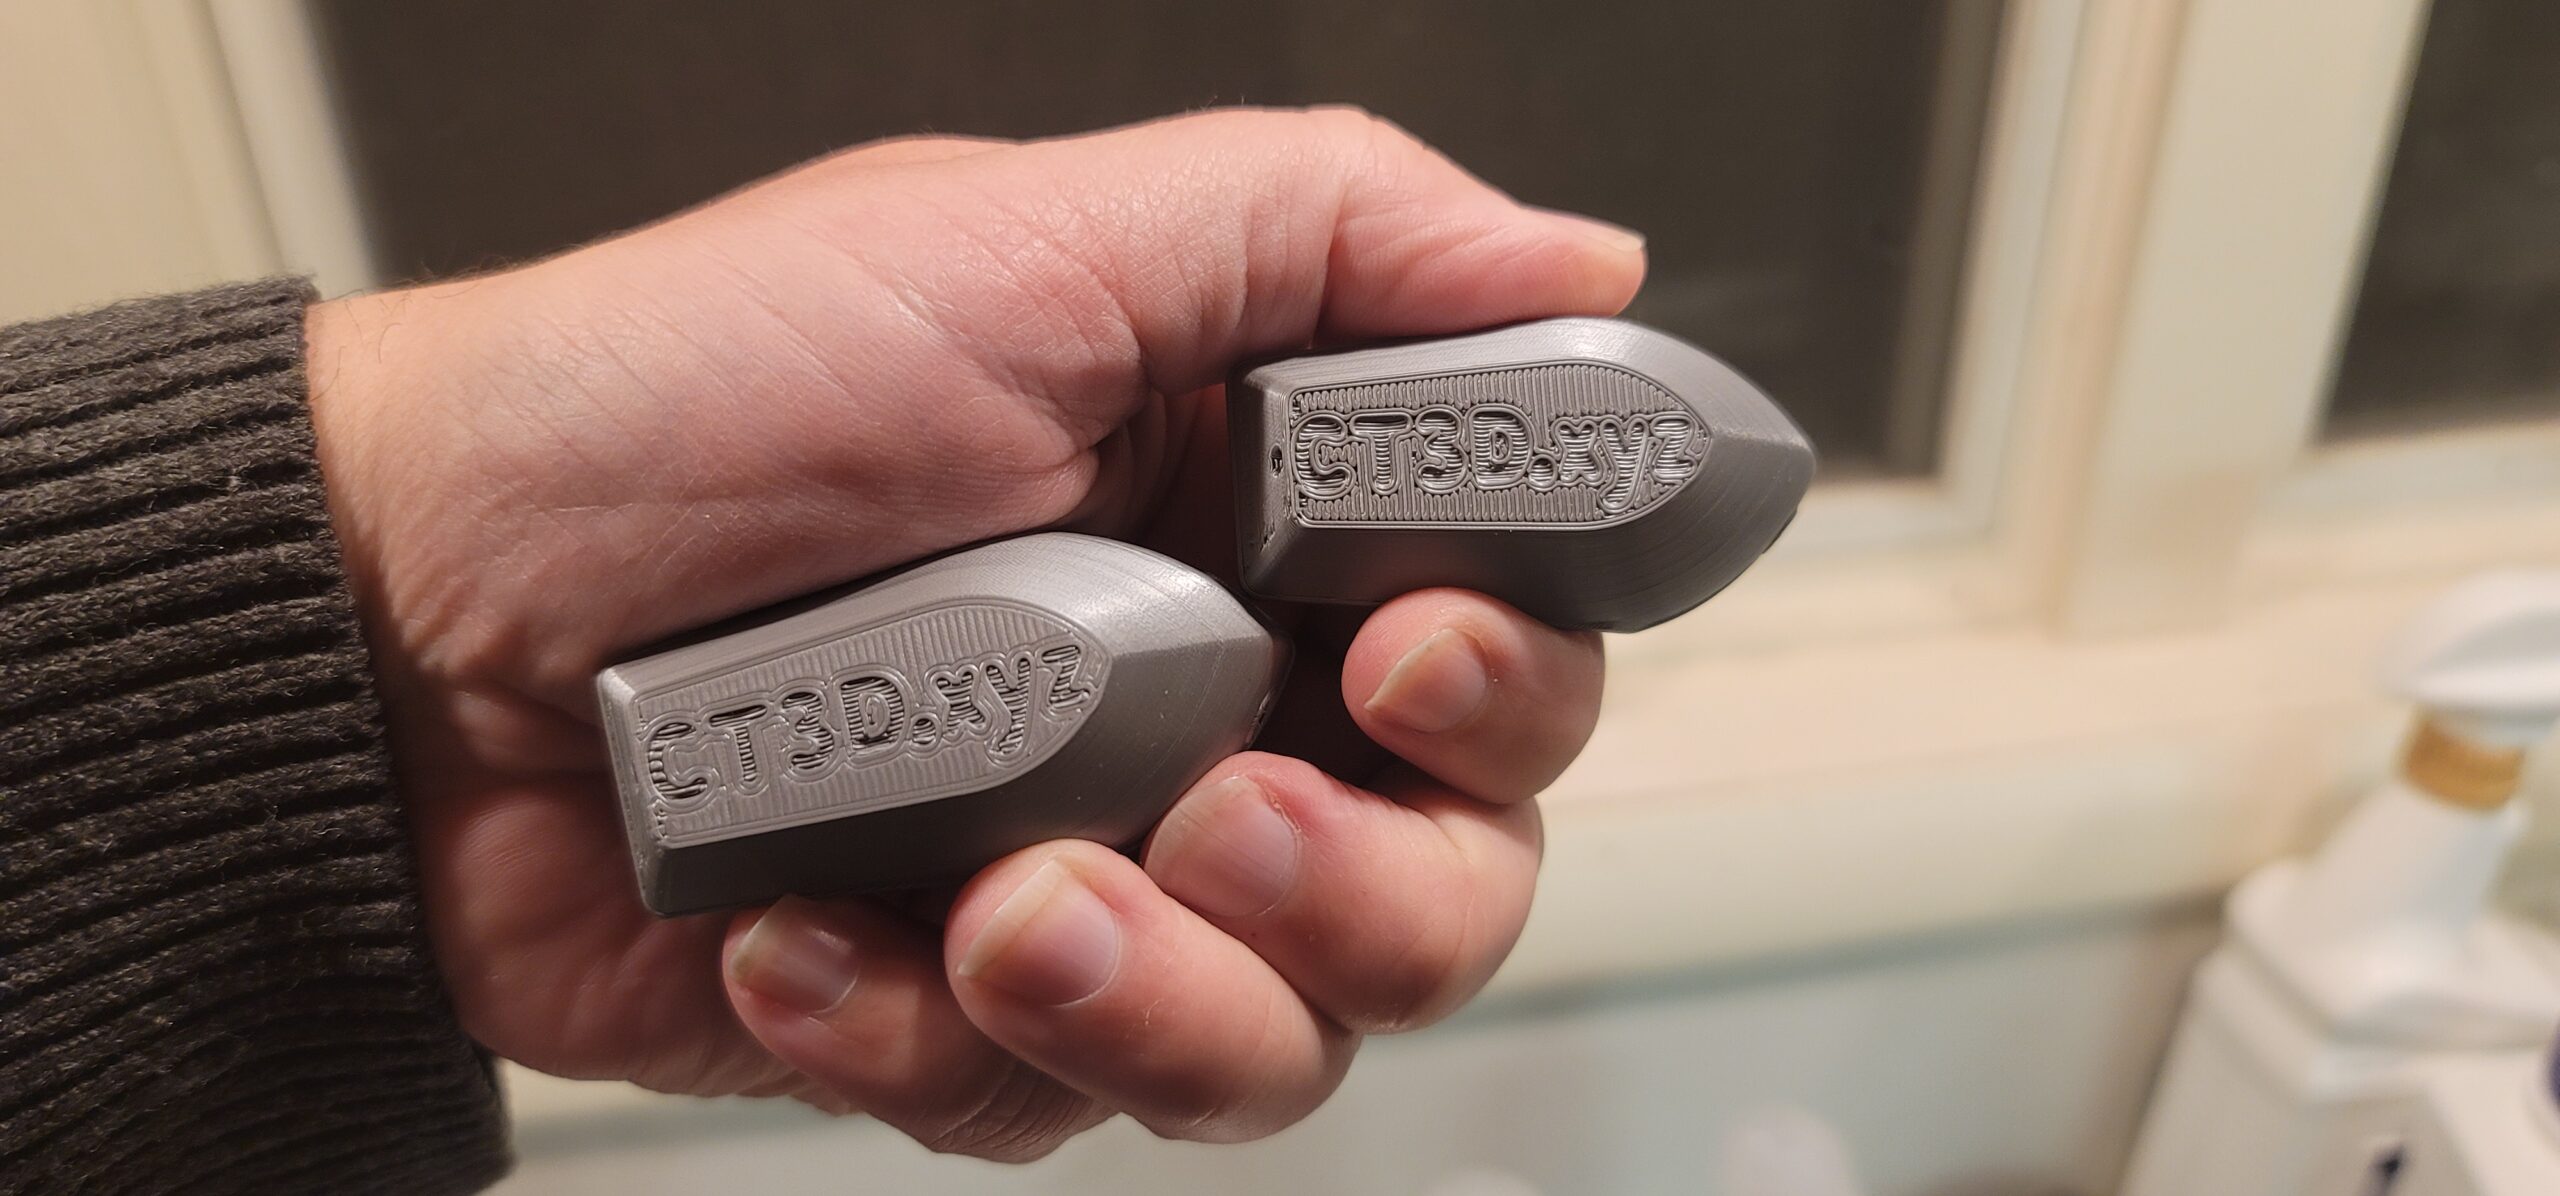
RE: Oops, success, oops again ...
I get that this can be frustrating.
The new benchy looks better for z-offset. You might get even better results if you use this method for setting the z-offset:
Have you washed your sheet with dishwashing detergent and hot water? IPA alone is not enough to remove fingerprints which can can adhesion problems.
Mk3S+,SL1S
I went down to .1mm and up to 4 perimeters and turned on ironing. It looks like the print released from the bed at the corners and caught on the nozzle,
By the look of it you have found some finer export settings in your design software, good.
There's no point in going to 0.1mm with a 0.4mm nozzle.
Extra perimeters are unlikely to have any useful effect with this print.
Ironing is very nearly a gimmick pandering to those who are not willing to post process their prints... It does have some use as a modifier in cases like yours where it can smooth the hard-to-get-at bottom of a cut-out but I've never used it on an exposed top surface. Try fine abrasive paper and laquer.
You used to have a decent first layer, you know what it looked like...
I'm with @sylviatrilling, I'm willing to bet you have fingermarks or other grease on your print-bed, time to clean it.
Cheerio,
RE:
I had only read to use the IPA so I have used it until the bed looks clean, but I will try washing with hot water and dish soap and then print benchy again. If successful I will clean again and try the nameplate again back at .15
I will update here in a few hours.
oh, yes, AutoCAD has a facetres setting that set at 10 gives truest curve output, defaulted at 0.5 it gives what you saw before. The pipecover (hemidome) at default was 1218 facets and at faceres 10 comes in at 18998 in prusaslicer.
RE: Oops, success, oops again ...
Just to be clear. Printing at layer height .15 instead of .2 for this model will not likely give you any improvement in quality and make the print time longer. Think about it. The layer height gives you higher resolution on the SIDES of your print, not on the TOP. You have no detail on the sides of your model. To get higher resolution on the TOP of this model, you would print it with a smaller nozzle (which I don't recommend until you get your other issues worked out).
Mk3S+,SL1S
RE: Oops, success, oops again ...
Ok, replying to a few things here ... on the .15 vs .2 in the nameplate, I definitely understand what you are saying, what I was (am) uncertain of and thought the things layer might help us filling the small holes next to the perimeters. I'm now also seeing that the smaller nozzle is the best approach for that but also agree that I need to learn more at this level first. Thank you.
I also learned today that even if the IPA removes all the shiny and leaves what looks like a clean surface, that's not enough. Question is, do you wash with hot water and soap every time?

I also took the nameplate mistake and and the top to test the post process Diem has suggested and I definitely see that it works. I'll pick up something to put a finish coat on it once I research what's good for that.
Since benchy stayed put this time I'll wash the surface again and start a new nameplate printing in a bit at .2 and standard perimeter settings, but with the higher res model Diem nudge me in the right direction to find.
Thank you again, I'll post an update once the nameplate is printed again.
RE: Oops, success, oops again ...
That benchy looks great. It generally isn't necessary to wash with soap after every print, but if your z-offset is good (which it is now) and your prints are coming loose during printing, washing with soap is the first thing to try.
As for filling in the holes around the letters, you MIGHT get an improvement by increasing the infill/perimeters overlap (you need to be in expert mode). The default is 25%. You could try 30% or so and see if it helps. If you overlap too much you could get uneven surfaces which you don't want either.
Mk3S+,SL1S
RE: Oops, success, oops again ...
The amount you need to wash with detergent (soap and water) is directly proportional to how much you touch your build plate. Its the oils from your fingers that are the killer for adhesion. Only touch the very sides and be very careful not to let it spread onto the sheet proper and you can actually go weeks without any sort of cleaning at all. I bought 1 litre of IPA before the pandemic and I've got about half left. Most of that was used cleaning my airbrush, I hardly ever use it on the printer anymore.
I'm currently printing a large multipart project (should be around 260-300 hours when finished) and I'm 160 hours in over the space of 4 weeks. I washed it before starting the project and I don't need to again as yet. However I am very careful in my sheet handling.
RE: Oops, success, oops again ...
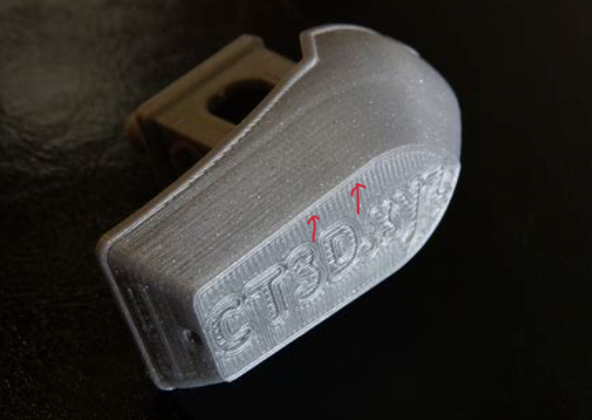
So, I printed the name plate again, and a Marvin and 55 minutes left on buddy, no early release so far.
I did not turn on ironing, though I might have if I'd figured out how to iron only the bottoms of the recessed letters. On Diem's suggestion I sanded the top of the nameplate which removed all the burrs and smoothed it nicely. There are a few minor holes between field and perimeters, do you typically fill these or just accept it as part of the reality? At this point I feel like maybe it should be painted, do you need to prime first? So many newbie questions 🤣
To iron only the bottom of the letters you need to use a modifier (right click on the part in the slicer) that is tall enough to cover the bottom of the letters but not the top.
If you are going to paint it most minor blemishes will be filled in the process. For a single colour you can usually get away with painting direct (usual warning to test on a scrap first) but precision painting will need some sort of primer as pigment will wick along the laid filament. Read the back of the paint can...
Cheerio,