RE: life adjust Z - my way
I know this is an old post but is there any way to do this automatically to print an array of say 25x25mm squares (separated by a narrow connector) each with a different Z-value - say an array of ~5x5 where you can either specify:
1. The Z-value for each square
2. The starting Z-value plus constant increment (or decrement if negative) in Z-value between subsequent squares...
Then you can peel off the 5x5 matrix with connectors and both visually pick the optimal as well as use a micrometer to find the square with the optimal thickness.
Is this possible in G-code?
RE: life adjust Z - my way
Hi 👋
Is this G-code live-Z working for MK3s also?
RE: life adjust Z - my way
I know this is an old post but is there any way to do this automatically to print an array of say 25x25mm squares (separated by a narrow connector) each with a different Z-value - say an array of ~5x5 where you can either specify:
1. The Z-value for each square
2. The starting Z-value plus constant increment (or decrement if negative) in Z-value between subsequent squares...
Then you can peel off the 5x5 matrix with connectors and both visually pick the optimal as well as use a micrometer to find the square with the optimal thickness.
Is this possible in G-code?
I don´t know whether it is possible, but it´s certainly not a reasonable option to find the correct Z value, as is the task of this thread. If you would run an automated test with pre-defined Z values you would run the risk of crashing the nozzle into the bed by entering a Z value incompatible with your setup.
I try to give answers to the best of my ability, but I am not a 3D printing pro by any means, and anything you do you do at your own risk. BTW: I have no food for…
RE: life adjust Z - my way
Hi 👋
Is this G-code live-Z working for MK3s also?
Are you referring to the post preceding yours or are you asking whether the method described by Jeff Jordan in this thread is feasible for an MK3S? If the latter, the answer is yes.
Regards
Chris
I try to give answers to the best of my ability, but I am not a 3D printing pro by any means, and anything you do you do at your own risk. BTW: I have no food for…
RE: life adjust Z - my way
Agree but if I have a range where I know that the end doesn't crash the nozzle, I could use such a grid to fine tune what is optimal.
For example if I know Z=-1.0 is too far and Z=-1.5 is too close (based on previous trials), then I could use a grid to test values between -1 and -1.5
Otherwise I haver to repeatedly run the test with a new Z-value, wait for the square to print, then observe/measure the square then repeat...
RE:
Jeff Jordan´s method is based on a large square which allows you to observe changes as you apply them. If you are already in the ballpark of good results - which is easily achieveable with the first print run, and then run that large square once more, which takes a few minutes only, there is basically no way that you miss the perfect setting with minimal Z adaptions during the print.
I try to give answers to the best of my ability, but I am not a 3D printing pro by any means, and anything you do you do at your own risk. BTW: I have no food for…
RE: life adjust Z - my way
Using Jeff Jordan’s method, I will typically change the z value 4-5 times over (1) 75x75 square print to see where ‘close’ starts. Mr. Jordan’s g-code files include an audible tone at the halfway point to prompt the user to select a second Z height value, so it’s not intended to print a full sheet - at least until you think you’ve nailed it, imho.
It’s simple enough to estimate when you’ve printed 20% or 25% of the square and make an incremental change. I jot my values down on a scratch pad so I don’t forget where I am. It’s actually easy to spot the changes in the finished print but if you’re concerned just make a little tic mark on the border of the print with a sharpie at each change.
If I know that Z = -1.0 is too far and Z = -1.5 is too close, I’ll start at Z = -1.1 and increment to -1.2, -1.3, and -1.4 as an example. From this. I can narrow down the range to my next 4-5 values on either side of the best result from the first run. I’ll keep running sets of values until I find what I want and then I’ll print a full square for verification. If it’s not right, I’ll keep going.
There is a refinement to the Jordan method that respected forum user @fuchsr has developed and posted to the ‘Printables’ libraries. This iteration generates a longer and narrower print with built in tic marks to prompt the user to make a Z height change up to (8) times over one print. I believe this is a valuable addition and extension to the Jordan method.
Thank you @fuchsr for your contributions.
Cheers
RE: life adjust Z - my way
Hi All,
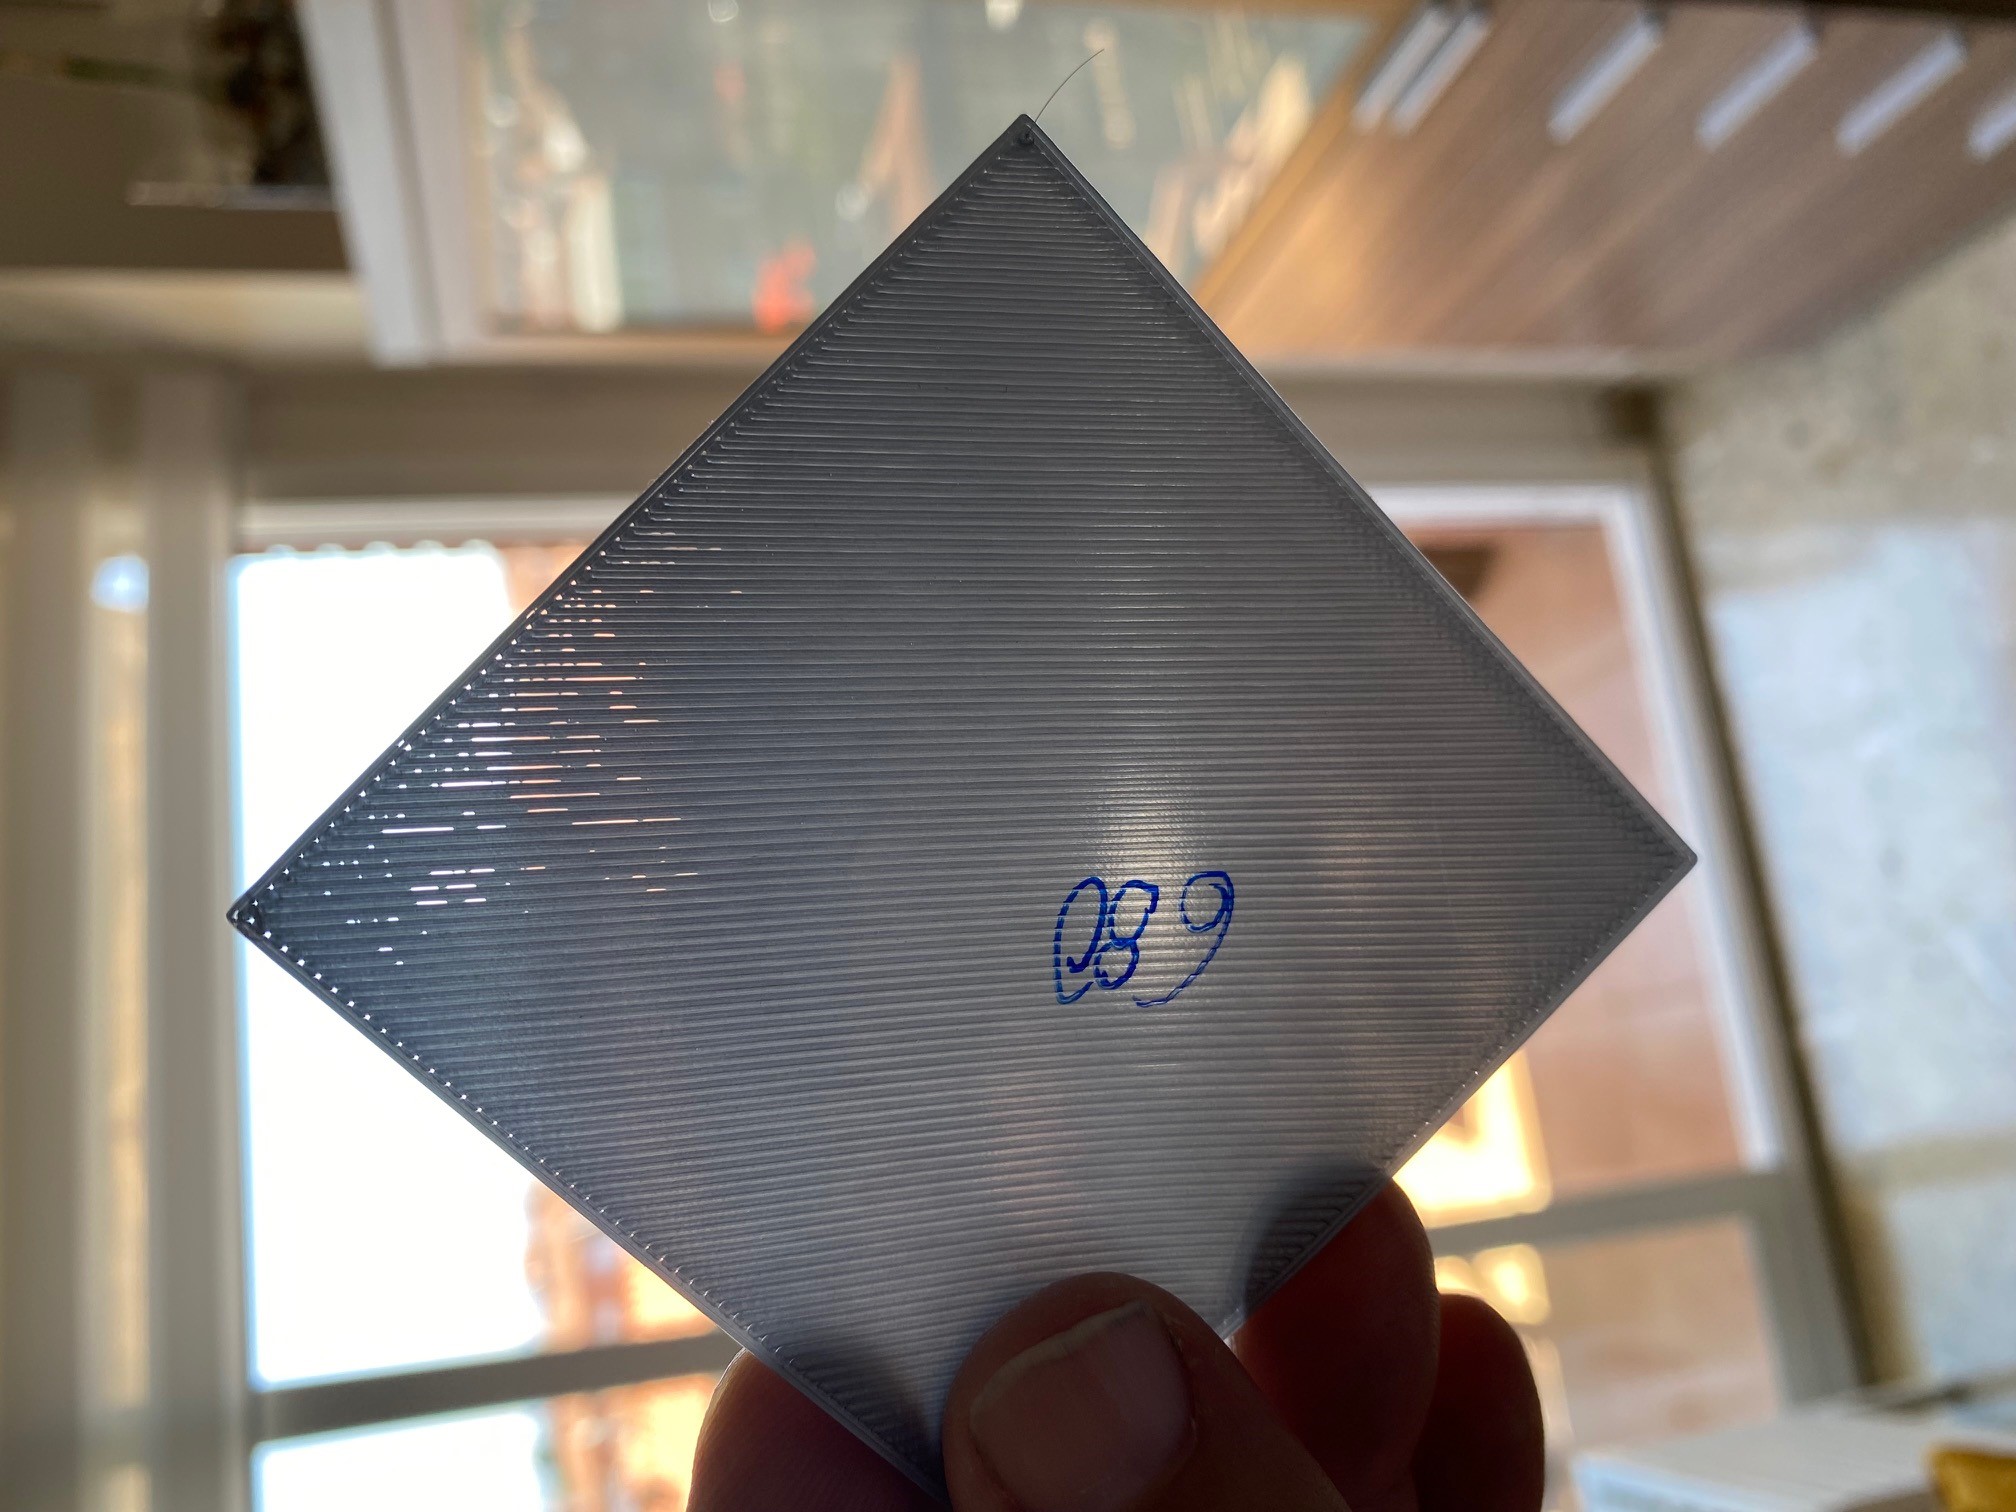
This is my latest test print. Since the last one I posted, the live Z was adjusted so the nozzle is now 100 microns closer to the print bed.

As you can see in the image, the lower right hand corner of the printed square shows something that would be more typical for a good first layer. As one starts to pan their view from the lower right corner to top left corner, they'll start to notice the lines become further spaced apart and look less squished. Does this interpretation seem accurate?
The obvious thing I see is that the nozzle height toward the center of the print is still high. However, it looks like the lower right hand corner and possibly upper right hand corner are very close to where the need to be for nozzle height. Since the Bed Level Correction (BLC) tool doesn't have an option for the center of the bed (only left, right, front, and rear), my plan is to continue lowering the live Z distance from the bed until the center looks good, but also adjust the BLC on the right side concurrently so the nozzle doesn't end up scraping the bed. Once the center and right are looking good, I can use the BLC tool to continue decreasing the nozzle distance from the bed until left side is also looking good. The rear may need similar adjustment.
Does my plan make sense? It seems like I'm getting closer, but not quite there yet.
Since my last post I double checked the belt tension. The X is at 254 and the Y is at 278. I also checked the pulleys on the X and Y axis stepper motors to ensure the set screw was tight enough and making good contact flat part of the stepper motor shaft. It looks good as far as I can tell.
Chance
RE:
No, IMHO there is nothing in your print resembling anything like "good first layer". You´re on the top floor of Empire State building and need to go down to the entrance. Once you get to the underground garage, go a bit up again.... 🙂 Don´t even start thinking about any complicated tweaking. Ensure your axis is horizontal, as described in Josef´s video, and then get down, down, down.
As you can see in the image, the lower right hand corner of the printed square shows something that would be more typical for a good first layer.
The obvious thing I see is that the nozzle height toward the center of the print is still high.
I try to give answers to the best of my ability, but I am not a 3D printing pro by any means, and anything you do you do at your own risk. BTW: I have no food for…
RE: life adjust Z - my way
Hi everyone,
This is the latest test I ran using the 9 patch print (11 if you include the L and R) for bed level correction.
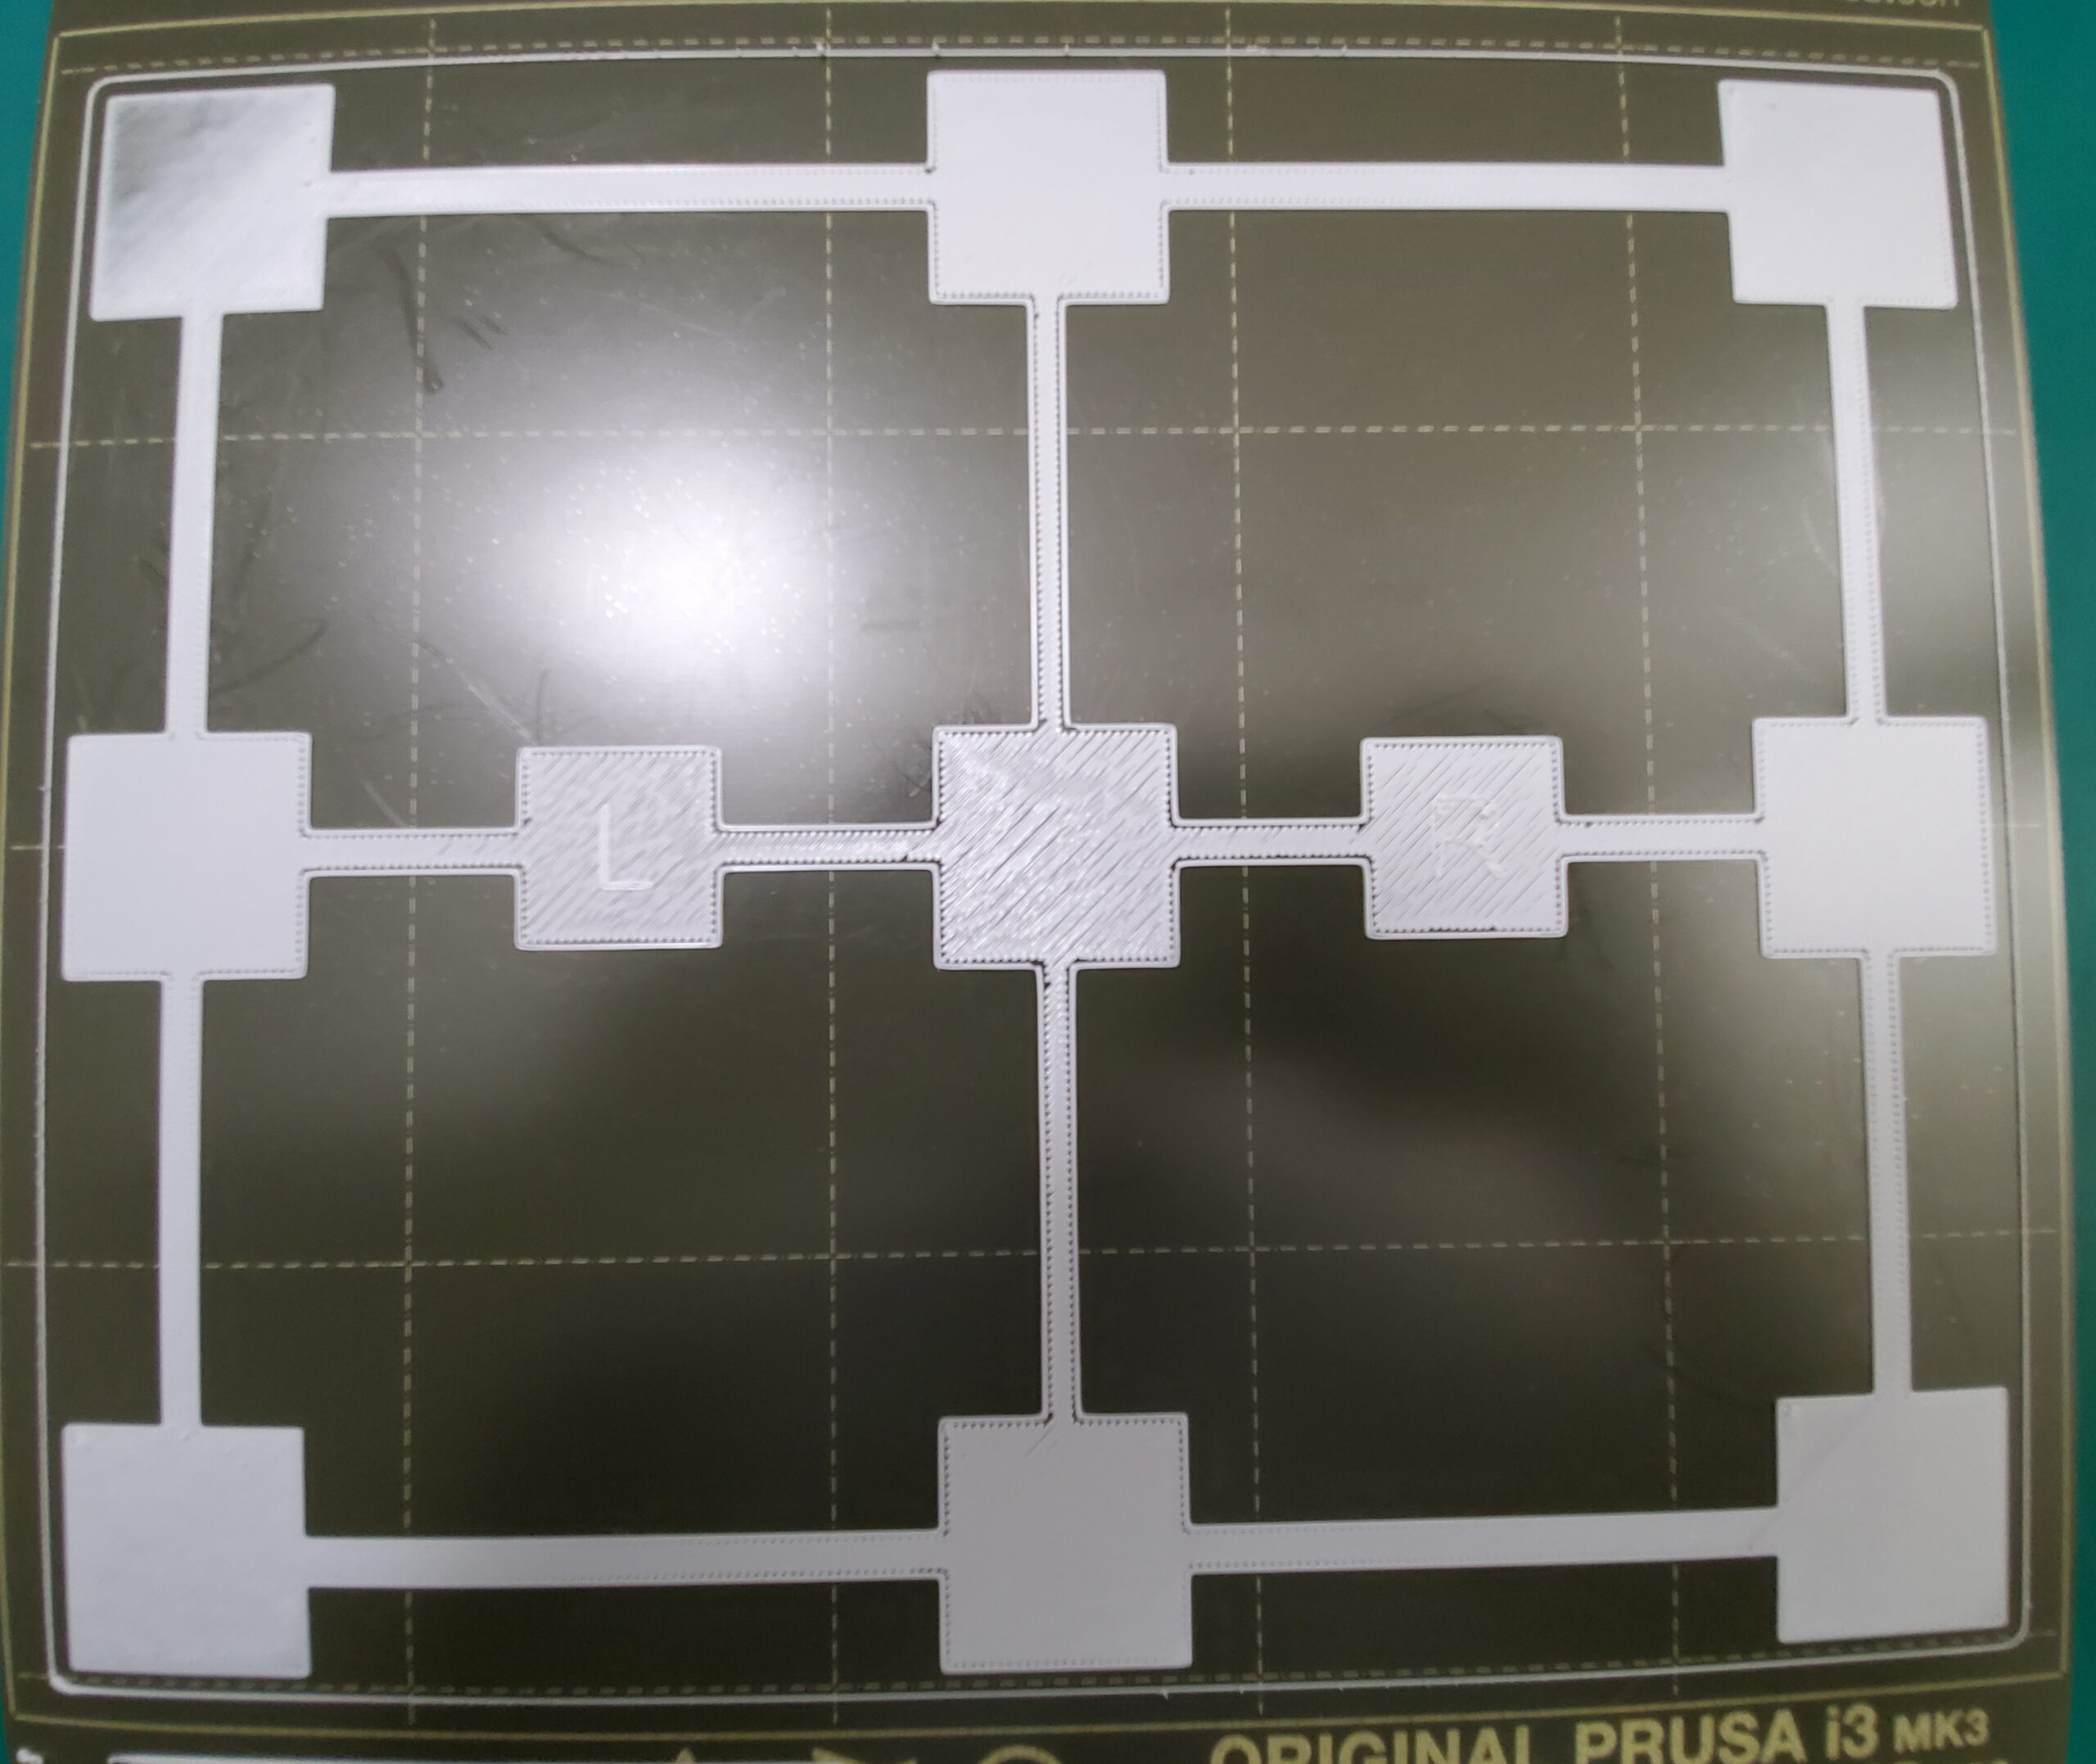
I've run this test a number of times and what I'm seeing in the latest is that the upper left hand corner is starting to show signs of the nozzle height being too low, the nozzle height is still too high in the center, and the ones on the right are starting to look like actual squares instead of strips of filament that happen to be parallel. However, I have already maxed out the positive value that I can use for the bed level correction on the left and rear so if I lower the live Z anymore, I run the risk of scraping the nozzle in the upper left hand corner of the plate before actually getting the nozzle low enough to the print bed to achieve a good first layer in the center. Essentially, if you move the nozzle from over the center of the build plate to the left side with all BLC values at zero, you would see a nozzle height difference greater than 100 microns. Since I've already checked the frame, the X and Y axis, the pulleys, motors, belts, Z axis, and the relatively new PEI sheet that I clean after every print, I'm looking at other aspects of the system that could be causing the issue.
Last night I inspected the heated bed and did a quick check of the 9 screws which secure it in place. What I observed was that the screws toward the outer edges of the plate had not been tightened as much as the screw in the center. I have a sneaking suspicion that this might have played a role in the large difference in nozzle height going across the print surface, so I tightened the other screws, cleared the build plate, and repeated the 11 patch test print to see the effect. Will report on the results when I have something to share. More to come!
-Chance
RE: life adjust Z - my way
I would agree that if it isn't screwed down properly, it would cause issues.
There is a video of how to mod your bed to make it more level which requires changes of screws and such.. It would actually scan the whole bed how level it is using the sensor. Then you adjust different screws to get everything leveled. So if you still have this issue, you might want to look that up.
RE: life adjust Z - my way
Hello, I have followed the instructions in this post, with my MK3 and I have used the recommended gcode to adjust the first layer, and I always have the same error, in the lower right area I see the layer well, but in the end in the upper part there are symptoms underextrusion and I can not find the solution.
Increase the flow of the first layer, or is it a calibration problem?I would greatly appreciate the help, since I have been dealing with this problem for months and apparently everything is fine with the printer.
Greetings
RE: life adjust Z - my way
Have you tried recalibrating your XYZ?
RE: life adjust Z - my way
Yes, on several ocasions, and the result is always the same.
Thanks!
RE: life adjust Z - my way
Are you using 3x3 or 7x7 mesh bed leveling?
RE: life adjust Z - my way
I use 3X3 from the begining.
RE: life adjust Z - my way
I started using 7x7 when it came available.
Before that I used 3x3
regards Joan
I try to make safe suggestions,You should understand the context and ensure you are happy that they are safe before attempting to apply my suggestions, what you do, is YOUR responsibility.Location Halifax UK
RE: life adjust Z - my way
Try 7x7 and set your z lower
I use 3X3 from the begining.
RE: life adjust Z - my way
I find in the default start G-code of my MK3 this line to reduce the flow,
M221 S{if layer_height<0.075}100{else}95{endif}
Could this be the problem of under extrusion?
Thanks
RE:
As it is a parameter that prusaslicer places by default, to reduce the flow in the whole impression,
M221 S{if layer_height<0.075}100{else}95{endif}
wouldn't it be better to increase the flow only in the first layer?
M221 S{if layer_z==1}100{else}95{endif}
I don't know which option would be the most correct, or if neither of the two is correct, any suggestions?
Thank you