RE: life adjust Z - my way
If you bend that coupon in half along a print line does it break or hold together?
As has been suggested, 7x7 mesh bed leveling and perhaps a slightly more negative z height could be tried. Worth a shot. Occam’s razor and all that...
Cheers
RE: life adjust Z - my way
Yes i change to 7x7 mesh leveling, the impression does not split in half, and if I lower the Z axis further I already see marks on the impression, I am going to try increasing the flow by 5%, which prusaslicer removes in its default configuration.
Thanks
RE: life adjust Z - my way
Sounds like a good idea. Hope you get it sorted.
RE: life adjust Z - my way
Just a note. I'm just starting out and tried using this on my prusa mini+. Well half the pattern was fine, but the other half jammed the nozzle into my heatbed. I'm thinking this is because the gcode tell printer to bypass auto leveling calibration before it prints. When I compare prusa part test files there is code to include level calibration before the print process. I'm just guessing the prusa assumed the bed was level after bypassing calibration on start?
I dont know, as I am new to this. any education on what caused this is greatly appreciated. I have no issues with level when printing prusa test parts.
RE: life adjust Z - my way
Life adjust Z was made for the bigger printers... so the patch prints off centre on the Mini,
However, it should still print Ok...
Do you want to try these test patches, they are still75mm square, but centred for the Mini
Joan
I try to make safe suggestions,You should understand the context and ensure you are happy that they are safe before attempting to apply my suggestions, what you do, is YOUR responsibility.Location Halifax UK
RE: life adjust Z - my way
Thank you very much for the suggestion! I'll give it a try. This time I think I'll edit the gcode to include the precaliberation.
RE: life adjust Z - my way
Automatic bed levelling is already in the g code
Joan
I try to make safe suggestions,You should understand the context and ensure you are happy that they are safe before attempting to apply my suggestions, what you do, is YOUR responsibility.Location Halifax UK
RE:
 Did the test print on my mk3s+ and unsure why it's bumpy on one side. Almost like ridges. I recently did xyz cal before this. Current z is -1.325.
How do I correct this please?
RE: life adjust Z - my way
I am new to this so I assumed this piece of gcode at the start bypassed the mesh bed leveling on the prusa mini as per its comment.
code-------line 202---
G87 ; magic code to tell the printer a calibration has been done
line 212: G28 W ; Home all Without calibration
end code----
When I look at other gcode of objects included on prusa usb that came with printer I see this gcode
code---------
G29 ; mesh bed leveling
end code---------
I don't see G29 in the file for this, so I just assumed mesh bed leveling was disabled in the code.
Being a new comer to all this I would appreciate any advice you can share to help me understand the process of where this code does the automatic bed leveling in the header before its starts printing. I have attached the file I was using. I'm thinking I may have downloaded a different version?
Thank you!
RE: life adjust Z - my way
Please disregard my last post. I just downloaded your files you posted in this thread and I see the bed leveling in them.
Thank you so much!
chris
RE: life adjust Z - my way
those ripples are caused by the nozzle being too close to the build plate,
reduce the size of the negative Live Z value, a little and the ripples should go away on another print
regards Joan.
I try to make safe suggestions,You should understand the context and ensure you are happy that they are safe before attempting to apply my suggestions, what you do, is YOUR responsibility.Location Halifax UK
RE:
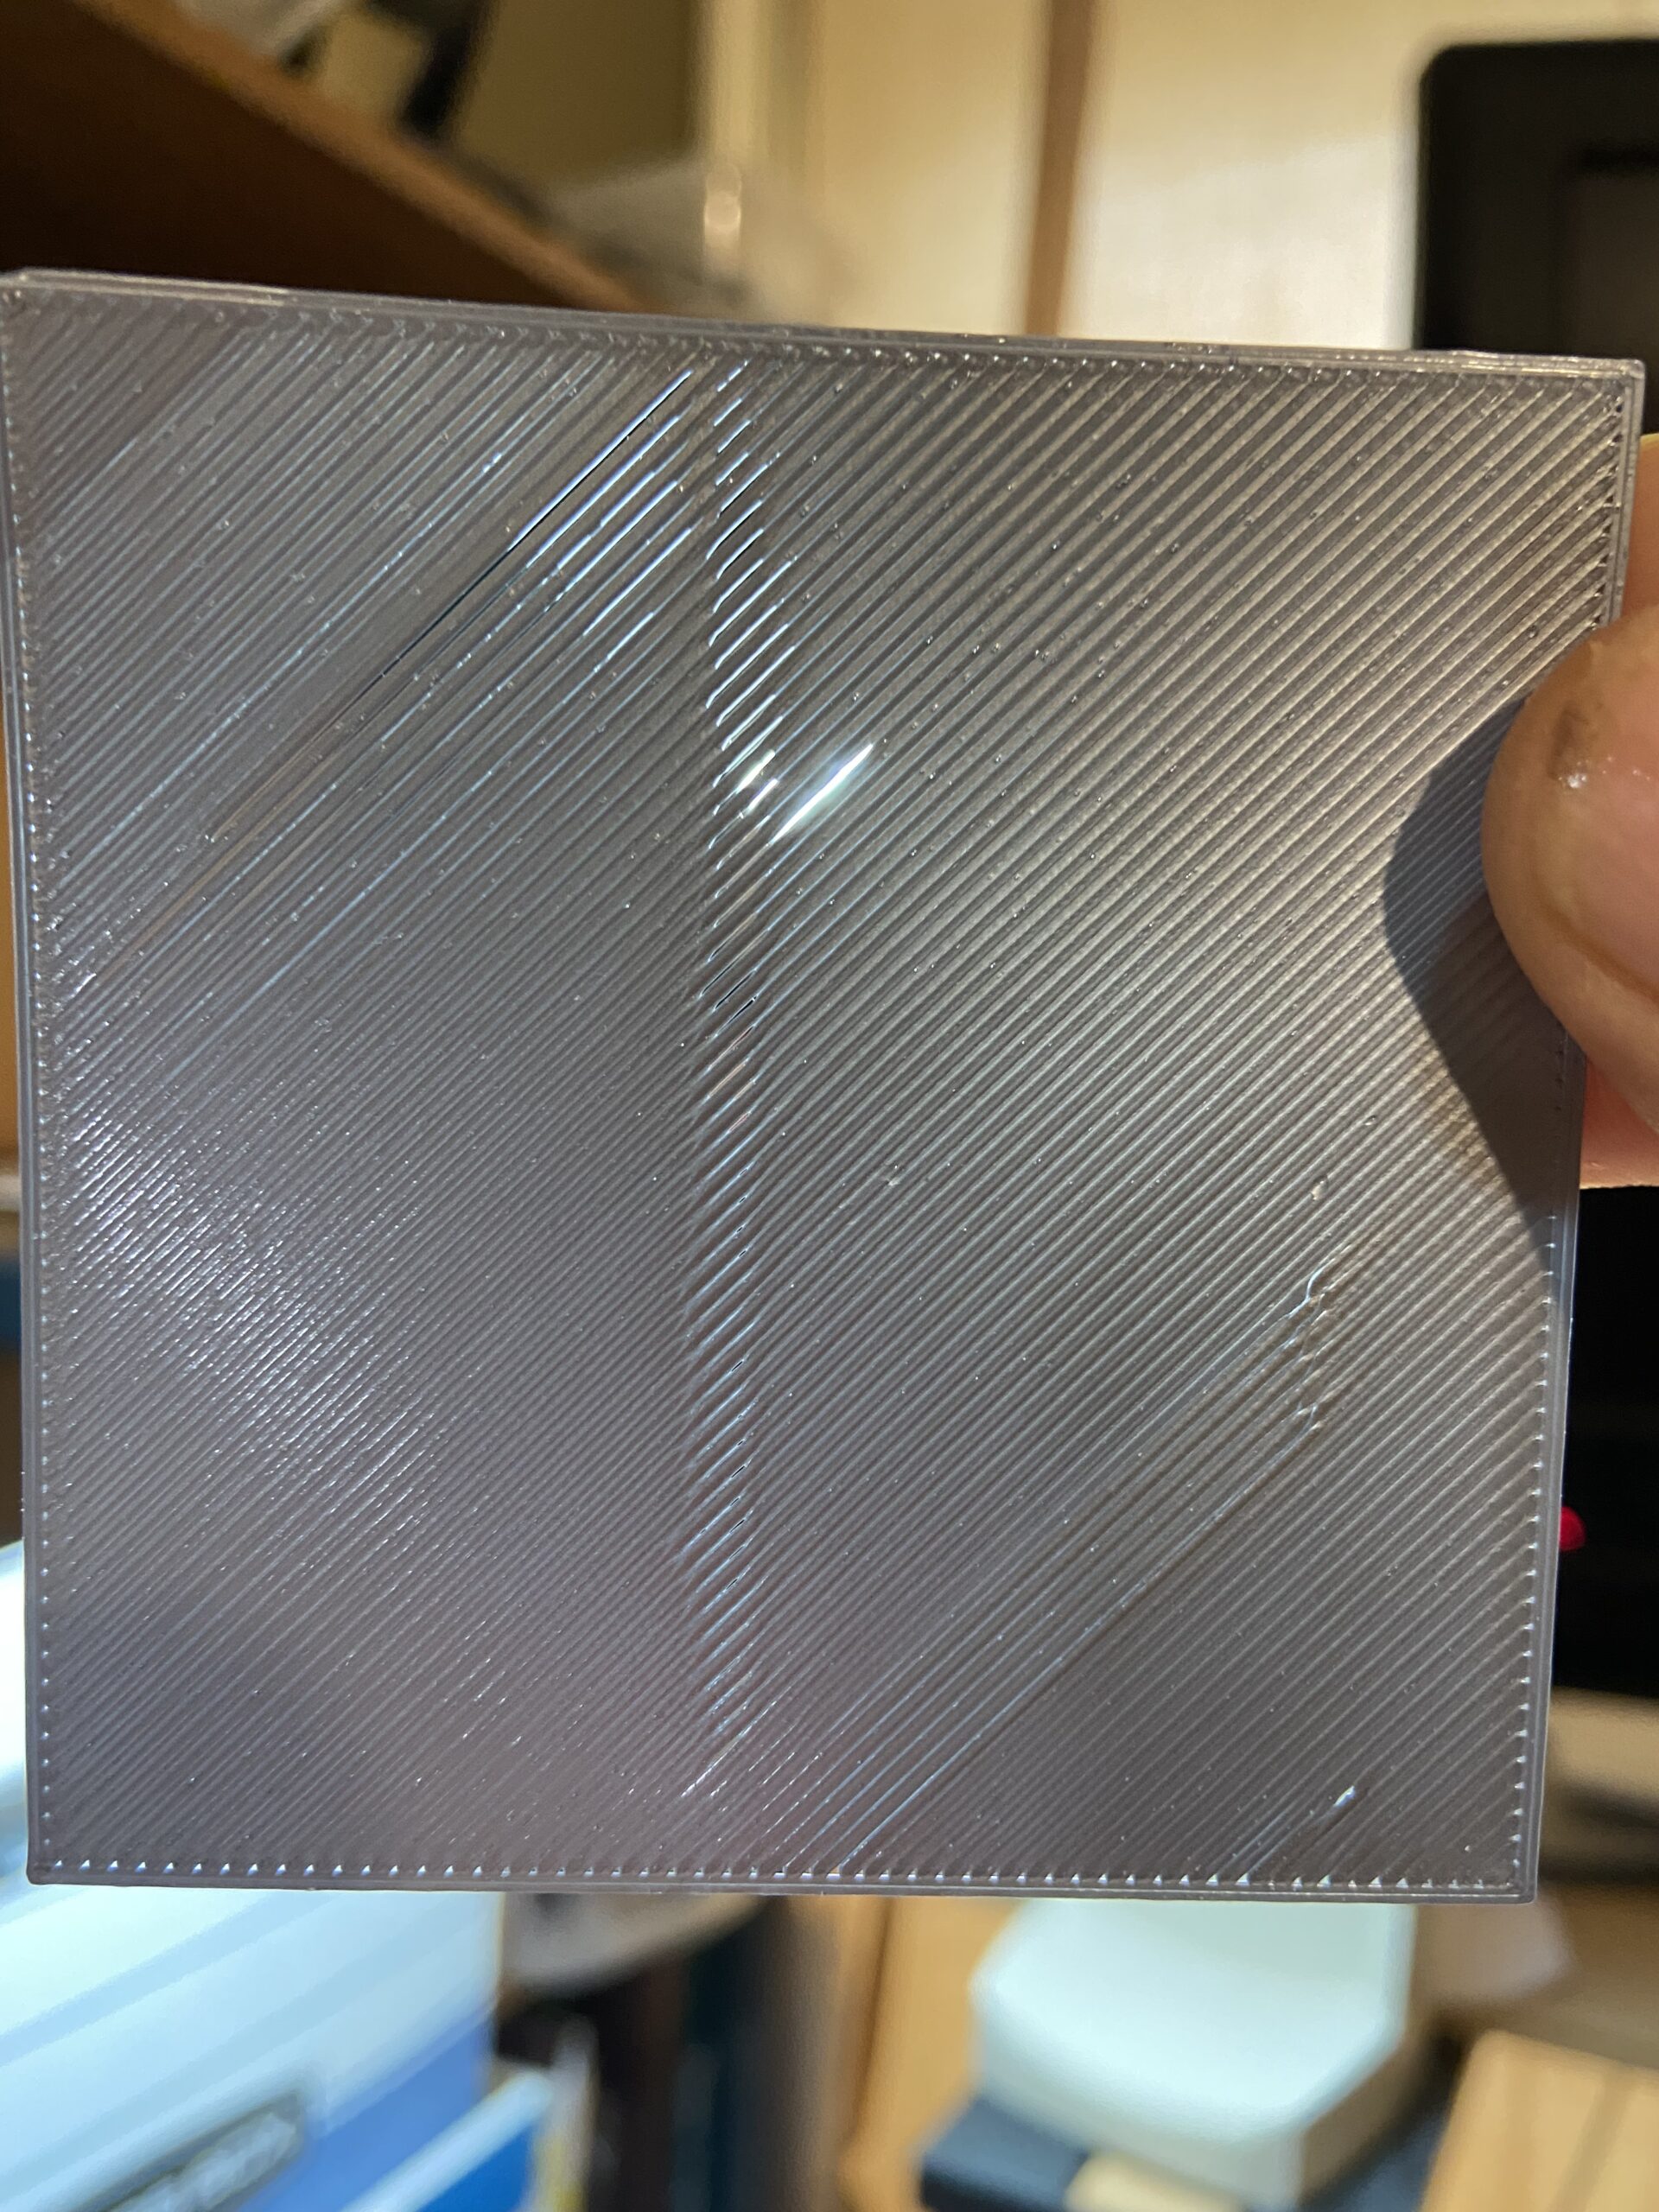
Thanks. I lowered z to - 1.210 and this is the result. Guess I may need to raise even more. Why are the lines not blending well? 
RE: life adjust Z - my way
I just wanted to say thank you! I have printed the test using your files, and it works wonderfully. Thank you for taking your valuable time to help.
Best Regards,
Chris
RE: life adjust Z - my way
Did the test print on my mk3s+ and unsure why it's bumpy on one side. Almost like ridges. I recently did xyz cal before this. Current z is -1.325.
How do I correct this please?
The nozzle is too low squashing the filament sideways, I had that problem before and had to calibrate my Live-Z a bit better.
Thanks. I lowered z to - 1.210 and this is the result. Guess I may need to raise even more. Why are the lines not blending well?
It is impossible to say anything, bad photo quality, you cannot tell if it is too low or too high but according to your previous post, the nozzle was too low.
RE: life adjust Z - my way
Good evening Lynk,
no doubt you have stared intently at the printer whilst it invokes some inexplicable logic, to the order in which it prints sections of models
this wizardry is coded into the slicer that you are using. and sometimes, you get odd results.
the normal result, is that the printer usually prints the perimeters first,
then it picks some apparently random point to start the infill, it then progresses until there is a change in geometry of the perimeters, at which point the printer gets bored with the section that it is working on, and wanders off to a new start point, and begins another patch...
Having very little patience the printer seems to get bored and wander off, with regular monotony.
which leads to lots of part completed sections.
the printer then realises there are bare parts on the print regions, and wanders back to fill in the spaces.
unfortunately, the filament which is already on the build plate, has already cooled by this time, and the new filament sometimes ends up wedged up, higher than expected because the spot the printer wishes to fill, with new filament, already has filament in it. so you get a taller line where there is a fight for space.
the chances are, that your Live Z (First layer calibration, nozzle height adjustment, is still a little too close to the print bed.
Too Large, a negative Live Z value).
this can result in the lines of filament trying to occupy more space than the slicer has allocated for them to exist in.
so the early patches spread out, and the edges of the later patches are unable to fit within the remaining spaces, resulting in raised lines.
there are a number of ways to address this situation, some cause other issues later in the print.
the one I use, is to raise the live Z a little, and cause the lines of filament to be a little taller and a little narrower, resulting in less conflict for space on the build plate.
regards joan
I try to make safe suggestions,You should understand the context and ensure you are happy that they are safe before attempting to apply my suggestions, what you do, is YOUR responsibility.Location Halifax UK
RE: life adjust Z - my way
Thanks Joan, love the explanation:)
As i continued to raise the nozzle from the bed with the live z (currently at -1.200), i indeed saw more of the squares start to feel more smooth along with most of the wedges gone. Will continue to tweak this. Could a situation exist where all the squares are smooth but the calibration square on this post ends up rough?
RE: life adjust Z - my way
Hi Lynk,
I suppose anything is possible.
however usually once you find the sweet spot, the first layers are OK...
Having said that... there was a user further up the list of posts who was planning to increase the flow by 5%.
If they increase the flow for the Live Z setup files, and then forget to add 5% to successive prints, they will get different results...
In my opinion you should use standard values for first layer configuration... then there is less chance of an error at a later date.
regards Joan
I try to make safe suggestions,You should understand the context and ensure you are happy that they are safe before attempting to apply my suggestions, what you do, is YOUR responsibility.Location Halifax UK
RE: life adjust Z - my way
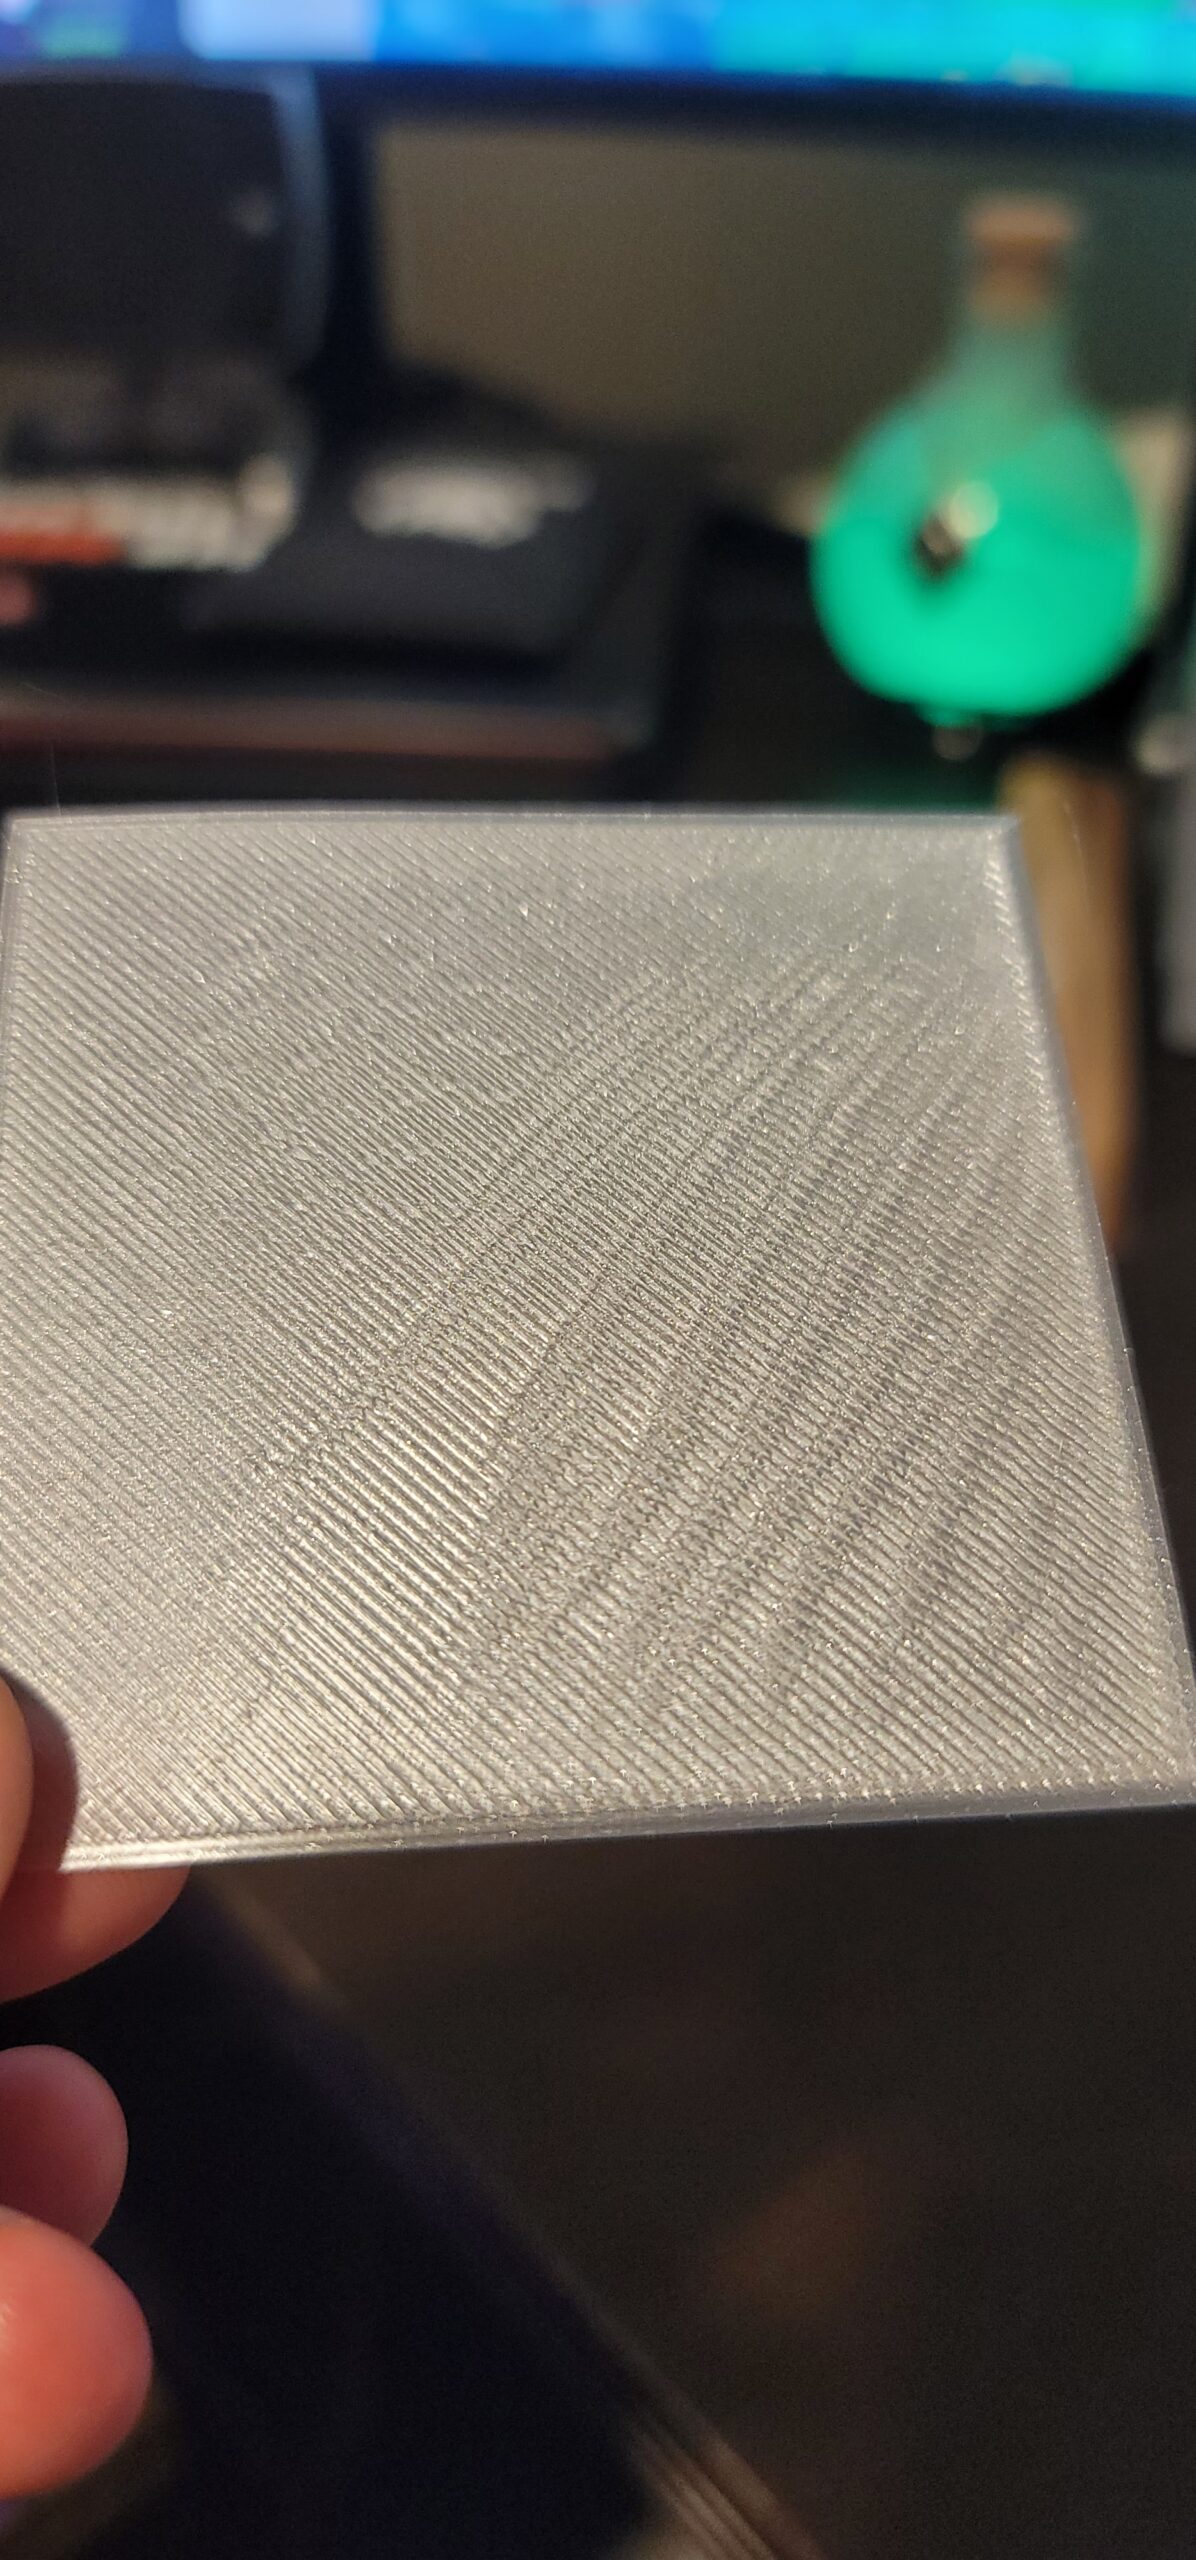
I am new to 3D printing. Just finished building my MK3S+ and have printed many of these test layers. No matter what height I set I am getting the same defect patterns in the print. Every. Single. Time. I'm using 7x7 bed calibration and have cleaned the print sheet with soap, alcohol, and acetone. Does anyone have any suggestions on what I can do to get a print that is consistent? From there I will adjust the right nozzle height. 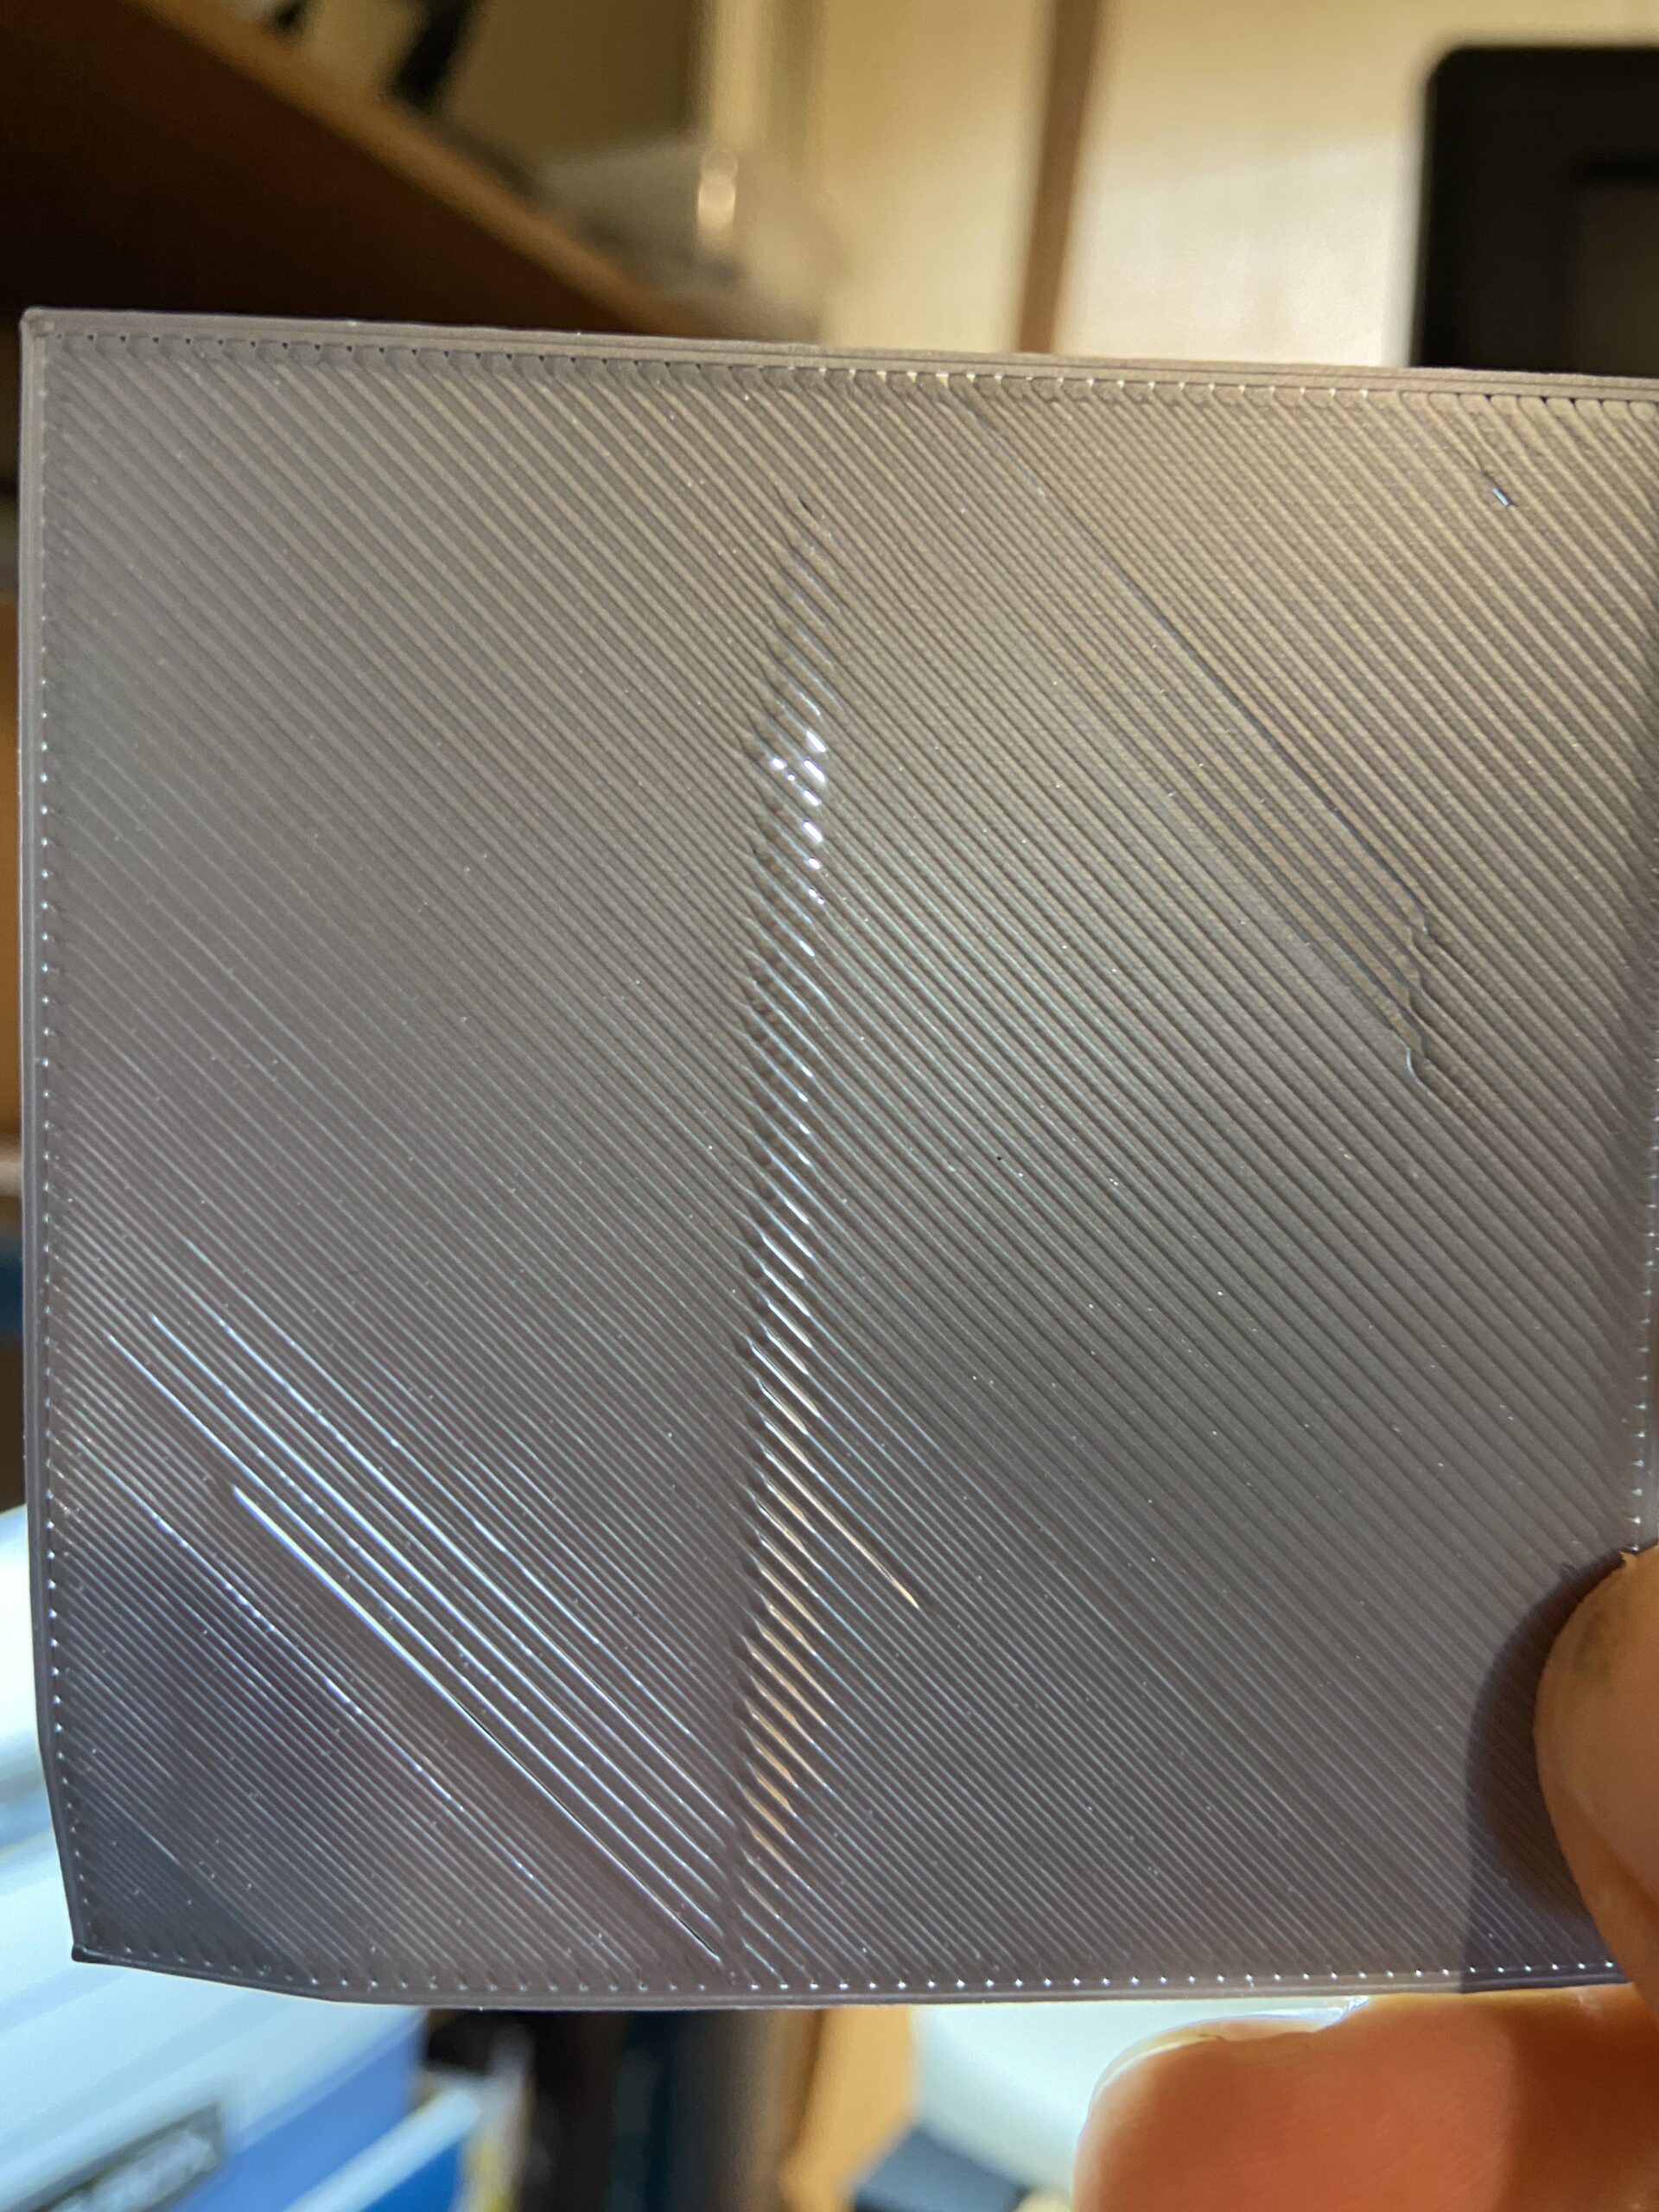
RE: life adjust Z - my way
You have to first adjust the nozzle height to get a consistent print, not the other way around.
When you state “no matter what height I set...” are you referring to the layer height in PrusaSlicer, or are you interactively adjusting your live Z value?
The purpose of the test print is for you to observe the print quality and make adjustments to your live Z height in real time. Once the print starts, press and hold the rotary button down for approximately 2 seconds to bring the live Z value up on the LCD screen. Jot down your starting value, then turn the rotary dial to adjust the nozzle more negative (closer to the bed) or more positive (further from the bed).
The larger the negative value, the closer the nozzle is to the bed. Your prints look like you need to go more negative. There should be no daylight between the parallel lines. They need to squish together to make a solid surface so that when you remove the print and bend it along the print lines it doesn’t break or come apart.
Forgive me if this is too elementary an explanation. It’s impossible to know how far along any new user is in his or her understanding of the basics. Let us know how you make out.
Cheers.
RE: life adjust Z - my way
Thanks for your reply. Yep, I understand what you are saying about going the other way around. I probably didn't explain myself very well.
I'm not using any slicer software, just printing the file I downloaded from the top post for PLA.
I am getting the same defect in the middle and bottom right corner (as seen in the pic I posted) on all my test prints regardless of nozzle height. I've printed at one level for an entire square, and also used live z adjustment. Still get the same defects in the same areas. Does that make more sense? Sorry, I am a noob and maybe not using the right words.