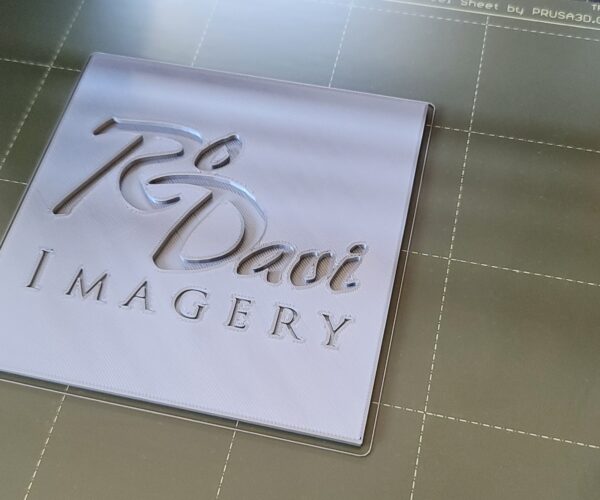
You don't say whether this is a kit or a prebuilt printer - no matter. That is a reasonably good print for a first try.
We generally suggest that new users do not get too ambitious for the first few weeks... Try printing some relatively simple shapes that do not need especially fine finishes, steep overhangs or delicate parts.
Every user builds their printer slightly differently and pre-built models are shaken up in transit so during the first few weeks of use the printer will run-in and settle its parts together; then you will have to go over the basic maintenance checks, lubricate and recalibrate. Even if you got everything dialled in perfectly today, it would all need re-doing.
Better to settle, temporarily, for a basic working printer and get some useful printing done, make your early mistakes, establish a routine and generally get used to the process. Then when you do your one month service you can take extra care knowing the new settings on your now stable printer are likely to last for several months.
That nameplate is quite a good model for early experimentation, I see your curves are showing segmentation, this is an issue with your design software. To improve the letter edges I would try lightly chamfering the top layer or so, also in the design software. I wonder how good it would look with a coat of antique gold paint and another of polish.
Get the idea? Experiment but don't commit to any critical work until you have a little experience.
Cheerio,
RE: First print not from a test file
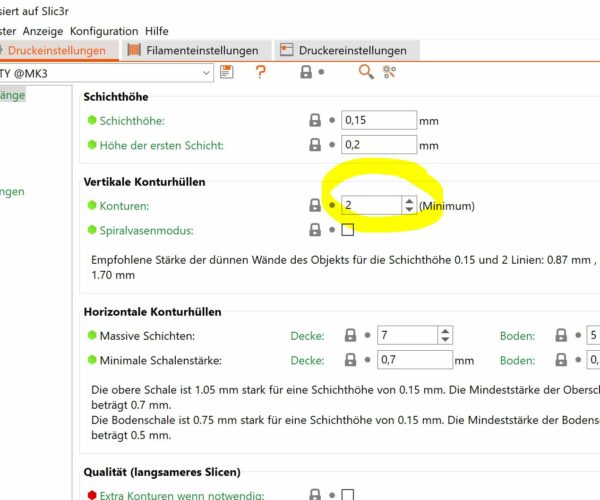
This is not bad at all for a rookie. I´ll second Diem´s view. Additionally, try adding another, third vertical contour or whatever it´s called in English, this will add another outside wall to the object and any of the holes (such as e.g. the holes in the letters) and eliminate the tiny zig-zags between e.g. the a and the v. You can see these additional verticals in the slicer and add more if it fits your purpose.
I try to give answers to the best of my ability, but I am not a 3D printing pro by any means, and anything you do you do at your own risk. BTW: I have no food for…
RE: First print not from a test file
Thank you for the reply. It is a kit, I just finished sending it a couple days ago. Ran z calibration at least a half dozen times before I felt it looked right.
I'm an architect, so I know and use AutoCAD. Is the segmenting/ facetting an issue with Autocad's stl export? Should I get and learn a different program?
I sliced at .15 for the nameplate, so for the chamfer to be noticeable I'd need to go .45mm chamfer? Is that what you mean?
I also had already modeled and started printing a more complicated model before I posted here, maybe should be a new topic, but I'll include it here and see what insights might come from it.
I first modeled it at 3mm thick but did not want to invest 18h32m if it was a complete failure. I reduced it to 1.5mm thick which got down to 12h19m, followed by realizing I would need a couple tabs for attaching and switching to .2mm layering to get down to 9h37m. I see I needed more width at the baseplate for better stability during printing, maybe just more tabs. But it was stable by the time it got to the top and you can see the quality shifts up there. I'm sure that's largely because of moving to .2mm instead of the thinner layers. The bridging inside did not meld together, is that because I should have used supports?
I like the idea for the nameplate of going to 3 perimeter layers around shapes, I'll try that. Obviously I needed to learn a lot about the slicing options. 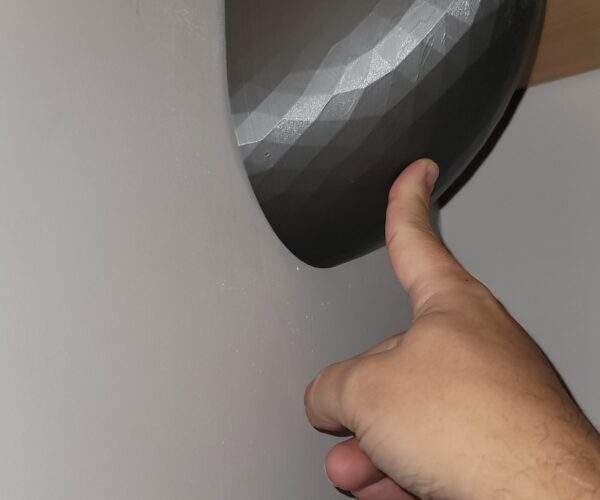
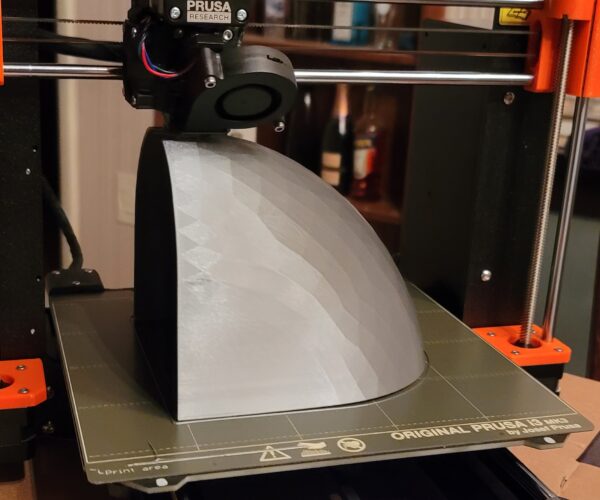
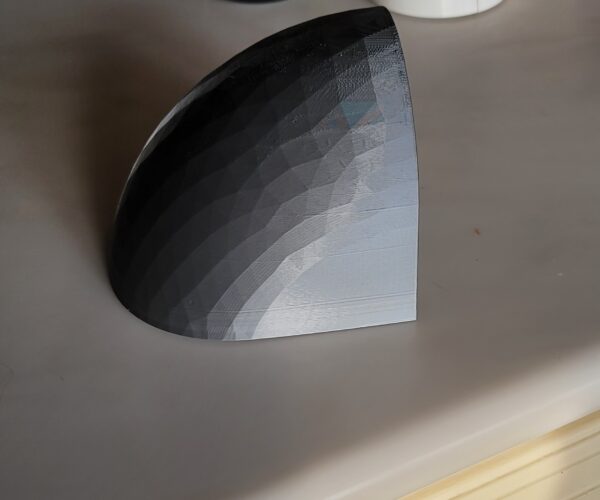
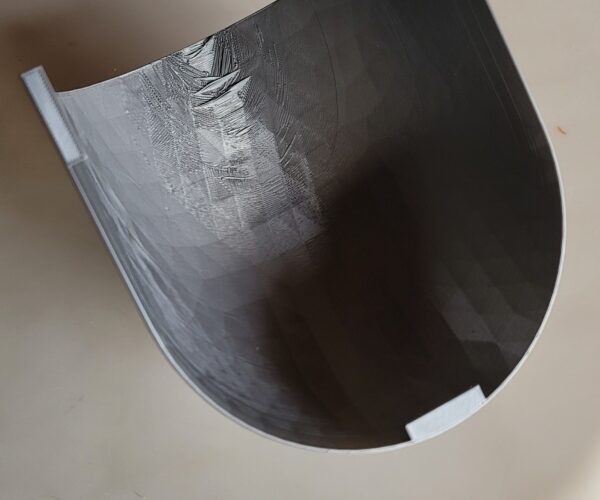
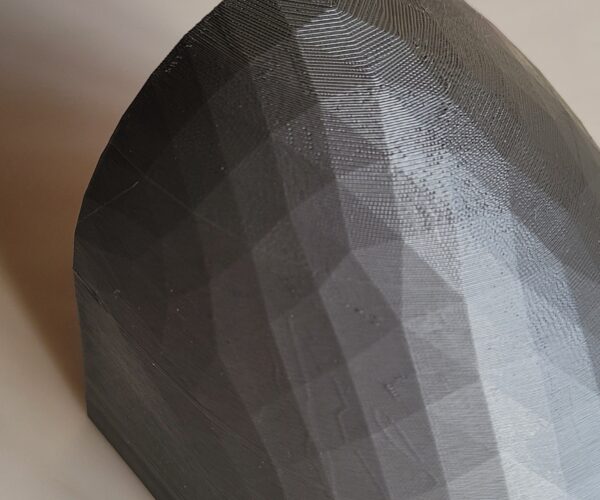
I know and use AutoCAD. Is the segmenting/ facetting an issue with Autocad's stl export? Should I get and learn a different program?
It's a long time since I used AutoCAD ... Yes, it's an export problem, this looks like a default, optimised for speed, resolution. There is almost certain to be a higher precision setting available.
Another program? Maybe, it rather depends on what you will be designing. Try out a few as part of your learning curve.
I sliced at .15 for the nameplate, so for the chamfer to be noticeable I'd need to go .45mm chamfer? Is that what you mean?
Yes, 'though in this case you don't want the chamfer to be noticeable, you are just pulling back the top layer or two to prevent the fragile, sharp, edge thereby making something that will both feel better and have a visually, apparently softer finish. Brush your hand over the plate, are there a few tiny prickles? 5 seconds with fine-grit abrasive paper will also make a difference.
Your hemi-dome clearly shows AutoCAD's low resolution output. There must be a higher resolution setting.
Start thinking about supports when your overhangs go beyond 45 degrees, you will usually be OK up to about 60 with simple shapes. PrusaSlicers's own supports might be excessive here, I would consider a custom support, basically a narrow central blade, as part of the original design.
For better adhesion and stability of narrow vertical objects try turning off the elephant's foot compensation.
Cheerio,
RE: First print not from a test file
Keep in mind that your printer is essentially a robot with a glue gun. There are going to be certain limitations printing with FDM. Further, we call these 3D printers, but really it's more like 2.5D, you have better resolution along the X-Axis and Y-Axis than you do along the Z-Axis. If you're printing at 0.2mm that's the minimum Z height you can get. It's easy to think you'll get a better print at 0.15, or 0.10, but that's not necessarily the case, sometimes all you get with a lower height is a longer wait for the print to finish.
There are settings you can tinker with to improve your prints but at some point you're going to hit a hard wall. FDM printers are not a panacea for creating things, they can do a lot, they're really cool, but you're limited to extruded plastics that bring with them their own limitations.
As for stability during a print, take a look at rafts and brims, they provide more surface area for your print to attach and are easily removable.
Cheers
-Bob
Prusa I3 Mk2 kit upgraded to Mk2.5s, Ender3 with many mods, Prusa Mini kit with Bondtech heat break, Prusa I3 Mk3s+ kit
