First layer Z calibration?
Just got done assembling my printer and my first print first layer looks garbage...
Too high or low?
It is a fraction too low but leave it like that for the moment and concentrate on keeping the print-sheet clean.
I would rate that as good enough for the first month.
Every user builds their printer slightly differently and pre-built models are shaken up in transit so during the first few weeks of use the printer will run-in and settle its parts together; then you will have to go over the basic maintenance checks, lubricate and recalibrate. Even if you got everything dialled in perfectly today, it would all need re-doing.
Better to settle, temporarily, for a basic working printer and get some useful printing done, make your early mistakes, establish a routine and generally get used to the process. Then when you do your one month service you can take extra care knowing the new settings on your now stable printer are likely to last for several months.
Cheerio,
RE: First layer Z calibration?
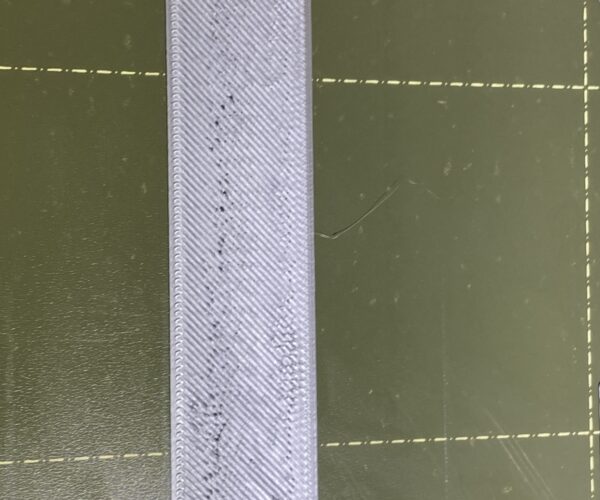
Your Z-offset is way too low. You can recognize that how your filament is extruded on surface: because there's very little space between nozzle and print sheet, filament is squished out on the side and dragged with the nozzle. Decrease Z-offset (raise up the nozzle) until you have smooth flat surface.
[Mini+] [MK3S+BEAR]
Oops! You went the wrong way, that is now too low, too much squish and you need to go back to your previous setting.
Cheerio,
RE: First layer Z calibration?
Hi,
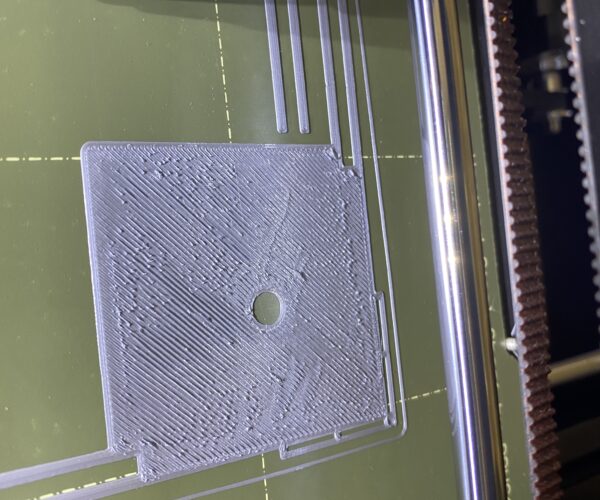
This is my first post and a pic of my first print after completing the build of our MK3S+. I like Diem's post about counting things good until the first month's maintenance but would like some feedback to see if I can dial things in a bit more. My first layer calibration ended up at -1.05. Thanks in advance for the help!!!
RE: First layer Z calibration?
Your first layer is too high, you can see the print broke lose from the bed and shifted. Do a live z calibration and show us 2 pictures of that, a picture of the full bed and the little rectangle at the end.
Cheers
-Bob
Prusa I3 Mk2 kit upgraded to Mk2.5s, Ender3 with many mods, Prusa Mini kit with Bondtech heat break, Prusa I3 Mk3s+ kit
RE: First layer Z calibration?
I am old and my eyesight doesnt do well at close distances.
I wonder if a wider spread of 2cm x 2cm patches spread apart by 10 cm with a pause between patches wouldnt be more helpful for dialing it in for new users.
@zinthoss, you are still too high, you need more squish.
@jeremy-laurenson, it's a little long winded but you can calibrate your first layer Z by feel.
In the built-in calibration print; the long, squared, zig zag is a single trace.
Wash your hands to reduce your fingerprint grease then brush your fingertips over the zig zag. It should be proud but with a detectably flattish top and it should not break free without some effort. If it is too low you will feel the ripples on the square at the end.
Once you are satisfied you must wash the print sheet; you will have left some fingerprints no matter how clean your hands. Use dishwashing detergent and HOT water.
Cheerio,
RE: First layer Z calibration?
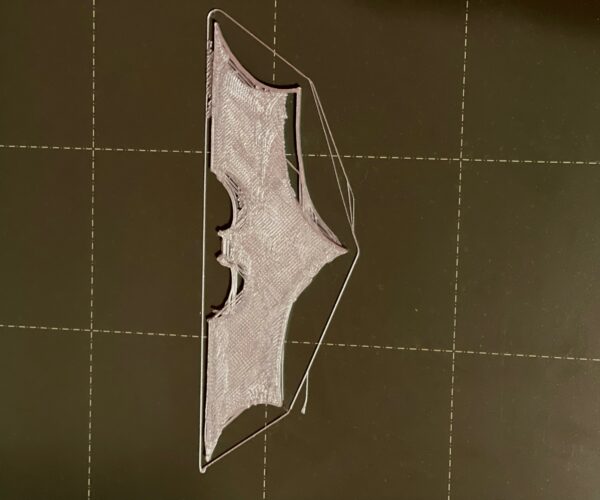
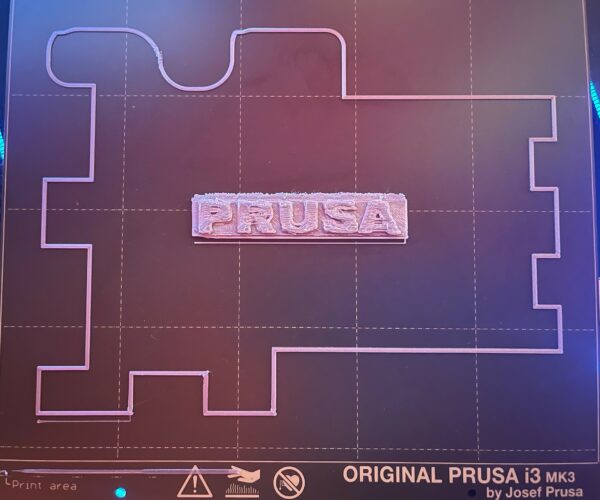
I ran the first layer calibration and stopped at what I thought was a good z value so I printed the prusa test pattern that came on the sd card. However, I'm pretty sure the test pattern should not look like this. Did I not go far enough when adjusting the z value? I went from -1.05 to -1.68.
@zinthoss Run the first layer Z calibration again and show us the print still on the sheet.
Also check the tension of your belts, I suspect they may be a little loose.
Cheerio,


