Can't Correctly Adjust PINDA
Hi,
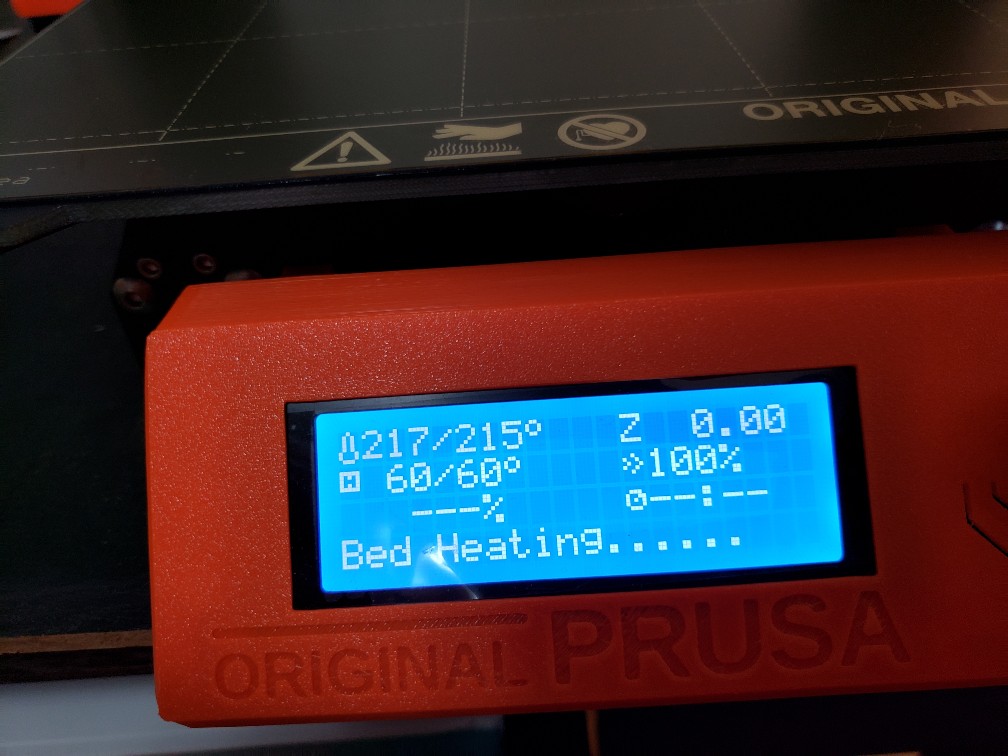
My Z axis setting is 0.000 which means I can only adjust it one way; to raise up the nozzle, but I need to LOWER the nozzle (aka make the Z axis value a more positive or larger number) 🤬
See my Z axis setting:
SooOoooooOOo.....somebody suggested I adjust my PINDA (move it up higher, further away from the build plate). But sadly, and frustratingly - you can ONLY adjust the PINDA an entire thread up or down - as shown, and is clear from these pictures. I adjusted it an entire thread up......then when I did, during the X,Y, Z calibration the nozzle grabs the paper, which it IS NOT supposed to.
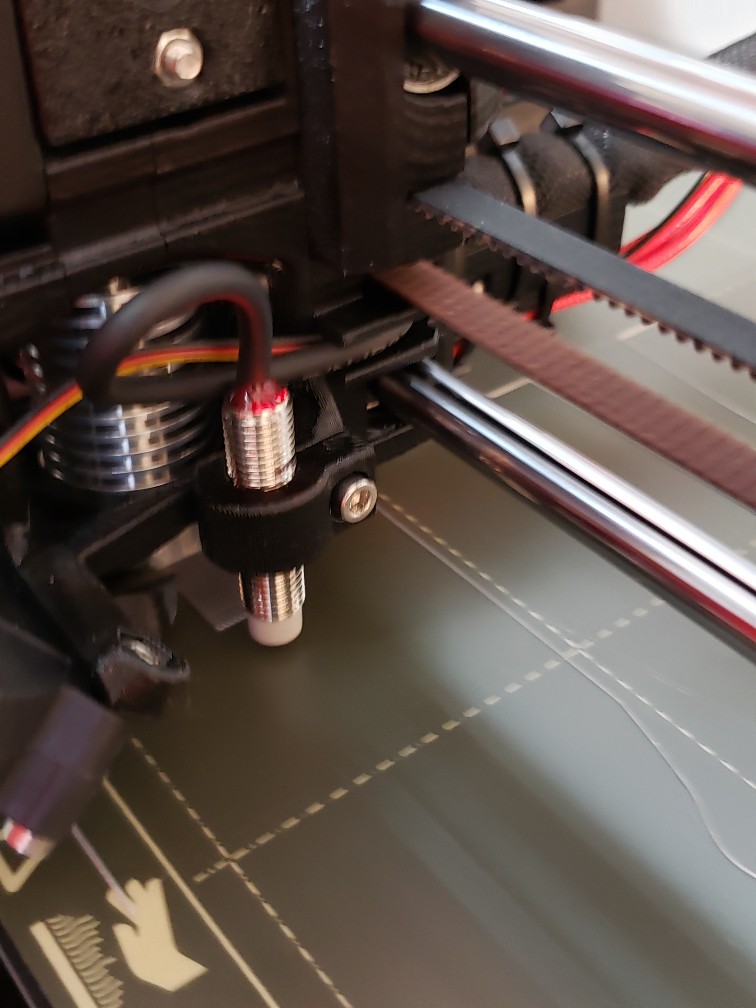
I am soOOOOooOOoo frustrated - Why isn't there a BETTER adjustment for the PINDA? The electric cable soldered at the top prevents you from moving it freely 1/4 of a thread turn, which is what I need.
The INITIAL Z-axis starting point must be some negative number, and mine is exactly 0.000 which means I can not adjust it more positive or lower the nozzle. The only way to change the initial Z-axis number is to adjust the PINDA, correct?
Any suggestions ?
Frustrated in Filly
RE: Can't Correctly Adjust PINDA
Set the PINDA like the manual says. Lower the nozzole to the build plate and stick a piece of zip tie under the PINDA.
Lower the PINDA until it touches the zip tie. Now tighten the clamp and forget about it. Where it is is fine.
Setup and Calibrate, again like the manual says. Z values will always be negative, likely -.750 to -1.100.
The firmware will not even allow positive numbers on Z.
Watch this; it may help you:
RE: Can't Correctly Adjust PINDA
@robert-rmm200
Robert - Appreciate your help
you don't get it - zip tie or no zip tie - you have no actual FINE ADJUSTMENTS on the PINDA. Yeah I did the zip tie thing - you can move the PINDA
- up one ENTIRE thread
- down one ENTIRE thread
.....that's all you got........... terrible design. There should be a FINE adjustment to the PINDA that move is 1/4 of a thread up or down - to be honest. You'll probably see that in future versions.
What I did was this - I found there is a separate z-axis adjustment in the menu items and I used that.
~~~~~~~~~~~~~~~~~~~~~~~~~~~~~~~~~~~~~~~~~~~~~~~~~~~~~~~~~~~~~~~~~~~
So I got it - not by following the directions, but by using this z-axis ajdustment
~~~~~~~~~~~~~~~~~~~~~~~~~~~~~~~~~~~~~~~~~~~~~~~~~~~~~~~~~~~~~~~~~~~~~~
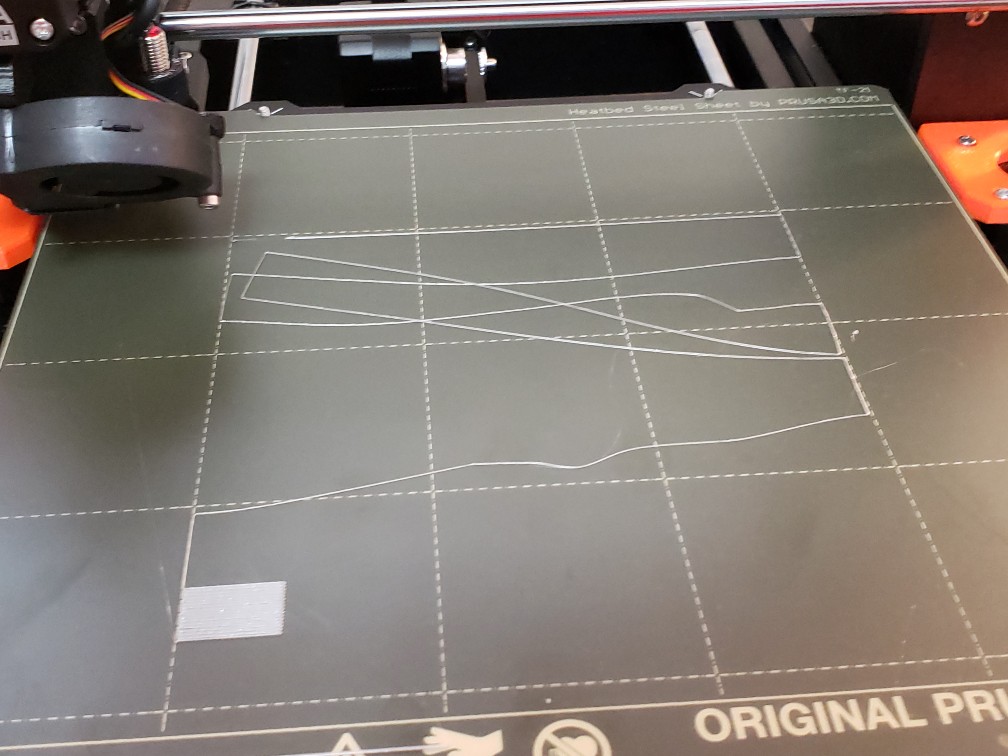
So now.... here's where I'm at and what is happening. I print a part - and the part prints to about 50%, I always include a brim ------ no problem, everything is great, then at around 50%, the part comes off the build plate, (but not until it's been printing about 50% of the way done).
What are the best brim settings?
Any Suggestions?
Thanks in Advance!!
RE: Can't Correctly Adjust PINDA
Just to eliminate the obvious: Have you completed a Live-Z calibration? Sounds like that the fine adjustment you're looking for, and I don't see anywhere in your description that you've done it. Negative numbers in Live-Z lower the nozzle incrementally towards the bed.
RE: Can't Correctly Adjust PINDA
@bobstro
Thank you
Yes - I did a live Z calibration. Initially - the problem, as explained above, was that my Z value was 0.000 and as you know, there is/was no room for adjustment with this Z value. Thus - I needed to adjust the PINDA first, in order to get the Z value to a slightly negative number, where I can actually adjust it (either a little more positive or negative). With a Z value of 0.000 - which is what it was to start after my initial setup, and my initial X, Y, Z calibration - there's no room for positive adjustment (to move the nozzle closer to the build plate), I could only move it more negative (further away from the build plate).
However......after going into the settings and offsetting or adjust the Z value by itself.....then, I came back and did a live Z calibration, and now my starting Z value was -0.2 something, which gives some room for both positive and negative adjustment.
Thanks
RE: Can't Correctly Adjust PINDA
[...] Yes - I did a live Z calibration. Initially - the problem, as explained above, was that my Z value was 0.000 and as you know, there is/was no room for adjustment with this Z value. Thus - I needed to adjust the PINDA first, in order to get the Z value to a slightly negative number
Well... when you 1st reset the printer, the Live-Z setting should be 0. You can do the same thing in the hardware menu under the build plate selection option. This 0 represents your PINDA's detection distance and will be the zip tie measurement comes in. That is 0. If you move the PINDA and repeat, 0 will move up or down. The PINDA has no other sense of 0. Moving the PINDA physically up and down will not "change" 0, merely where the PINDA probe detects 0.
When you do Live-Z calibration, you are applying a negative offset (negative value) to incrementally lower the 0 point. If 0 is a zip tie thickness above the build plate, lowering Live-Z (making it more negative) will lower the nozzle incrementally. From what you're describing, this sounds exactly like what you're trying to do.
Typically, you only physically raise or lower the PINDA if it is so high the nozzle hits the bed, or so high you have to apply a huge negative Live-Z value to get any sort of 1st layer adhesion.
The PRUSA does not need the PINDA (or bed) raised or lowered like most other printers once you have it assembled correctly. The Live-Z calibration will provide a good range of adjustment downwards.
I hope this makes sense. You seem to be describing a manual 1st layer nozzle gap adjustment as is done on cheaper printers, and it's simply not necessary. Sorry if I've misunderstood anything.
RE: Can't Correctly Adjust PINDA
I realize this is old, old, old, but it might help someone. I think the OP was thinking that the Pinda was supposed to thread up or down. It doesn't. If you loosen it enough it is adjustable. The threads on the pinda give a false impression that you must thread it up or down.
RE: Can't Correctly Adjust PINDA
Not only that, i think he does not understand, that the live z adjustment moves the nozzle towards the bed.
RE: Can't Correctly Adjust PINDA
I realize this is old, old, old, but it might help someone. I think the OP was thinking that the Pinda was supposed to thread up or down. It doesn't. If you loosen it enough it is adjustable. The threads on the pinda give a false impression that you must thread it up or down.
I too realize this is old but this thread pops up on a web search. The above is not entirely true, at least not for every printer. I did exactly that, the screw was fully loosened, and I ended up breaking off the pinda bracket on the extruder body. I doubt I am alone. I added some wear and tear on the new extruder body so it does slide up and down without so much force that it breaks the bracket.
Yes, I am a noob and don't know what I'm doing. This post isn't for those who do know what they are doing, it's for the other noobs like myself. Don't just think you can move it up and down, it might need threading in order to prevent the bracket from breaking like it did for me.
Don't propagate this confusion to new users.
Once the PINDA is installed, unless it is out of its 2mm wide position tolerance (ie, wrongly installed) DON'T MOVE IT.
The first layer 'Z' calibration takes care of fine adjustment and will need to be redone every few months as your nozzle wears or if you replace the nozzle.
Cheerio,
RE: Can't Correctly Adjust PINDA
Don't propagate what? I did not propagate the reason for moving the Pinda, I propagated that if you do move it, don't break it. I'll stand by that.
I did a full calibration after printing went bad (was printing fine for over a year). I put a piece of paper under during the calibration and the nozzle started shredding it. All searches I did pointed to needing to move the Pinda, like these threads:
https://forum.prusa3d.com/forum/original-prusa-i3-mk3s-mk3-assembly-and-first-prints-troubleshooting/xyz-calibration-paper-is-moving/
https://forum.prusa3d.com/forum/original-prusa-i3-mk3s-mk3-hardware-firmware-and-software-help/nozzle-keeps-catching-on-paper-in-xyz-calibration/
Why did the XYZ calibration start shredding my paper after I've used the printer fine for a year ? I don't know, but anyone having the same issue has a valid reason to move the Pinda, at least based on search results in this forum. If you want to propagate not moving the Pinda at all, start with those threads. They are what got me moving mine.
RE: Can't Correctly Adjust PINDA
My Z axis setting is 0.000 which means I can only adjust it one way; to raise up the nozzle, but I need to LOWER the nozzle (aka make the Z axis value a more positive or larger number) 🤬
I belive it is only possible to lower the z, which is as you state a positive value.
to do so I would add a negative value. are you unable to do so?
RE: Can't Correctly Adjust PINDA
This thread really adds to the confusion of new users. Sure, "if you move the PINDA do not break it" is a good advice, but actually you can apply this to pretty much everything including the PINDA.
What Diem said is the better advice: Install the PINDA correctly and you never have to move it. Just do the xyz-calibration and the first layer calibration and everything is fine. If you install the PINDA incorrectly no calibration or setting will get aour printer working...
If at first you don't succeed, skydiving is not for you.
Find out why this is pinned in the general section!
RE: Can't Correctly Adjust PINDA
I really only started with commenting that " If you loosen it enough it is adjustable" isn't always true, which it isn't. In my case the bracket broke before it budged and I did not apply a lot of force.
"Never move it" doesn't apply if for example you want to replace the pinda with a superpinda, which I was going to do anyway while I was at it trying to resolve my issue since I had one laying around.
So, clarification for noobs that, like myself, stumble in here after searching. If you are trying to resolve an issue that suddenly happened, adjusting the pinda is a bad idea as stated above. However, if there is an issue with the pinda itself and you intend to replace it or upgrade to superpinda, you may need to unthread it instead of pushing it like a lot of people suggest. The bracket can break easily.
RE: Can't Correctly Adjust PINDA
Did that guy ever finally realize to turn the dial to adjust z during live z. Z always starts at 0.000 unless you already did live z. I know my problem is probably stupid. So there's no way I'm going to post anything about it. I'm just gonna keep reading until I figure it out. There's more than enough info in all these threads to fix any setup problem.