Base Level Calibration Issues
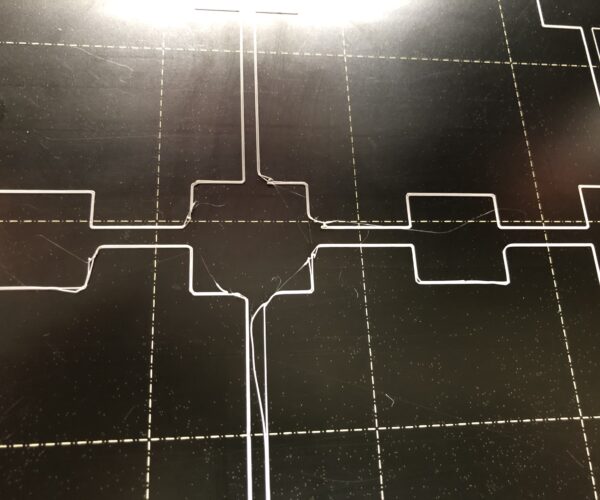
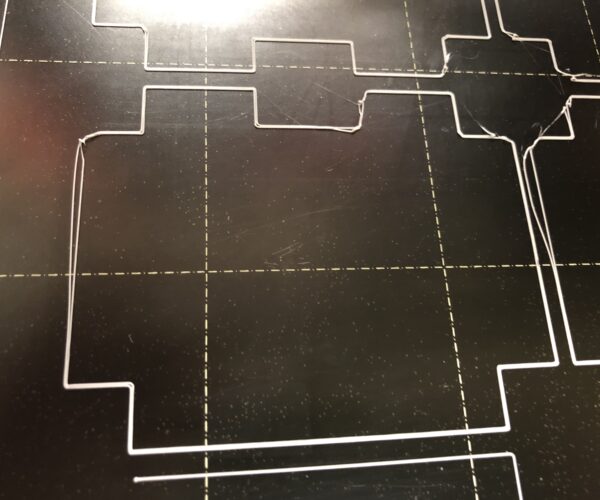
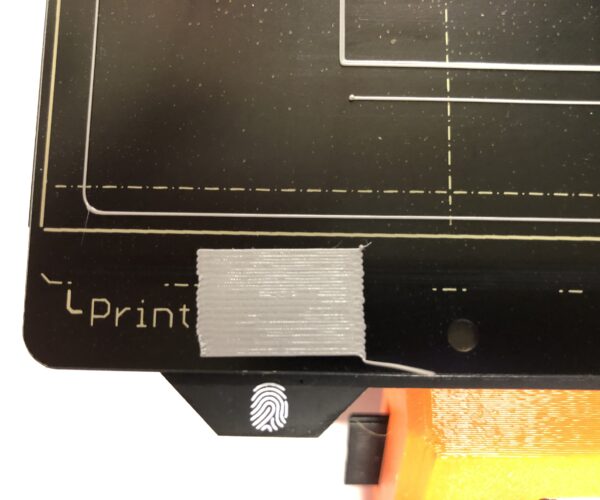
After doing some work on my I3 MKS3/MMU2S I wanted to redo the first layer calibration and base level adjustment. I performed the calibration and have a very nice looking example at 0.585. My problem is when I try to print the base level adjustment pattern (as shown below). At some point it appears that the second pass lines get messed up (pulling the first layer off?) and I can't figure out why. The last image is of the first layer calibration result (0.585).
Any help would be greatly appreciated. Thanks.
RE: Base Level Calibration Issues
Such issues are usually related to bed adhesion, Live-Z or some combination of both.
Try taking the PEI sheet to the kitchen sink and giving it a scrub under hot water with plain Dawn/Fairy dish soap or your local equivalent. Scrub it with a clean plain paper towel and dry it with another. Do nothing else to the PEI surface and avoid touching it.
Replace the sheet on your printer and try Jeff Jordan's "Life Adjust" procedureto calibrate your Live-Z. It is much easier to use and understand than the on-board routine.
Although these seem rudimentary, they are essential to getting a good 1st layer. Try these 2 steps and if you still have problems, report back annd we can continue from there.
and miscellaneous other tech projects
He is intelligent, but not experienced. His pattern indicates two dimensional thinking. -- Spock in Star Trek: The Wrath of Khan Unfortunately,…
RE: Base Level Calibration Issues
Thank you for the response. Washing the build plate with Dawn worked very nicely and I will put that process into a weekly or daily thing to do. The instructions for Jeff''s "Life Adjust" procedure failed to work. I believe it failed to work because of the MMU2S attached to this printer and the provided G-code wasn't ever modified for the MMU2S. If you or somebody has the source STL I can then redo the G-Code generated from the PrusaSlicer for the MMU2S.
If you have any other ideas I certain open to trying it.
Thanks.


