Another z issue? Prints pull off sheet after 5-10 layers....then a mess!
Hi!
I have been having a consistent issue with initial prints (PLA and PETG). Will print ok for the first 3-20 layers, then something 'catches' and the model is pulled from the plate and see a combo of spaghetti and blobs with the model moving all over the place.
Have re-leveled, run the first layer, and other configurations multiple times. Still not sure if z-leveling correct.
Very appreciative of any thoughts/ troubleshooting.
RE: Another z issue? Prints pull off sheet after 5-10 layers....then a mess!
First thought is to clean the sheet with warm water and dish soap. It might seem like the print is sticking - it not well enough!
Also I find the smooth sheet is best for
PLA where as in use the textured sheet for PETG.
I recall also having an issue with the cooling fan when I first assembled my printer. I had to angle cooling nozzle down a bit.
**FIXED**RE: Another z issue? Prints pull off sheet after 5-10 layers....then a mess!
Fixed: this was 100% an adhesion problem due to z-axis tuning and not bed or extruder problem.
Once I completed the recommendations here, see below.
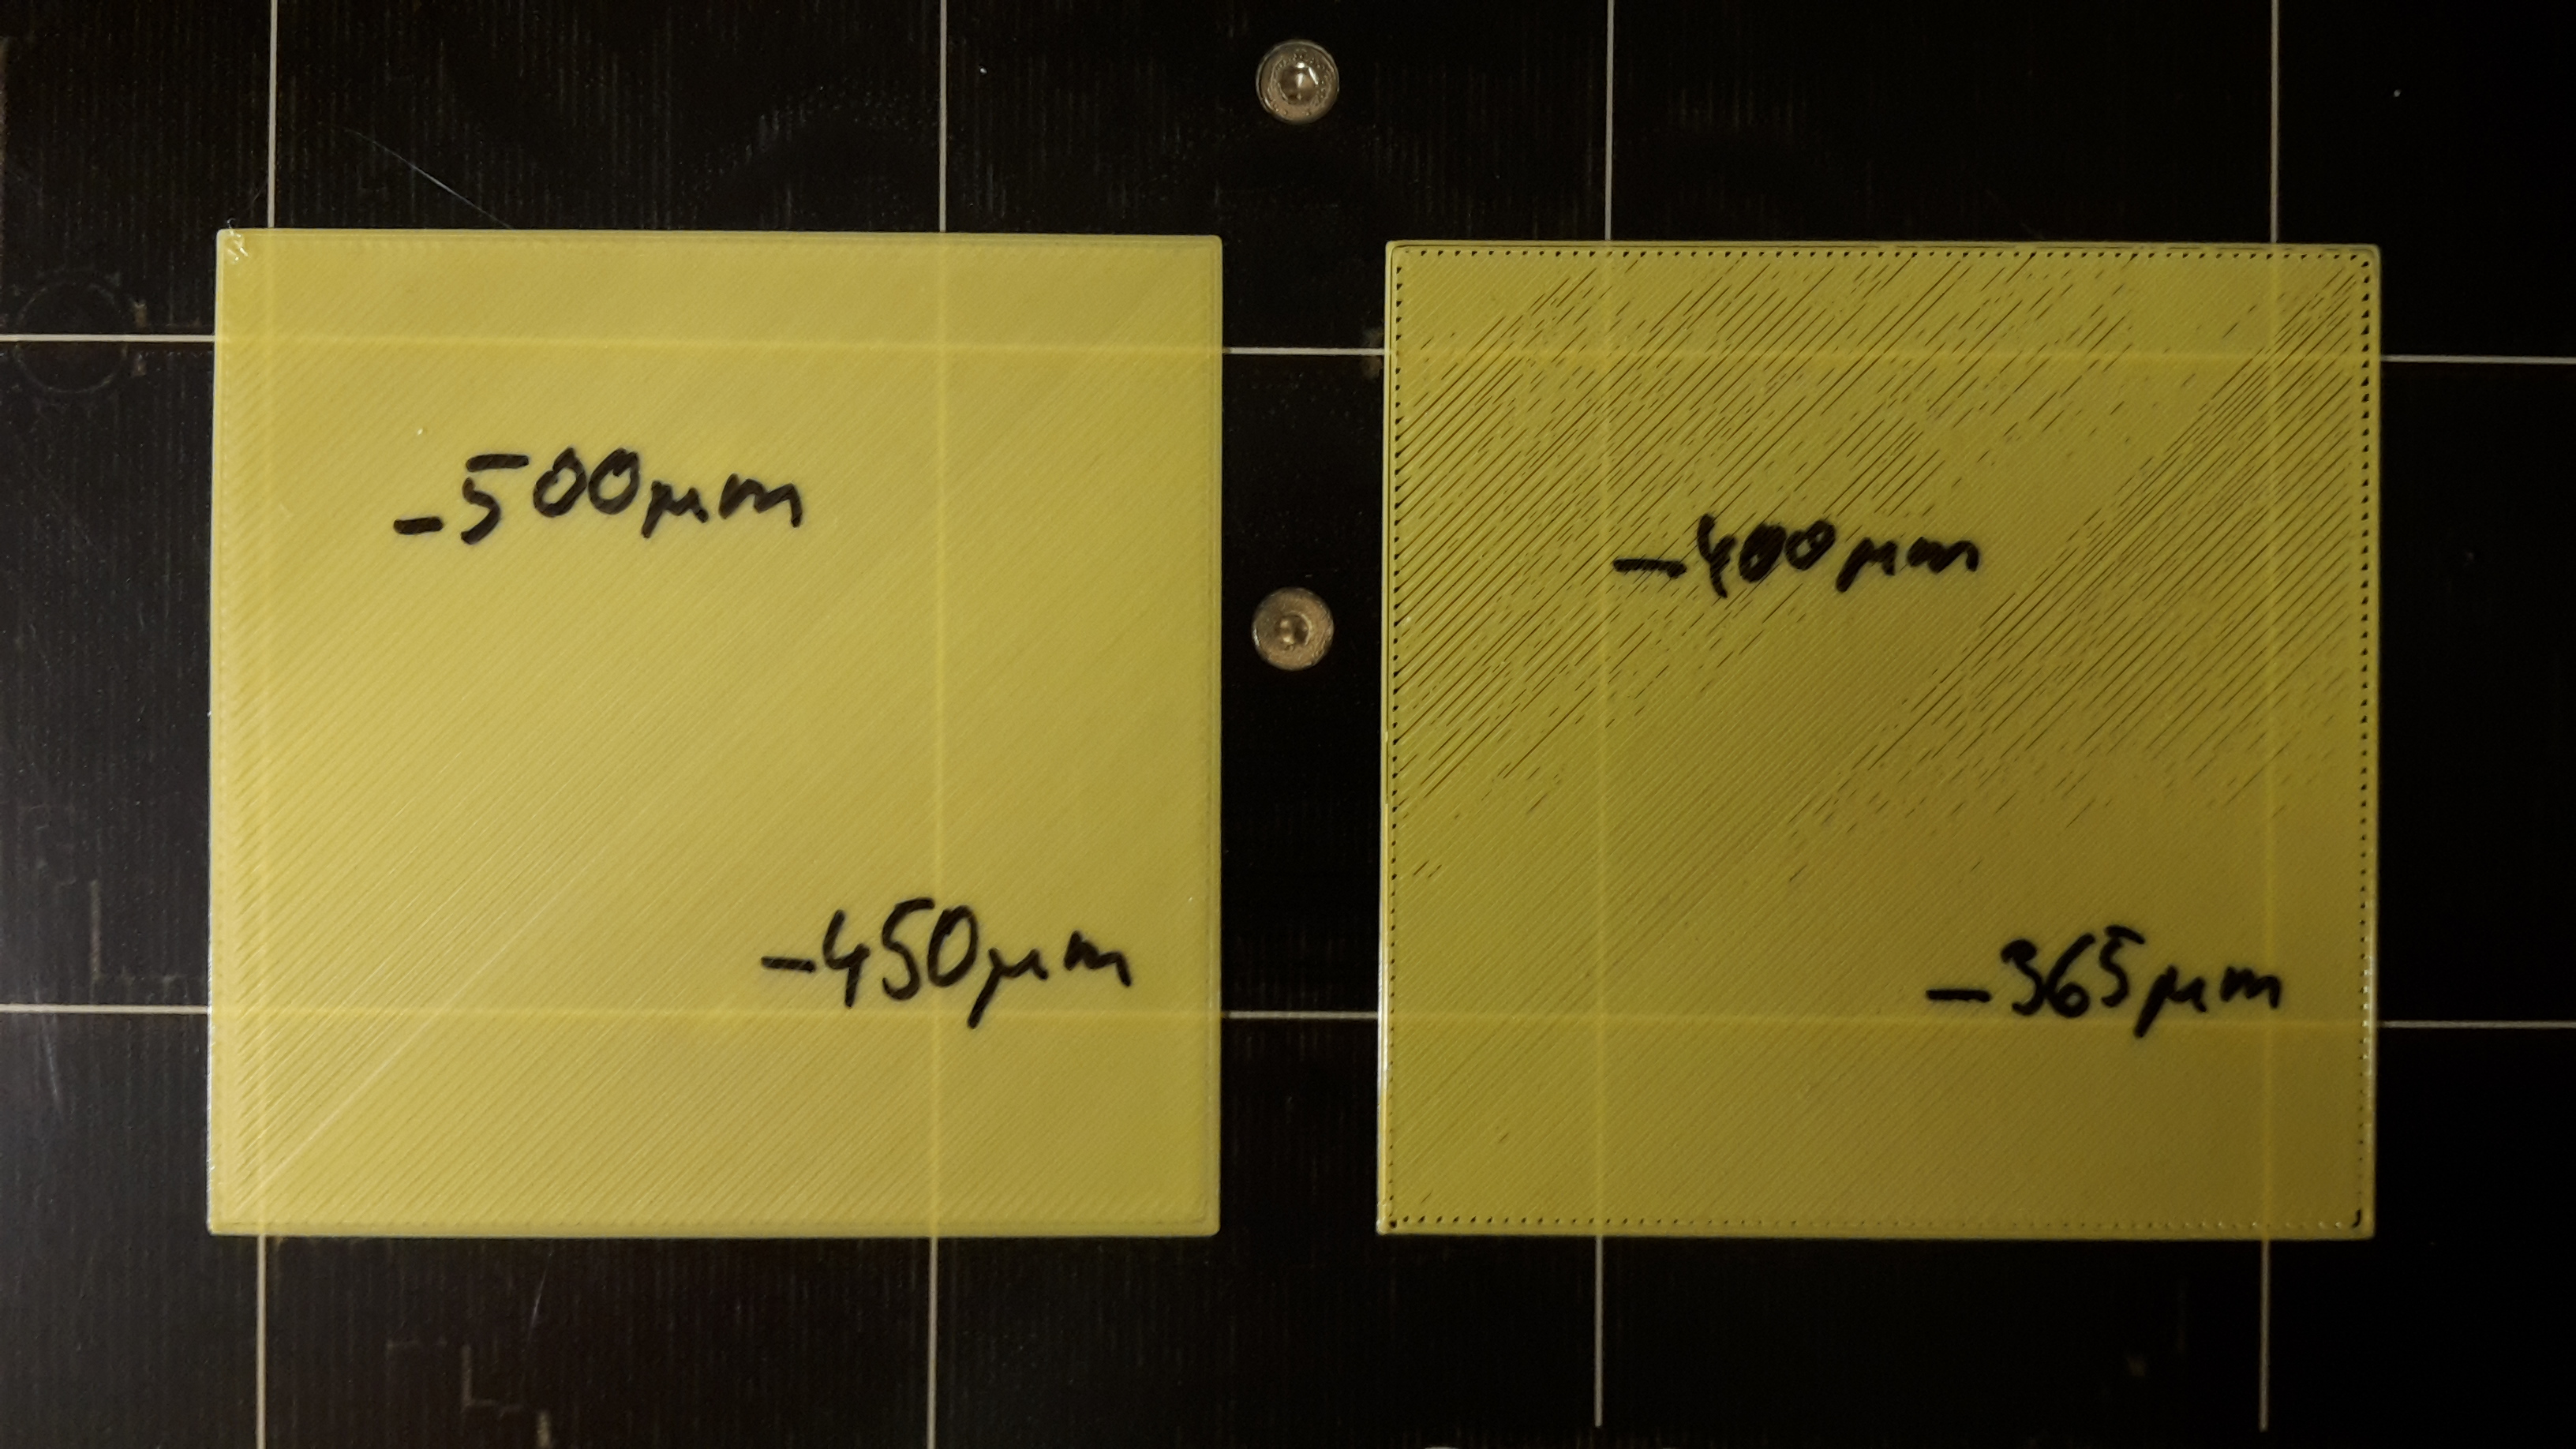
The larger test pattern makes a huge difference as described. As a novice, I underestimated the adjustment needed and played around from -.250 to -.500 until I found the sweet spot at -.450 which will differ for each printer setup. I looked for a smooth pattern without gaps, that was pretty 'sticky' with a flattened bead. The instructions for basic setup and images of beads aren't really helpful in themselves.
hi community
just want to share with you my way of finding the right correction value for the life Z adjustment.
just in case that somebody still tries to get it right with the v2 calibration gcode that came with the kit, which i think is only of limited usability.💡
find attached a little gcode that should print a 75x75mm surface with 0.2mm height (PLA settings).
i simply print this file in a bright color (takes about 12 minutes) and change the life Z adjustment level in the middle of the print, when the diagonal of the square is reached.
so a little film is printed. a good idea is to write the settings with an edding at the sheet 😉 .
i repeat the procedure until i get a completely smooth and homogenous surface.
in addition it's a good idea to measure the thickness of the film with a micrometer gauge or a digital vernier calliper ❗➡ when you look at the attached picture, you can see at first sight, that the right foil (with the -365um and -400um) shows some small gaps, which indicates that you need to squish down the nozzle a little bit more.
furthermore you can see that the -500um setting delivered the best result, and as you can guess: it's thickness was exactly 0.20mm.anything more to explain ?
update:
just forget to tell you how you can get the film off from the heatbed without damaging it:
just use coolant spray at one edge. the sheet will immediately curl up and you can get it off easy as pie from the printing surface with your spatula.edit 17th january: just replaced the attached gcode file with one where i added a "G1 Z=10.000 F1800" at the end, just to make sure that the nozzle moves up a little bit more (would remain at 0.2mm after the print).
edit 29th of august: removed the first test sheet (which has been downloaded more than 1000 times) and replaced it by the most recent one (v4).
With the advent of the Prusa Mini the files above, proved unsatisfactory,
I add the file below in the hope that Mini users find it useful, the Contents are a .3mf file with the test patch on the build plate, so that you can edit it for new filaments, plus ready made test patches, for PETG, PLA and ABS.
Please let Joan.t know if there are any problems. 75mm square Mini Life Adjust Z.
➡ update (14.01.2018): calibration surfaces for PLA, ABS & PETG (generated with the latest S3D version, lin-advance, G87 and preheat procedure to avoid nozzle dripping (tnx 2 PJR)):
Attachment removed
Thanks!
Thank you for these. Clearly I was too high on my PTEG prints. It is much easier to see that on these larger test squares, and adjusted midway through give a good compare/contrast opportunity. The alarm at the mid point is helpful. The "zip tie" PINDA adjustment leaves me little Z down adjustment. I clearly have to go lower with a textured sheet and PETG. I might have to move my sensor up a few thousands of an inch to get closer to -1mm with PLA on a smooth sheet for a little more down adjustability with the PTEG.
