1st print started off okay
hello
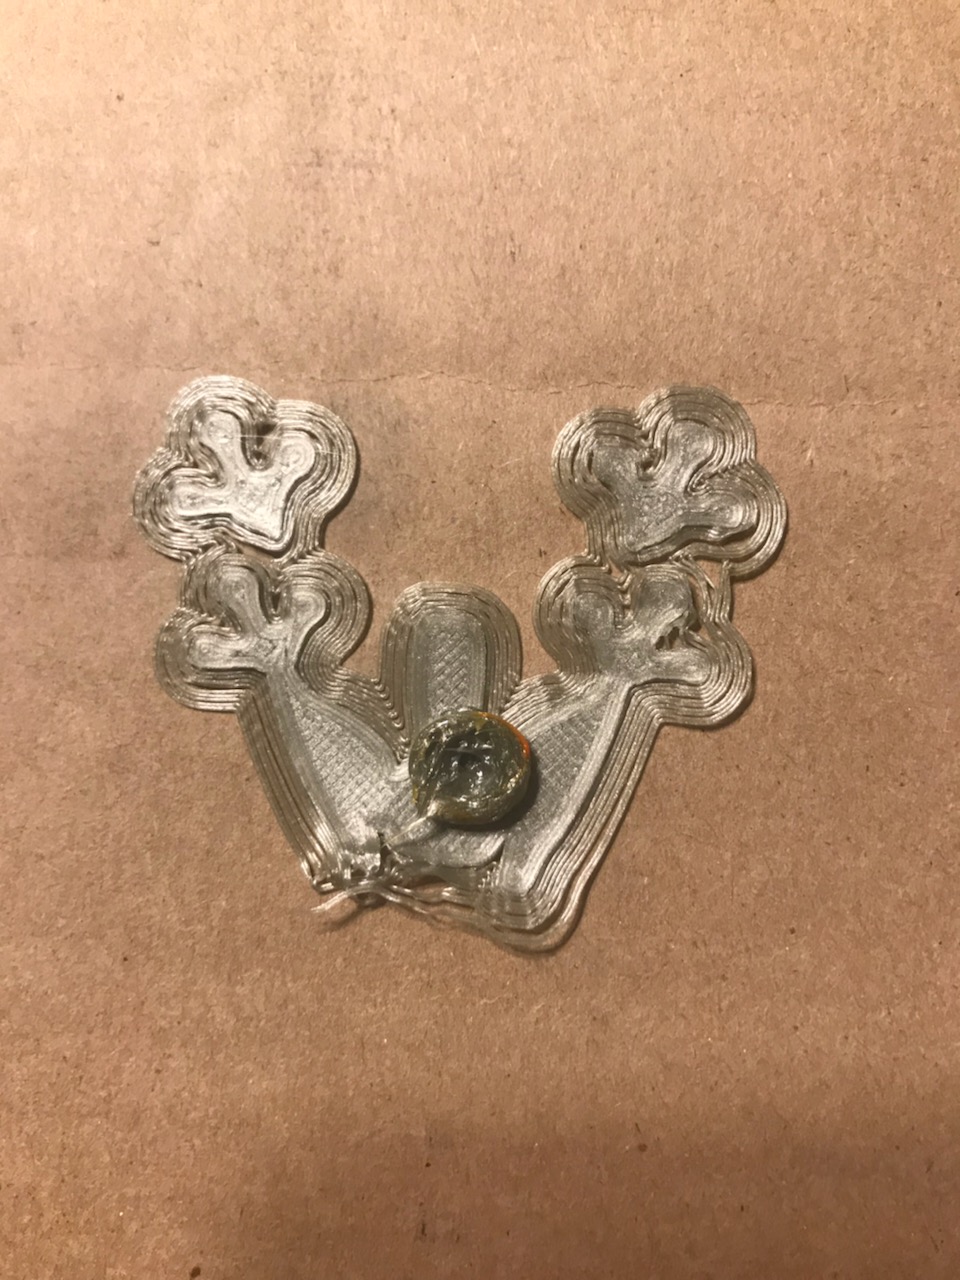
We just got done building our mk3s did the calibration. Went for our 1st test print and tried out the frog. Started off good then it just started pooling in the dead center.
Pulled it off and restarted it to test it again. This time it just pooled in the center without even getting as far as the 1st time.
So we tried doing the boat instead and same thing just pooled at the start. It just sticks to the nozzle.
Please help.
RE: 1st print started off okay
When you say it just pooled in the middle, do you mean that the filament didn't adhere to the build plate, and ended up dragging around under the extruder?
If so, the two primary causes are poor Live Z (First Layer) calibration, and a print bed that needs a bit more cleaning...
Instead of the Prusa First Layer calibration tool, I use the
"Life Adjust 'Z' My Way" Process https://forum.prusa3d.com/forum/original-prusa-i3-mk3s-mk3-assembly-and-first-prints-troubleshooting/life-adjust-z-my-way/
here are test patches in a Zip File at the bottom of the first post, on the first page.
but before that I clean my build plate with hot water and a splash of dish soap to ensure any grease and finger prints are removed from the build plate surface... then rinse well with hot water and dry immediately with clean paper towels.

regards Joan
I try to make safe suggestions,You should understand the context and ensure you are happy that they are safe before attempting to apply my suggestions, what you do, is YOUR responsibility.Location Halifax UK
RE: 1st print started off okay
@joantabb
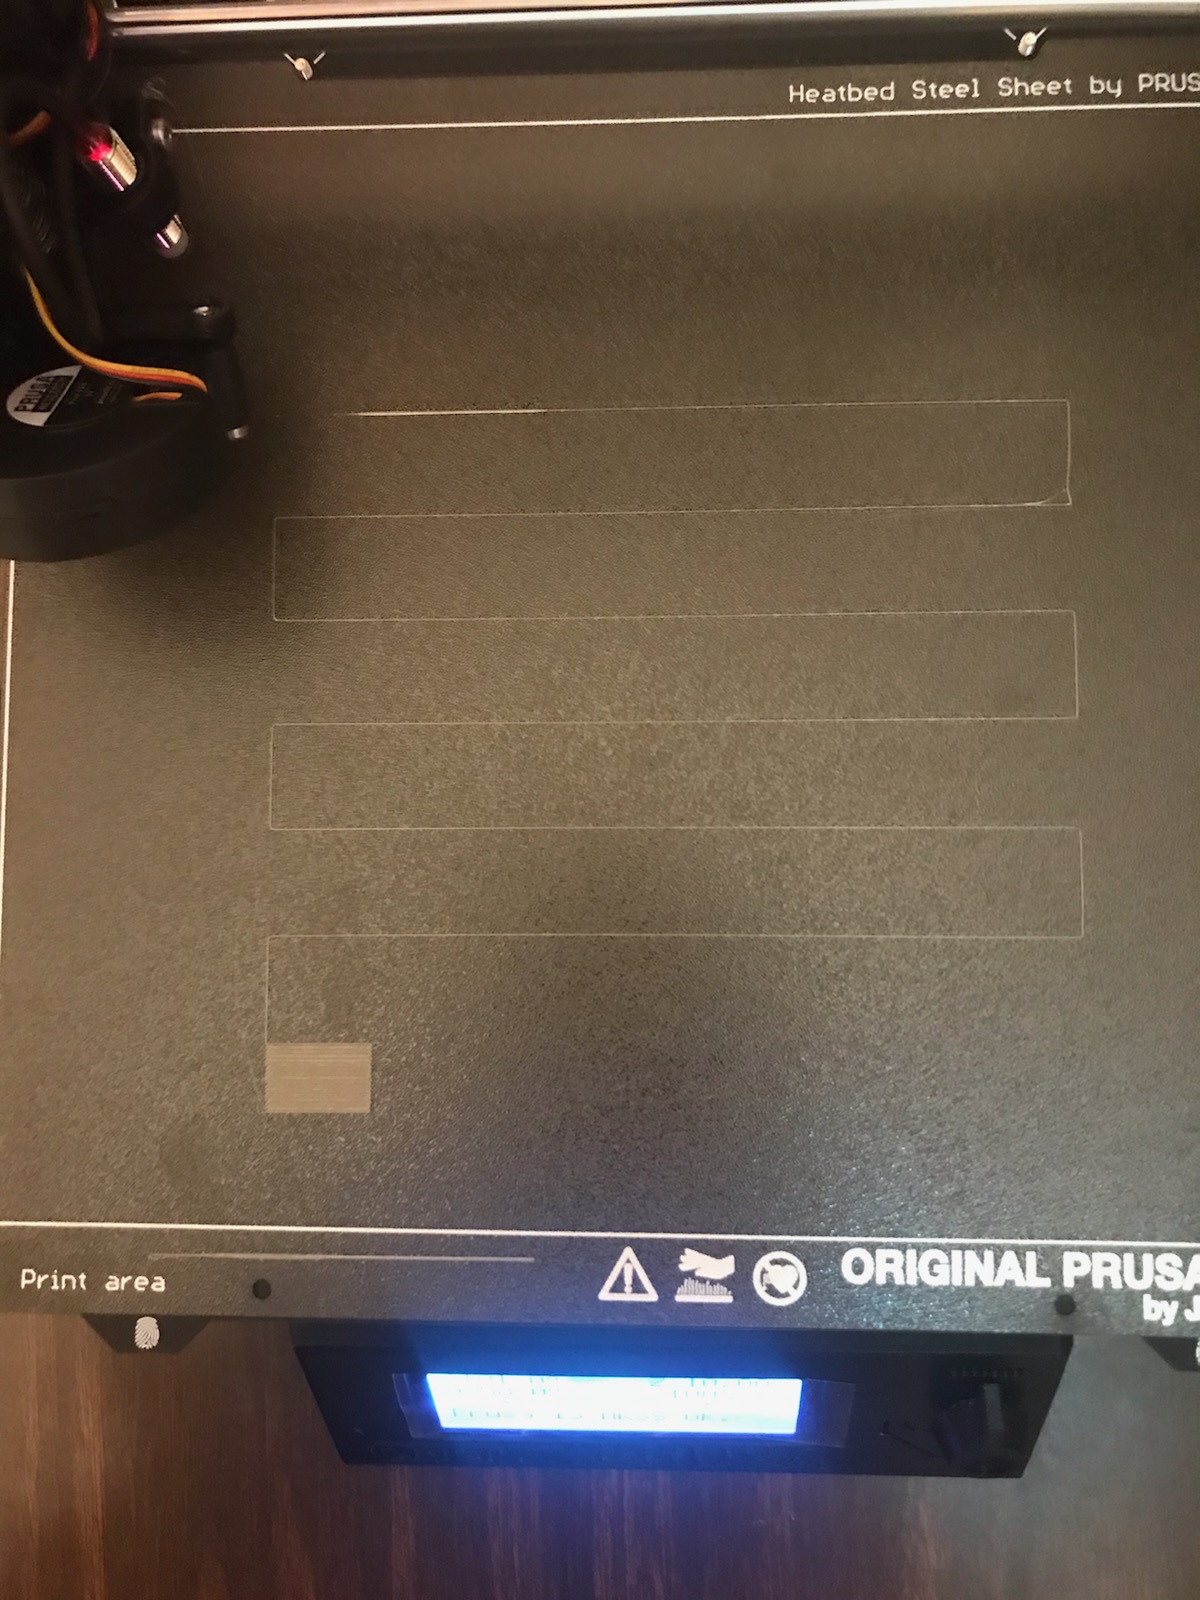
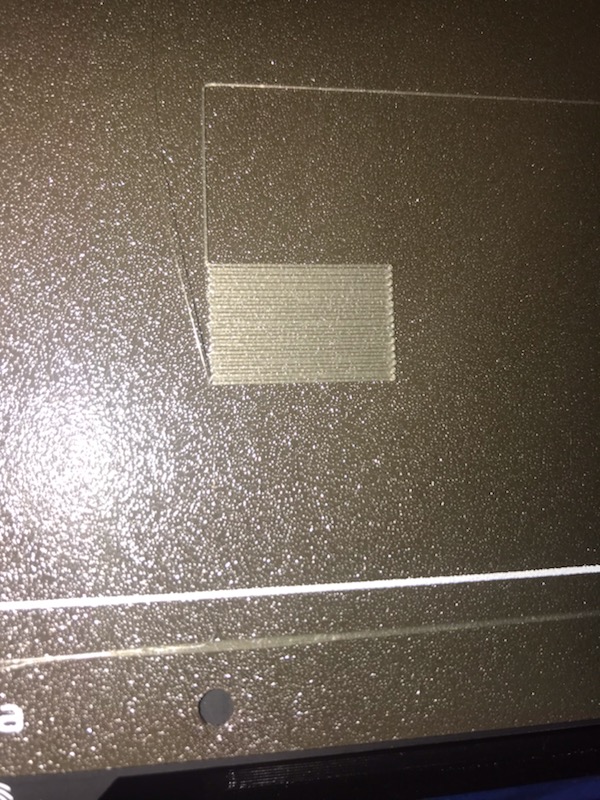 here are some pictures
As you can see it started fine and did the calibration then on the frog it did that
RE: 1st print started off okay
Live Z looks Ok, I would still try Life adjust Z My Way, because it does the test patch where your frog, became detatched, not towards the bottom left of the build plate.
Adhesion Looks BAD... did you have a collision on the Y axis? the frog seems to have been displaced before it broke loose!
Have you lubricated the smooth rods ans linear bearings, If not, it might be time to do some maintenance...
https://help.prusa3d.com/en/article/i3-printers-regular-maintenance_2072#rods-and-bearings
Did you try washing the build plate?
Have you tried 7x7 Mesh bed levelling (Accessible through the LCD Menu ) ?
regards Joan
I try to make safe suggestions,You should understand the context and ensure you are happy that they are safe before attempting to apply my suggestions, what you do, is YOUR responsibility.Location Halifax UK
RE: 1st print started off okay
We cleaned the plate, lubed it, and ran all the tests again. Passed them all. We did run the mesh bed leveling and it just goes point to point without doing anything else.
next we started the frog again. It got farther but, it lifted off the print bed and started to pile.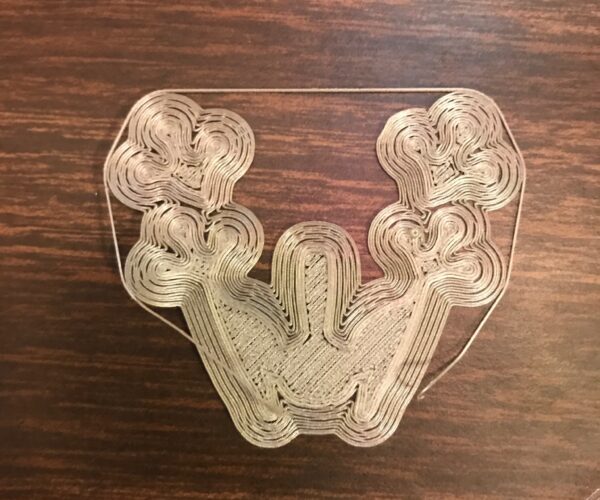

RE: 1st print started off okay
@arcaduck
If that is the underside of your frog, it looks like your live Z is wrong. (Too High)
regards Joan
I try to make safe suggestions,You should understand the context and ensure you are happy that they are safe before attempting to apply my suggestions, what you do, is YOUR responsibility.Location Halifax UK
RE: 1st print started off okay
RE: 1st print started off okay
We cleaned the plate, lubed it, and ran all the tests again. Passed them all. We did run the mesh bed leveling and it just goes point to point without doing anything else.
To add to what Joan has said, your Live-Z looks way too high (not negative enough).
I've compiled some notes on cleaning the PEI print surface here and Live-Z here.
RE: 1st print started off okay
We have it set at -2.0 I dont think its that the Z is to high, could be wrong. Should we go lower?
also in all pictures that is the frog facing the way it was printed not upside down. Currently running a 50point test
will look into Jeff Jordans
We moved the prob back and changed it to -1.5
RE: 1st print started off okay
RE: 1st print started off okay
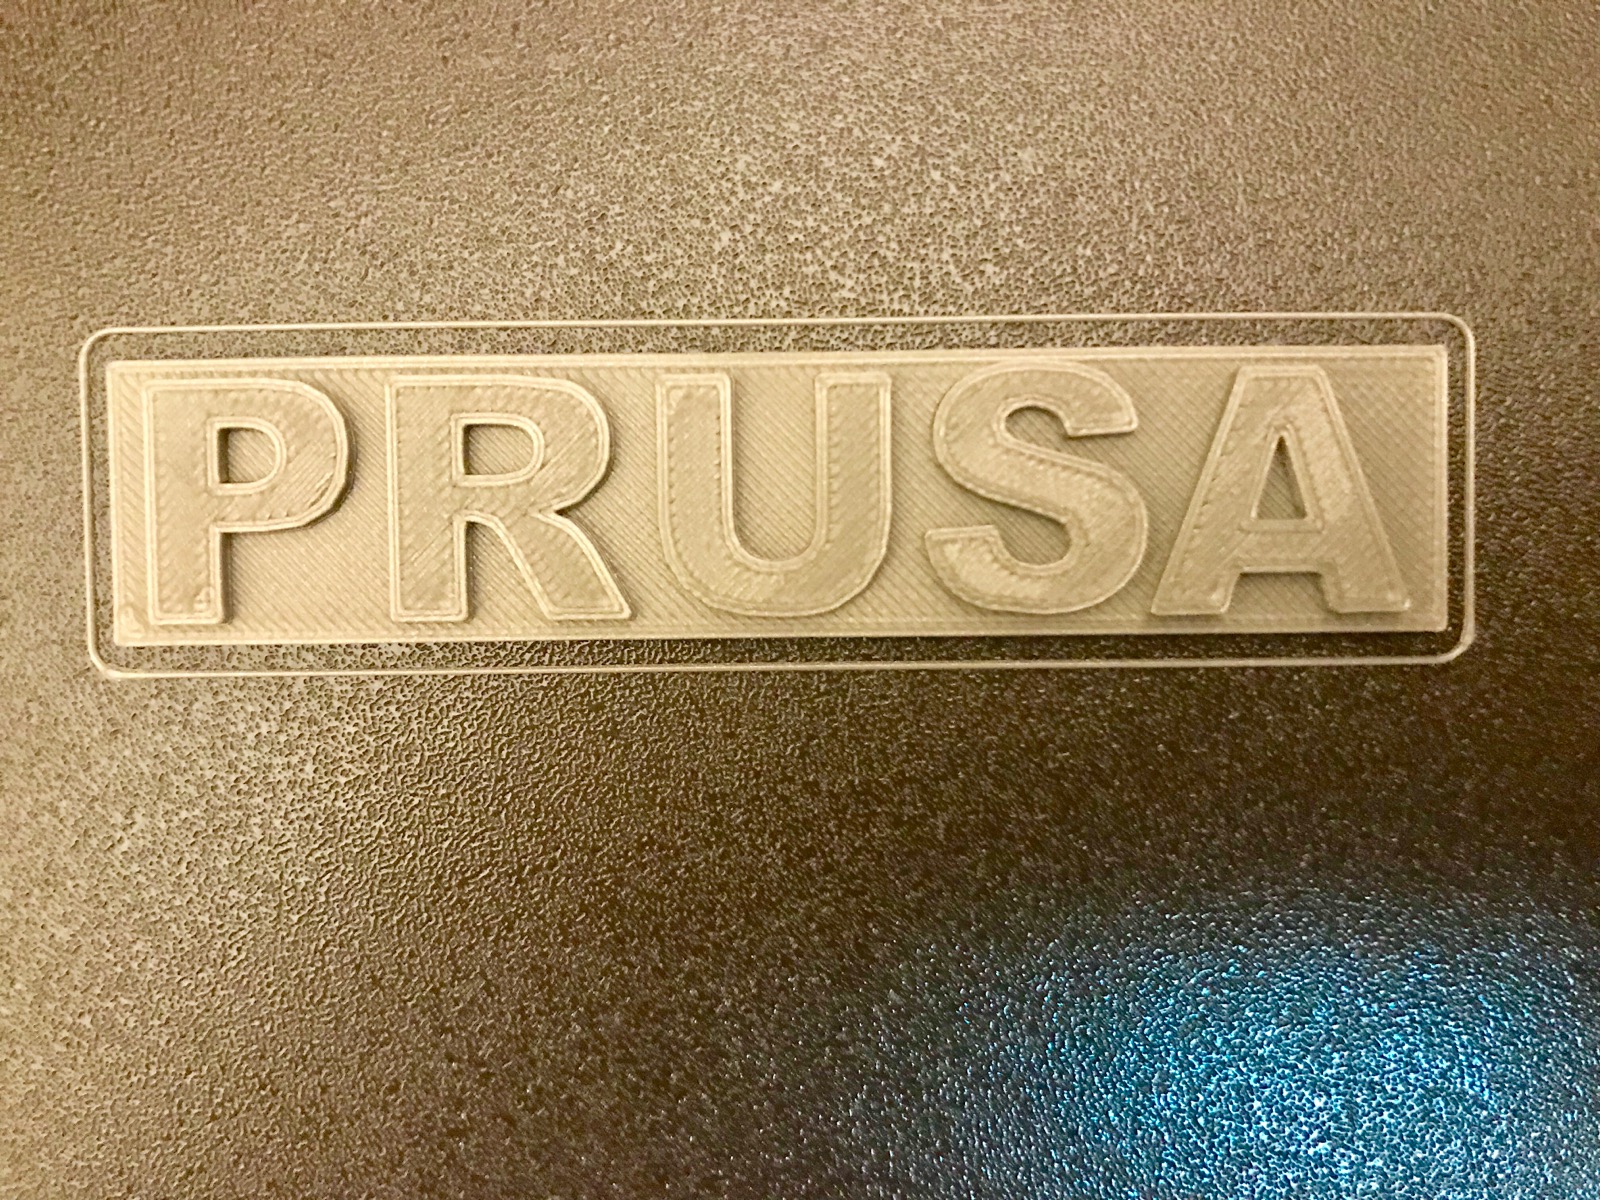
[nice logo]
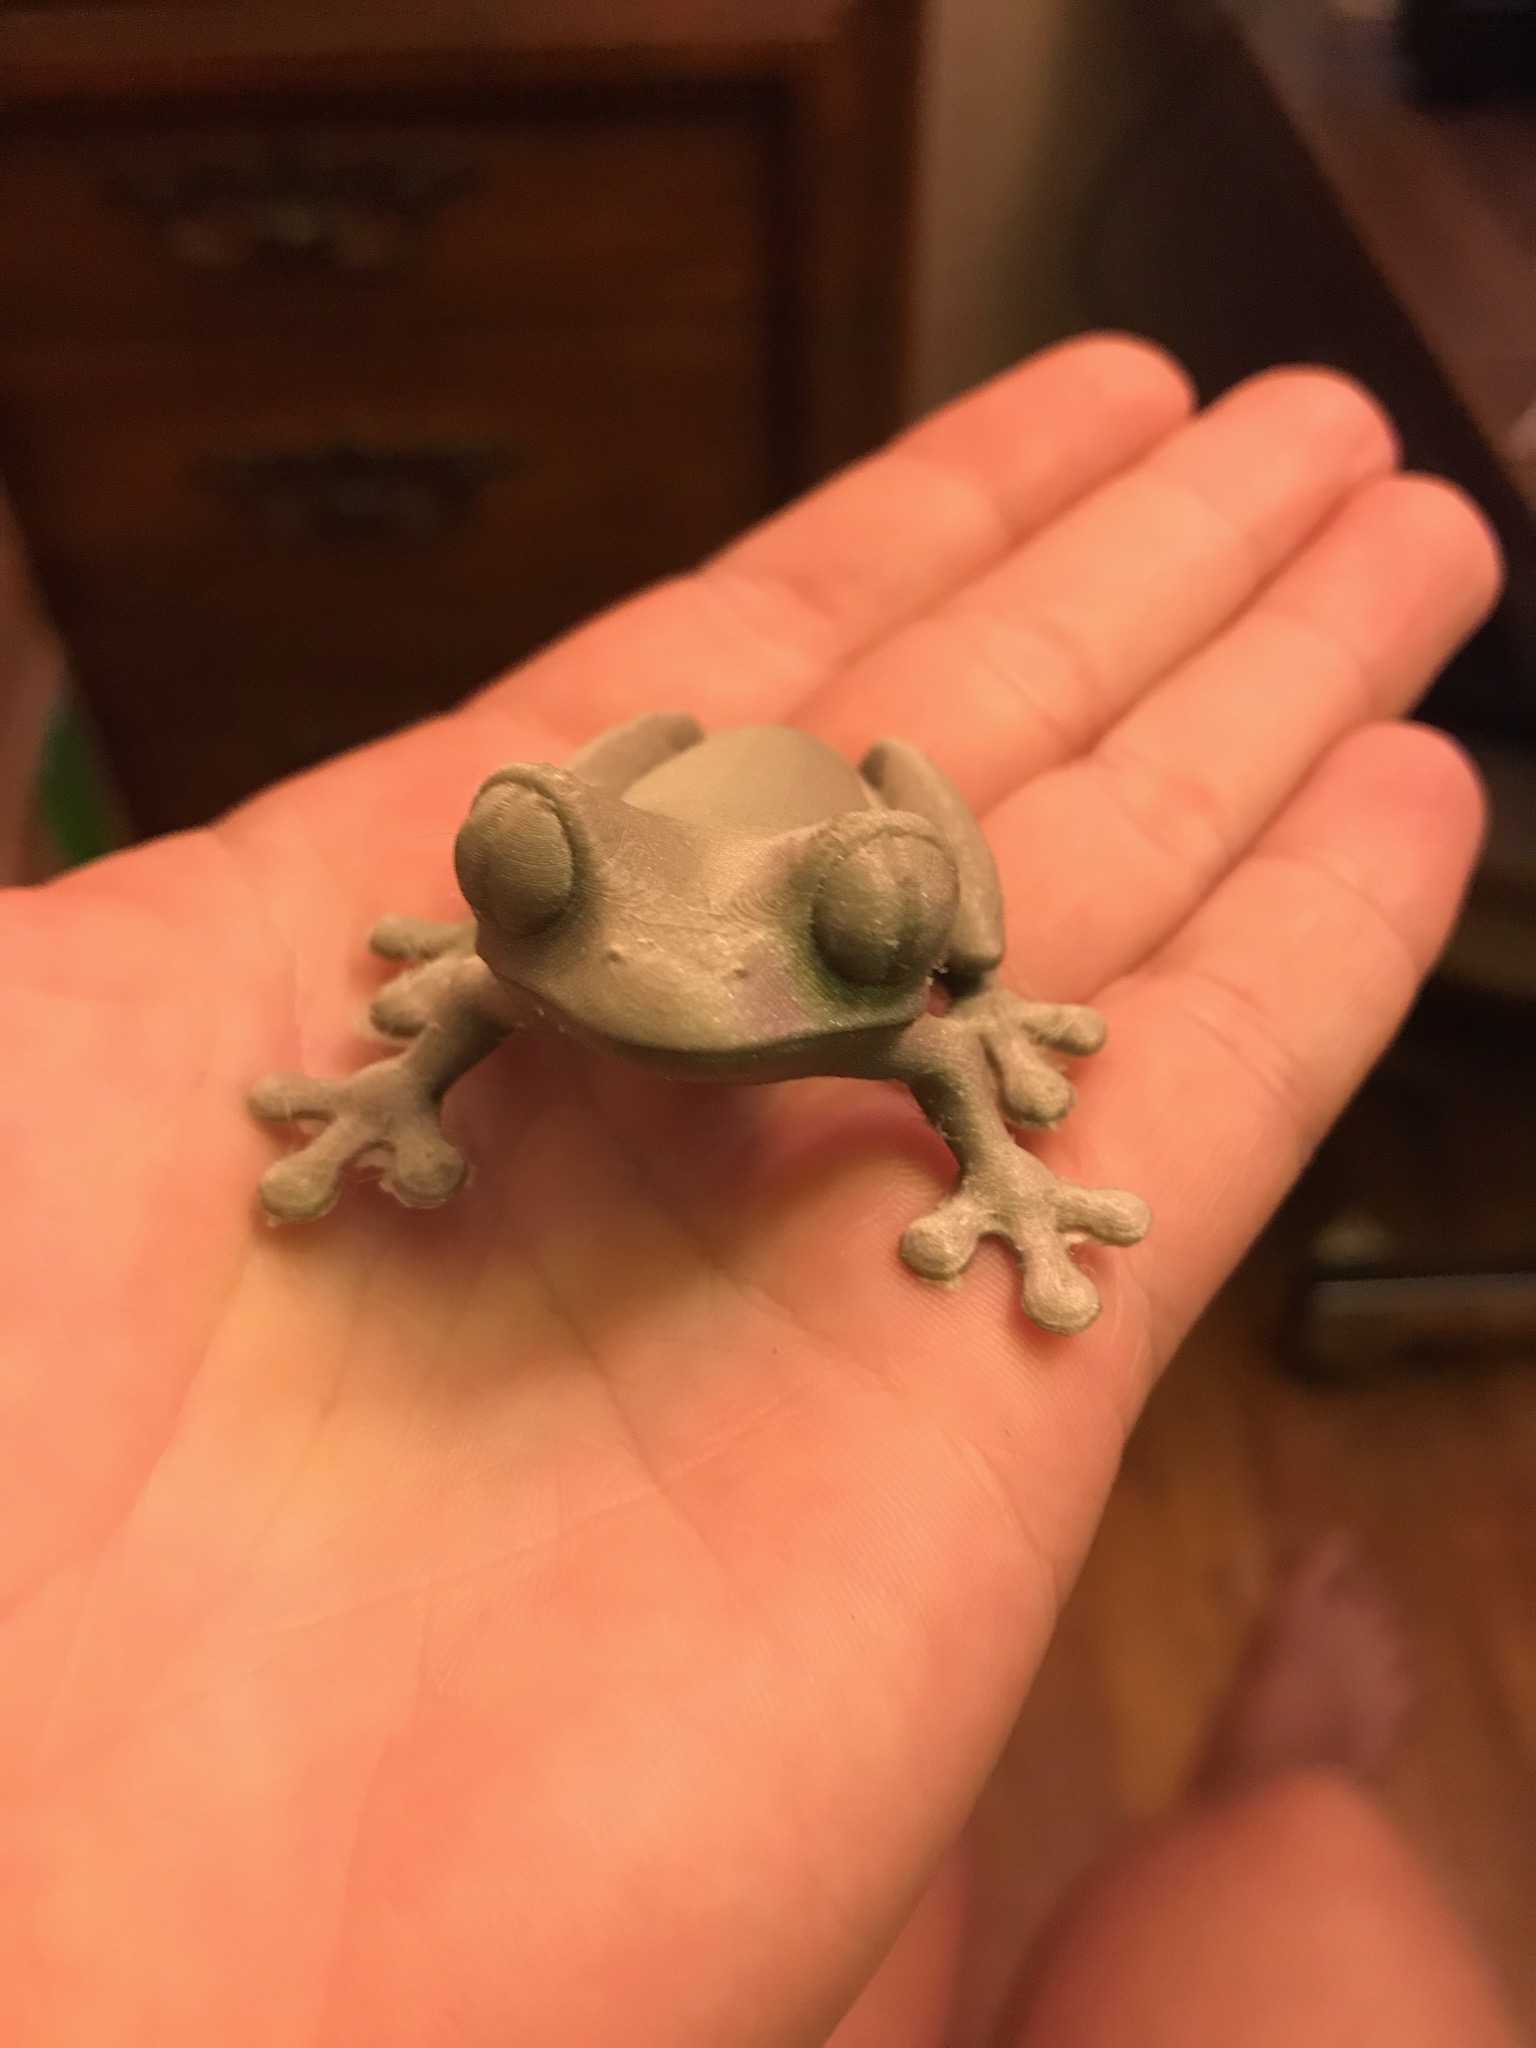
That looks pretty good. Show us the underside of that same print. That's a good one for judging the 1st layer Live-Z settings. Congrats!
RE: 1st print started off okay
Very happy with the frog!
RE: 1st print started off okay
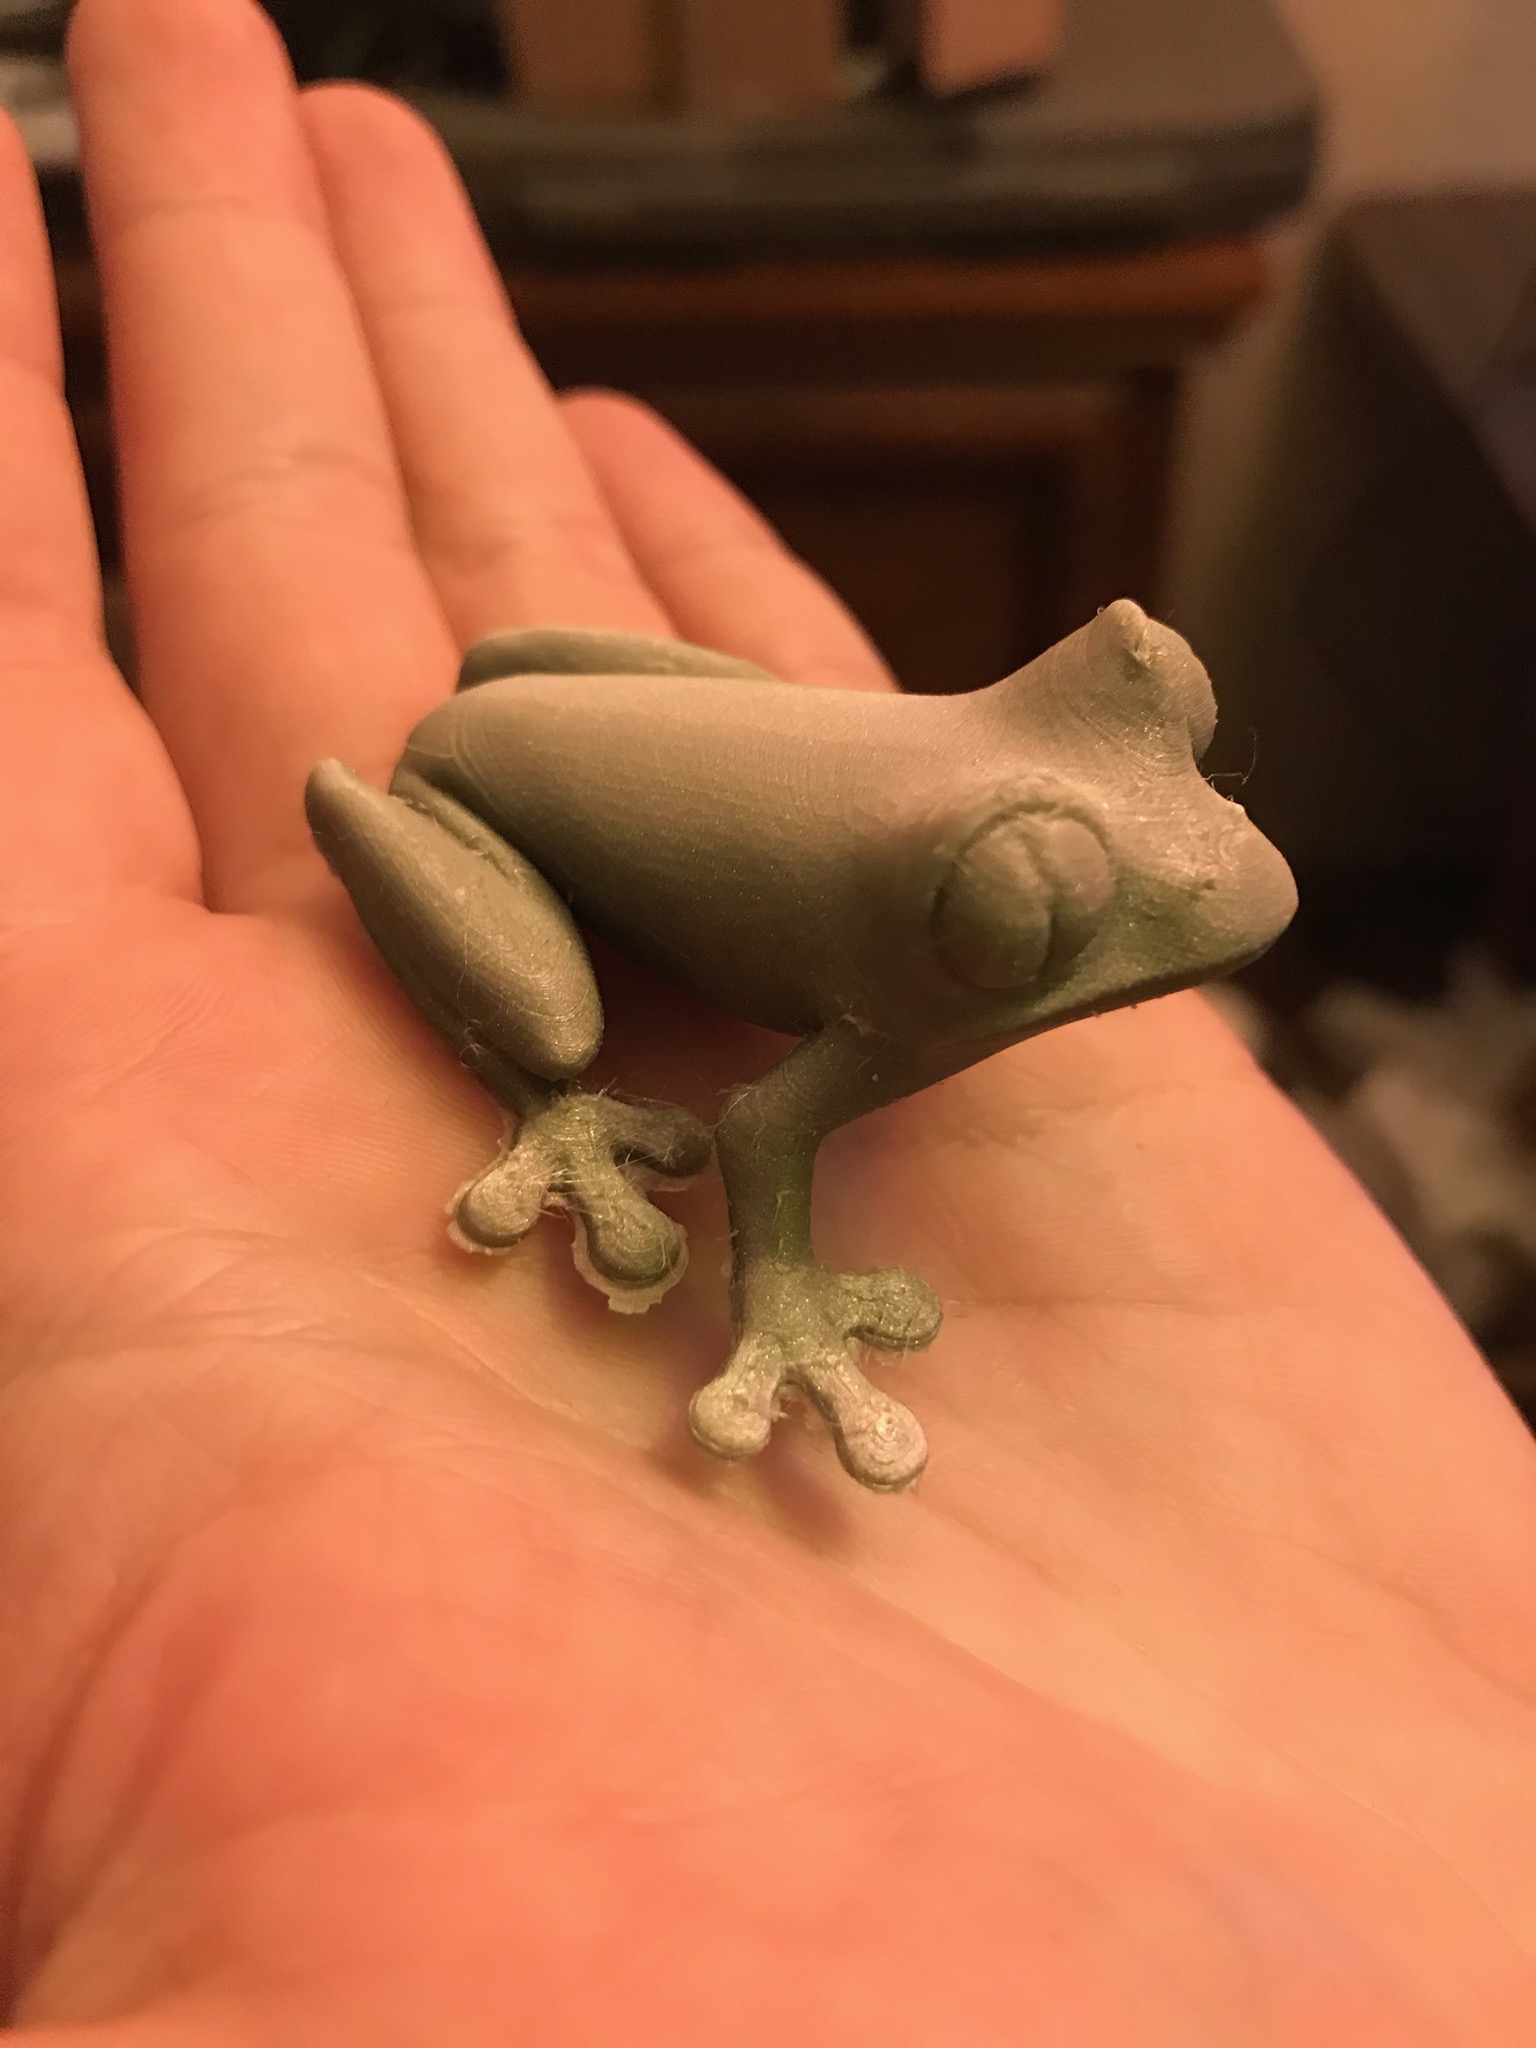
 here is the back btw
RE: 1st print started off okay
So in conclusion we adjusted the Z to -1.5 and super cleaned the plate then did the 50 point test.
Printed the Prusa test block and the frog and everything seems to have worked.
We are happy with it but we are conserend about one thing. The time it took to print. It took us 4 hours to print the frog at 125. In the book it shows 1h 51m at settings lower then that. Is it normal for it to take so much longer?
RE: 1st print started off okay
I don't know what you mean when you say 125. 125 what ?
Also that bottom layer on the prusa logo above has slight waves in it indicating its very slightly to low. That first layer should be low enough to merge all the print lines but not give any of those waves as that indicates the nozzle is pushing already laid down plastic around.