Upgrades from Original Prusa i3 MK2
I have the upgrade marked MK2 MMU to MK2.5/MK3 MMU 2. Inside the box are the following upgrades:
- Extruder Upgrade Orange R3 (stamped with B7)
- Orange MMUv2 (M1)
- MMUv2
- MMUv1 to MMUv2
I also have the upgrades:
MK2.5 Smooth PEI
MMU2 to MMU2S with printed parts
I am having trouble finding instructions for these upgrades, including the order in which they should be done. Any help would be appreciated.
Thank you.
RE: Upgrades from Original Prusa i3 MK2
This might help:
https://help.prusa3d.com/en/category/assembly-manuals_272
--------------------
Chuck H
3D Printer Review Blog
RE: Upgrades from Original Prusa i3 MK2
Good morning ebgodel
I assume that you already have a Mk2 Printer with the original MMU
If this is the case, you will need three of the extruder motors and one Bondtech gear pair and the E3dV6 hot end, off this setup in order to build the new setup... the printer above is a Bowden printer with four remote extruder drive motor assemblies feeding a multiplexor and E3dv6 Hotend.
Here is a link to the MMU upgrade pages... (It's confusing, and well hidden) 🙂
https://help.prusa3d.com/en/tag/mmu2/
One motor will be required to make the new extruder into a direct extruder assembly
One Motor will be required to drive the MMU2 Idler body
One Motor will be required to drive the Filament pulley shaft
so I expect the best upgrade process would be
Look at the parts supplied for
- Extruder Upgrade Orange R3 (stamped with B7)
Check to see whether they are Mk2.5 parts or Mk2.5S Parts (I suspect they will be Mk3 Parts which will be no good) (these are the same as the Mk3 and Mk3S parts with the addition of a small buffer piece to press the X axis Endstop Switch.
If Necessary print the Mk2.5S upgrade parts (Consider printing the Mk3S Rambo case, because the cable clamps are better!)
, dissassemble the Mk2 MMU1 components off your current printer,
https://help.prusa3d.com/en/guide/2-mmu1-disassembly_64520
that is, the entire X axis Carriage assembly, and the two extruder pairs off the top of the main frame, plus the Superswitch and cables that are in the small box, above the Rambo case on the main Prusa Frame.
If you are changing the Rambo case for the Einsy case, you will need to dissassemble the rambo case too.
I suggest that you refit the Einsy case using the Mk3S assembly instructions...
(Sorry you are having to bounce from Assembly guide to Assembly Guide)
Follow the Mk2S to Mk2.5 Upgrade assembly guide to
Remove the heatbed off the Y axis.
install the new heated bed (12 volt, Mk52 heatbed) onto the Y axis
Now switch to the Mk2.5S assembly guide to assemble the new extruder setup... (you will need to use one of the recovered extruder motors)
Note there are two options here:
1, assemble the printer as a stand alone Mk2.5S and test the printer out, before adding the MMU2S (this needs partial dissassembly to move the filament sensor into a new location, for the MMU2S)
2, assemble the Mk2.5S extruder in MMU2 format, from the beginning... (this does not need partial dissassembly later! )
the Differences are :
a, The standard MK2.5S has the filament sensor inside the top cover of the extruder, it is activated by the filament sensor lever(FS Lever) in conjunction with two magnets, set to repel each other, and a steel ball bearing inside a hollow printer adapter block.
b, The MMU style extractor does not use the FS Lever or the magnets or the Ball bearing in the hollow Printer adapter block,
Instead it has a solid Printer Adapter Block, and the filament sensor PCB is mounted higher, in a filament sensor tower and is operated by a new Bondtech Idler door with an integrated filament sensor arm sticking up into the filament sensor tower.
Don't forget to load the Mk2.5S Firmware for use with the MMU2S... !!!
I would go straight for the MMU style extruder setup, and try the printer without the MMU2S (Autoload and filament end sensing will not work properly at this stage), but you can confirm that the printer it's self is working
then I would assemble the MMU2s using the mmu2S assembly instructions but following the MMU1 to MMU2S modification to extend one of the recovered extruder motors for the filament pulley shaft. and use the third recovered extruder motor for the idler drum motor (Please be aware the recovered motors have much longer cables than necessary, please cable tie the extra length neatly along the new MMU2 power and data, wiring route.
NOTE! Remember to load the Mk2.5S MMU2 firmware version onto the MMU2 processor
there are many upgrades to the MMU2S components you may wish to consider
https://www.prusaprinters.org/prints/3792-prusa-mmu2-reinforced-idler
https://www.prusaprinters.org/prints/3417
https://www.prusaprinters.org/prints/4205
prusaprinters.org/prints/1829
https://www.prusaprinters.org/prints/1957 (this shows a bolt on Filament sensor arm which may make adjustment and access to the bondtech gears easier)
https://www.prusaprinters.org/prints/21356-prusa-multi-color-mmu2-ptfe-m10-adapter (this makes management of the PTFE Tubes much easier)(You don't need to print it in different colours... )
I used 2.5mm x4mm PTFE Tubing for all tubing except the short piece inside the extruder heatsink. the larger bore tubing reduces friction in the filament path...
Friction in the filament path is your enemy with the MMU2s
I hope that helps you,
regards Joan
I try to make safe suggestions,You should understand the context and ensure you are happy that they are safe before attempting to apply my suggestions, what you do, is YOUR responsibility.Location Halifax UK
RE: Upgrades from Original Prusa i3 MK2
@cwbullet
Thank you for the reply. I have been to this page but cannot seem to find instructions for the particular upgrades I have.
RE: Upgrades from Original Prusa i3 MK2
@joantabb
Wow! Thank you so much for your detailed reply. I will work through it! I may not have an original MMU, since it does not look like the picture and I only have one filament feed. Also not sure if I have "S" versions of parts. But you have givien me a running start.
RE: Upgrades from Original Prusa i3 MK2
@ebgodel
can you photograph the items that you do have?
regards Joan
I try to make safe suggestions,You should understand the context and ensure you are happy that they are safe before attempting to apply my suggestions, what you do, is YOUR responsibility.Location Halifax UK
RE: Upgrades from Original Prusa i3 MK2
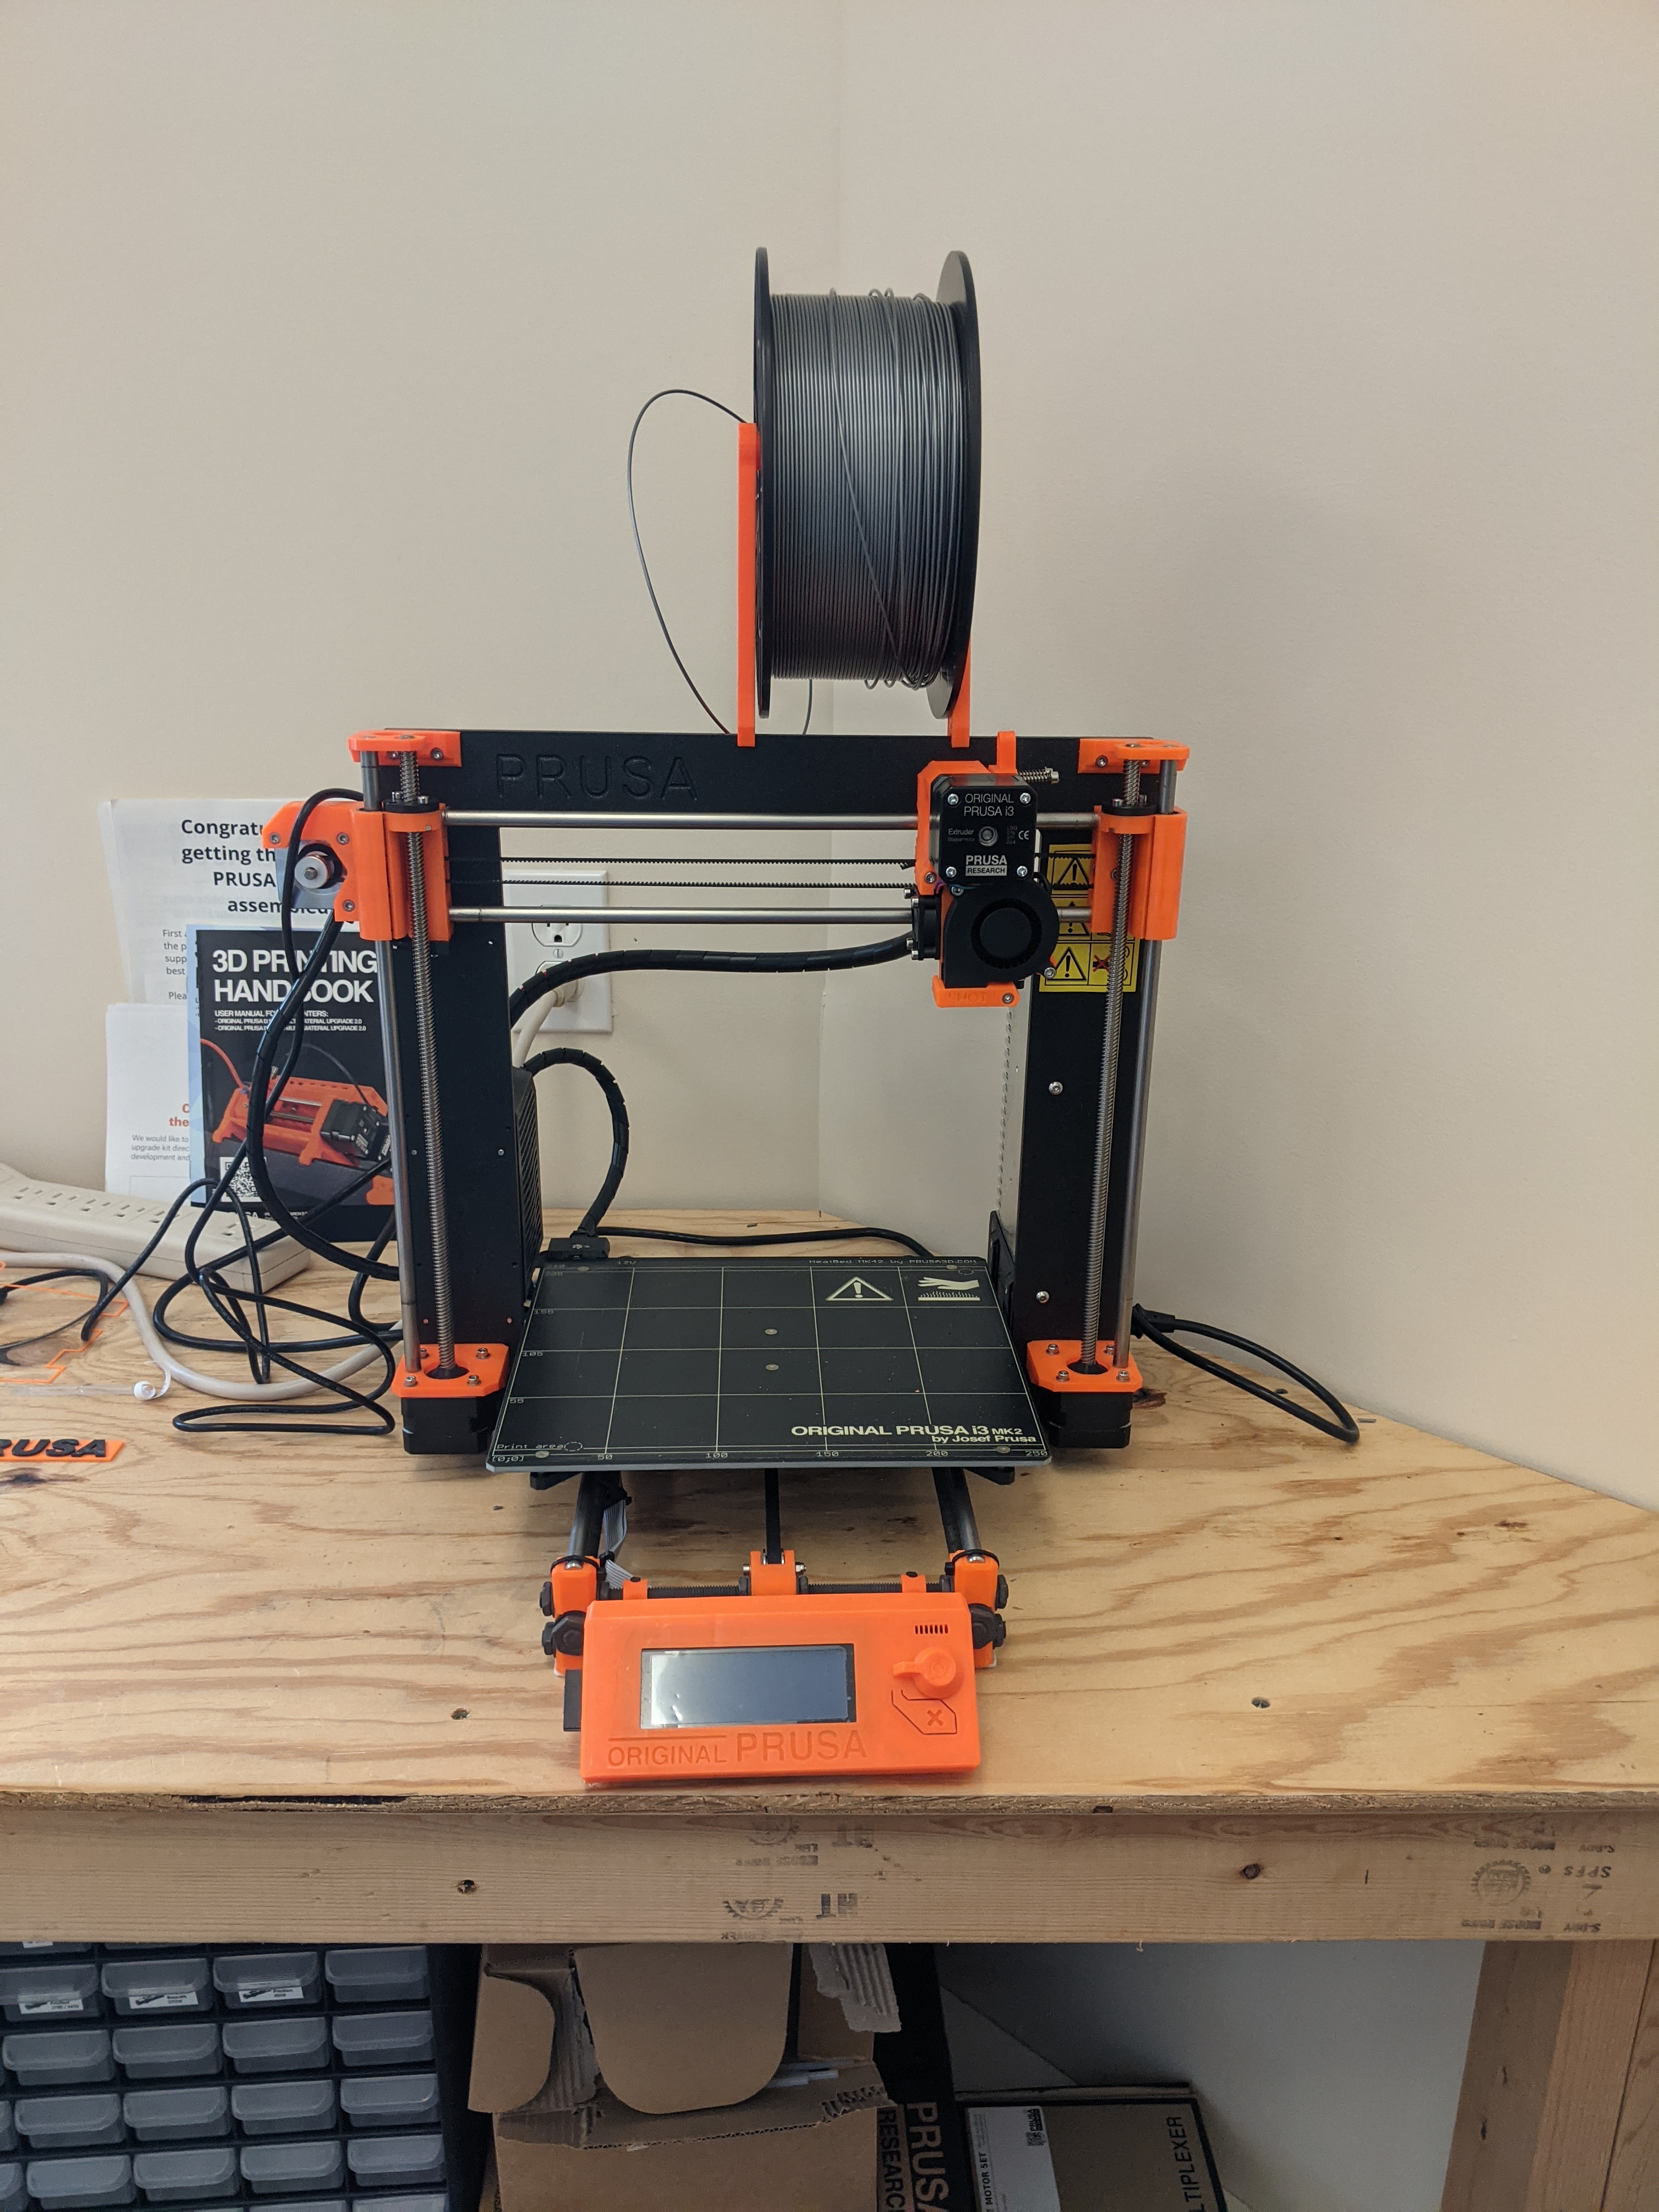
I have 33 pictures, totaling 105MB. It seems that I can only attach one file at a time. Here is the original printer. Is there a good way to share the pictures?
RE: Upgrades from Original Prusa i3 MK2
@ebgodel
Hi,
what I do, is to move the forum text input window, so that you can see the bottom of the window, on the screen,
I then open the file manager as a small window, and Drag the files to the bottom of the text window
like this
then an 'ADD MEDIA' window opens, and if you tick the 'Link to: Media File' box, in the botttom right hand corner of the screen, your pictures will be set to open full size, when clicked in the forum.....

I hope this helps,
regards Joan
I try to make safe suggestions,You should understand the context and ensure you are happy that they are safe before attempting to apply my suggestions, what you do, is YOUR responsibility.Location Halifax UK
RE: Upgrades from Original Prusa i3 MK2


RE: Upgrades from Original Prusa i3 MK2
I believe you want to build a Mk2.5S... but you have a bunch of parts of various versions.
Picture 1, Build plate, ok for Mk2.5S
Picture 2, Heatbed good mk2.5S
Picture 3, Cables directly Mk2.5S, use as Hardware general stock.
Picture 4, General Hardware,
Picture 5, not sure what's in this box?
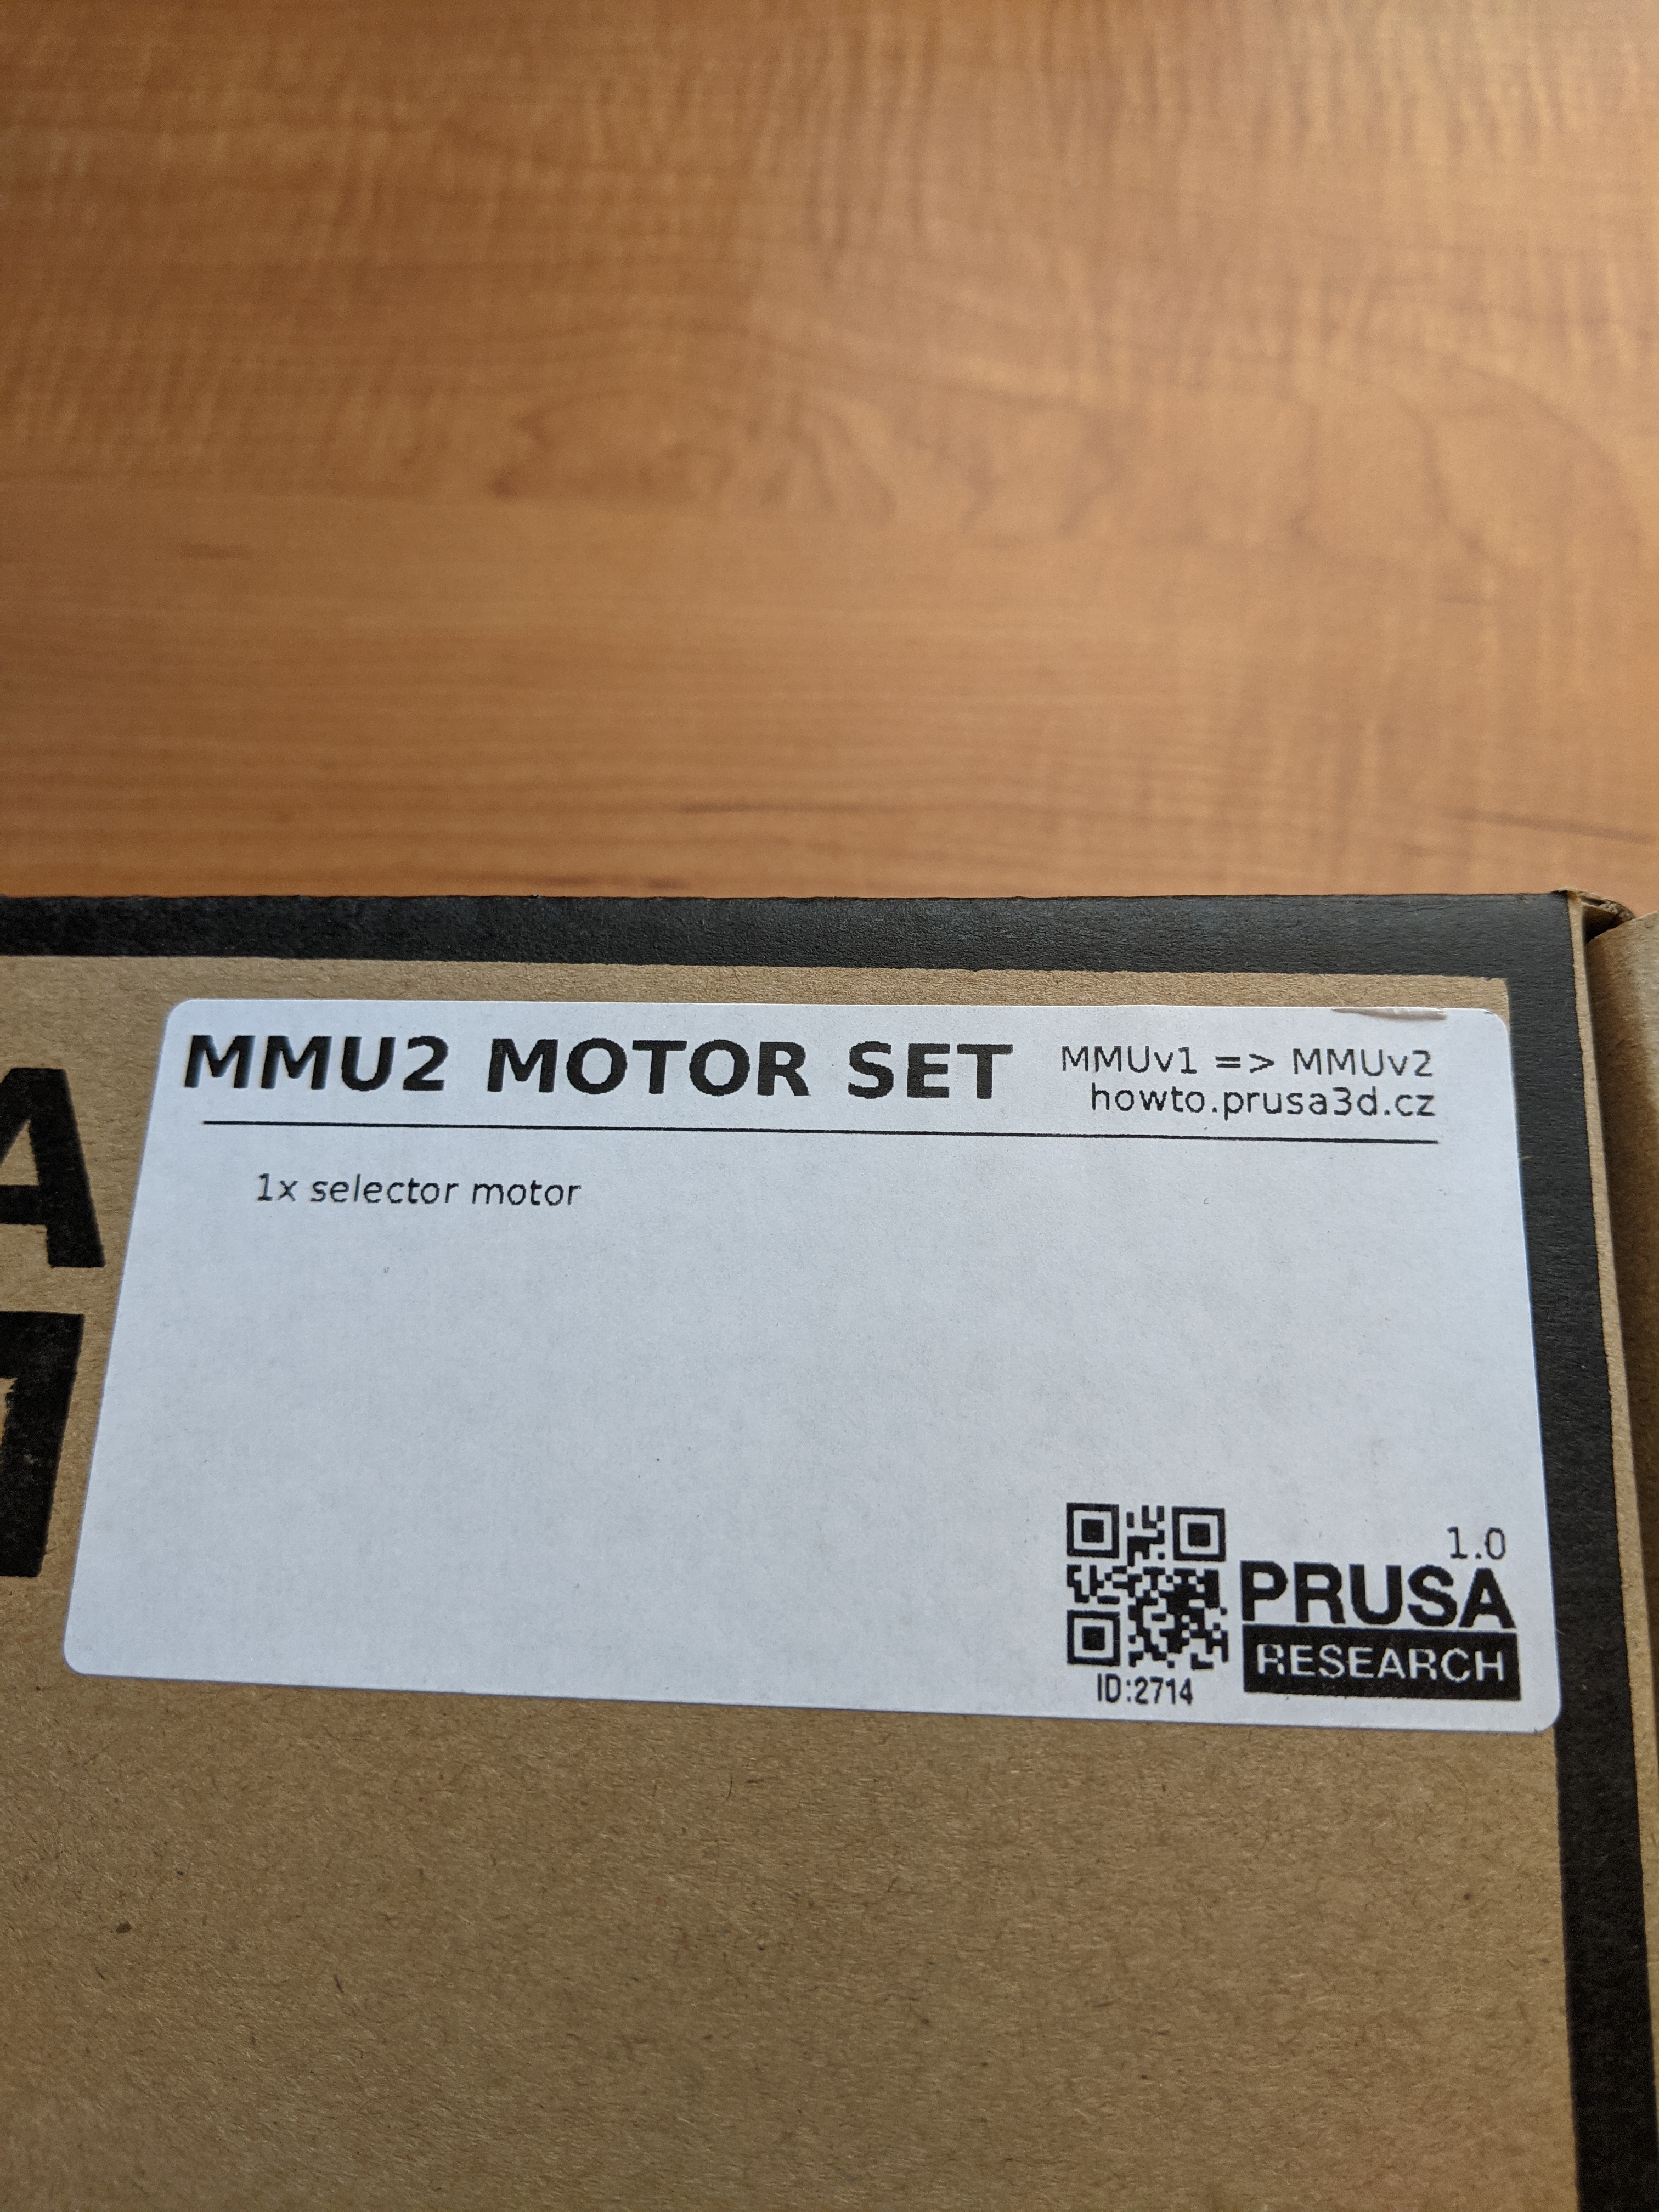
Picture 6, Motor Set, ONLY 1 Motor, Need to re purpose three MMU1 extruder motors to make MMU2S
One for the Mk2.5S extruder, One for the Filament Drive Rollers on MMU2S, and one for the Idler Barrel, on the MMU2S (DON'T OVER TIGHTEN THE CLAMP SCREWS
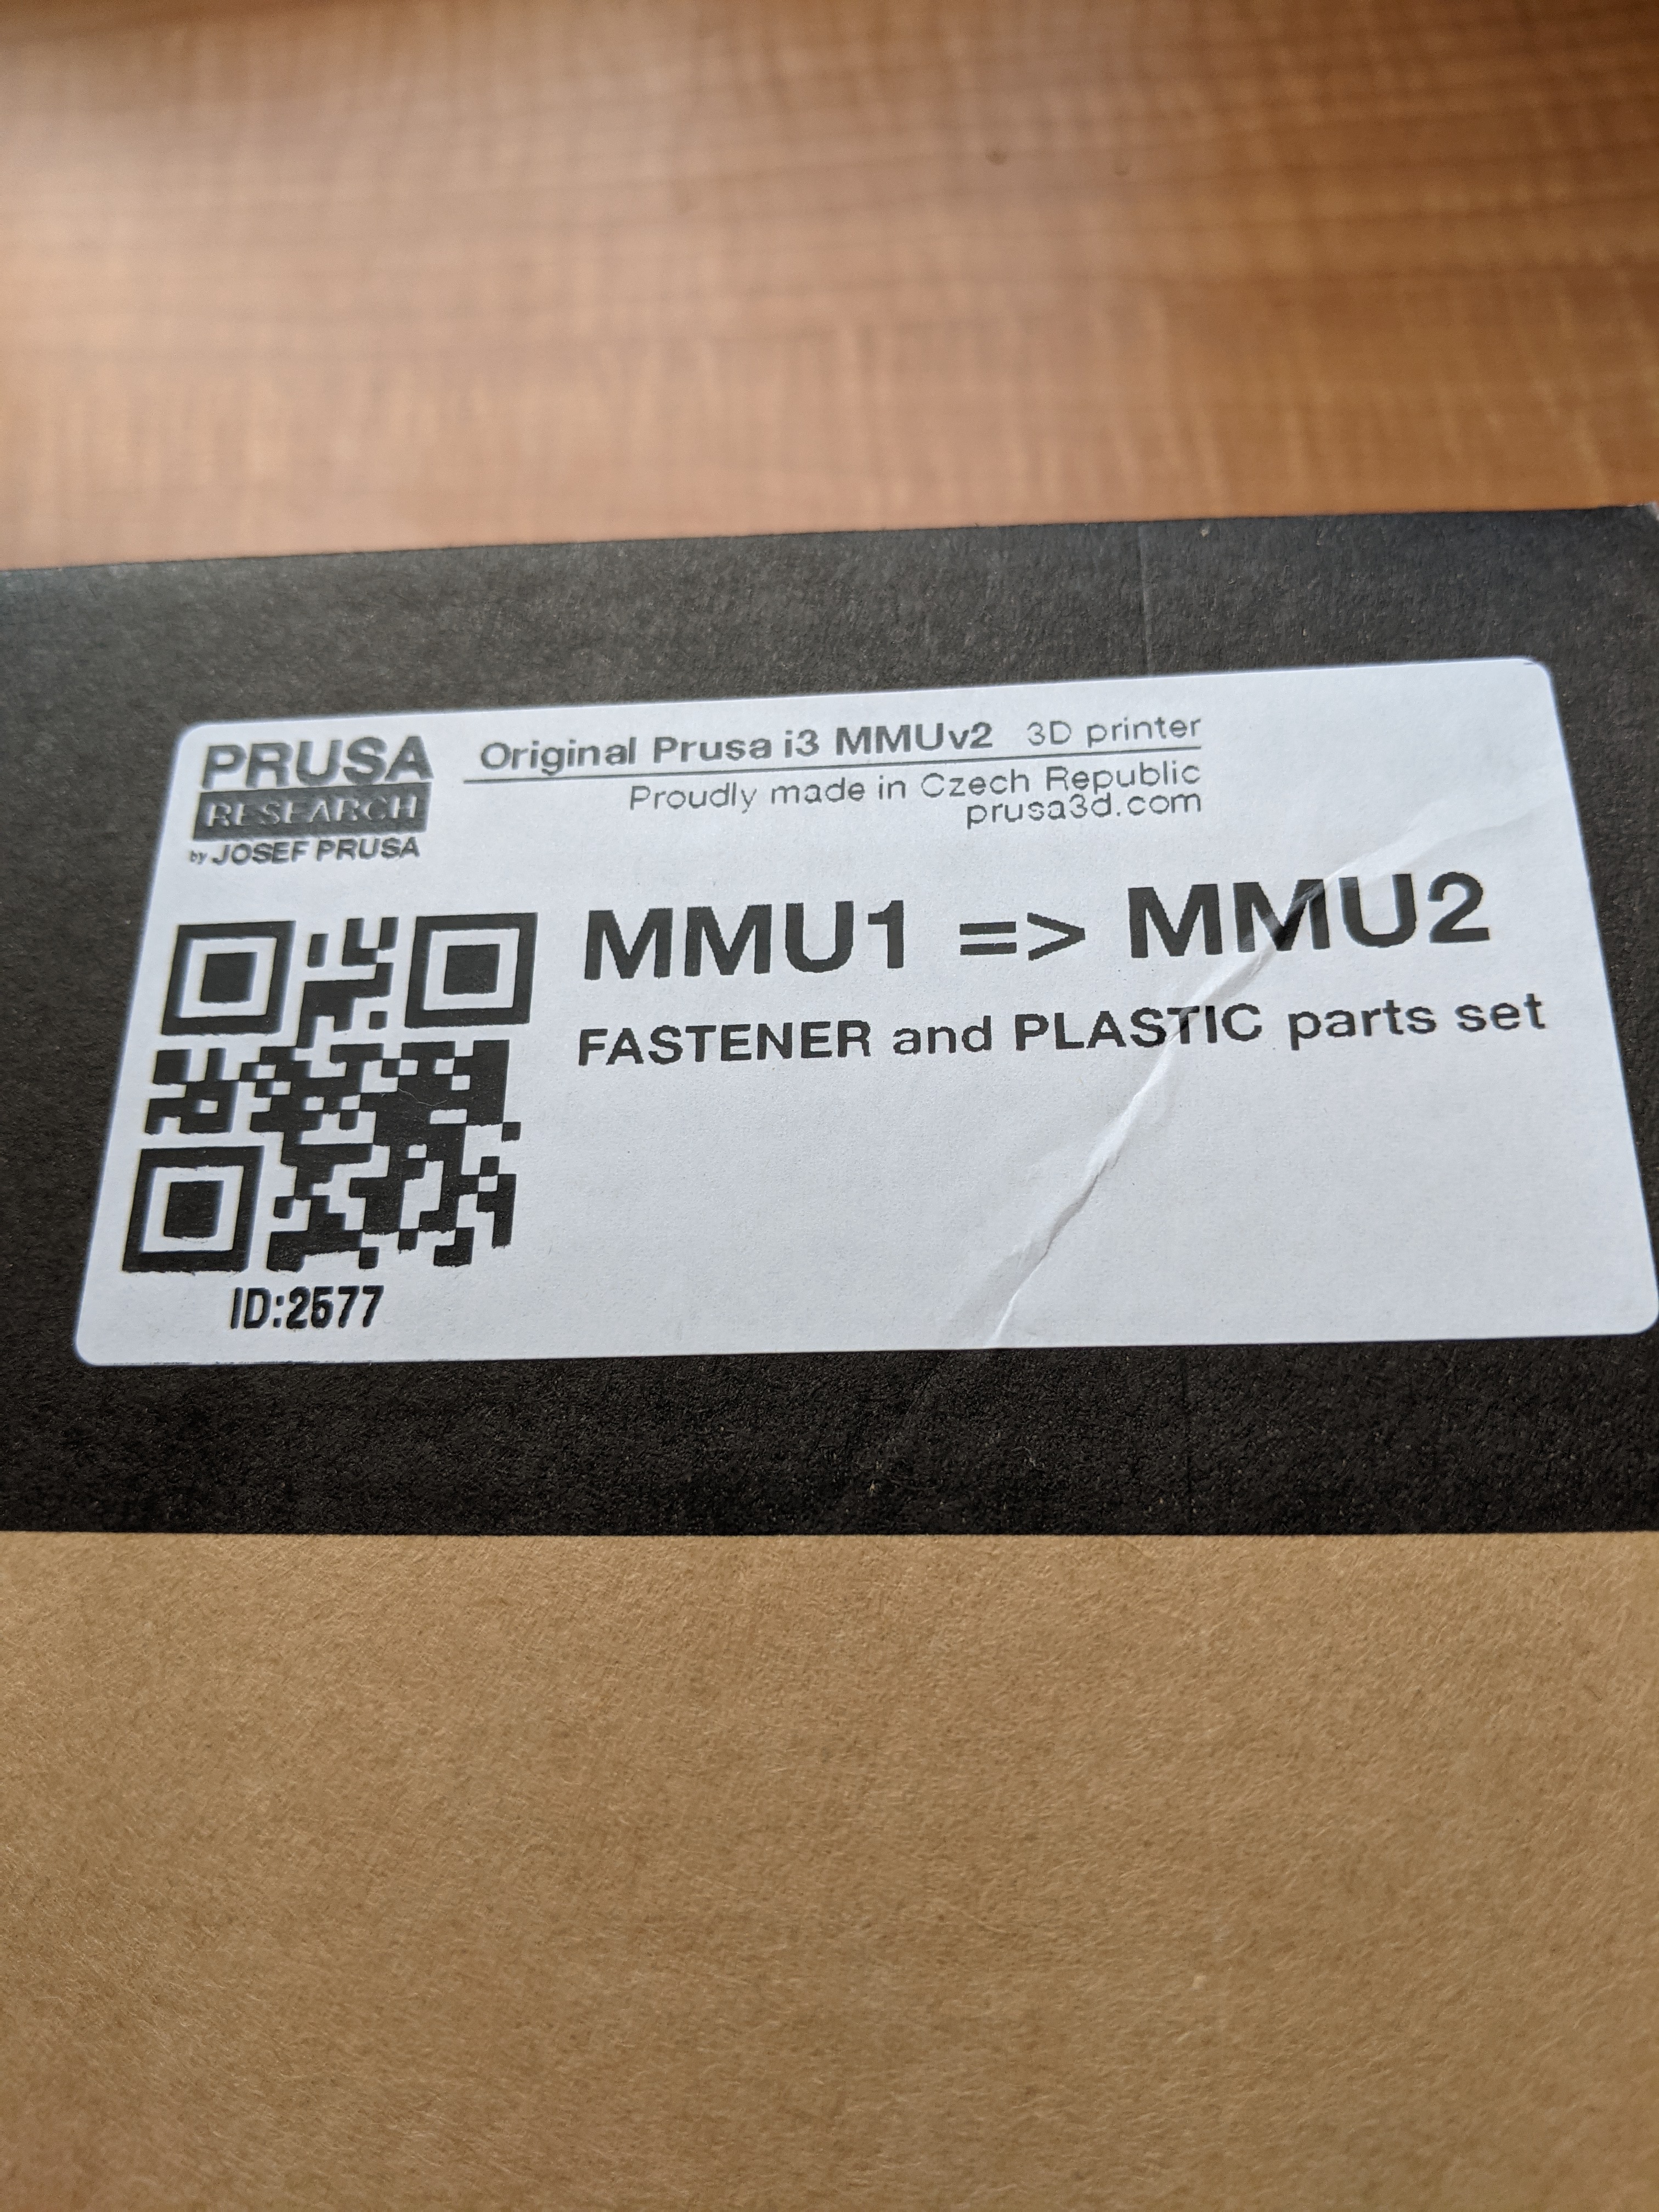
Picture 7, Fastener and Plastic parts OK for MMU2S
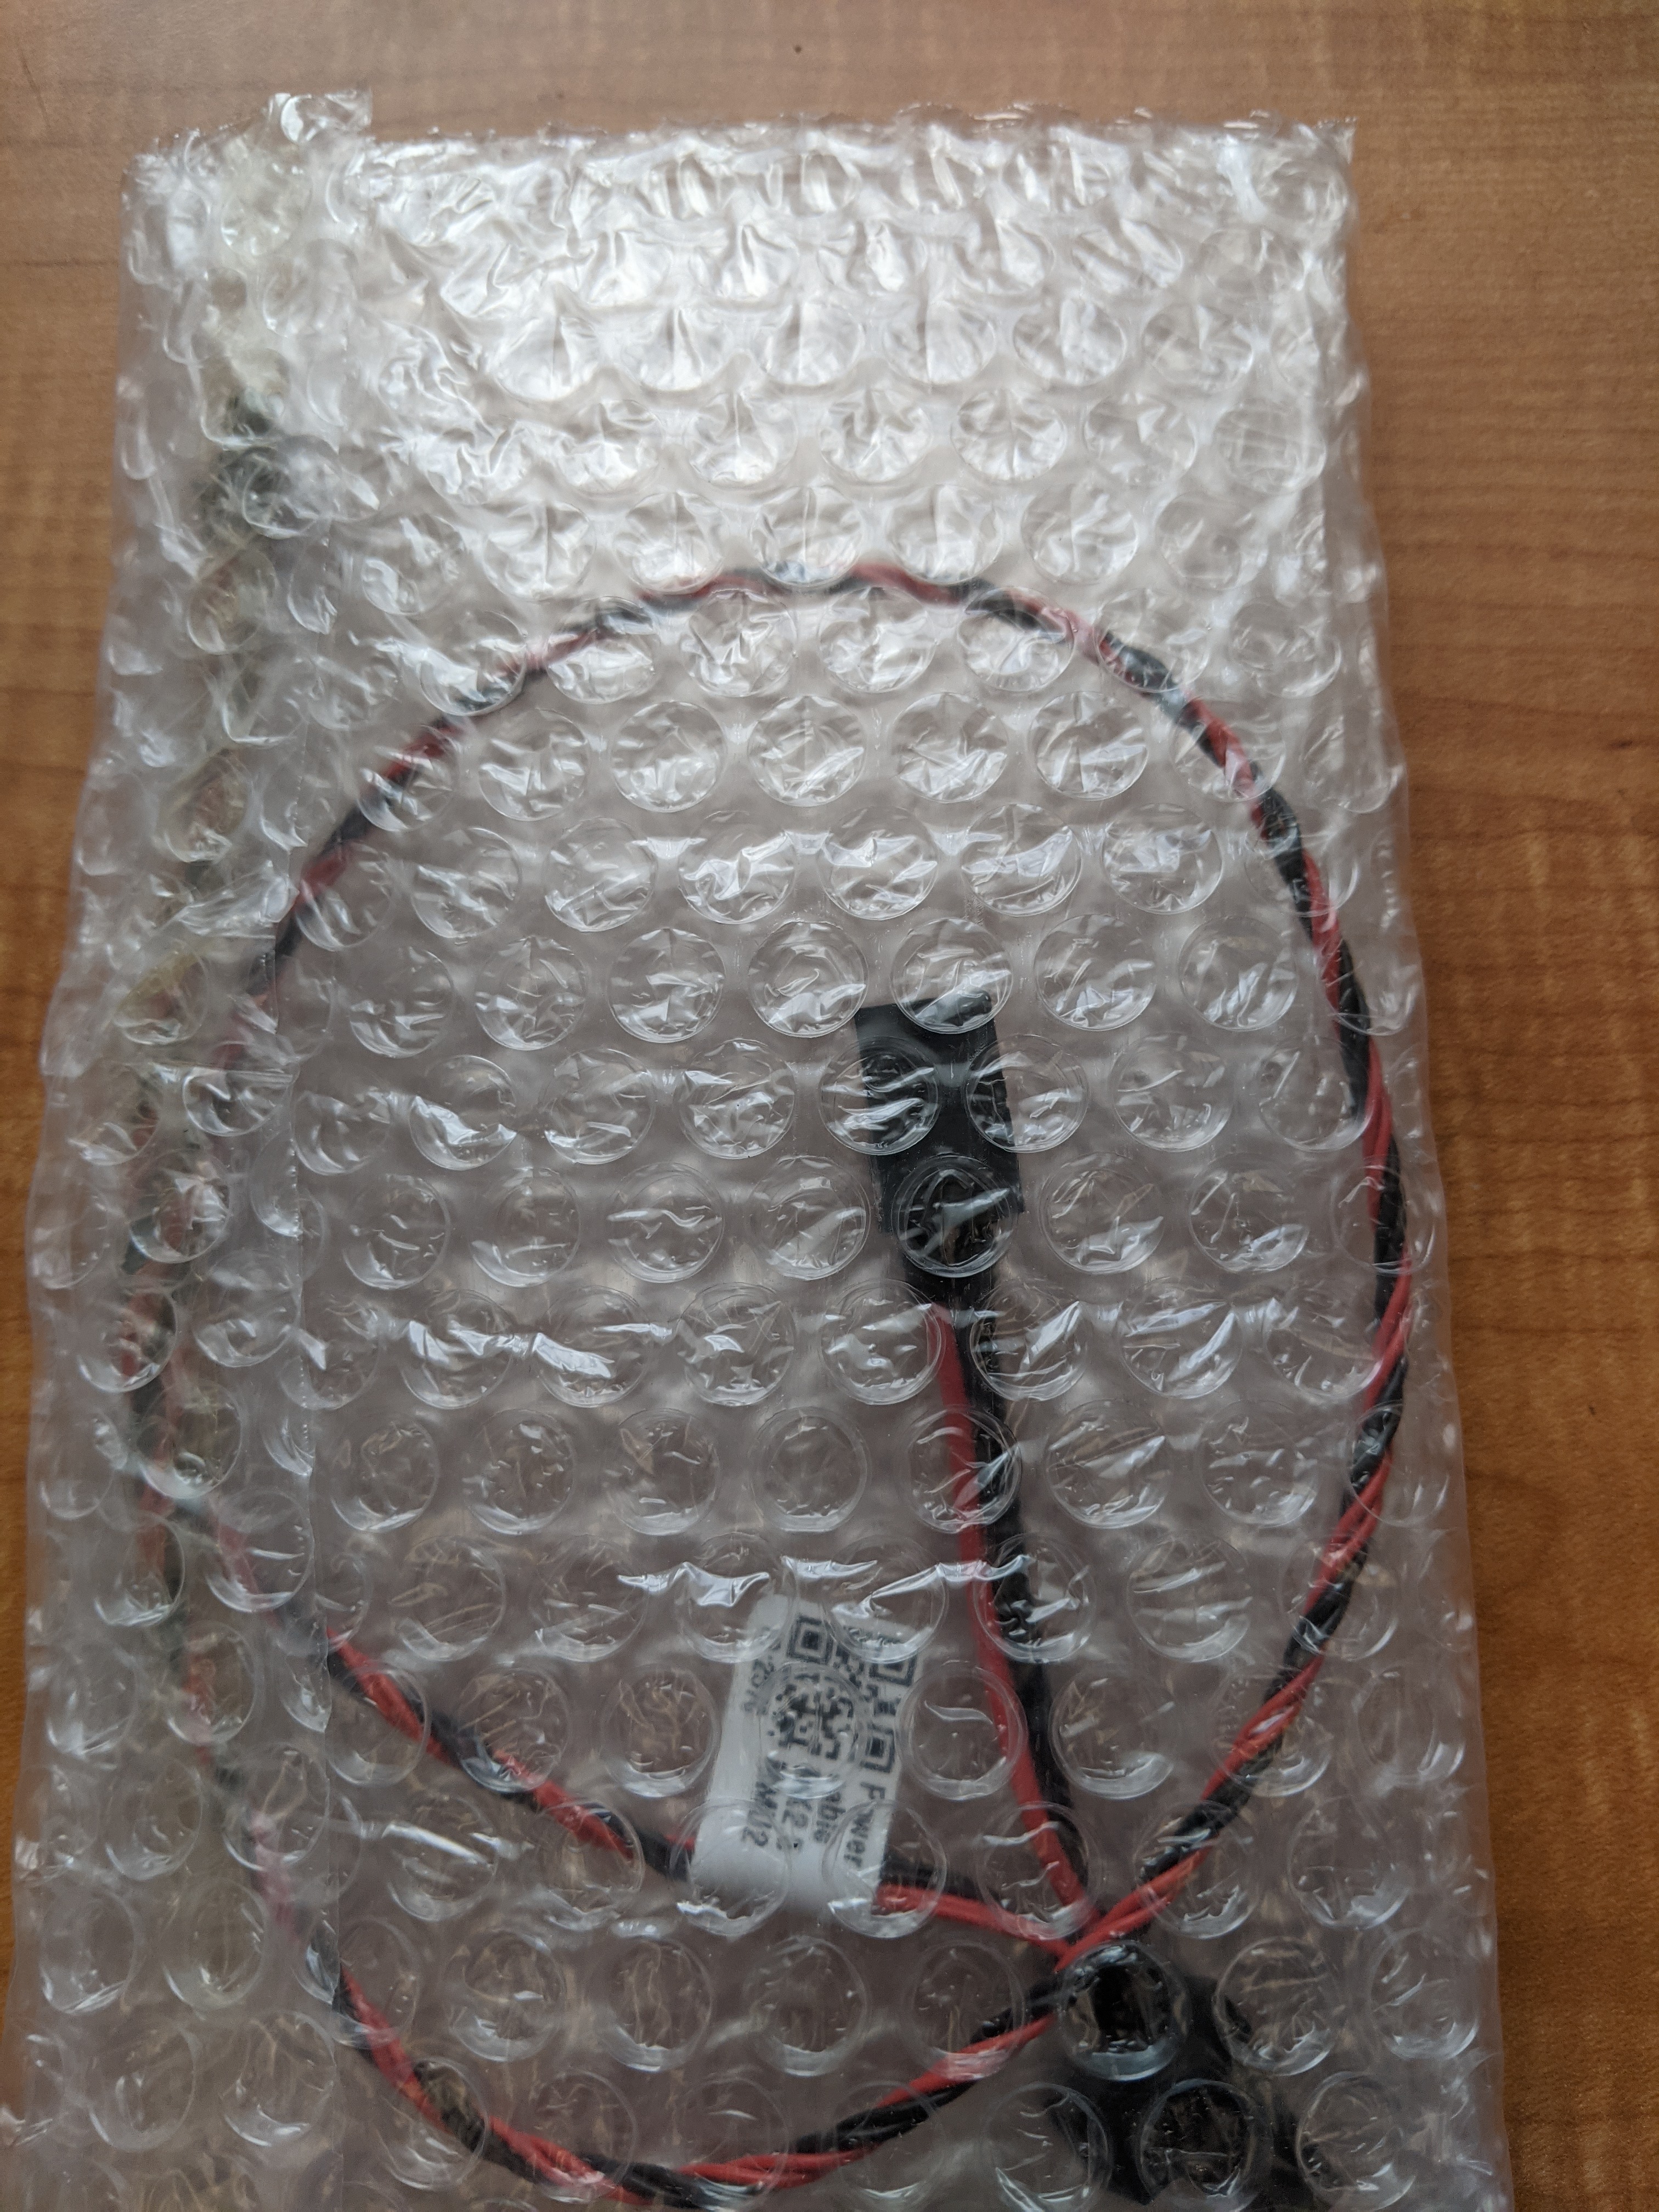
Picture 8, Power Cable, Ok MMU2S
Picture 9, MMU Screws Ok MMU2S
Picture 10, Spool Holder Bases OK MMU2S
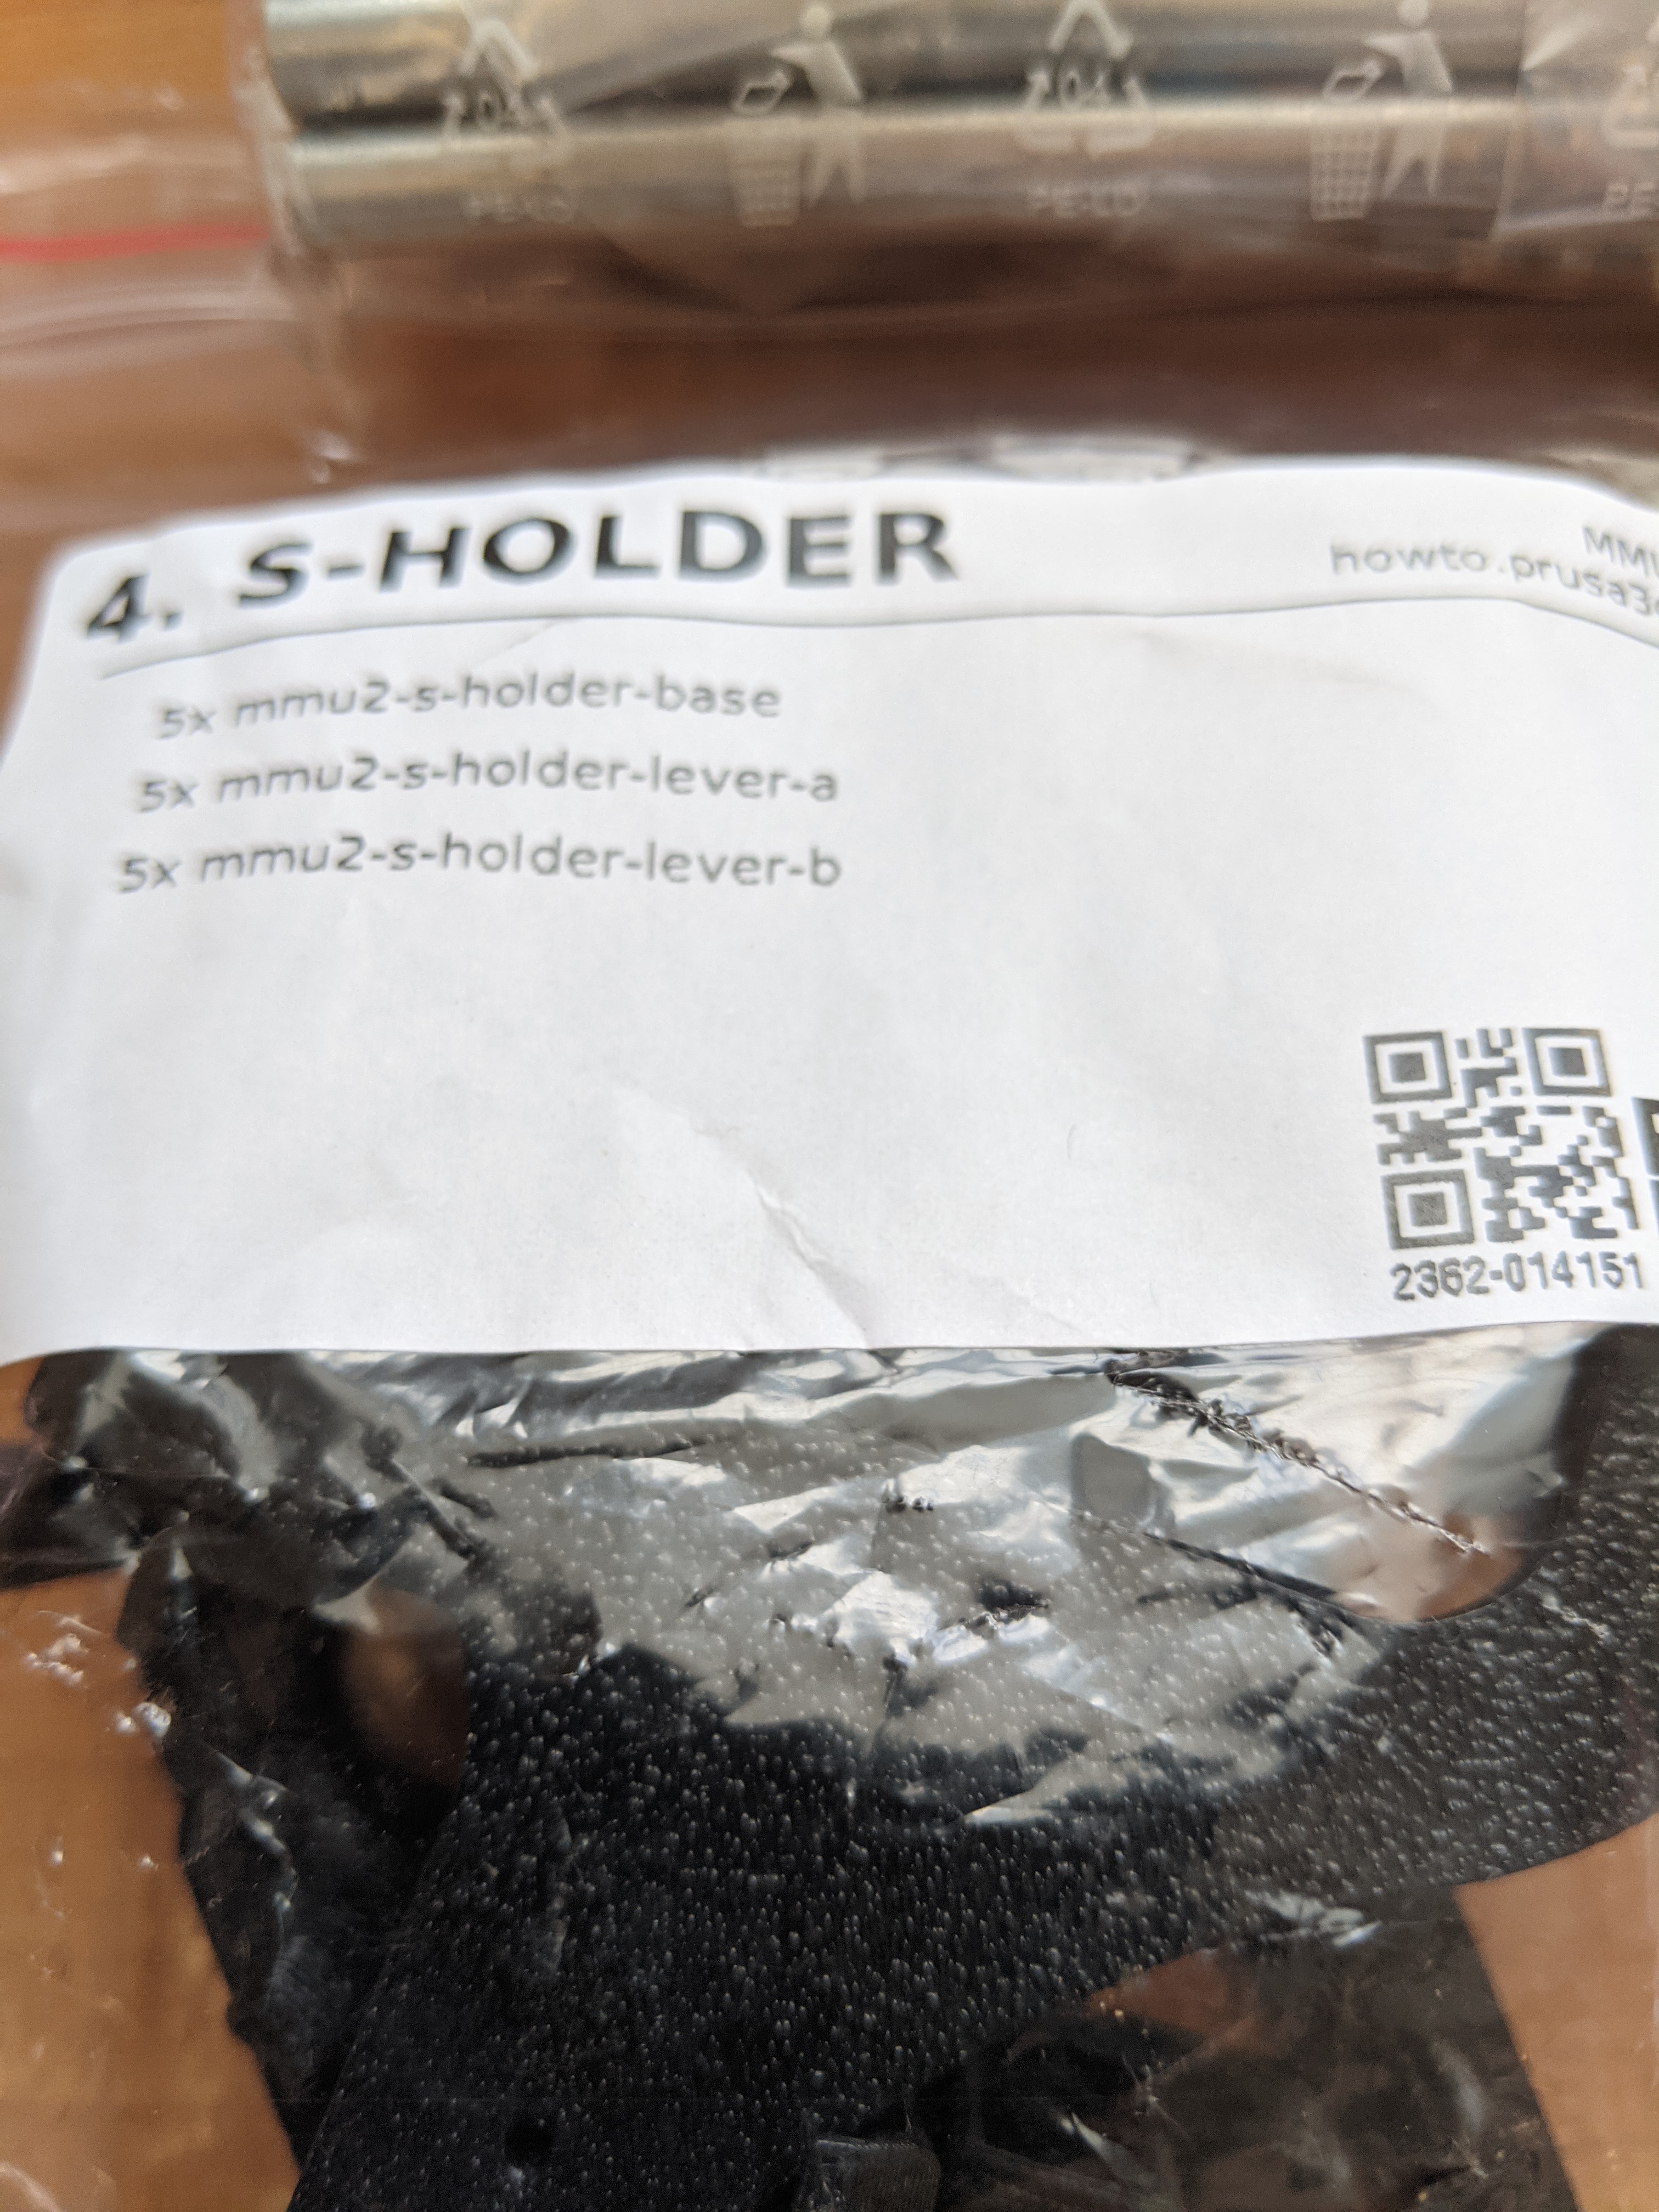
Lever a, Lever b, Not needed for MMU2S
Picture 11, Spool Holder Shafts and bearings + endstops... OK MMU2S
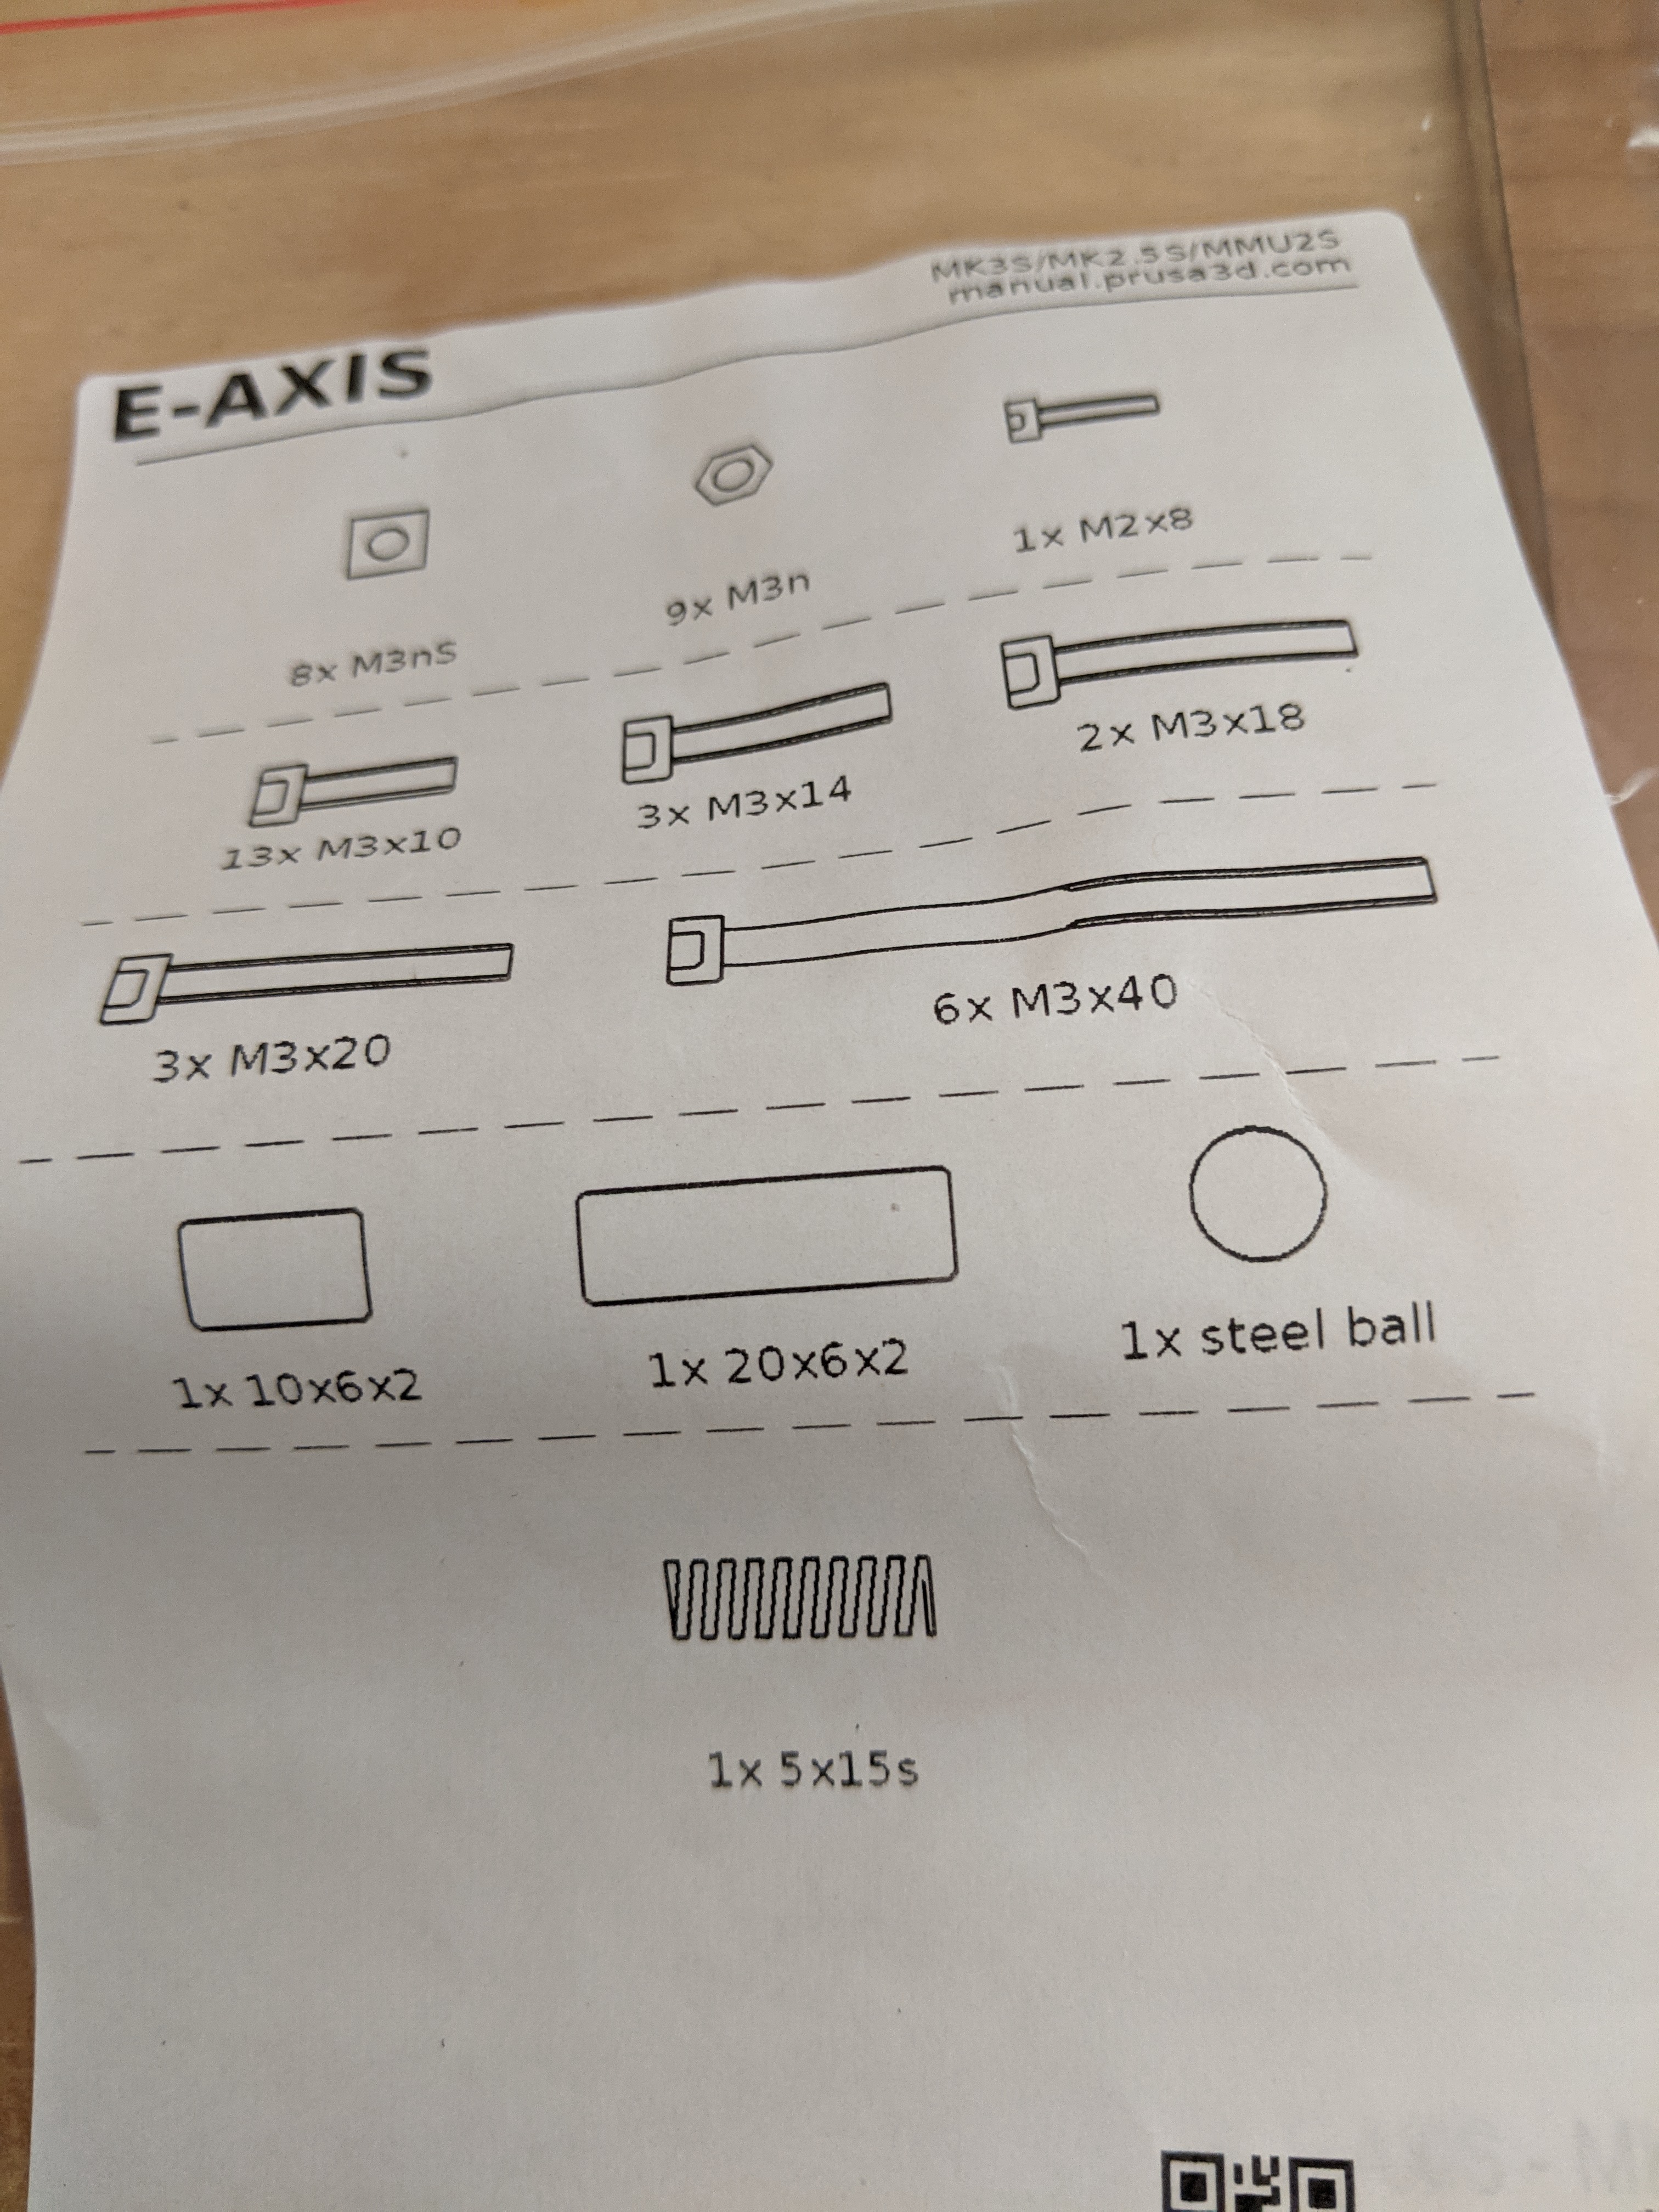
Picture 12 , 2 x 1.85 x 50 and 2 x PTFE -4 x 13(Probably junk, mk2.5 not S)
Data cable Ok, MMU2S
other parts ok general stock
Picture 13, Pulley Body... careful when tightening motor spindle clamps...
Picture 14, Parts Ok MMU2S
Picture 15, Ok MMU2S
Picture 16, Tools Good
Picture 17, probably junk... can't see enough detail
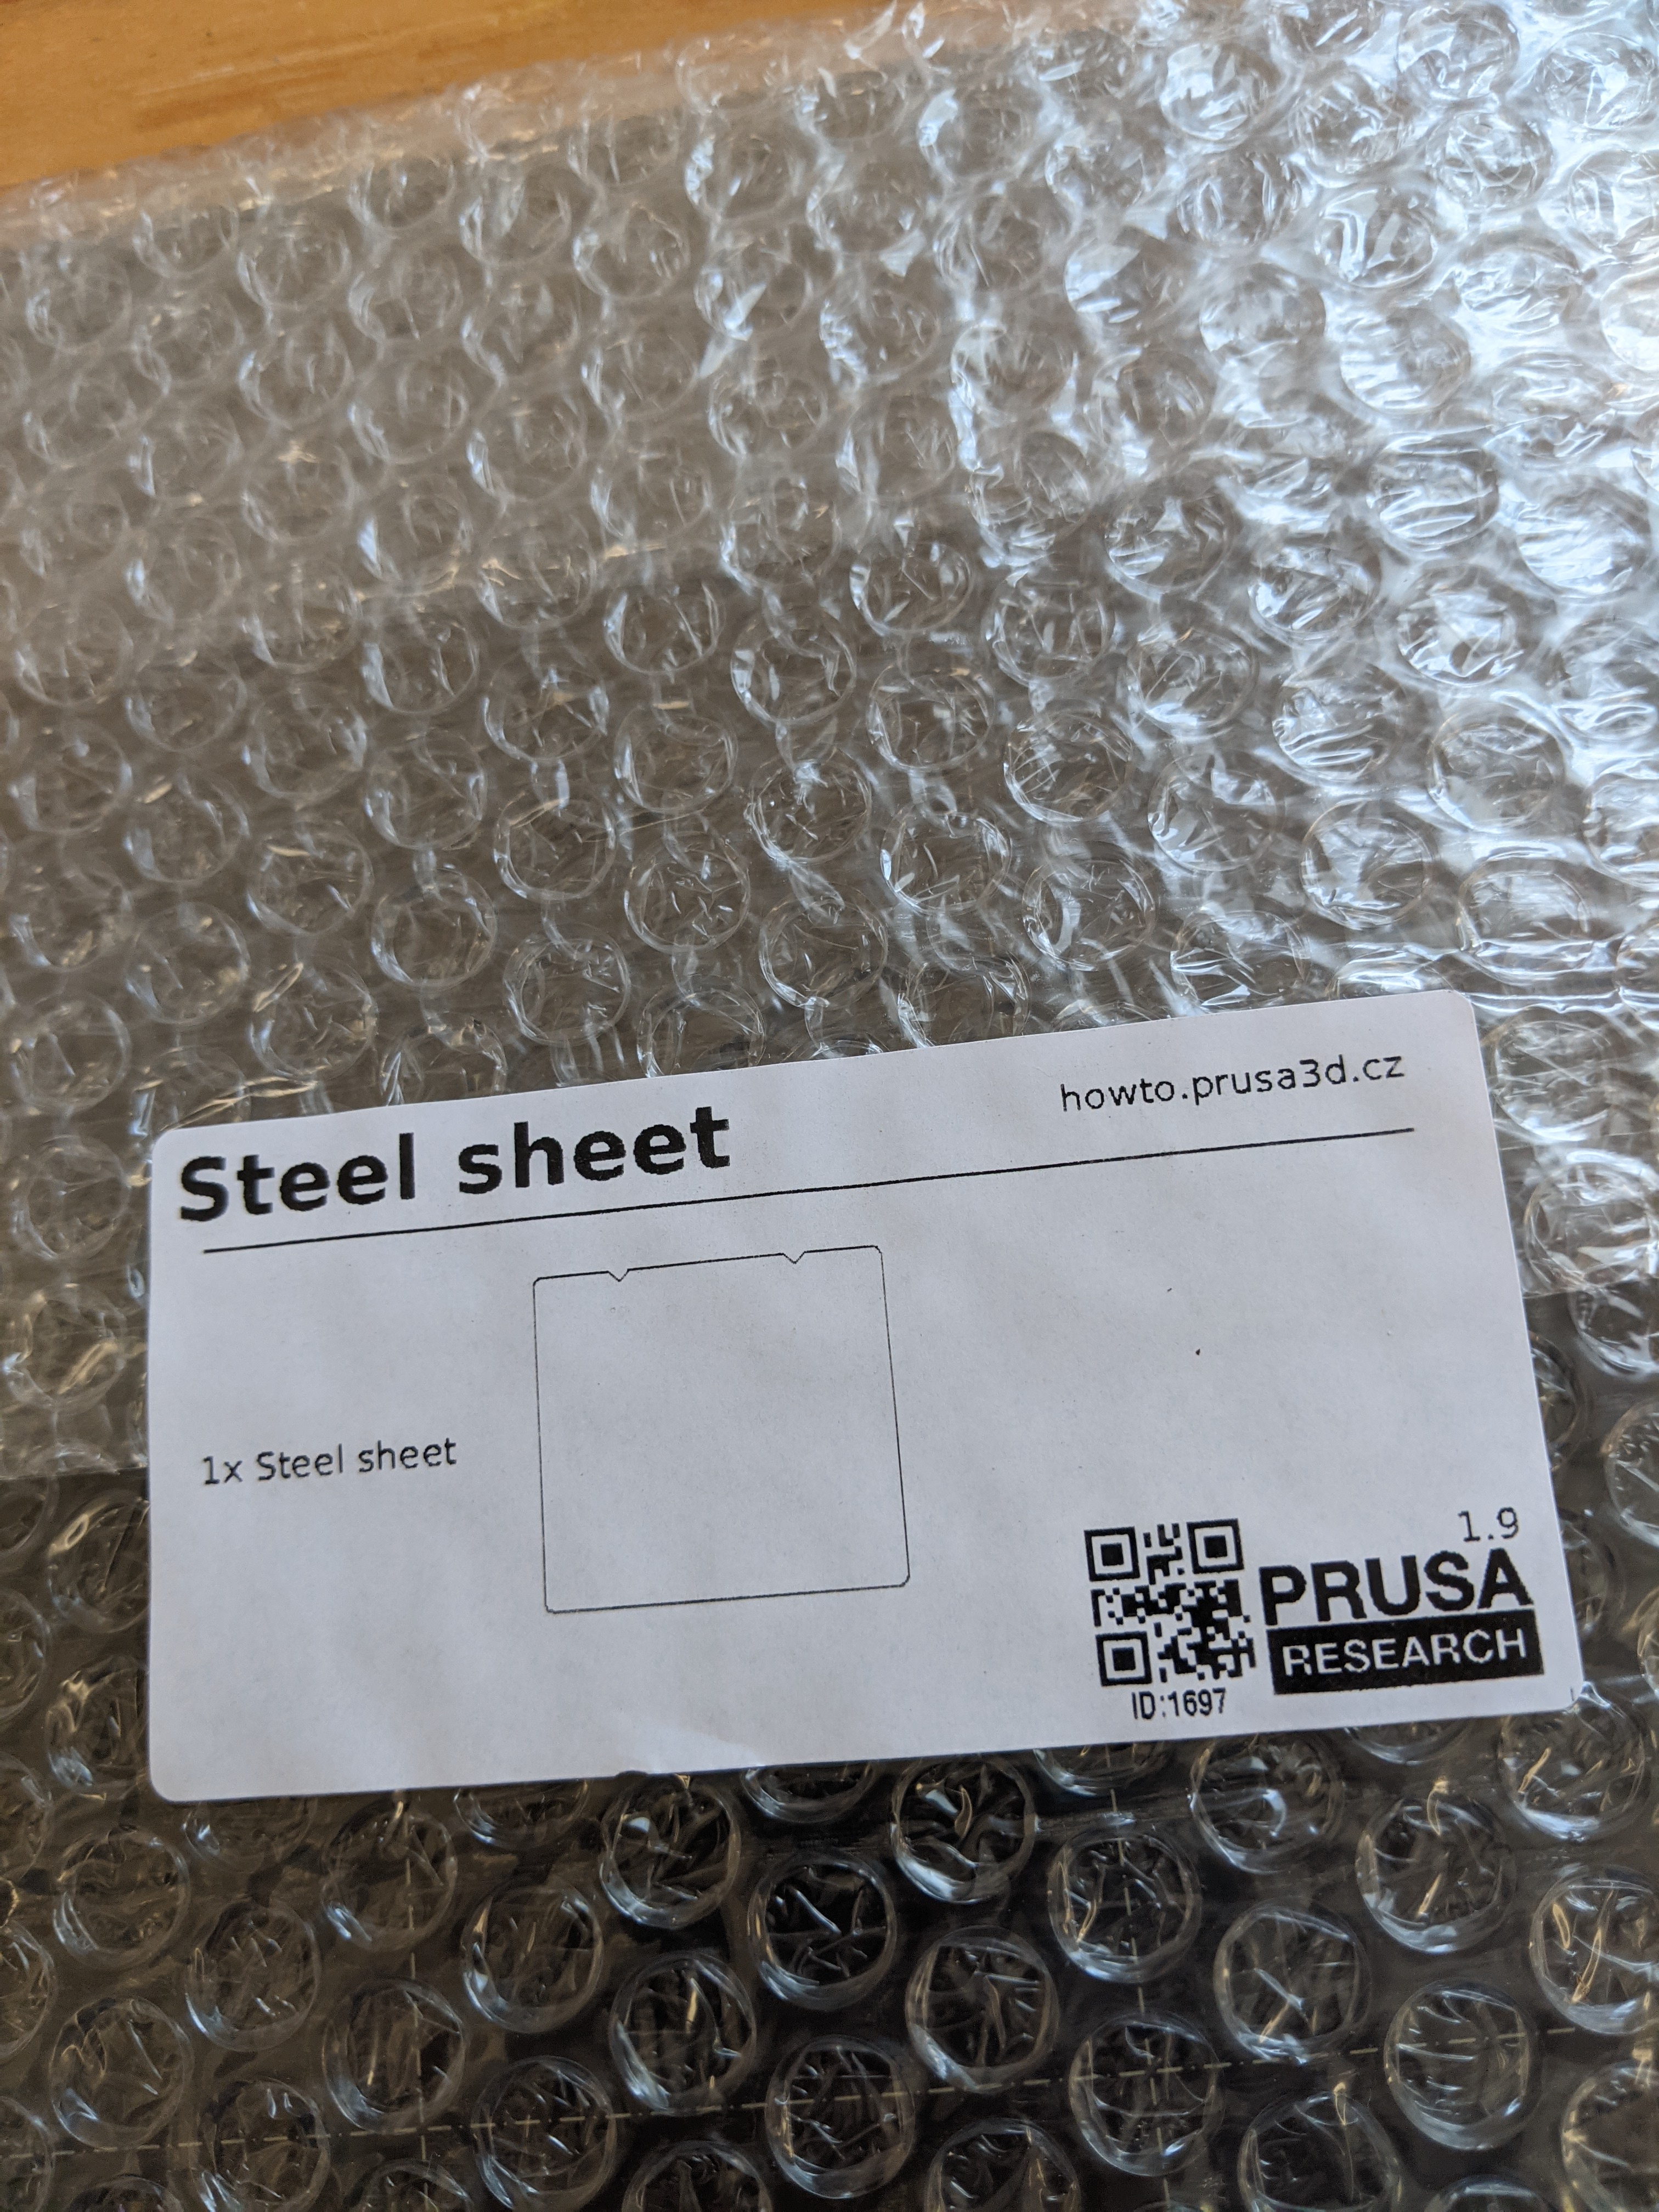
Picture 18, Another Steel sheet OK...
Picture 19, Basic Mk2, NO MMUv1 Worrying... this suggests that you have the WRONG MMU2 kit...
Picture 20, MMU2S Buffer Box dividers... this is what makes an MMU2 into an MMU2S. In the cable in the background is for the Infra Red filament sensor, this is good for Mk2.5S
picture 21, this looks like the Mk2.5S extruder Parts, good for Mk2.5S...
Picture 22, Good MMU2S parts
Picture 23Good parts Mk2.5 Extruder
Picture 24, Mk2.5S extruder hardware good
picture 25, Spare Parrs Good... If you print the modified MMU2S selector Block, you could use a magnet and Ball Bearing from this bag
Picture 26, Infrared filament sensor and PTFE liners for Mk2.5S extruder, compare the elngth of the Mk2.5 PTFE Further up, if the same as these tubes then the others are actually worth keeping
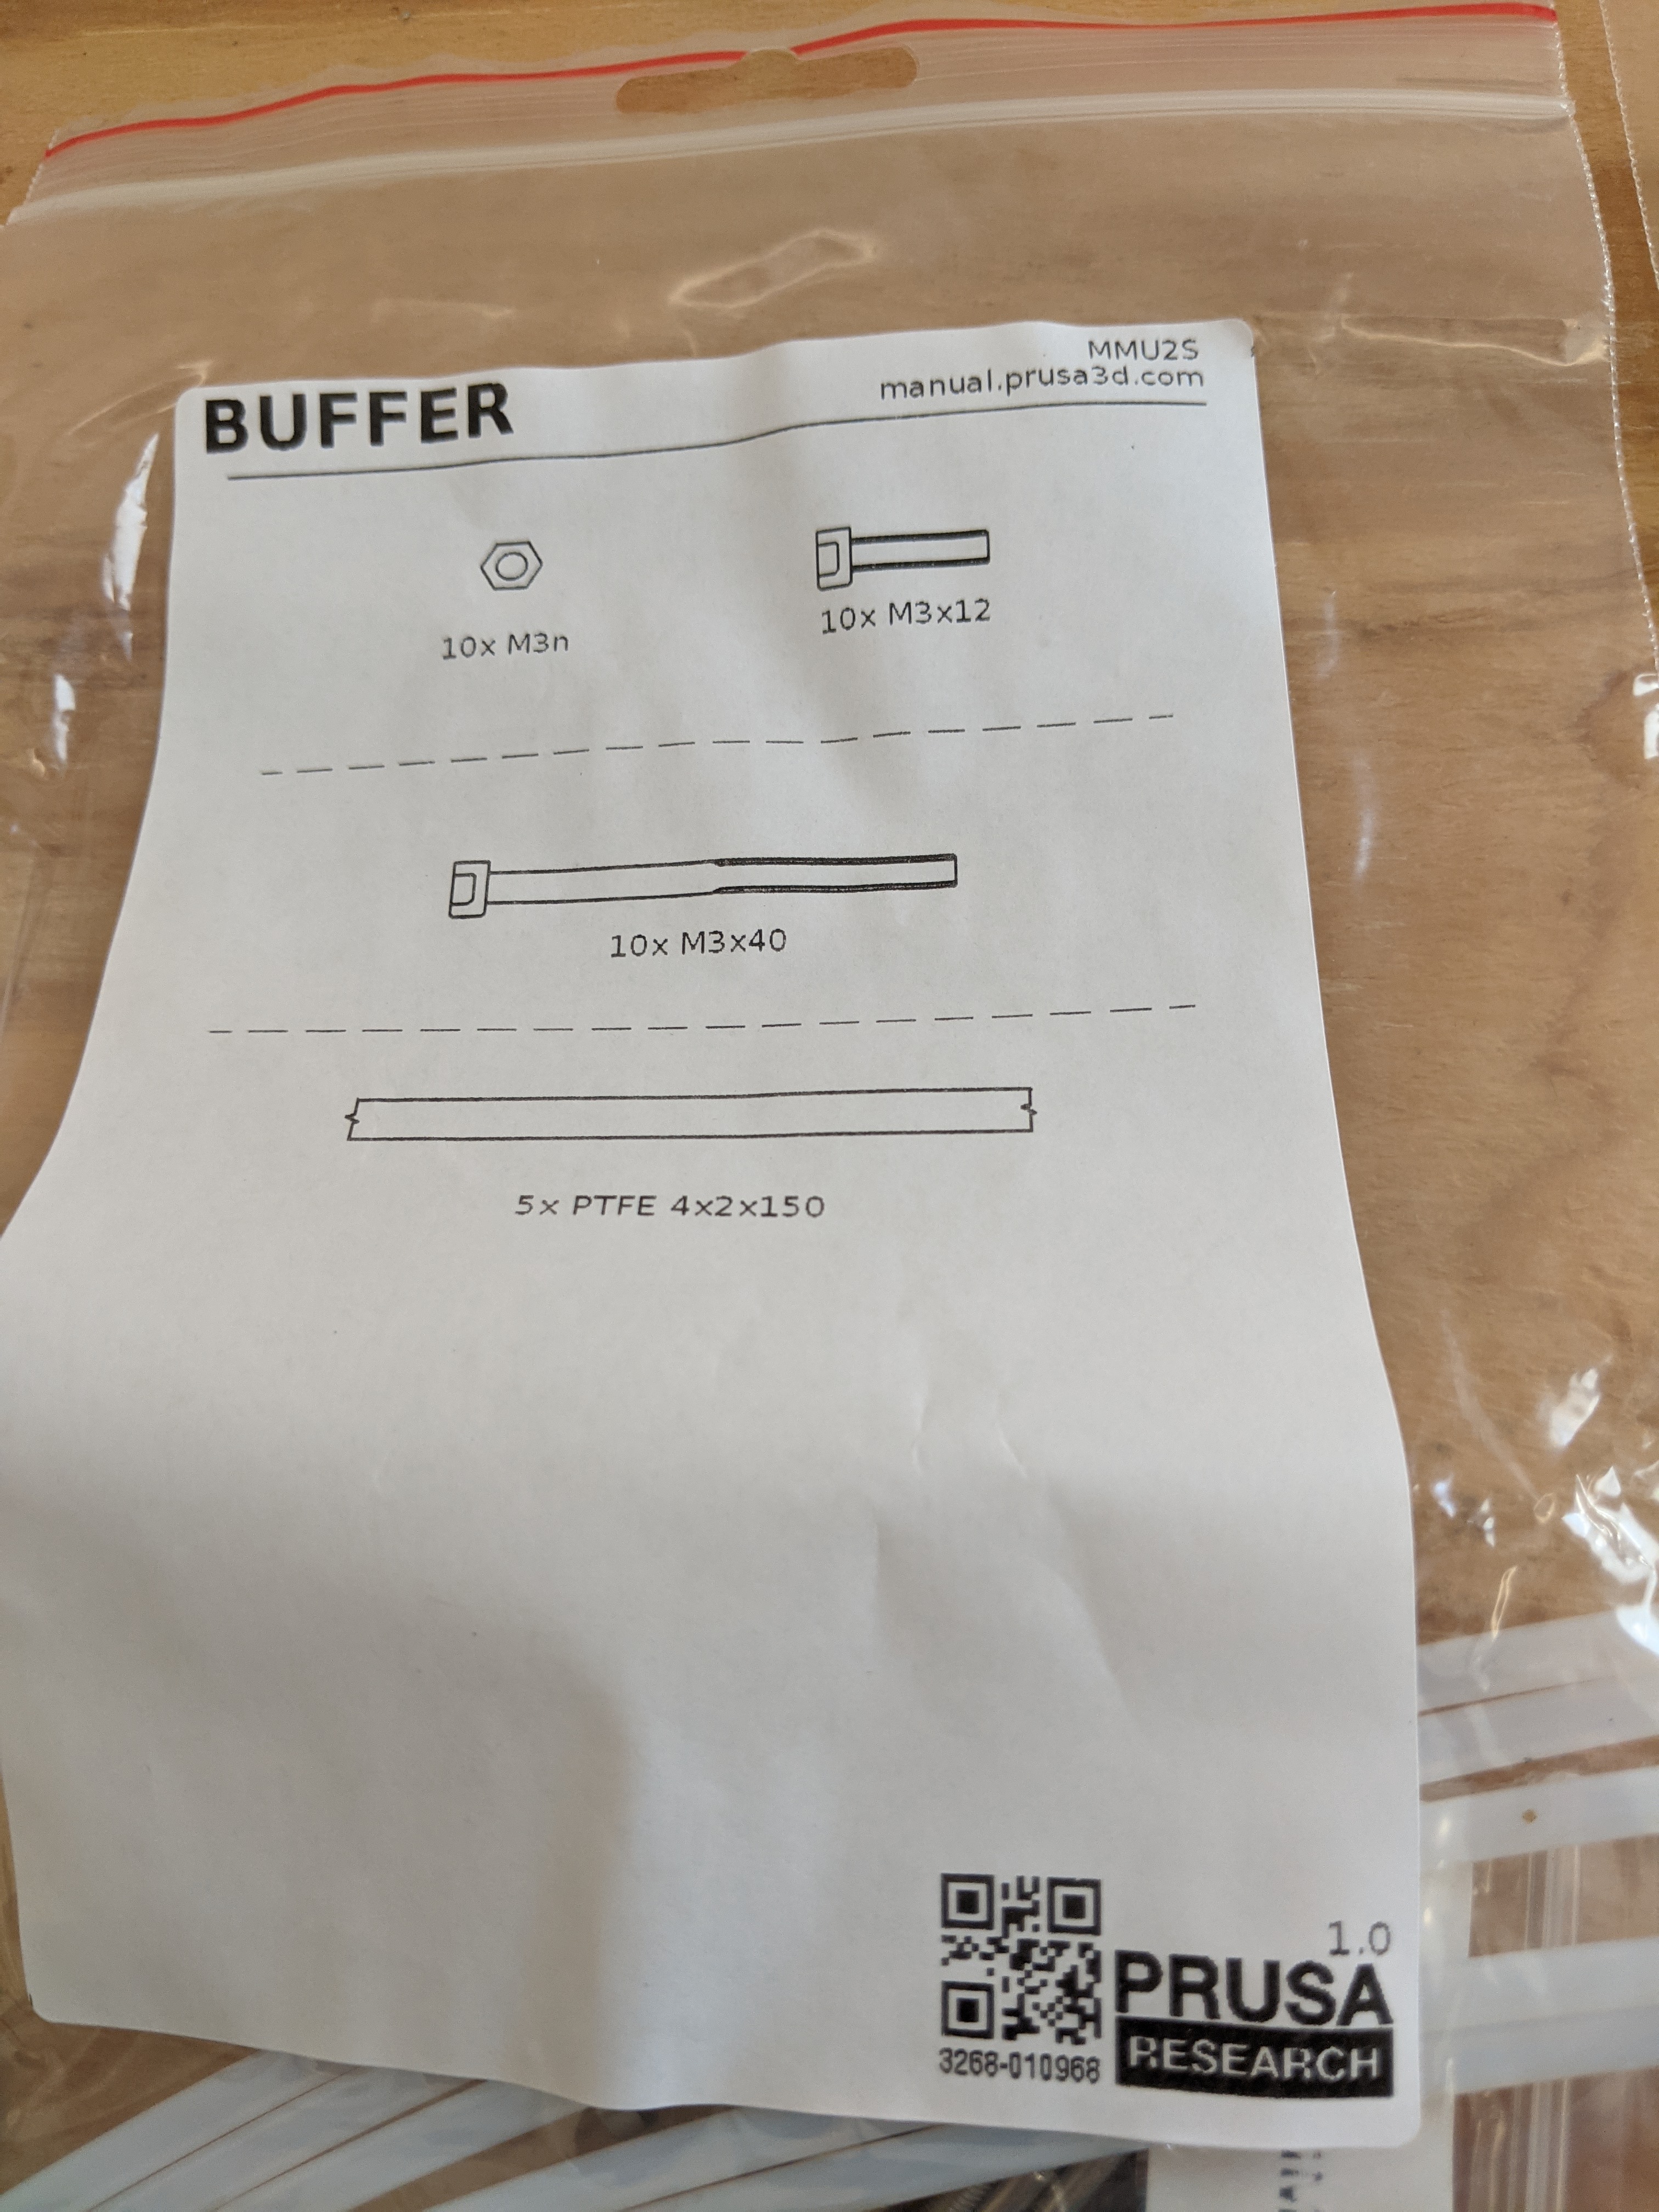
Picture 27, MMU2S Buffer Hardware Good
Picture 28, MMU2S plastics... Good
Picture 29, All parts ok for Mk2.5S apart from the Laser Filament sensor and Filament sensor cable (4 pin to 5 pin)
Pictue 30, PTFE Filament should be spare
Picture 31, MMU2 Plastics Good for MMU2S
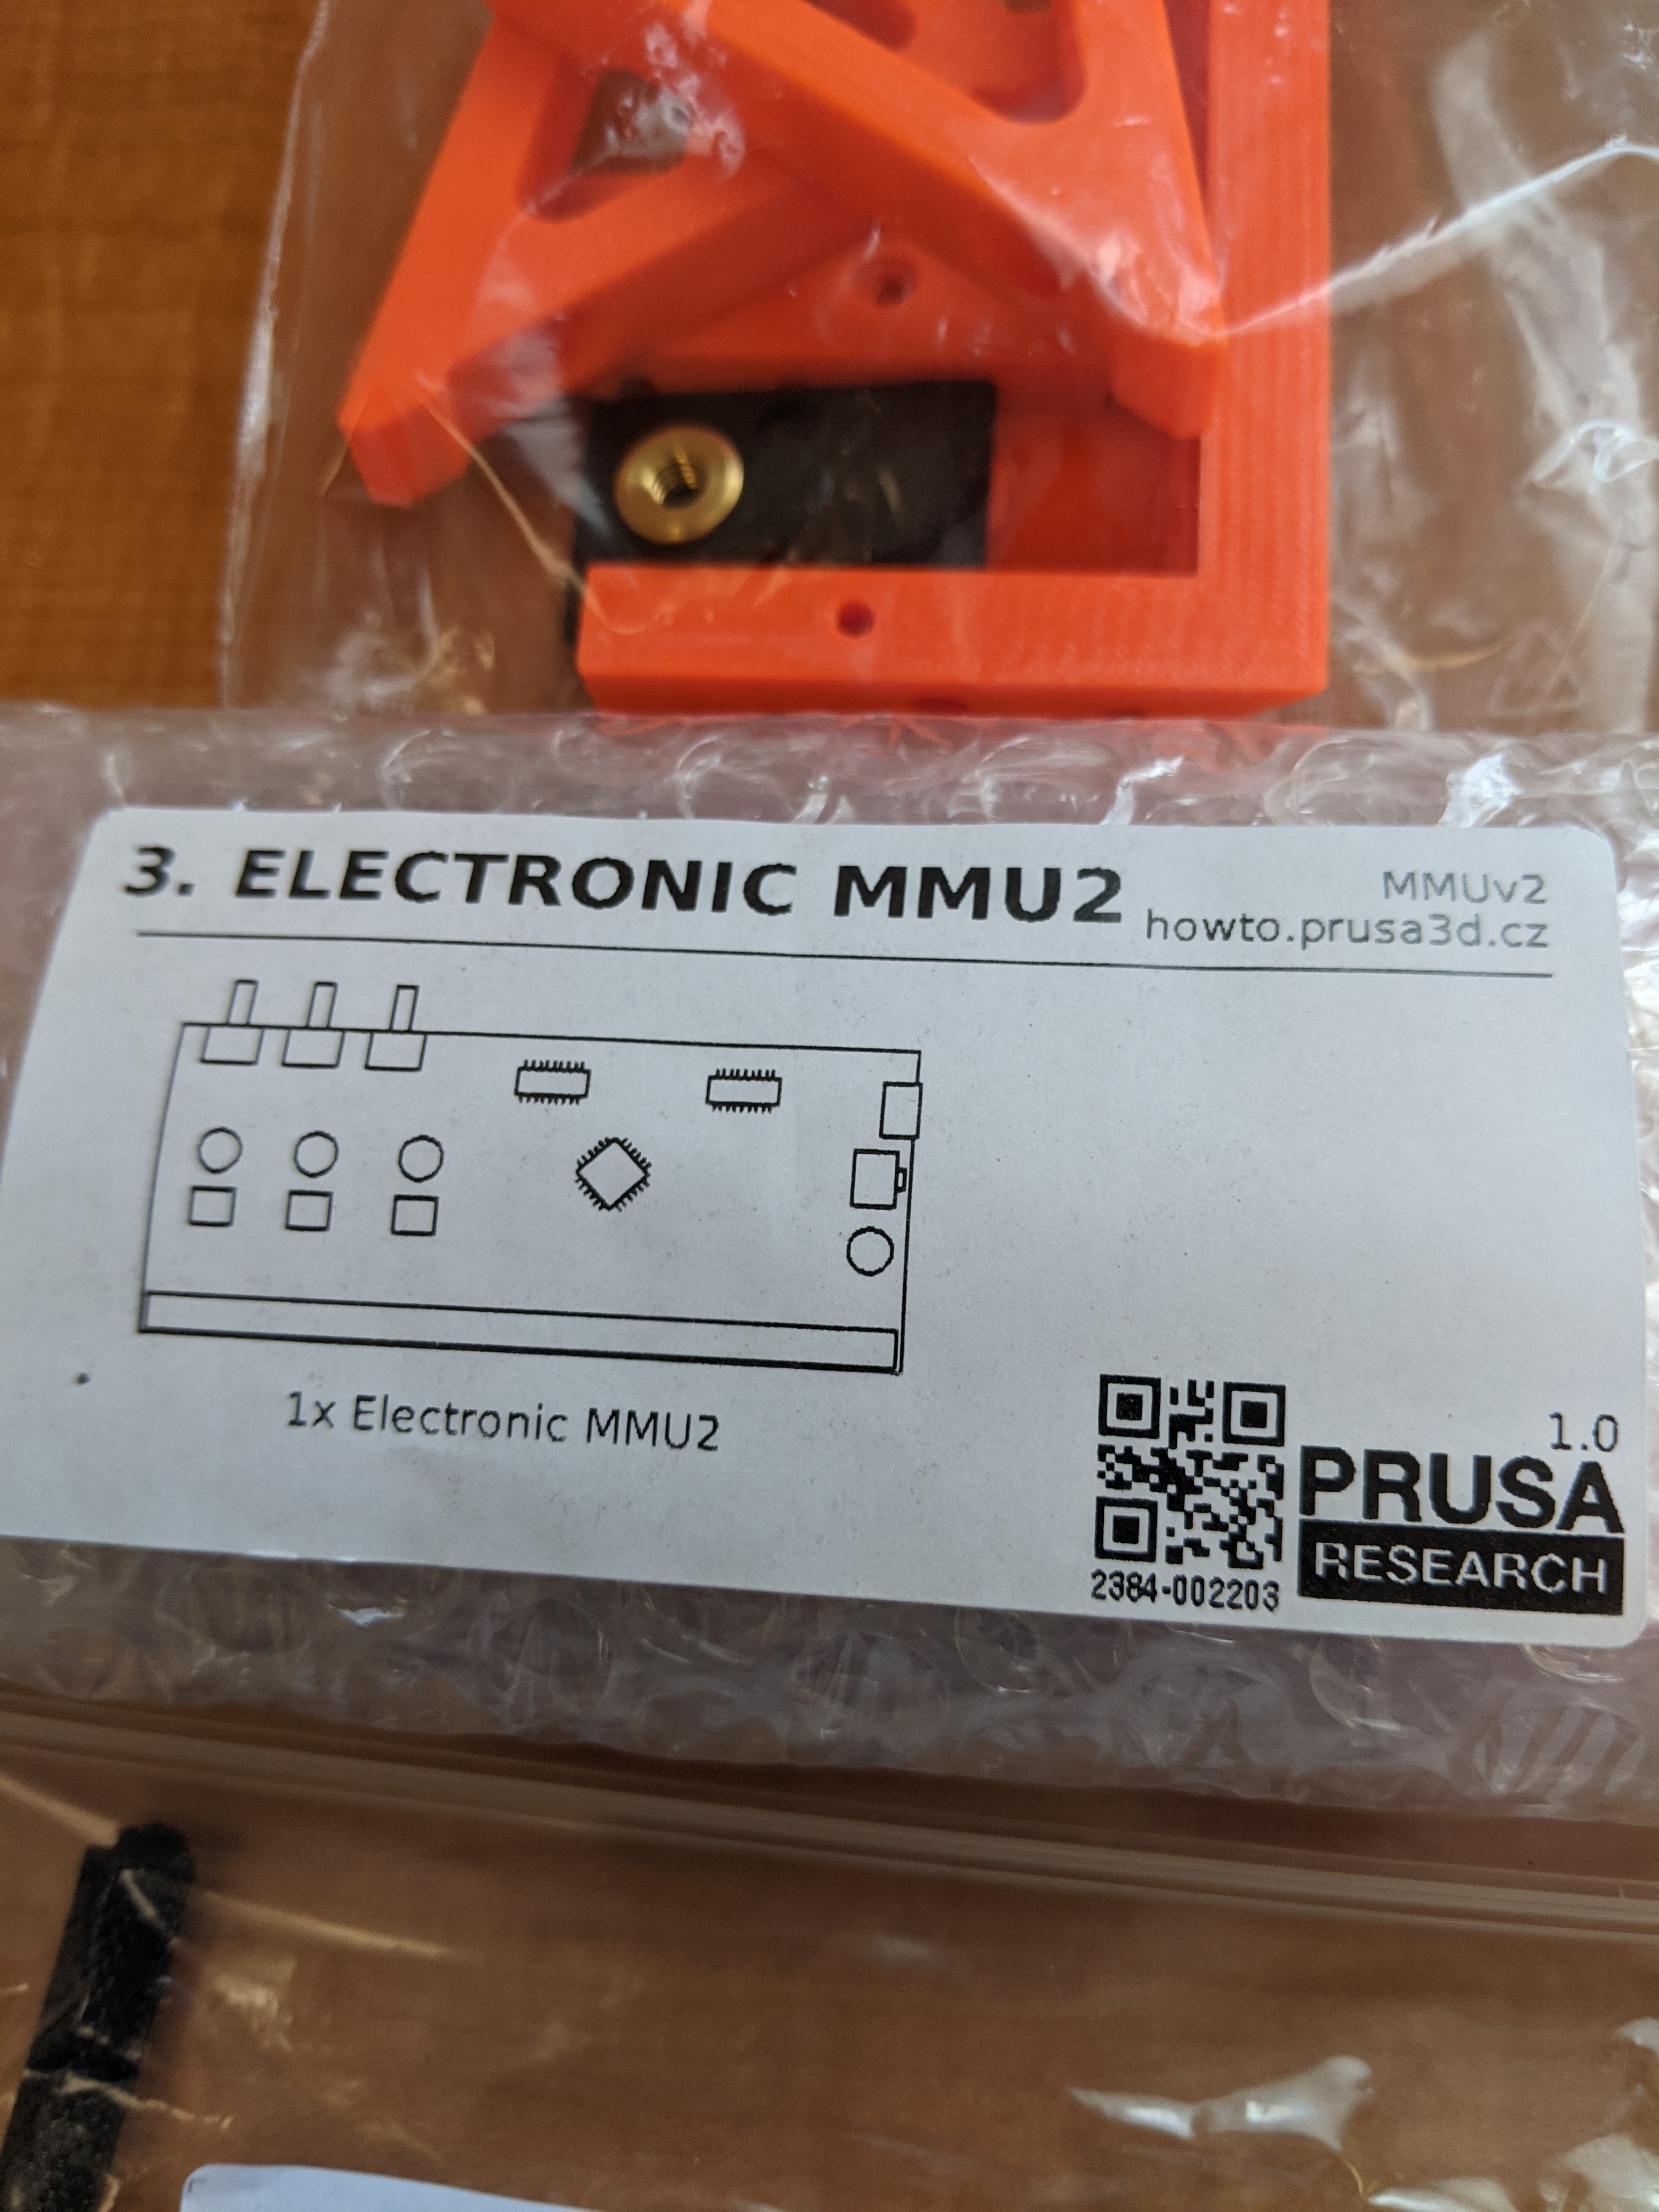
Picture 32, MMU2 electronics, good for MMU2S, Don't forget to reload firmware
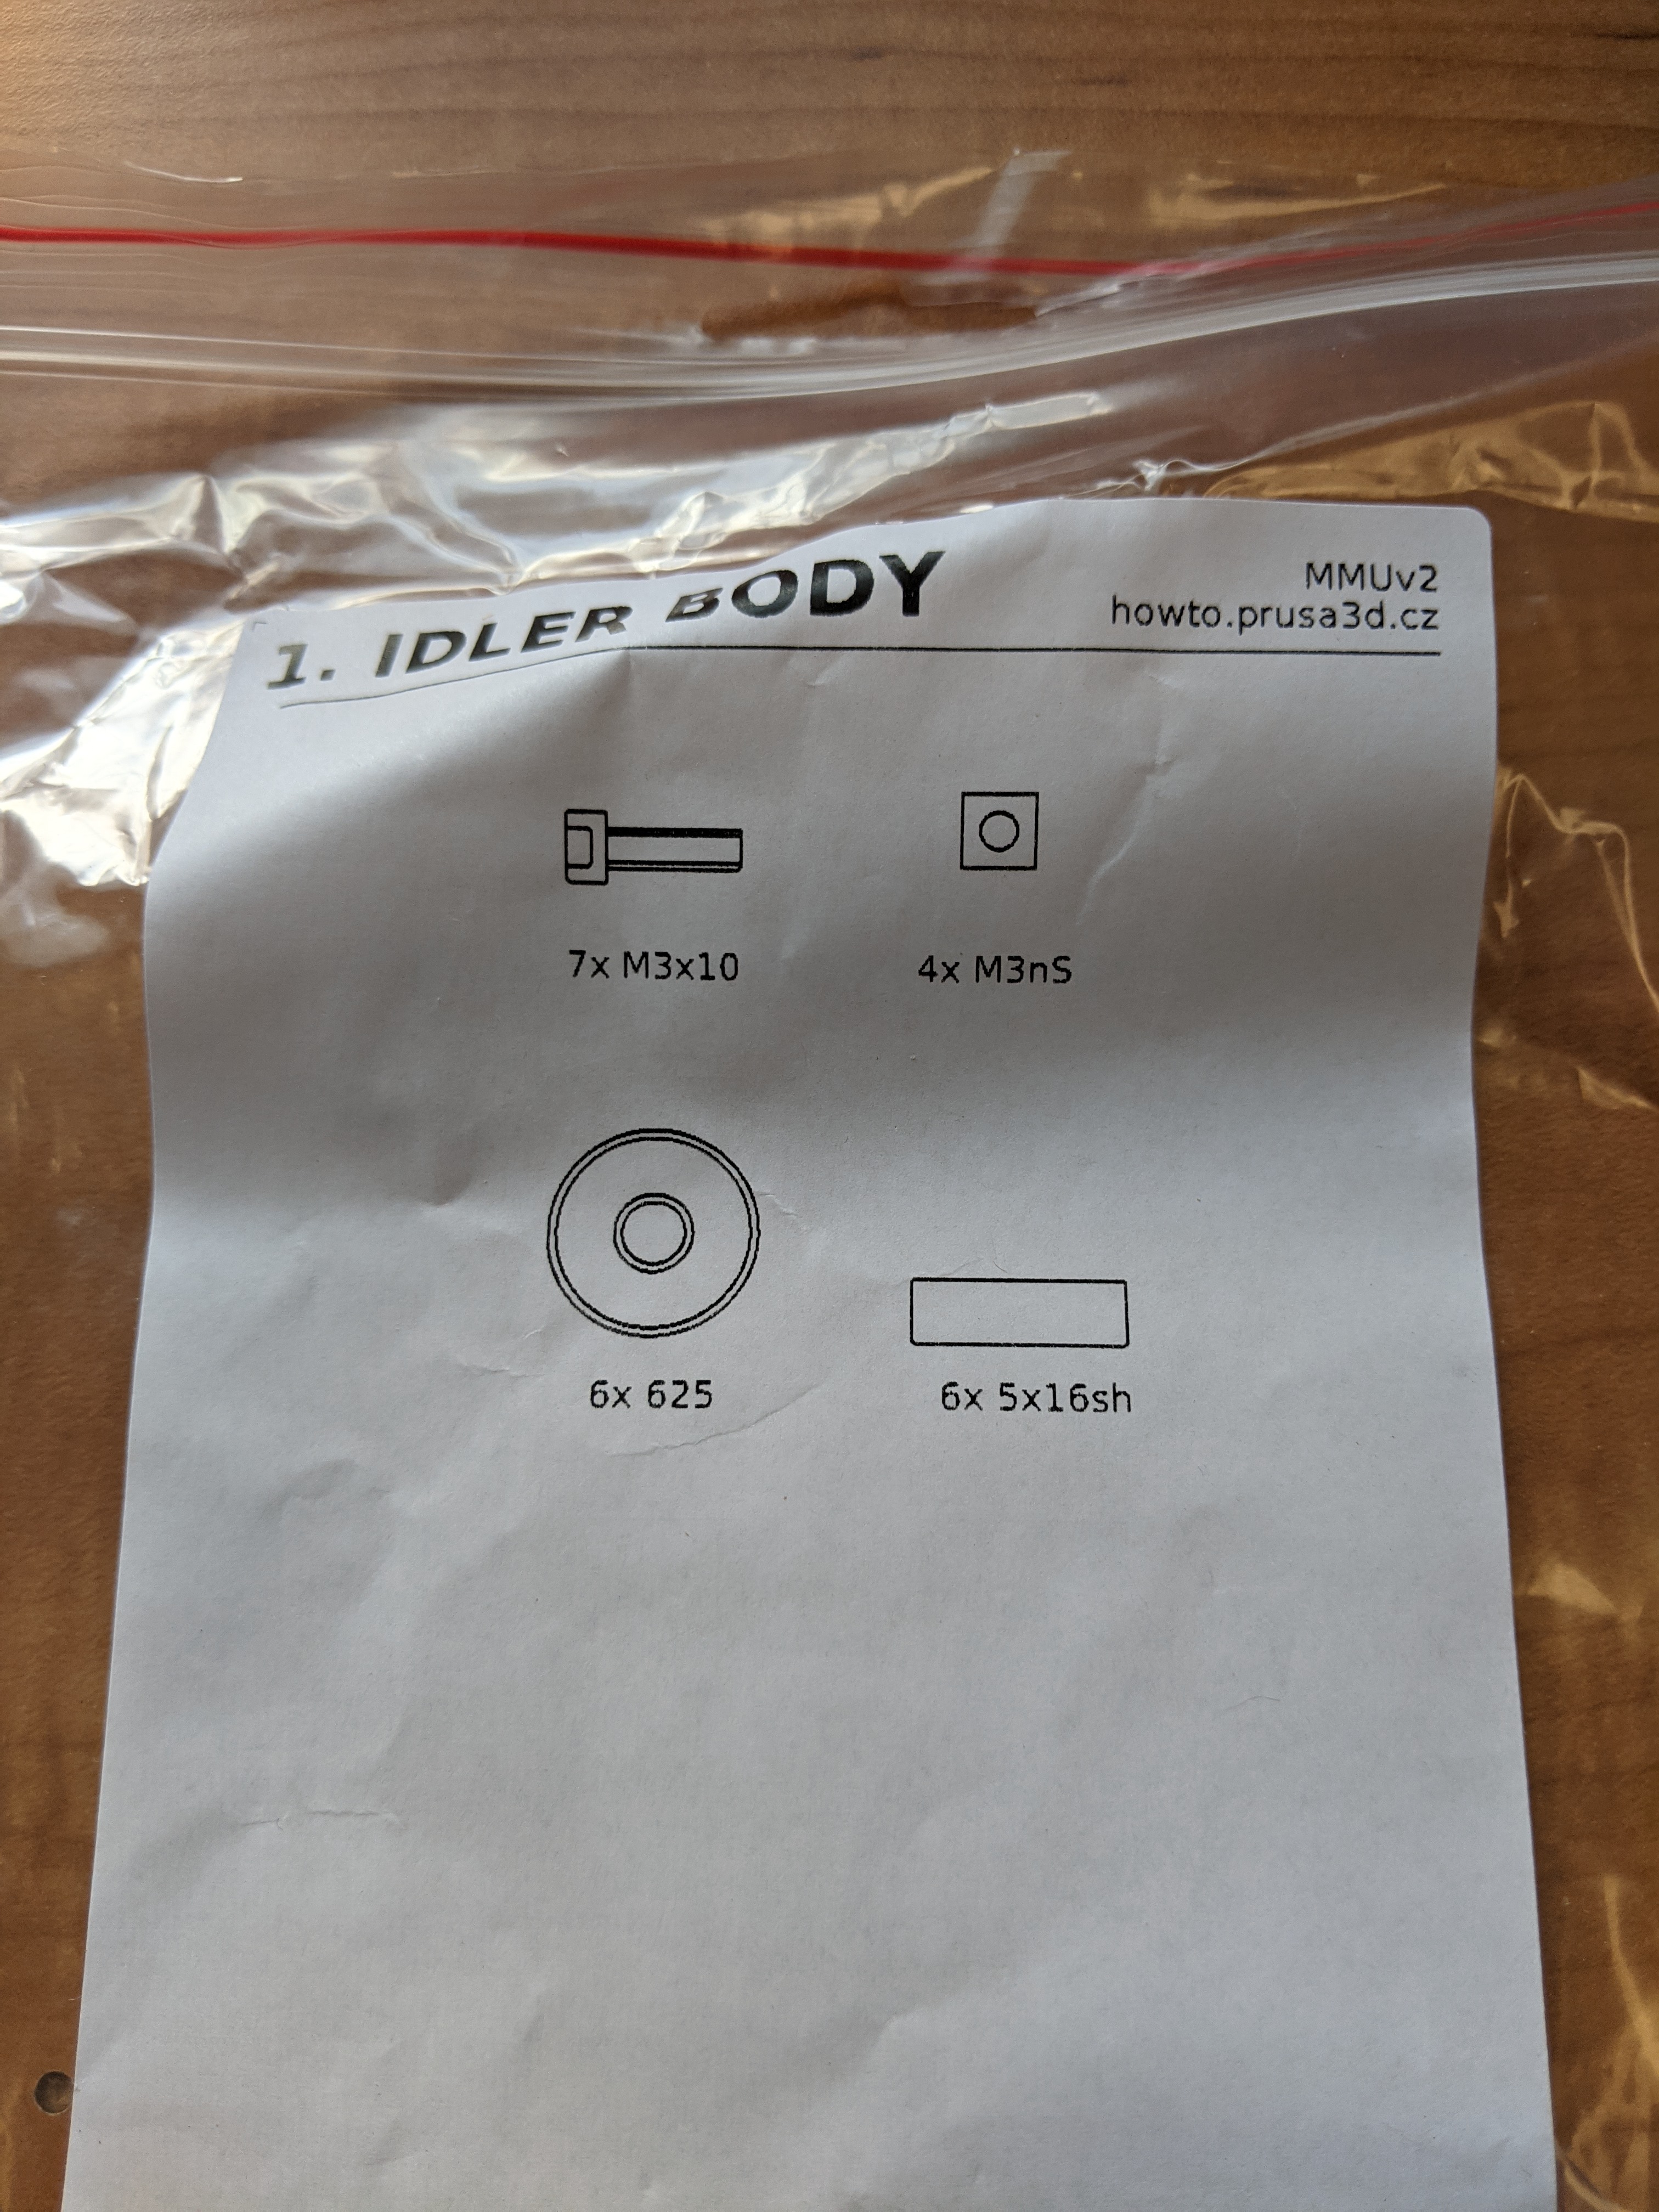
Picture 33, Idler Body, good for MMU2S
Ok, You have an issue, it looks like you ordered the wrong MMU2 upgrade kit.... Your donor printer, should look like this.........
the parts on the top of the frame are the MMU1 parts...
YOU don't seem to have this setup...
there are Four extruders up there, and you were supposed to re purpose three of them for the upgrade you have bought....
to resolve this error, ideally you would want one of these
and one of these
but as you can see, the long shaft motor is not currently available.
you have three options,
a, Buy two idler Motors and use one with the shaft extender that is in your MMU1 - MMU2 Upgrade,
b, Buy an additional Exruder motor and use it with the shaft extender
c, Buy a chinese version of the extended shaft motor.
Or I guess you could wait for the correct motor to come into stock at Prusa.
regards Joan
I try to make safe suggestions,You should understand the context and ensure you are happy that they are safe before attempting to apply my suggestions, what you do, is YOUR responsibility.Location Halifax UK
RE: Upgrades from Original Prusa i3 MK2
Thank you so much! It looks like I have work to do.
It appears then that these are the first set of instructions I should follow:
https://help.prusa3d.com/en/category/original-prusa-i3-mk2-5-to-mk2-5s-upgrade_312
Do you agree?
RE: Upgrades from Original Prusa i3 MK2
@ebgodel
pretty much, yes.
regards Joan
I try to make safe suggestions,You should understand the context and ensure you are happy that they are safe before attempting to apply my suggestions, what you do, is YOUR responsibility.Location Halifax UK