Max Bed Size too small?
Hello everybody,
I just had to dial in PJR's bed correction values by using Jeff's altered firmware (see Hyperfine bed leveling?).
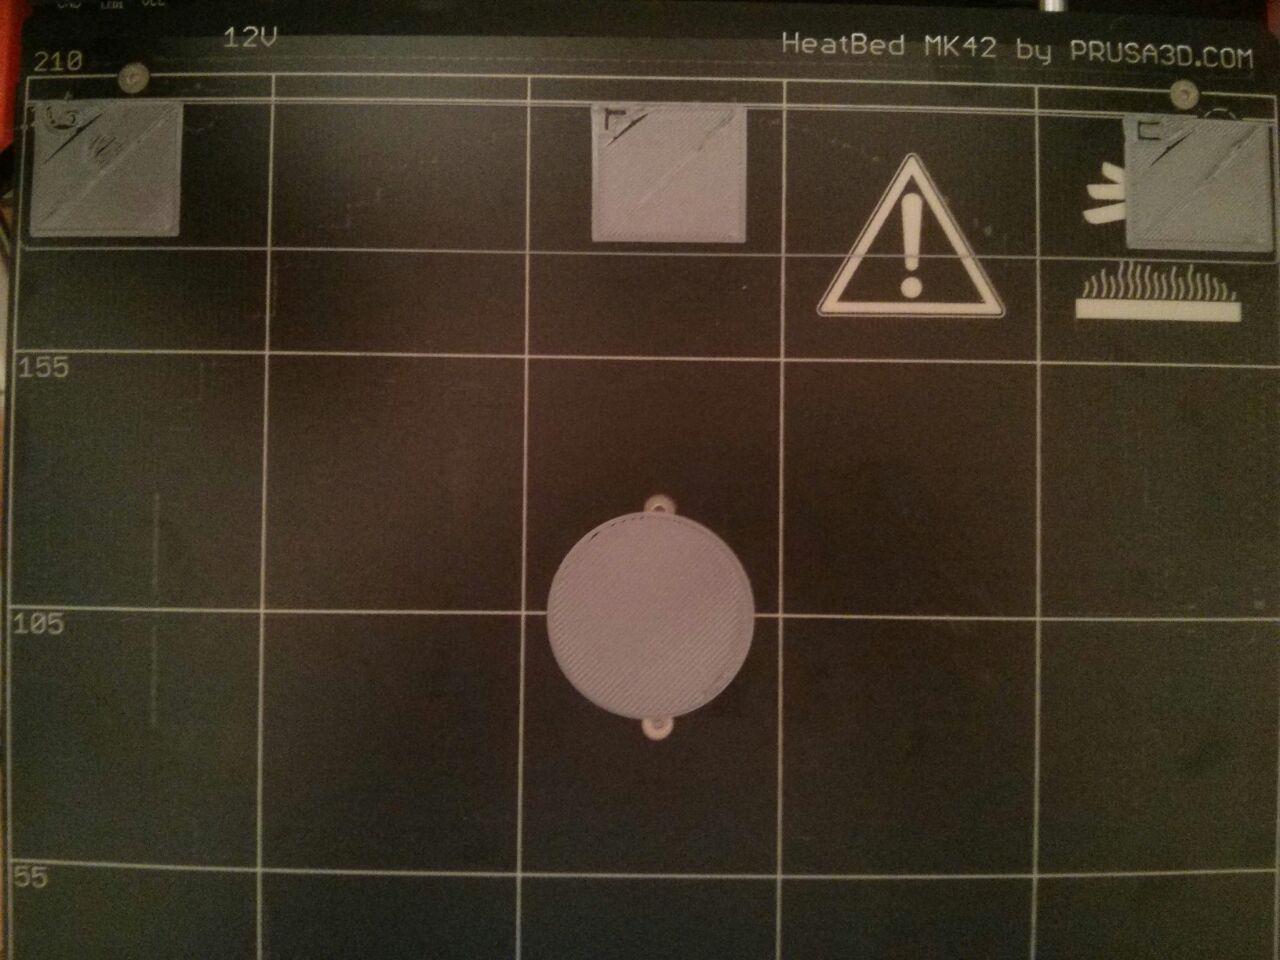
Everything went smooth, except for the last row, calibration points E-G were messed up completly. I thought the gcode could be corrupt so I downloaded it again, nothing changed. I sliced the calibration squares myself, nothing changed.
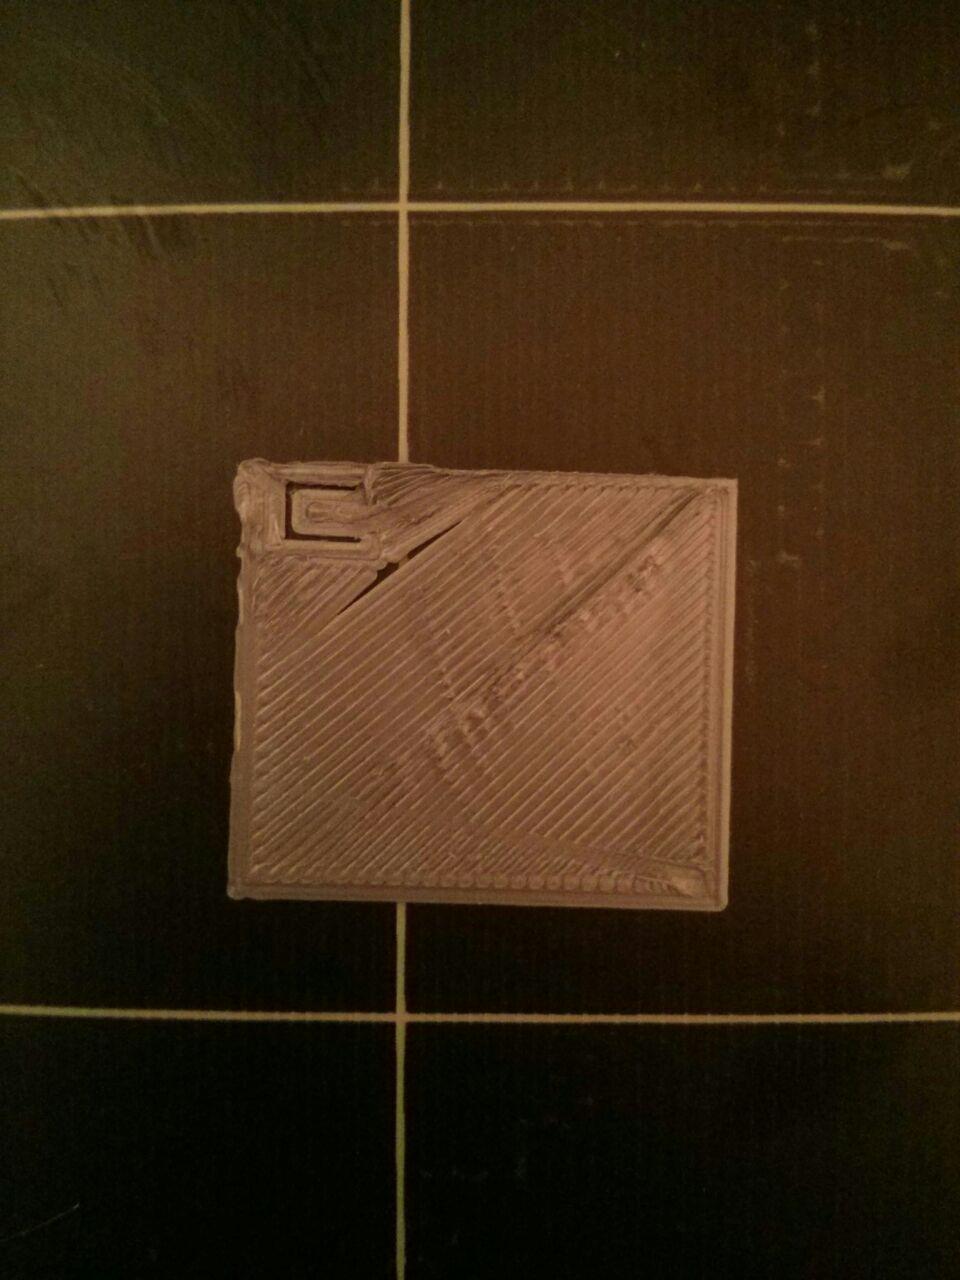
The squares are always cut exactly along the 205mm mark and show the same fails on my sliced ones and those sliced by Jeff.
I always get the same things of under-/over-extrusion on the same parts of the squars e.g. the big scar in point E or the acute triangle directly under the letter.
Espacially the fact that my printer seems to think it only has a 205mm deep printbed, and I did some minor alterations to the firmware myself made think I might accidently changed the values for the axis demensions. But after I looked at it, everything seems okay.
So I am pretty much out of ideas now 😐 and would be happy if you could come up with any suggestions on what to do now.
Re: Max Bed Size too small?
So I did some more testings.
After I calibrate Z and try to move the Y-axis via the menu. It will always stop moving forward at 204.4 mm, even if I disable the steppers, move the bed back by hand and then moving it back to the front using the menu, it will always stop at 204.4 mm.
However if I restart my printer, move the bed back until it triggers the endstop while being turned off and then try to move it via the menu again, without calibrating Z, it will drive up to the front, displaying 210 mm.
I can't see anything of the y-axis hitting something or anything else causing the bed to stop at 204.4. Moving it around with my hand is very easy.
So far with my testing, still clueless, though.
Re: Max Bed Size too small?
Sounds very much as though your Y axis is not positioned correctly with respect to the Z frame.
With the power off push the bed back to the end stop and measure from the zero line to the nozzle in the Y direction - it should be about 4mm (I think).
Peter
Please note: I do not have any affiliation with Prusa Research. Any advices given are offered in good faith. It is your responsibility to ensure that by following my advice you do not suffer or cause injury, damage…
Re: Max Bed Size too small?
I noticed yesterday, that the nozzle is just at the very end of the bed, outside of the PEI sheet when the bed is all the way to the back. So the distance between your described 4mm and the position of my nozzle is pretty much my misssing 5.6mm of bed movement.
I checked the distance between the Z-frame and the Y-corners which is still 100mm.
Do you recommend moving the Z-frame back despite this fact?
Re: Max Bed Size too small?
Actually, is that even possible with the PSU connected to both the Y-axis and Z-frame, limiting the option to push the Z-frame back?
Re: Max Bed Size too small?
OK, so you do have an assembly issue.
I wonder if your Y chassis is the wrong way around? Of the belt fastener under the chassis? (most likely the former)
Peter
Please note: I do not have any affiliation with Prusa Research. Any advices given are offered in good faith. It is your responsibility to ensure that by following my advice you do not suffer or cause injury, damage…
Re: Max Bed Size too small?
I am not quite sure if I get what you mean.
I double checked the proper orientation of the Y-carriage and just looked again, the marker is facing up in the top left corner.
The belt holder is facing right with its open side. I don't know the evolution of the different parts so I just took a picture of it.
Re: Max Bed Size too small?
Did you ever get this fixed? I'm running into the exact same issue and am at a loss. I've tried all adjustments I can think of for the Y-axis, I'm to the point of looking at recompiling the firmware with new travel limits on the Y... hoping I don't screw it up.
Re: Max Bed Size too small?
Hi Nelson.
This is caused by large Y distance from min. Adjust the nuts which hold the Y axis in the frame - how much will depend on the readings you get from the support menu/xyz cal details on the LCD.
Before you adjust, put a white dot on one of the nut flats so you can see how far you have moved.
Rerun xyz calibration after adjusting and recheck the measurements shown on the LCD. Aim for a figure between 2 and 3mm on the MK2S but less is better than more - I have a machine running well with 1.74, 1.74 and 1.75mm. The manual does say anything over 0.5mm is acceptable - I think it should say over 0.5mm but still less than 3mm.
Bill
Tagaytay City, Philippines
Founder member of Philippines Prusa Printer Owners FB Group
Sponsor Pillars of God Academy in Bacoor

