Filament poured out?
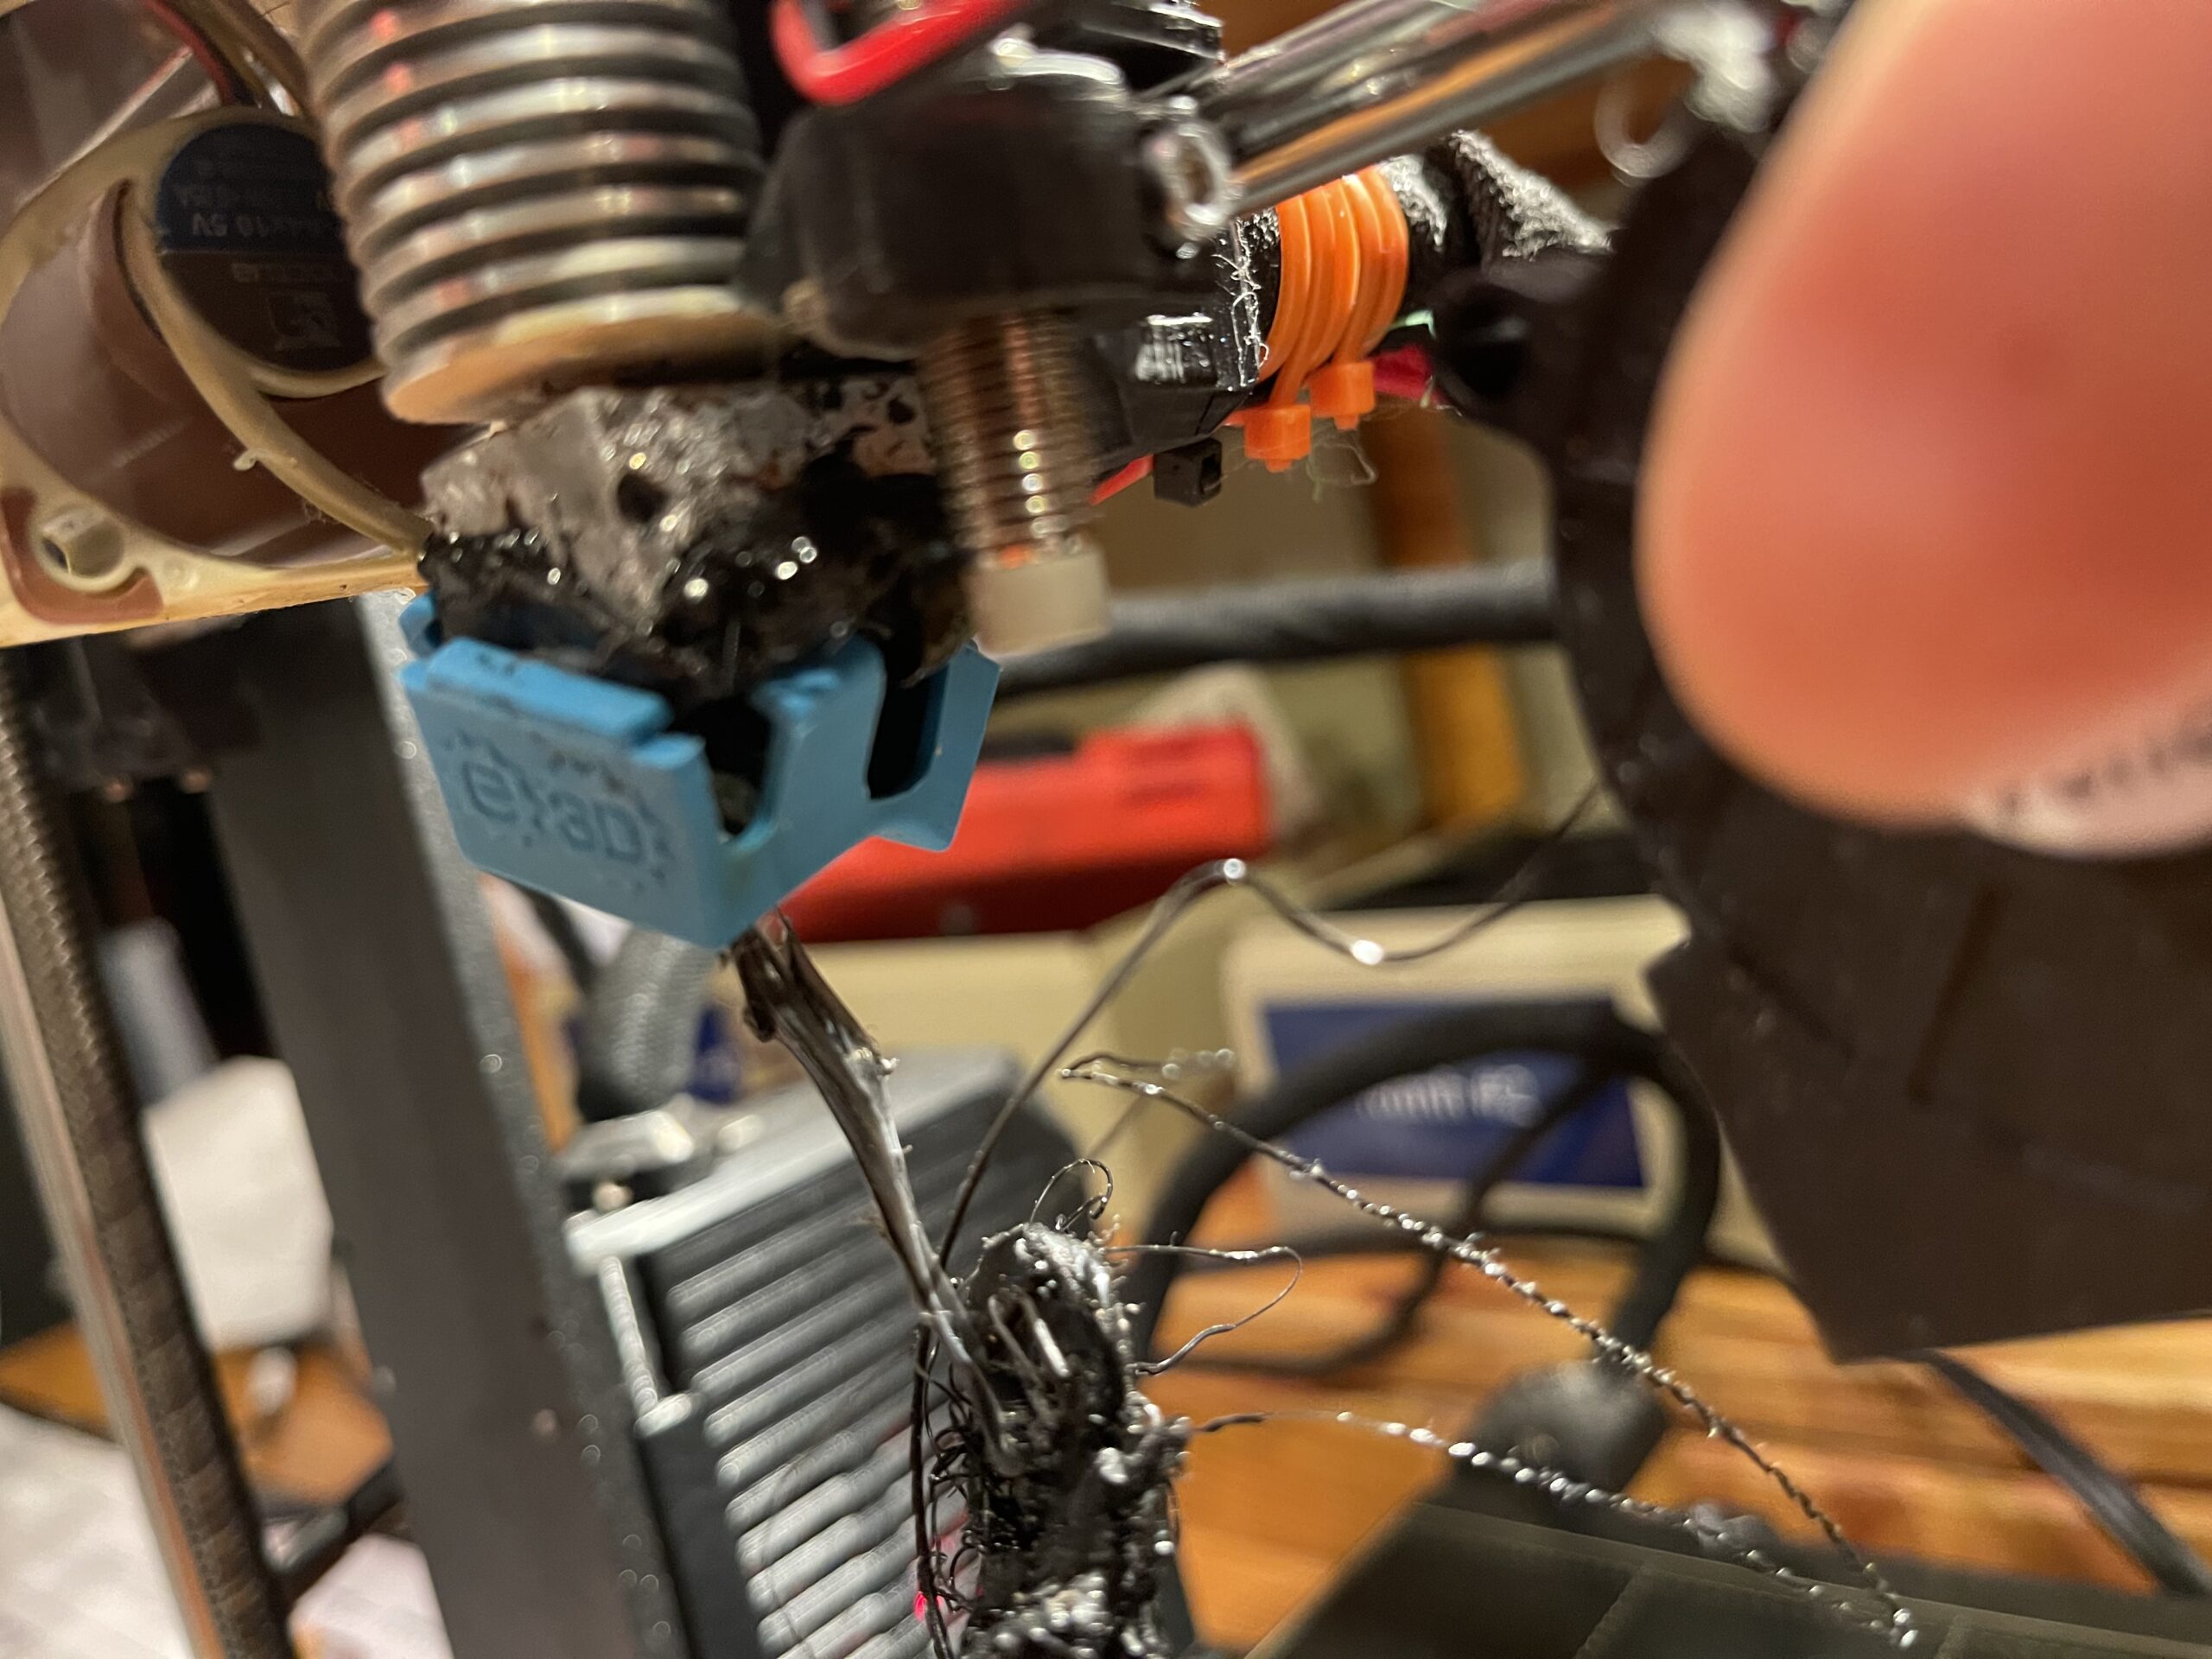
Been using printer for couple of weeks now with no issues with my prints. Had 2 excellent prints today. Started another, came back 1/2 hour later and alot of filament build up. See pics
1. what causes this to occur?
2. remove nozzle and clean?
3. What is used to clean nozzle and mess aound the heating element?

RE: Filament poured out?
I made a big mess with some ASA I wasn't watching, because it stinks. I changed the tip and cleaned up best I could and then I was getting occasional bleeding from around the outside, often from the previous filament. I think the problem was that I didn't get the tip screwed in well enough. Changed it again, trying a steel tip, it's not bleeding filament anymore but now I get the occasional clear amber coloured drops. They aren't any filament I have used so I'm curious as to what it is. They clear out well, so it isn't a problem like the filament mess I was getting, but what is it?
RE: Filament poured out?
Forgot to mention im using 1.75 pla
RE: Filament poured out?
This looks to me like your nozzle isn't properly installed. It's hard to see from the pics because they're soooo out of focus, but it looks like at least some of the ooze is coming out of the top of the heat block and some is coming out around the nozzle.
There are two ways I know to clean this, with solvent or with heat. Not all filaments are susceptible to solvents so that may limit your choice. I won't go into solvents here because many of them are dangerous and need to be handled with care. Do research on solvents and understand their safety concerns before taking any steps. For that matter, using heat has is dangers too so in any case take care.
To clean this you have to be very, very, careful. If you really are careful and you know what you're doing you can do this with the nozzle in place, but I don't recommend it, there is too great a chance of shorting out your printer. So, remove the entire hot end assembly from the printer and in a safe place to use open flame, heat the head block with a torch and brush away the molten plastic with a brass brush. You'll most likely ruin the wires to the thermister in this process so be prepared to replace it.
When you have much of the gunk removed, with the heat block still hot unscrew the nozzle and then unscrew the heat block from the heat break. Using brass brushes and heat continue to remove as much of the gunk as you can. Then reassemble the hot end assembly. Once assembled you'll need to properly install the nozzle, Prusa has a video here that shows the process. It is critical that the nozzle contacts the heat break with the proper amount of force, in the video Josef shows you how to make sure that takes place by rotating the heat block after the nozzle contacts the break and you insure this by having a tiny gap between the shoulder of the nozzle and the heat block.
If all of this seems intimidating a final choice is to purchase a completely assembled new hot end. Pay attention that while V6 hot end assemblies for Mk2 and Mk3 variants look alike the Mk2 are 12v and the Mk3 are 24 volt. I don't know anything about this vendor, but this specs out as the correct one https://www.printedsolid.com/products/e3d-12v-prusa-mk2-v6-hot-end-kit?currency=USD&variant=32974388822101&utm_medium=cpc&utm_source=google&utm_campaign=Google%20Shopping&gad=1&gclid=Cj0KCQjwwISlBhD6ARIsAESAmp6LnUsqVboDplw8Ovgew6X2Ge0_OIT7wrZEjF0M1VQke7xJ7MRXMo8aApCFEALw_wcB
The tricky thing these days is finding the 12v heater cartridge, I don't even think you can get those from Prusa right now.
Cheers
-Bob
Prusa I3 Mk2 kit upgraded to Mk2.5s, Ender3 with many mods, Prusa Mini kit with Bondtech heat break, Prusa I3 Mk3s+ kit