Notifications
Clear all
X-Carriage Upside Down?
Pretty sure the X-Carriage on my XL was delivered mounted upside down. The three holes that align with the top carriage plate are on the bottom.
If confirmed that it is, how much pain am I to fix this?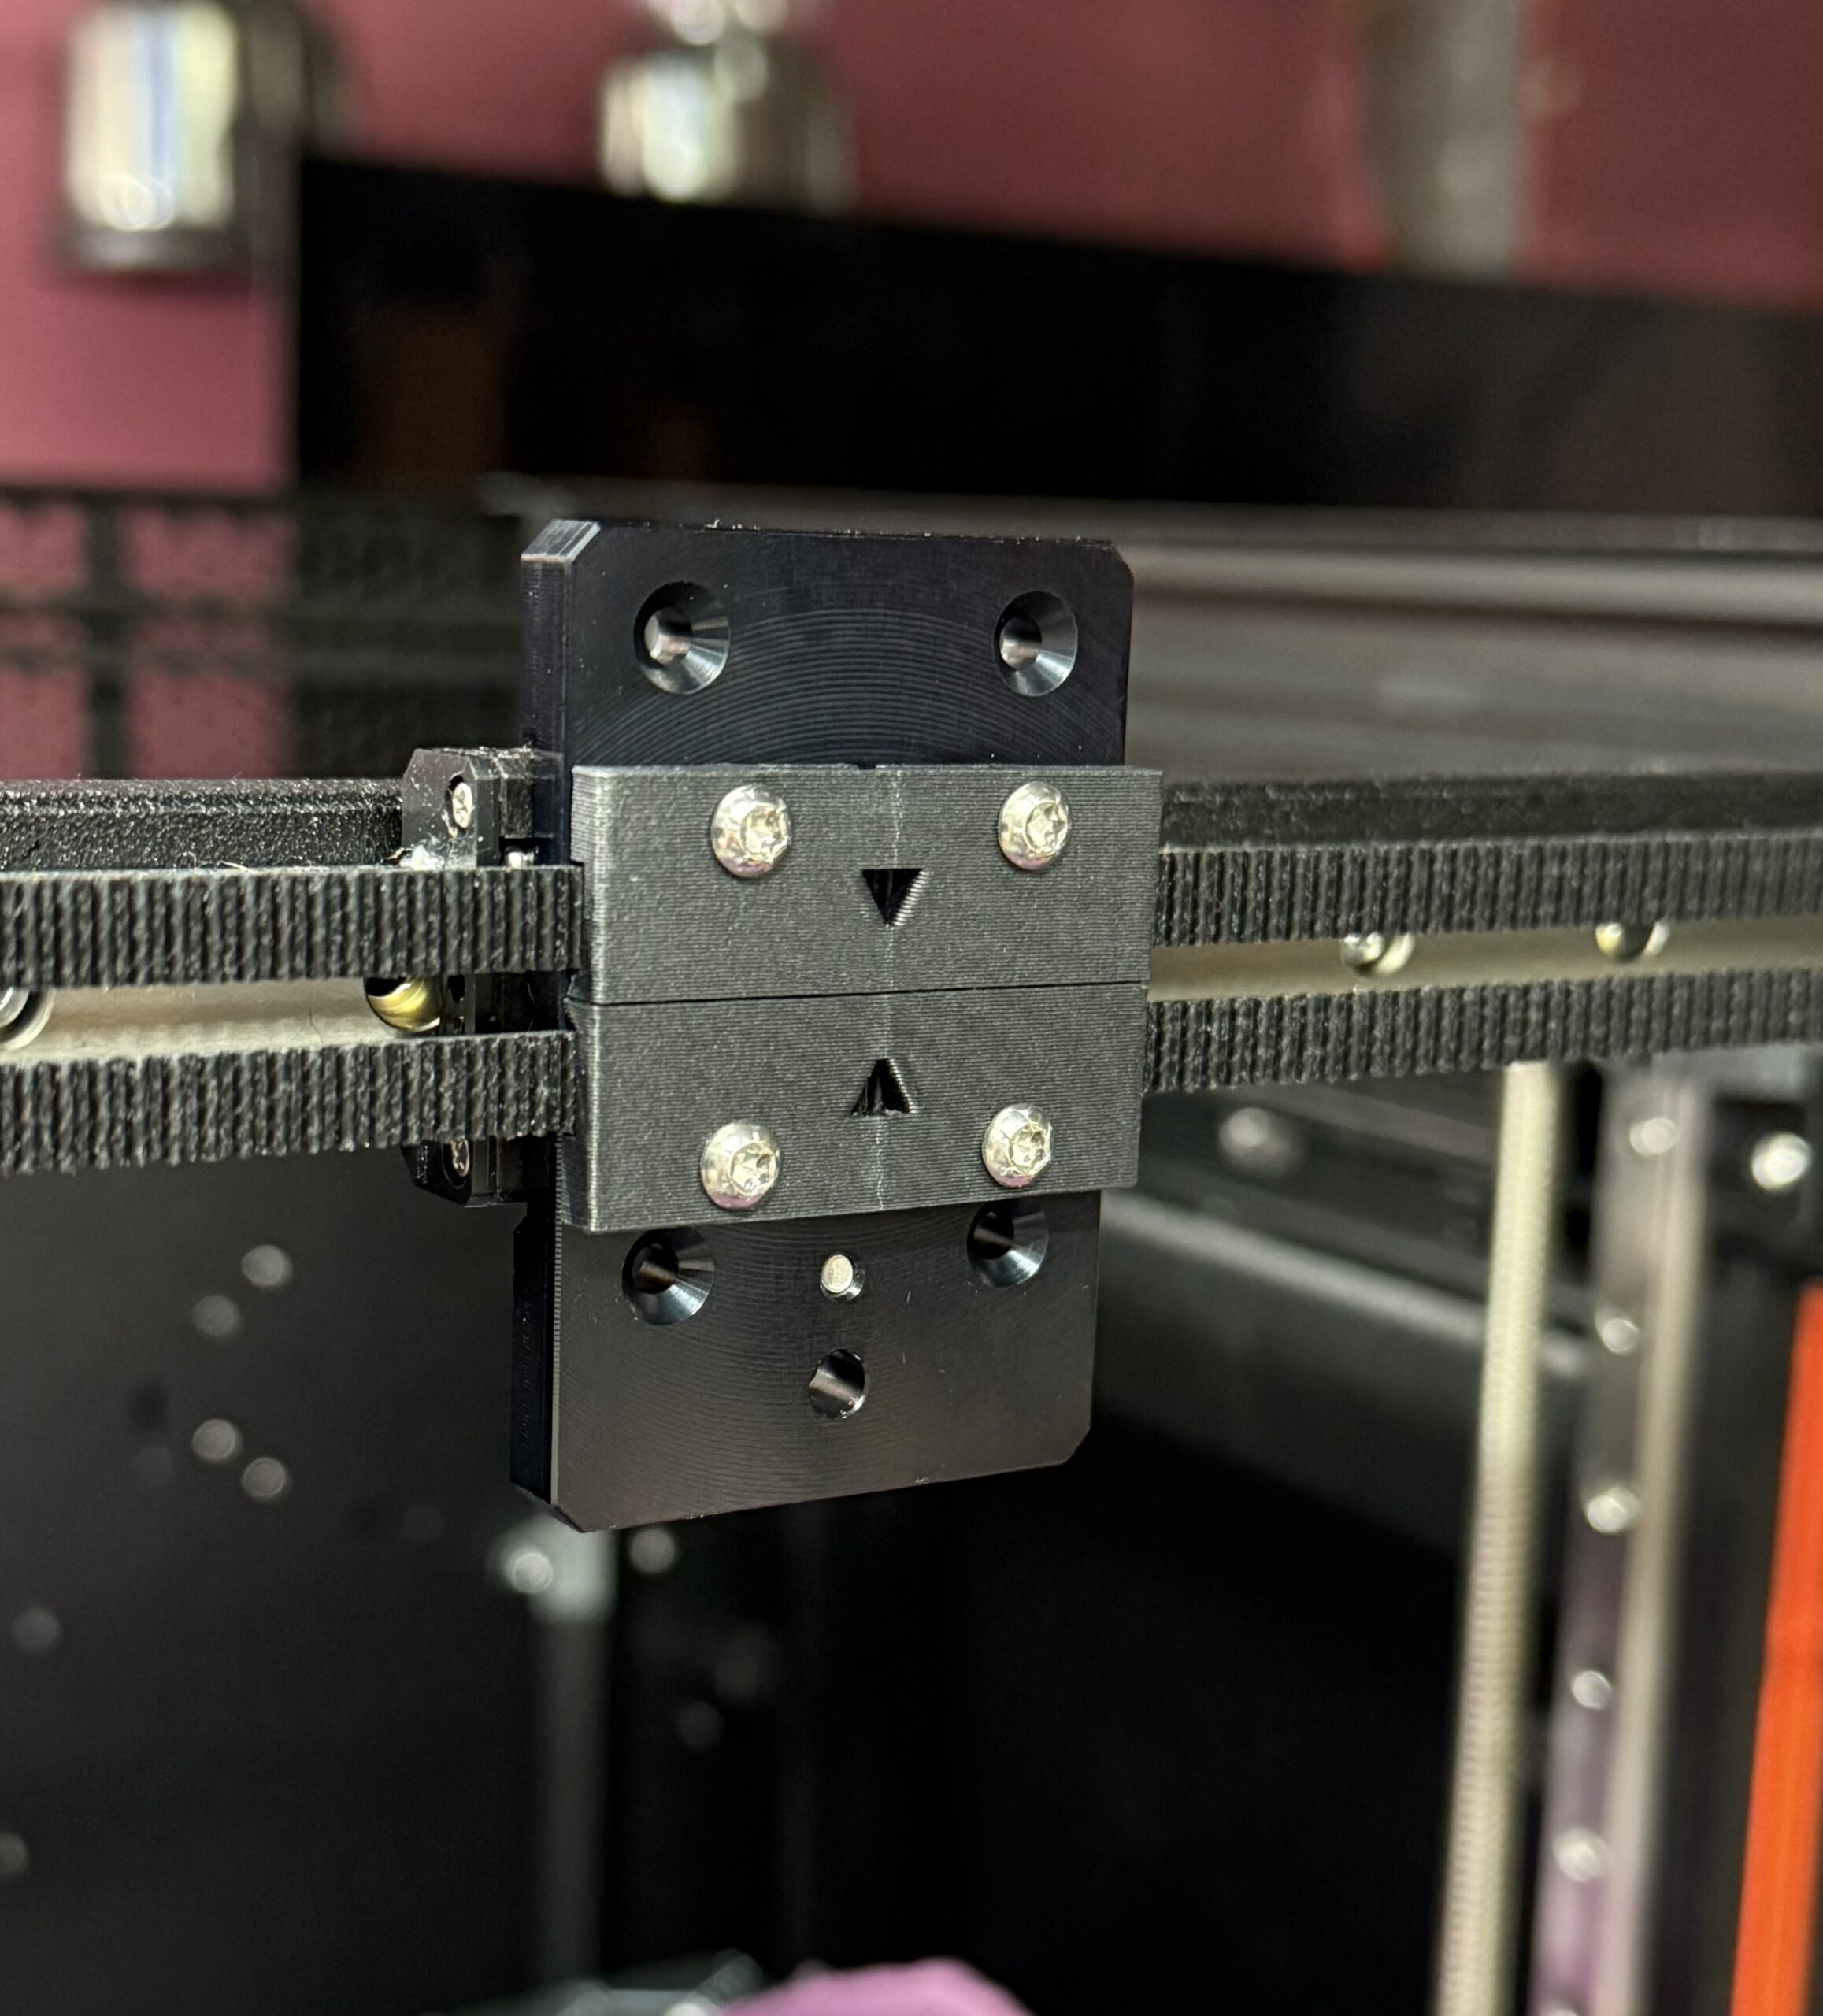
Opublikowany : 15/03/2025 5:48 am
RE: X-Carriage Upside Down?
Upside down compared to mine. Never took it apart though. Looks like its just 4 screws and the most annoying part will be re-setting your belt tension.
XL-5T, MK3S MMU3 || Printing with multiple nozzle-sizes: Official Guide, Unofficial(old) || PrusaSlicer Fork || Other advanced slicer tactics || TPU || HF Nozzles
Opublikowany : 15/03/2025 9:58 pm
Topic starter
answered:
RE: X-Carriage Upside Down?
Thanks for the confirmation!
It wasn't that bad.
- loosen the two belt tensioners (screws on the front of the CoreXY assembly 4 turns (DO NOT REMOVE))
- remove the four screws on the front of the X-carriage. This holds down both belts and they will flop free.
- remove the screw from the back of the carriage plate. Note that there is a small metal bar that is under the screw that holds the whole thing in place.
- Flip, place small bar, and screw in the screw that holds the carriage plate in place
- Grab one of the belts and place the teeth up to the middle of the belt hold down. Screw that down.
- Insert the other half of the same belt into the hold down from the other side.
- You can use a flashlight to look through the little triangle window in the middle of the hold down. The ends of the belt should be touching.
- Once confirmed touching, screw down the other half of the hold down.
- Repeat with the other belt.
- Tighten the belt tensioners 4 turns (undo step 1).
That's it. I didn't need to re-tension the belts as the above restores them to the way they were.
Opublikowany : 16/03/2025 1:58 am
1 ludzie polubili