RE: Input Shaper with Klipper Testprint
I've also ran the Gcodes and found for my printer: 37.42 Hz for X and 41.42 Hz Y. Two questions on what to do next:
- As already mentioned by others, the leg marked X on the printed sample is actually the Y axis of the printer. Should the values therefore be swapped when creating the M593 codes?
- I couldn't find any M593 commands in my printer settings yet (newest PrusaSlicer version). So I've inserted them into the preset of the physical printer under 'start G-code', at the end. When I however execute a print and on the printer click Tuning and then Input Shaper, it shows the standard Prusa value of 40 and 50 Hz. Should there the new values be shown?
RE: Input Shaper with Klipper Testprint
The entry in the start code is no longer there. I think in preparation for the final input shaper firmware. The menu in the printer is not yet active. in the final version you can set your values there. i guess.
In your start code should be the following.
M593 X T2 F37.42
M593 Y T2 F41.42
The twisted values are correct. It is because what you see at the Y axis is caused by X.
RE:
My MK4 has igus drylin bearings. That's likely causing things to be well out of range - the mass of those is quite lower than the metal bearings.
I don't see a lot of improvement in the ringing on the X side, with Y having a clear area where the ringing is minimized. Well up on X there's kind of a "better" place, but I suspect that higher still might be better. Squash ball suspension.
X = 56.36
Y = 32.88
RE: Input Shaper with Klipper Testprint
You can create a test print with higher frequencies. But you have to calculate the frequency at the end and not use the webtool.
Here you can find the instructions.
The best thing to do is to watch the video from Chris that I linked at the beginning.
RE: Input Shaper with Klipper Testprint
Did the test with your PETG Gcode, according to the script the values should be X 41.21, Y 45.
Printer on a very stable workbench, filament roll removed, obxidian 0.4 nozzle, Prusament PETG.
MK4/MMU3 - VORON 2.4 350 Stealthburner
RE: Input Shaper with Klipper Testprint
I did view the video but as you provided pre-sliced gcode much of it wasn't relevant. But now it is.
I'll try to re-slice with increased range and see what I find. Thanks!
You can create a test print with higher frequencies. But you have to calculate the frequency at the end and not use the webtool.
Here you can find the instructions.
The best thing to do is to watch the video from Chris that I linked at the beginning.
RE: Input Shaper with Klipper Testprint
It would be interesting to know what it did.
Whether positive or negative. We all want to learn something.
RE: Input Shaper with Klipper Testprint
The entry in the start code is no longer there. I think in preparation for the final input shaper firmware. The menu in the printer is not yet active. in the final version you can set your values there. i guess.
The input shaper settings on the printer are still grayed out in the final firmware and cannot be adjusted. Is there currently any way to implement these settings?
RE: Input Shaper with Klipper Testprint
I've seen it before too and posted a question about it on github as well. As it looks, this still can't be changed. You still need to change the start gcode.
RE: Input Shaper with Klipper Testprint
Ok, that's fine, I was under the impression that didn't work anymore after Prusa stopped including those commands in the default start gcode.
So I can just add the commands and frequencies anywhere in the start gcode and the printer will use those settings?
RE: Input Shaper with Klipper Testprint
This took a bunch of prints as the changes are pretty subtle.
Where I think the sweet spot is for me is x=16.87, y=13.84
(To reiterate, drylin bearings.)
RISPONDI: Input Shaper with Klipper Testprint
Sorry for the stupid question but is it better to remove the filament spools from the printer or leave them on the spool holder?
RE: Input Shaper with Klipper Testprint
In my opinion, the spools have no place on the printer.There are certainly no advantages, especially with input shaper.
If you have space, I would make the spools extra and connect them with a PTFE tube to the print head. I have printed these parts for me.
RISPONDI: Input Shaper with Klipper Testprint
Thank you . Good idea.
RE: Input Shaper with Klipper Testprint
Just found this thread because of my ghosting issues and will try it this evening.
Question: what’s the T2 in the “M593 X T2 Fxxxx”?
I just insert the two lines in the custom g-code in printer settings, right?
DonI have to insert it there every time or is it saved with the profile?
RE: Input Shaper with Klipper Testprint
I have copied the instructions from the first alpha in the Prusa Github.
Input Shaper - M593 Setting and activation of Input Shaper
D - Set the input shaper damping ratio. If axes (X, Y, etc.) are not specified, set it for all axes. Default value is 0.1.
F-Set the input shaper frequency. If axes (X, Y, etc.) are not specified, set it for all axes. Default value is 0Hz - It means that the input shaper is disabled.
T[map] -Set the input shaper type, 0:ZV, 1:ZVD, 2:MZV, 3:EI, 4:2HUMP_EI, and 5:3HUMP_EI. Default value is 0:ZV.
R- Set the input shaper vibration reduction. This parameter is used just for 3:EI, 4:2HUMP_EI, and 5:3HUMP_EI. Default value is 20.
X<1> - Set the input shaper parameters only for the X axis. Y<1> - Set the input shaper parameters only for the Y axis.
I just insert the two lines in the custom g-code in printer settings, right?
Yes
DonI have to insert it there every time or is it saved with the profile?
Save it
Question: what’s the T2 in the “M593 X T2 Fxxxx”?
There are several input shapers. With this you can select them. But not all of them are useful. I would take the suggested one from Prusa. I also chose the other possible one but it was worse.
RE: Input Shaper with Klipper Testprint
Danke Rainer
RE: Input Shaper with Klipper Testprint
During the print with the new frequencies, when I select „Tune“ and scroll down to input shaper, there are still the standard frequencies of 50 Hz (x-axis) and 40 Hz (y-axis).
is that correct or does it mean that the printer did not accept my changes?
The custom gcode editor was not empty in my Prusa slicer, so I inserted the two lines at the end. Or does it matter where they are inserted?
RE: Input Shaper with Klipper Testprint
Einfach nur den Gcode herunterladen und auf den USB Stick machen und drucken. Dann wird die Frequenz fortlaufend verändert. Du siehst dann Bereiche mit starken und sehr wenig ringing.
Die besten Bereiche markiert du und gehst dann weiter nach Anleitung vor.
So siehst Du auch wie Input Shaper wirkt. Und was die Veränderung der Frequenzen bewirkt.
RE:
Thanks to @rainer-2 for showing this, I knew it from my Klipper printer, but didn't realize this could be done on the Prusa. 🙂 Now I did test it, it worked and I have very different resonances from stock (X: 52.4 Y: 62), may have to do with the table it's sitting on or something.
Anyway, I printed the same file again in vase mode, but this time with all other settings set back to what a normal print should have. On the Y axis, things seem to look good (slight differences at different speeds, but I think that can be expected), on the X axis however something is up. There is another resonance underneath and no matter how well I go over the printer, making sure things are tight etc. it stays exactly the same. Did anyone have something like this as well?
Y-Axis:
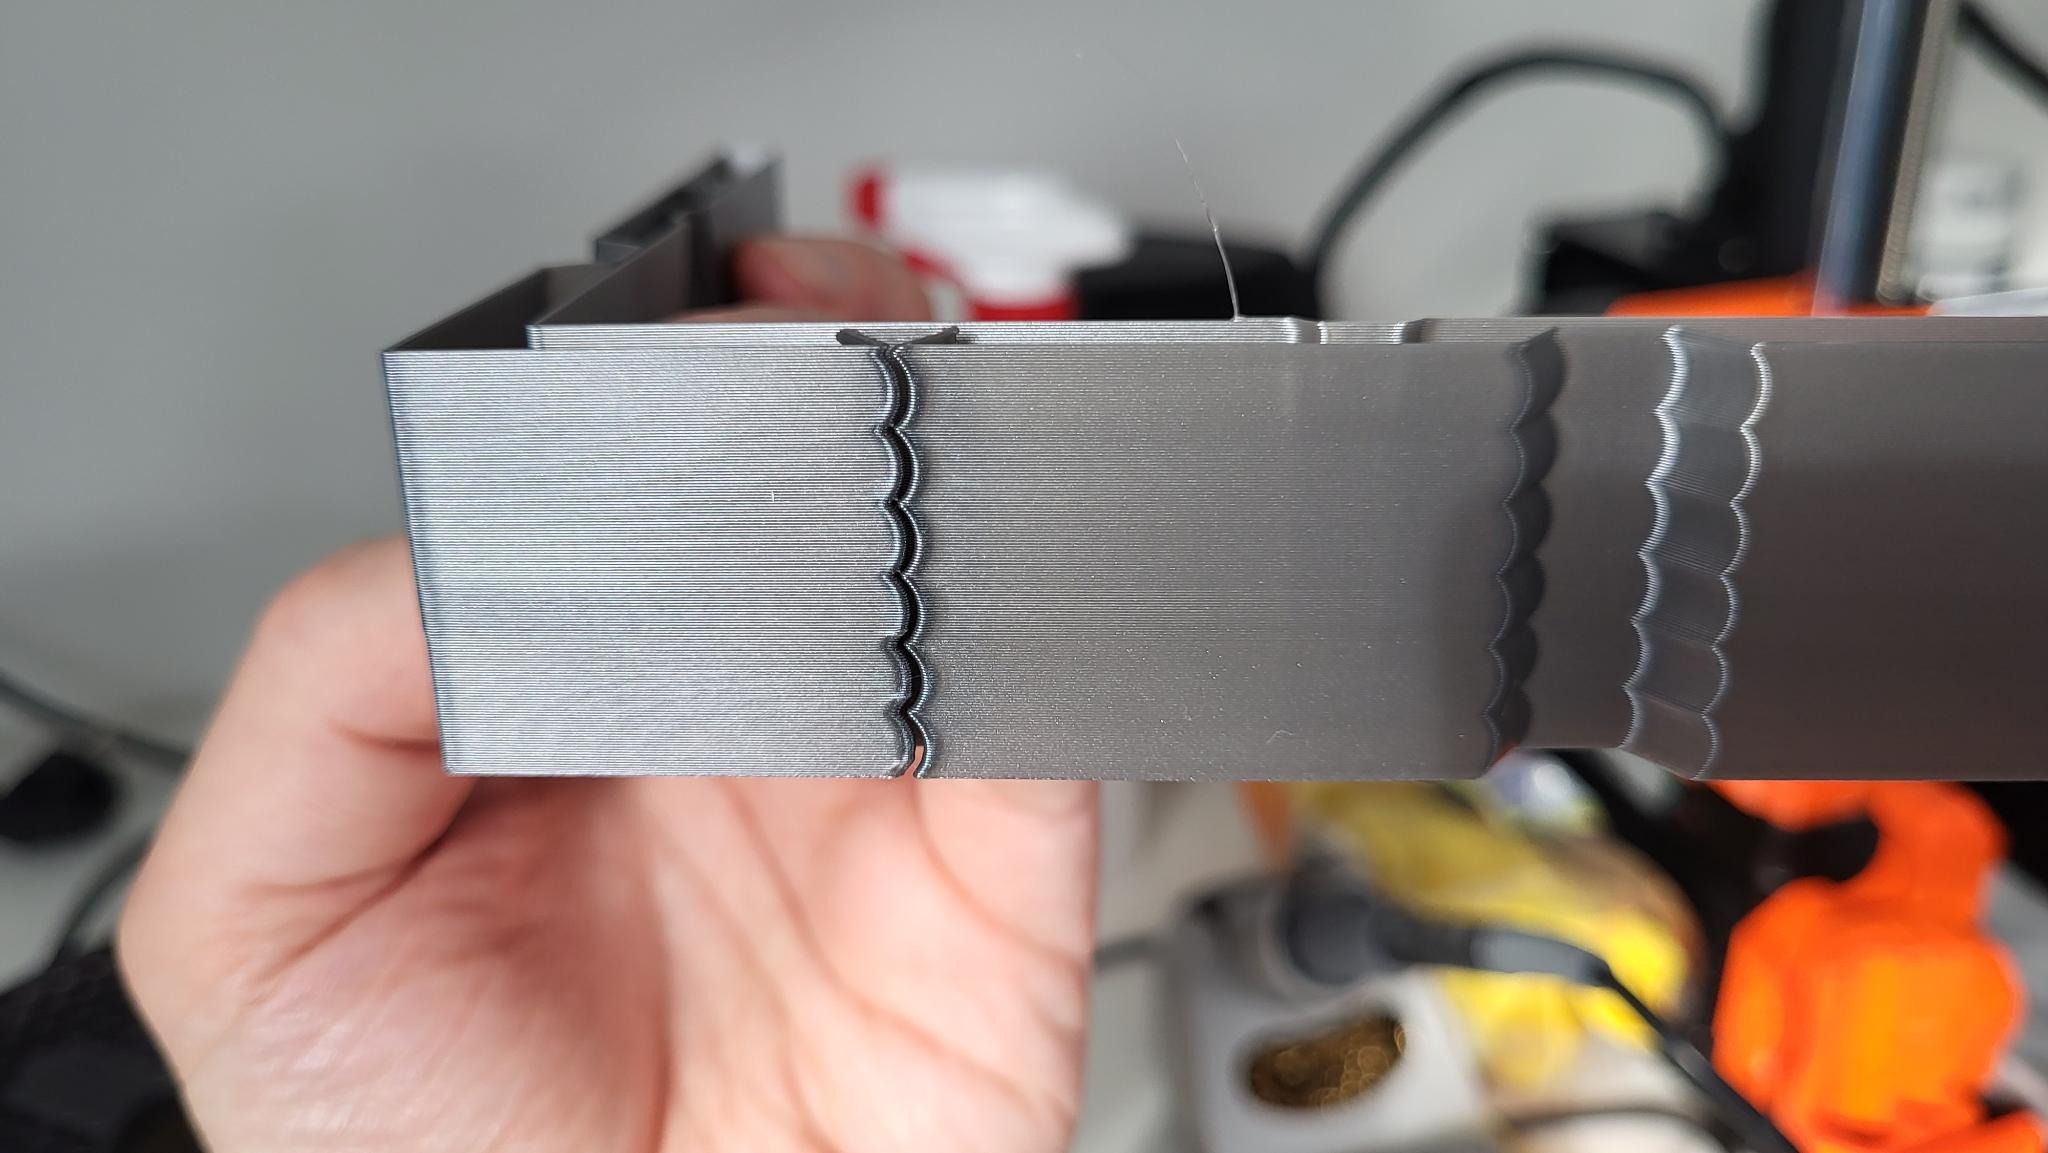
X-axis (I tried different speeds during the print)
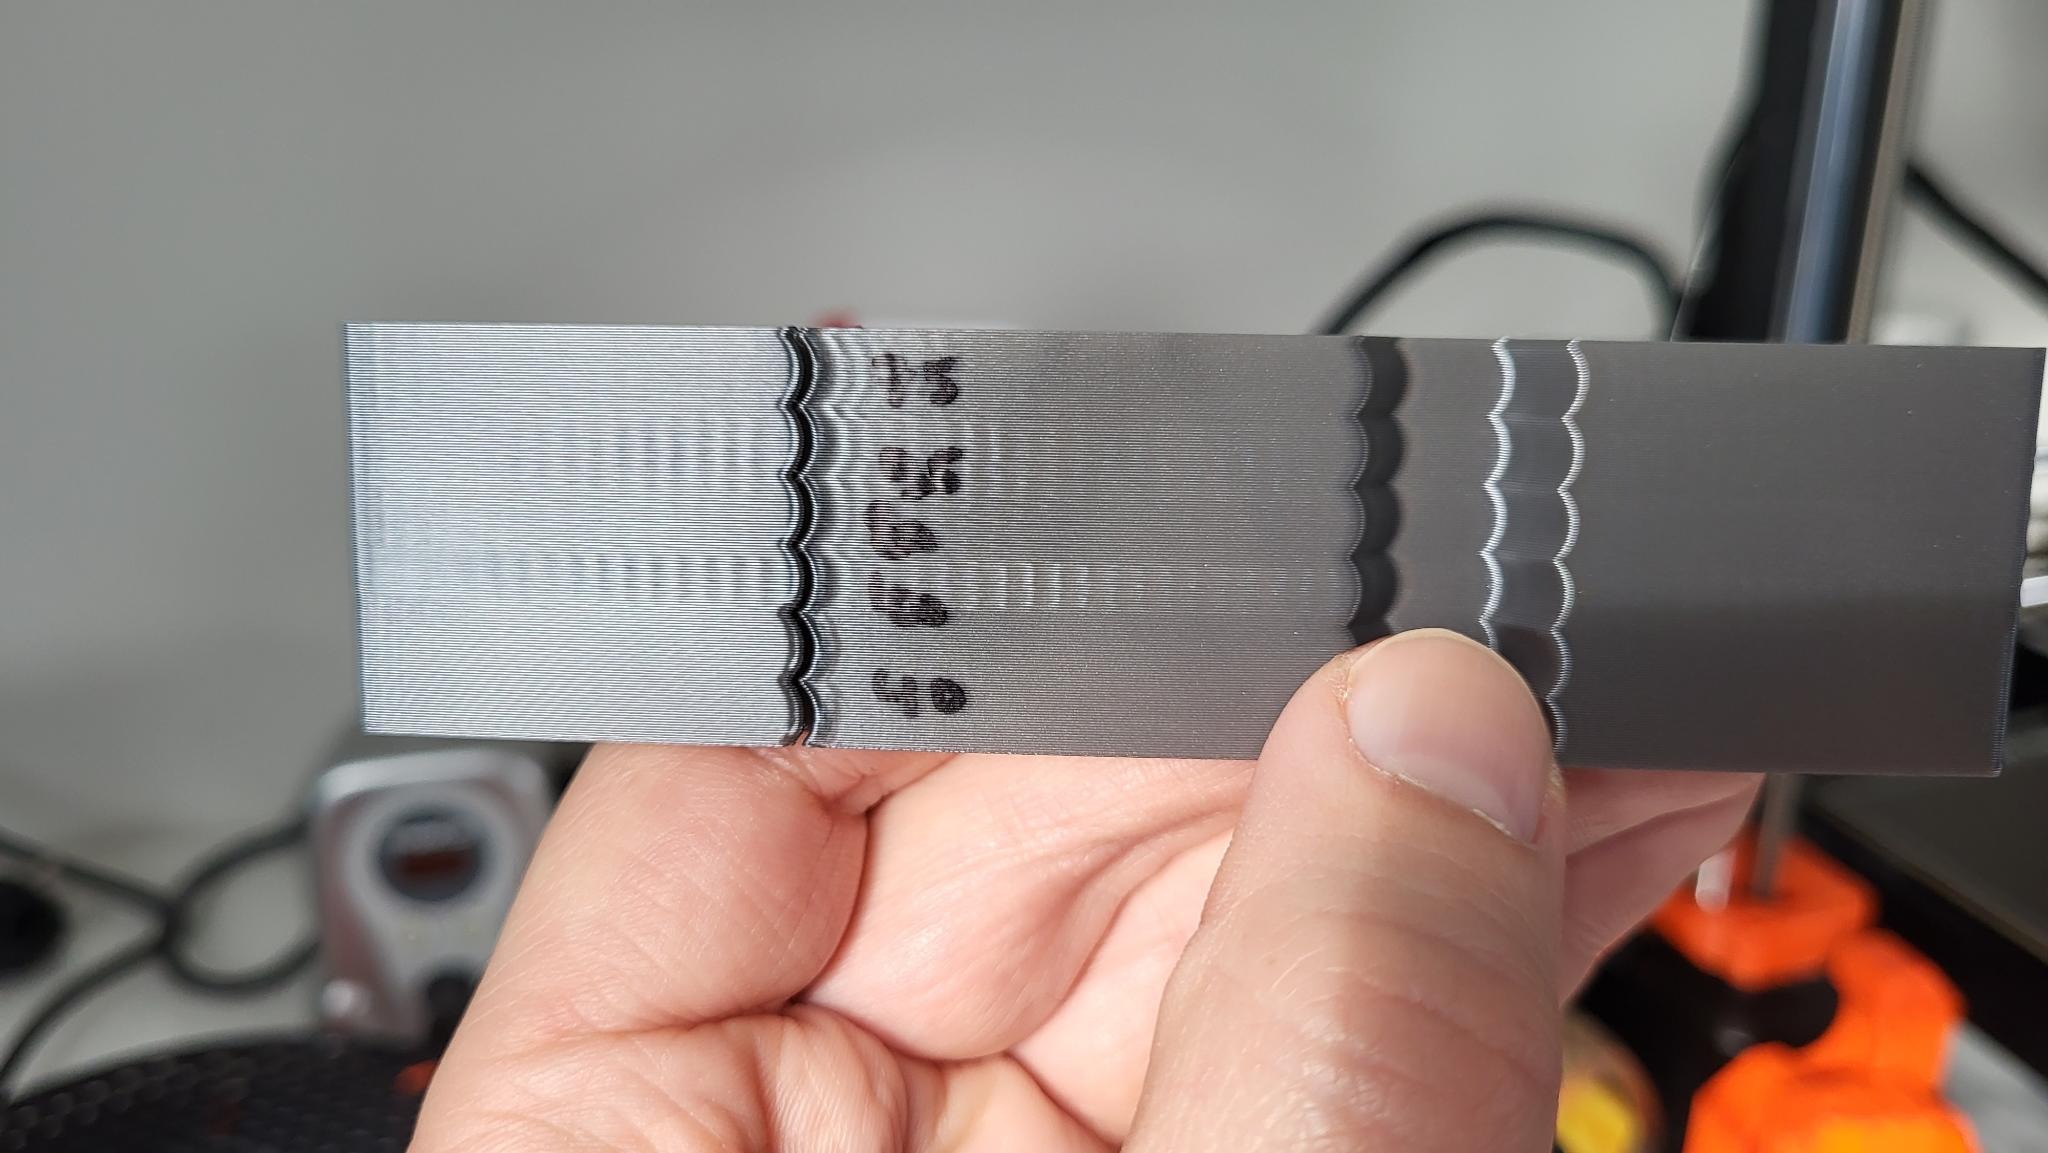
Only at 40 mm/s it doesn't show. The slicer does advice 40 btw when sliced this way, so would that resonance then not be there if the slicer determines a higher speed for another model?