Print on top of microscope slide
I've been digging around for a topic like "how to print on top of an object" and I haven't found anything. Please direct me to a post that can help me out, as I'm sure I'm not the first one do to this. My goal is to print features on top of a microscope slide. I know the dimensions of the slide (1 x 25 x 75 mm) and I'm want to incorporate its topography into my PrusaSlicer software so I can print on top of it. Let me know!
RE: Print on top of microscope slide
I recently learned that the trick is to use a multipart object.
Only one of the parts needs to have contact with base plane:
https://forum.prusa3d.com/forum/prusaslicer/how-to-set-z-height/#post-588856
In jour case, load a tiny part outside of microscope slide location, then add your real part and move onto slide, with increased z. This will work, but I am not sure how well filament adhesion will be on microscope slide and/or whether slide gets same temperature as heatbed.
In case this works, please add a sample print photo here.
RE: Print on top of microscope slide
This technique got the print head to position where I want it to go - thank you!
Now I have a different issue to content with. First, I found out that the slide was 1.1 mm thick (not 1.0 mm). The glass is really sensitive to z-height for the PLA (Prusament) to stick - I used "Live Adjust Z" to help in my efforts. I've only tried a few times, but only a fraction of it sticks. I will keep playing with the settings but you got me on the right track! (I'll post something here if I'm successful)
RE: Print on top of microscope slide
Probably doesn't help much but my printer uses a borosilicate? bed and it sticks just fine. How are you keeping the slide still? I assume its not possible to print normally then find some way to attach to the slide, maybe mechanical?
RE: Print on top of microscope slide
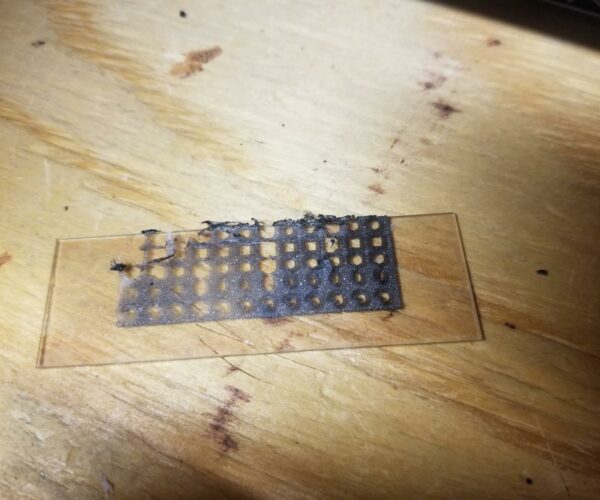
Thank you for your contribution to this thread - I've heard of some people using glass beds though I don't know any tricks associated with it. For my slide, I used a glue stick to adhere the backside of the slide to the bed. Sometimes it slips, so I might try taping the edges next time (or use double sided tape). I also raised the temperature of the bed to compensate for the slide height offset (70 instead of 60 for PLA), and they worked well. The attached image is by third attempt. The PLA sticks well to a clean slide (I cleaned the glass with Acetone), but getting it started is the hardest part. Aligning the slide to the correct position is also an issue (the alignment marks in Prusa Slicer at not exactly where the bed marks are). Also, I'm trying to deposit a thin layer (0.1 mm thickness) with a small nozzle (0.1 mm step height setting, 0.25 mm nozzle). My goal is to create custom hydrophobic reservoirs to contain droplets. If I pull on a corner, the whole thing will peel off but there is some good adhesive force of PLA to the glass.
RE: Print on top of microscope slide
I think if the goal is to print directly onto a slide and have it stay there you might want to consider something other than PLA as that is always going to come loose when it cools, that's why glass print beds are so popular, if you printed with PETG or ASA it would stick very well indeed. As regards to the initial layer, microscope slides are most likely not as level as you would assume ands since there is no way to get the standard bed levelling to take into account a 1mm thick slide on the plate you are probably stuck with trial & error.
RE: Print on top of microscope slide
To aligning the slide perhaps before you place the slide, print a single line outline at a known position.
I wonder if you wouldn't have more success by printing the part (perhaps indexed to the edges) the "cook" the part perhaps under enough pressure to make it want to stick.
My goal is to create custom hydrophobic reservoirs to contain droplets.
Wouldn't be great if I understood any of that.
RE: Print on top of microscope slide
This is a great suggestion. I'll order some PETG and give these suggestions a try.
Sorry for the technical jargon, but I'm trying to replicate something similar to this. https://www.tekdon.com/ptfe-coated-microscope-slides.html
The teflon acts as a barrier to keep small liquid samples contained and isolated, but open to air. They have limited sizes and are mostly circles. I want to try different shapes for some of my evaporation experiments.
Later I'm going to try to make microfluidic devices to teach basic fluid mechanics to my students (diffusion, mixing, droplet generation) - but that's another post for another day!
RE:
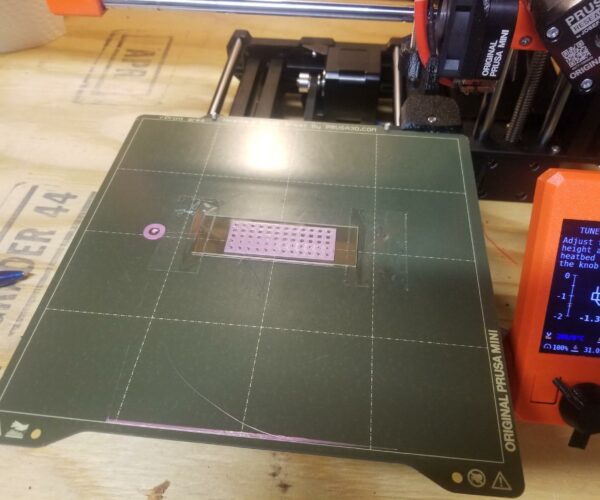
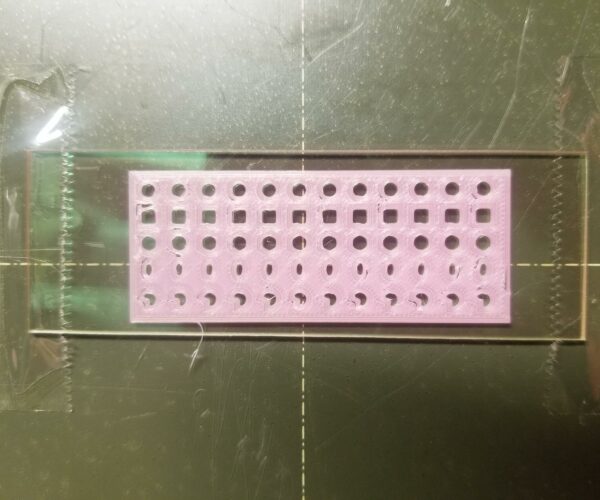
Thank you all again! With your feedback I was able to do it. See pictures below. Here's what I did:
- I measured the thickness of the glass slide. It was 1.1 mm. Based on HermannSW's comment, I created a 1.2 mm cube in addition to my slide pattern. In the PrusaSlicer program I would stack the slide pattern model on top of the 1.2 mm cube. The cube was placed far away from the slide.
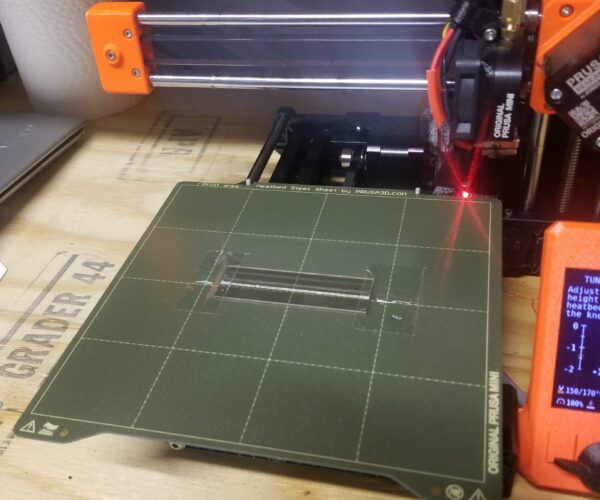
- I taped the slide on the print bed. This provided more consistent height compared to a glue stick.
- I used a 0.2 mm nozzel with PETG using the default settings.
- During the print, once the nozzle moved to the glass slide, I would adjust the nozzle height until I was satisfied with the result.
- You won't get it on your first try. Use the first trial run to figure out your nozzle height to adhere to the slide. The advantage of having it taped is that you can likely peel away the failed print while keeping everything else in place. You may also need to reposition the x-y position of your slide.
Thanks again!
 PETG printed on glass slide
  Close-up image of PETG printed on glass slide
  1.1 mm thick slide taped to the print bed
