[Newbie] Advice on debugging Mini+ sag issue
Hi all,
I just received my Mini+, followed the online advice, and first layer calibration went well.
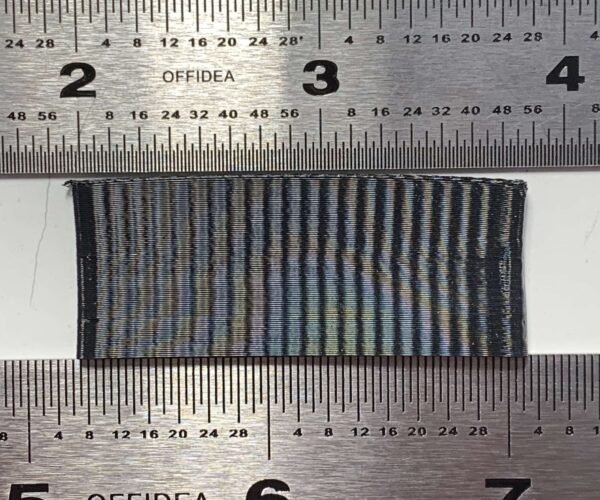
I'm experiencing what's been referred to as "sag" on large and small prints. The issue seems to be on the right size of the x-axis; here are two examples:
The top example curves up; the bottom curves down.
I'm about to go through the procedure to square the printer, but wondering if someone can point me in the right direction to debug this issue.
RE:
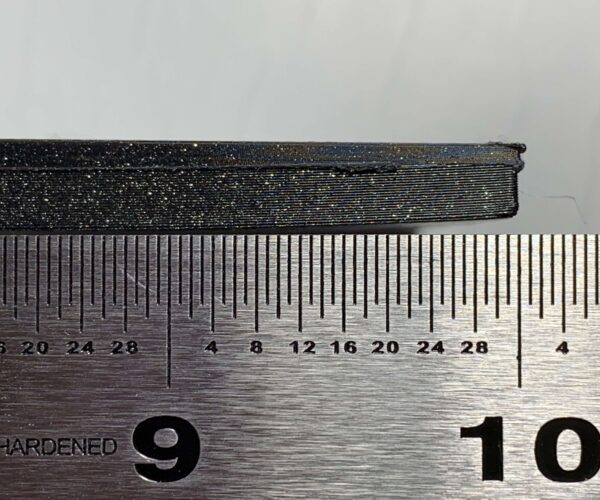
This looks like you have poor adhesion at the right hand side of this model,
It looks like successive layers have caused the model to warp away from the build plate but the printer does not know what is going on, so the printer keeps extruding the same amount of filament into a Smaller than expected space.
Eventually ending up with what looks like over extrusion. but this over extrusion is a result of the warping, rather than true over extrusion...
the second print looks very odd... i would have expected it to look more like this 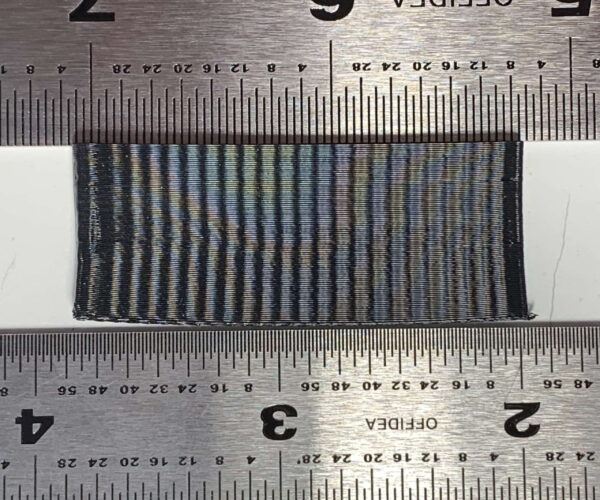
I can't explain how the top got curved...
If it was the bottom, I would look at poor adhesion again.
what are your first layers like? the first layer is the foundation for the rest of the print.
If it is poor then the print is likely to fail
Live Z is very important,
too high, and you have reduced adhesion,
too low you have reduced adhesion
I use a 75mm square to adjust Live Z, in preference to the Prusa first layer calibration tool.
For Mk3 users, I suggest using 'Life Adjust 'Z' My Way'
But the test files put the patch off centre on the Mini
75mm square Mini Life Adjust Z
You could try these files (they do not 'Beep' at the middle)
As they are printing, you can adjust the live 'Z' value, and watch the changes in surface appearance
which will hopefully help you achieve a good first layer.
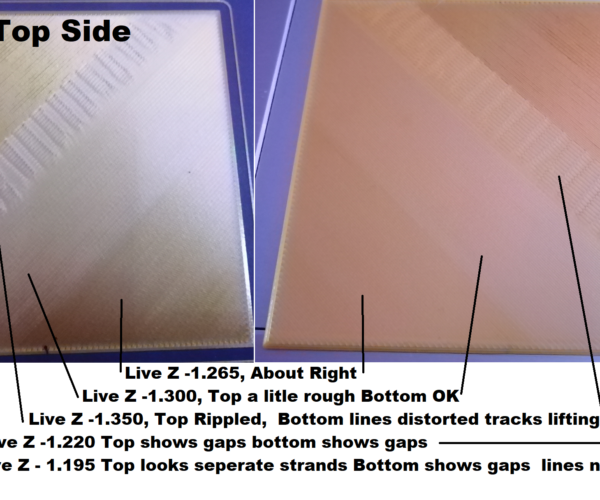
The images above give an indication of how small adjustments to live Z, can have significant effect on first layer quality...
the actual values were unique to my printer on that day, yours will be different, but the relationship of the different vales will be similar.
another factor in first layer adhesion, is Build plate contamination.
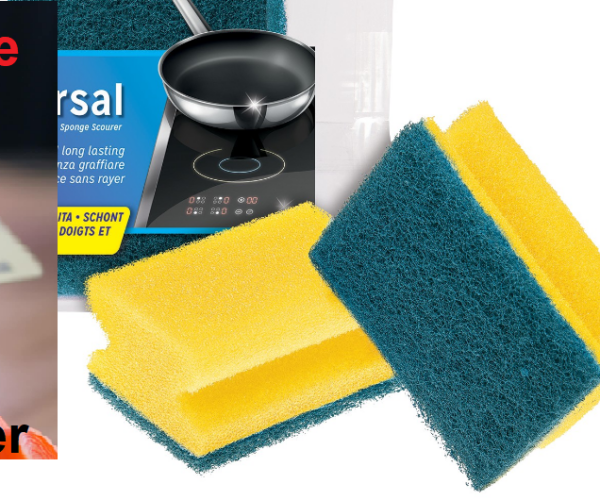
I have tried many options but now I use Hot Water and a little simple dish soap with a new kitchen sponge, I rub the surface of the build plate, really well with the kitchen sponge and the dish soap, removes contamination like finger grease and deposits left behind by previous prints etc. then I rinse well with hot water, and dry with clean plain paper towels, keeping my fingers off the build surface
Regards Joan
I try to make safe suggestions,You should understand the context and ensure you are happy that they are safe before attempting to apply my suggestions, what you do, is YOUR responsibility.Location Halifax UK
RE: [Newbie] Advice on debugging Mini+ sag issue
Thank you @joantabb!
On the first print, the first layer looked good… except in that corner. That corner was actually rough, as in, the layer wasn't smooth and flat but was taller than the rest of the layer lines. Poor bed adhesion could explain it, but I've been diligent and thoroughly cleaning the build plate with 91% IPA; but maybe I need to be a bit more diligent with my cleaning in between prints.
For the second, this happened with both Prusament PLA (smooth plate) and FilaFlex40 (which is pictured) on the textured plate. The sags gets worse the higher it goes; I've experimented with .5", .75", and 1" and it progressively gets worse.
I'm currently printing it rotated 90º so it's printed along the y-axis to see if that makes a difference.
After I square the printer, I'll try the 'Life Adjust 'Z' My Way' to see if I can focus in on the issue. And I'll probably be buying some of those scrub sponges. 🙂
RE: [Newbie] Advice on debugging Mini+ sag issue
Good luck Matthew.
Rough and raised first layer normally means live Z is a bit too large (Nozzle Low) this starts to ripple the filament which reduces f=effective contact area on the build plate, and roughens the top surface of the first layer up too!
IPA tends to dilute grease, and IF you use enough of it and change cloths often enough it can remove grease...
BUT... if you don't use enough, or change cloths enough, IPA can spread grease around more evenly and reduce adhesion over a larger area...
Dish soap has surfactants in the mix, which bind with grease and other pollutants and allow it to wash away with the rinse water....
Additionally, hot water is not expensive, so you can use much more, to rinse the junk away!
I ALWAYS dry the build plate immediately after washing it.
regards Joan
Oh.... if you have difficulty removing a print from the build plate... try dribbling IPA around the base of the model, let it sit a while, and then try removing gently again.
IPA can reduce bond strength between filament and PEI
I try to make safe suggestions,You should understand the context and ensure you are happy that they are safe before attempting to apply my suggestions, what you do, is YOUR responsibility.Location Halifax UK
RE: [Newbie] Advice on debugging Mini+ sag issue
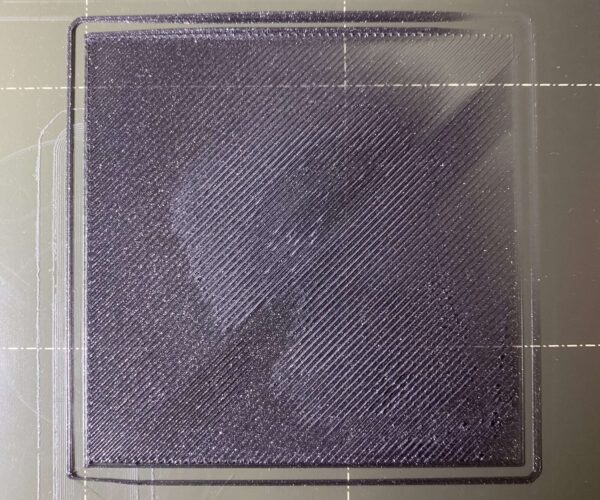
Update. Printed the test:
As you can see, the upper right corner literally fades away.
I still haven't had a chance to square the printer, but it does seem I'll need to do some bed/build plate leveling.
RE: [Newbie] Advice on debugging Mini+ sag issue
Yep, you definitely need to square up the printer.
Mini+ (kit) - Revo Micro | Antler Cooling | WiFi (4.4.0RC1)
RE: [Newbie] Advice on debugging Mini+ sag issue
Well… the bed is definitely NOT level along the y-axis. If I have the bed pushed all the way back (after disabling steppers), using a small 6" metal ruler in as a feeler gauge and lowering the nozzle so it's just barely touching the ruler, when I push the bed all the way forward the ruler will not fit in between the build plate and the nozzle.
There's easily a 1mm or more diff between the front (low) and rear (high) in the y-axis. And there doesn't seem to be a way to correct this using the squaring procedure.
The x-axis was also off, but that was prob. around .5 to .25 mm, and the squaring procedure seems to have gotten that down even further.
So it's looking like I'll need to do the silicone bed leveling mod to correct the y-axis issue.
#sigh
RE: [Newbie] Advice on debugging Mini+ sag issue
Start with these resources:
https://help.prusa3d.com/en/article/squaring-your-mini_158518/
I thought I would have to go with the silicone mod, but after running through these and carefully adjusting the screw tightness on the bed, I don't.
Mini+ (kit) - Revo Micro | Antler Cooling | WiFi (4.4.0RC1)
RE:
Thank you @chris-laudermilk!
I did go through the "squaring" procedure and the y-axis was still way off after that was done.
But I hadn't seen the "Oh no we're skewed!" post before, so that's next on my list. Interestingly, I was thinking about first trying washers as shims before I did the silicone mod, but I'm going to read through this post and see what it suggests.
THANK YOU!
RE: [Newbie] Advice on debugging Mini+ sag issue
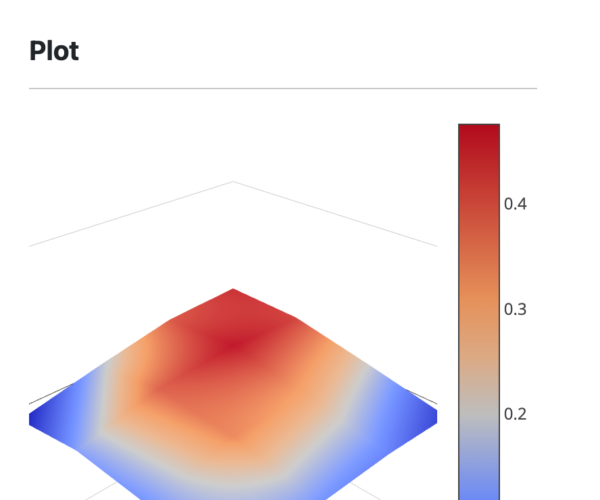
Using OctoPrint and @benji's "G29 absolute to relative value converter & plotter" on GitHub ( https://github.com/bbbenji/PMSBLM), I was able to confirm what I believed to be true; my bed is warped:
Looks like the silicone mod is in my future.
