Did my first maintenance, and ruined my printer...
I've had my Mini+ for just over a month now, and after a shaky start with nozzle height, I've been printing really well in both PLA and PETG.
Following the general advice here, I did my first month's maintenance - wiped down and relubed the rods; opened the little door on top of the extruder, gave the gears a clean with a brush and compressed air. I also loosened off and retightend the bolts around the base, using a level to make sure everything was nice & straight. Then - and this where I think I've shot myself in the foot - I gave all the other screws a little tweak. Nothing major, just a little tighten here there if they would move (but careful to make sure the spring-loaded screw on the extruder was just level with the outer shell.)
Went to do a first layer calibration, and was surprised that the filament looked really over-squashed, and had to *raise* my nozzle height from -1.5something to -1.247. Then did one of Joan's 75x75 squares, which looked great - resulted in a nice, smooth single sheet. Finally, I did a Prusa logo and this where things went wonky...
.. the first layer went down nicely; the next outside edge of the logo went on nicely. The print head begins the 2nd layer (which is always a bit faster, starting from top right corner), and the first couple of seconds were fine, but then I heard a "ClickClick", and saw that no filament was being extruded.
Since then, I've gone back and loosened things off a little; I've given my belts a twang (!) and made sure I get a bass-note; I've done 2 cold pulls (because prior to maintenance I was using PETG, and I've read that going from PETG to PLA can cause blockages); they look ok to my untrained eye, and there's no obvious signs of debris on what I pull out. I've removed the spring loaded screw, cleaned out behind the door, and replaced the screw (again, being careful to make sure its just level with the outer shell); I've take the PTFE tube off and blown air through it.
Each time I try to print again, though, the behaviour is the same - first layer goes down ok; 2nd layer starts, but a couple of seconds in, I get "clickclick" followed by no filament.
If I do a filament purge, I get nice coils, so it appears that filament is flowing nicely; it just won't print beyond the first layer...
Short of taking the whole thing to bits, and rebuilding it, I'm not sure what else to try; any guidance/advice would be gladly received!
RE: Did my first maintenance, and ruined my printer...
Well.... this is highly embarassing.
I hit Submit on my post, closed the tab, which left me staring at the KB article I'd been referring to ( https://help.prusa3d.com/en/glossary/idler-screw_1592), and it's right there, plain as day "On the Original Prusa MINI, the head of the idler screw should be about flush to 1mm within the printed plastic part, when the filament is loaded."
I could've sworn it said "unloaded". Adjusted the screw according to the instructions that I'm apparently incapabable of comprehending, and whaddaya know: problem solved. <facepalm>
RE: Did my first maintenance, and ruined my printer...
Glad you sorted it out -we learn most from mistakes we make 😀 .
[Mini+] [MK3S+BEAR]
RE: Did my first maintenance, and ruined my printer...
Thanks for the follow-up. The basic lessons are the hardest. Have fun with it!
RE: Did my first maintenance, and ruined my printer...
@andrewterry
Hey, we've all been there!
Formerly known on this forum as @fuchsr -- https://foxrun3d.com/
RE: Did my first maintenance, and ruined my printer...
Hi
Did the same few days after assembling my MINI+ as I had to secure X motor pulley. And when giving 1/4 turn on all unsecured screws I was lucky to realized that I did it also for the famous Idler screw before restarting any printing. I correct it back and all went ok them
Good to know you solved your issue as well
JC
Prusa MINI+ at home / Prusa MK3S+ in the Fab Lab / You can have a look at my designs here printables.com
RE: Did my first maintenance, and ruined my printer...
Actually, you read it correctly the first time:
The Original Prusa MINI has its idler screw on the bottom of the extruder, located on the Z-axis extrusion. This too should be about flush with the plastic, when the filament is not loaded.
Although there's no need to readjust if it's working.
RE: Did my first maintenance, and ruined my printer...
@ksweir
I knew I'd seen it somewhere...! 🙂
It's a bit confusing to have conflicting instructions. I've found that PLA was fine if I adjusted while it was loaded, but PETG came out way too thin. Adjusting the screw after unloading the PETG and then reloading it worked better...
RE: Did my first maintenance, and ruined my printer...
Have you thought about replacing the nozzle?
--------------------
Chuck H
3D Printer Review Blog
RE: Did my first maintenance, and ruined my printer...
Whenever I face any issue with my printer I directly go through the professional tutorials. In your case I would recommend this one: https://www.printerwire.com/common-3d-printing-problems/
I hope it helps! 😊
RE: Did my first maintenance, and ruined my printer...
Have you thought about replacing the nozzle?
I don't think it needs replacing (I've only had it 5 weeks, so i hope it doesn't! 😉 ).
I suspect that after my ruining it tinkering with it, I haven't quite found the sweet spot where the gears are grabby enough for both materials - and I'm basing that on that fact that PLA & PETG prints are coming out nicely again.
RE: Did my first maintenance, and ruined my printer...
@andrewterry
That found like a possibility. Sometimes when switching materials, you can leave some material in the nozzle that causes partial clogs. I remove the nozzle and clean it by hand if purging and cold pulls do not work.
--------------------
Chuck H
3D Printer Review Blog
RE: Did my first maintenance, and ruined my printer...
@cwbullet
I'm beginning to wonder if do need a new nozzle... I'd be disappointed if I do since I've had the printer less than 2 months, but I don't know what else to try.
The last couple of days, I've been struggling with the dreaded click, which today I traced back to a too-low nozzle height. After much faffing about I printed a lovely, single-sheet 75x75 square, followed by a decent benchy. Happy days, I thought; time to clean up. Followed the process for brushing all the crap from the nozzle, did a cold-pull, and went to do a Prusa logo.
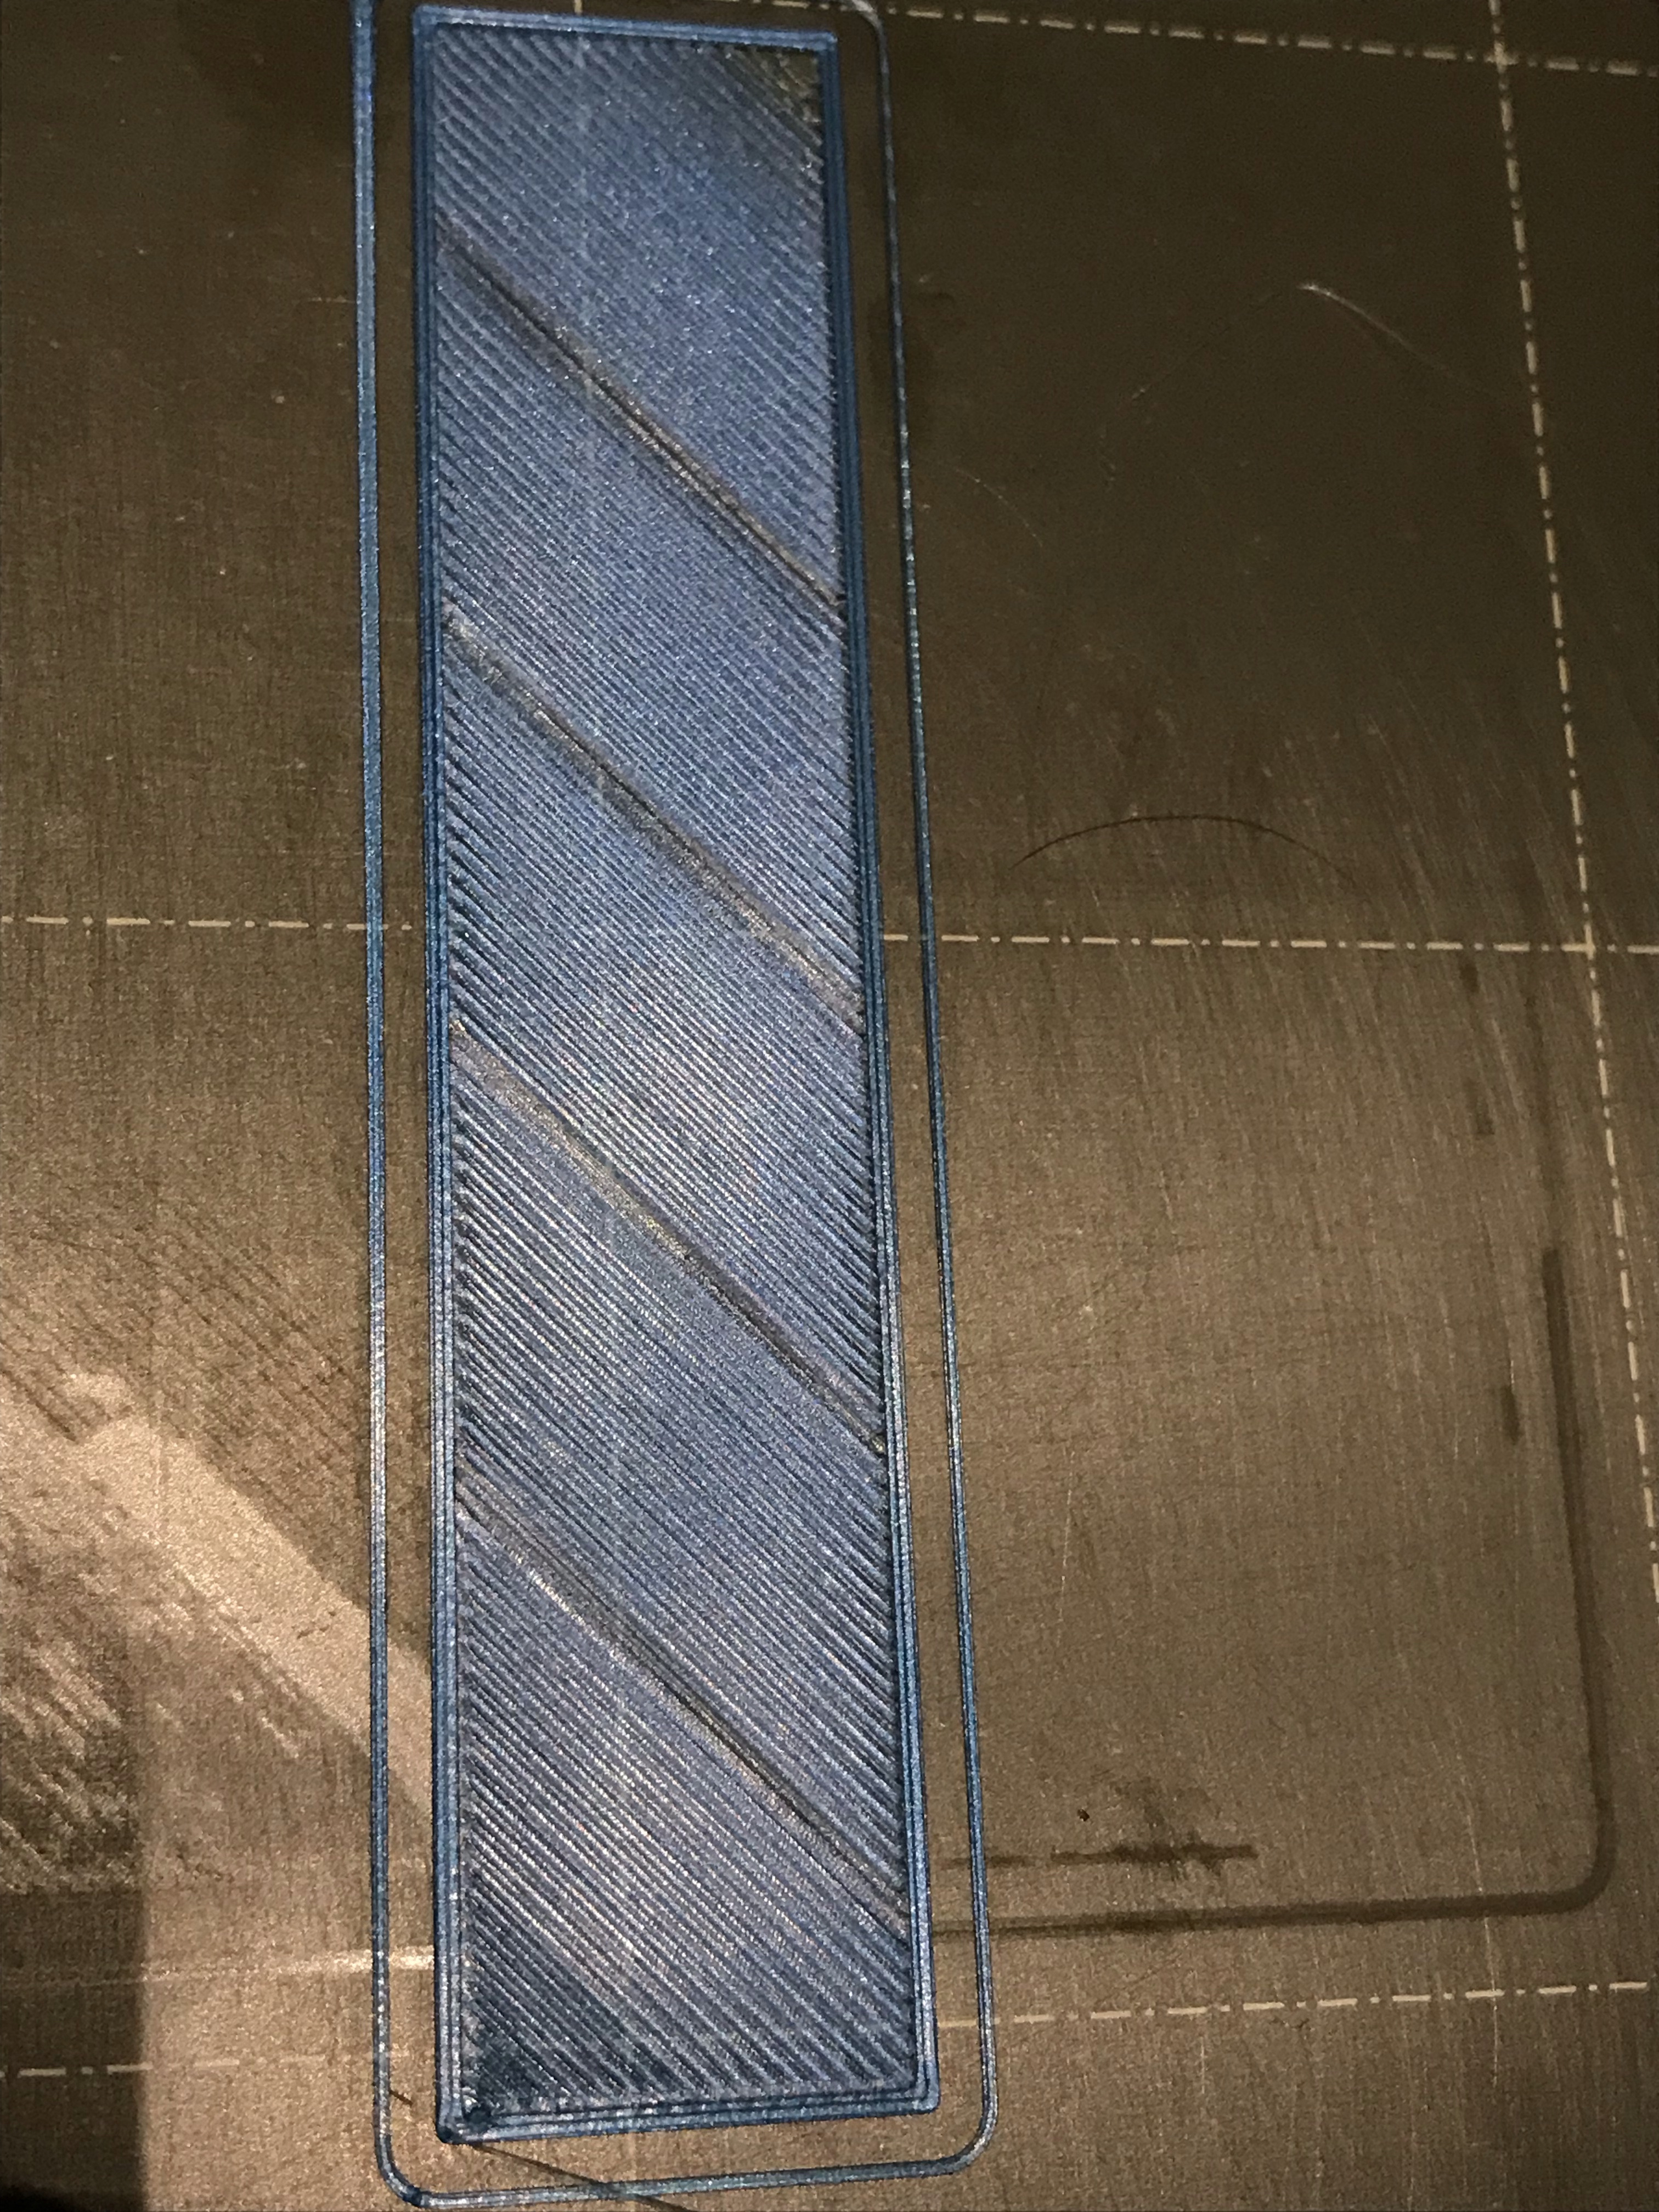
Then I noticed every 2cm, no filament would come out. It's quite regular and ends up looking like tartan by the time it finishes the next layer. I did two more cold pulls, which looked ok, then I heated the nozzle to 290 to try and melt whatever gunk may have been left behind.
Still no luck. Every 2cm, it looks like the filament isn't being extruded.
I don't think my nozzle height is the issue, and I don't think my idler tension is the issue (it doesn't click), but I'm at a loss what to try now.
RE: Did my first maintenance, and ruined my printer...
@andrewterry
It is either that or you are not low enought. You can save the nozzle with a heatgut, pliers, and acupicture needles.
--------------------
Chuck H
3D Printer Review Blog
RE: Did my first maintenance, and ruined my printer...
I’m going in circles.. adjust the nozzle height, I get clicks; adjust the idler screw, I get poor extrusion. Get things good enough for a 75mm square, I get clicks on the next print requiring more layers, and the cycle continues. (It doesn’t help that one KB article says set the idler screw with filament loaded, and another says set it with filament unloaded. I’ve tried both ways; with filament loaded gave me the better results, I think, but I’ve no idea what a baseline starting point should be now).
Honestly wishing I had just settled for the “pre-maintenance” prints I was getting, and not touched anything.
RE: Did my first maintenance, and ruined my printer...
I know what you mean by "going in circles". About setting "right" extrusion with idler.. don't take take these guidelines too literary.. they're just guides. If perfect instructions would exist, then there should be some gauge or scale on that tension screw. So, keep guides in mind and do it by "feeling": there must be enough grip, so extruder is capable to push filament into hotend.. but at the same time, there shouldn't be too much grip, because that would damage filament inside extruder (which again, will cause under-extrusion).
For experimenting, you should maybe only do load/unload filament (so you don't waste time and filament on printing). And when filament is unloaded, check it's surface .. there should only be small traces of gear teeth gripping filament. Take your time and you'll succeed.
[Mini+] [MK3S+BEAR]
RE: Did my first maintenance, and ruined my printer...
I understand what you mean by "circling in circles." Don't take these criteria too literally when it comes to establishing "correct" extrusion with idler... they're simply that. If flawless instructions exist, then that tension screw should have a gauge or scale on it. So, keep the following guidelines in mind and do it by "feeling": there should be enough grip for the extruder to push filament into the hotend, but not too much grip, since this would damage the filament within the extruder (which again, will cause under-extrusion).You should probably just conduct load/unload filament for experimentation (to avoid wasting time and filament on printing). Check the surface of the filament after it has been unloaded... there should only be minor evidence of gear teeth grasping.
RE:
I don't know... this pattern looks way too regular for me to believe it's caused by idler tension or a partial clog. It almost feels like there's an obstruction that blocks filament every few centimeters. Maybe it's just a crazy idea but I'd check to make sure there's nothing blocking the filament either on the spool itself or at the spool holder. With the spool turning and hitting something once a turn that could explain the pattern you're seeing. Or maybe the set screw on the extruder axle slipping. But then I'd expect to see a lot more, less regular under extrusion than the regular pattern you're seeing.
Formerly known on this forum as @fuchsr -- https://foxrun3d.com/
...or are just one or two teeth in the extruder clogged?
Cheerio,
RE: Did my first maintenance, and ruined my printer...
In my case I was getting clicks due to the spring door being too tight. I loosened it more that being flush and it stopped having issues.