Issue with debossed text
Hello everyone! I'm on my first week of 3d printing and I'm running into an issue with debossed text. I can't really read the text and after the last letter, it is leaving artifact going up. I've made the font bigger and I have tested it with the depth set to 0.5mm and 0.25mm with the same results. Other than the text, the part looks ok. How can I clean this up?
Prusa Mk4s
Prusaslicer
Prusament PLA

The smallest text you can get away with without special calcultion is about 30pt, 10mm tall. It may help to use a modifier to reduce the number of perimeters to one. Deboss (or emboss) by a multiple of the layer height.
Cheerio,
RE:
I find adding text can be tricky. (click on pics below to get higher-res). Most of the text below uses 2 color text to get some contrast. If you want high legibility, you need to add contrasting color.. but it might not be possible in your model. I created all text in these models using Fusion 360, but the emboss/deboss tool in slicer should be similar (and I've also used that with the same success). The "Neighbourhood" text is at 8mm and the "Sweet 16" text is at 4mm to give you some reference (so you can effectively go below 10mm if you use dual-colour). Choice of FONT is important. "Neighborhood" uses an Arial Black (Bold), "Sweet 16" uses Comic SANS (on macOS). Lower Case doesn't work as well as Upper Case because there are more smaller "islands" in lower case. (the small bit in "e-a-o-p-q, etc). All the examples here were printed with the text facing the build plate (which some don't recommend), but the advantage is (if your Z is good) is that you can hide the layer lines around the text. (I use the rough sheet with glue stick for both PLA and PETG) . All these are embossed. 4mm font size is the absolute minimum I've been successful with and you'll notice the black/yellow "Pillar III" didn't really work well. At the small sizes it is also how well your first layer is working at the build plate, and how slow you go.. I use the MK3S+ and the profiles there are slow for PLA. The black/Yellow might have been PETG and I find that filament doesn't give as crisp letters.
I deboss at a depth of 0.6 to 1 mm which helps visibility (especially all one color) as you get a bit more shadow.
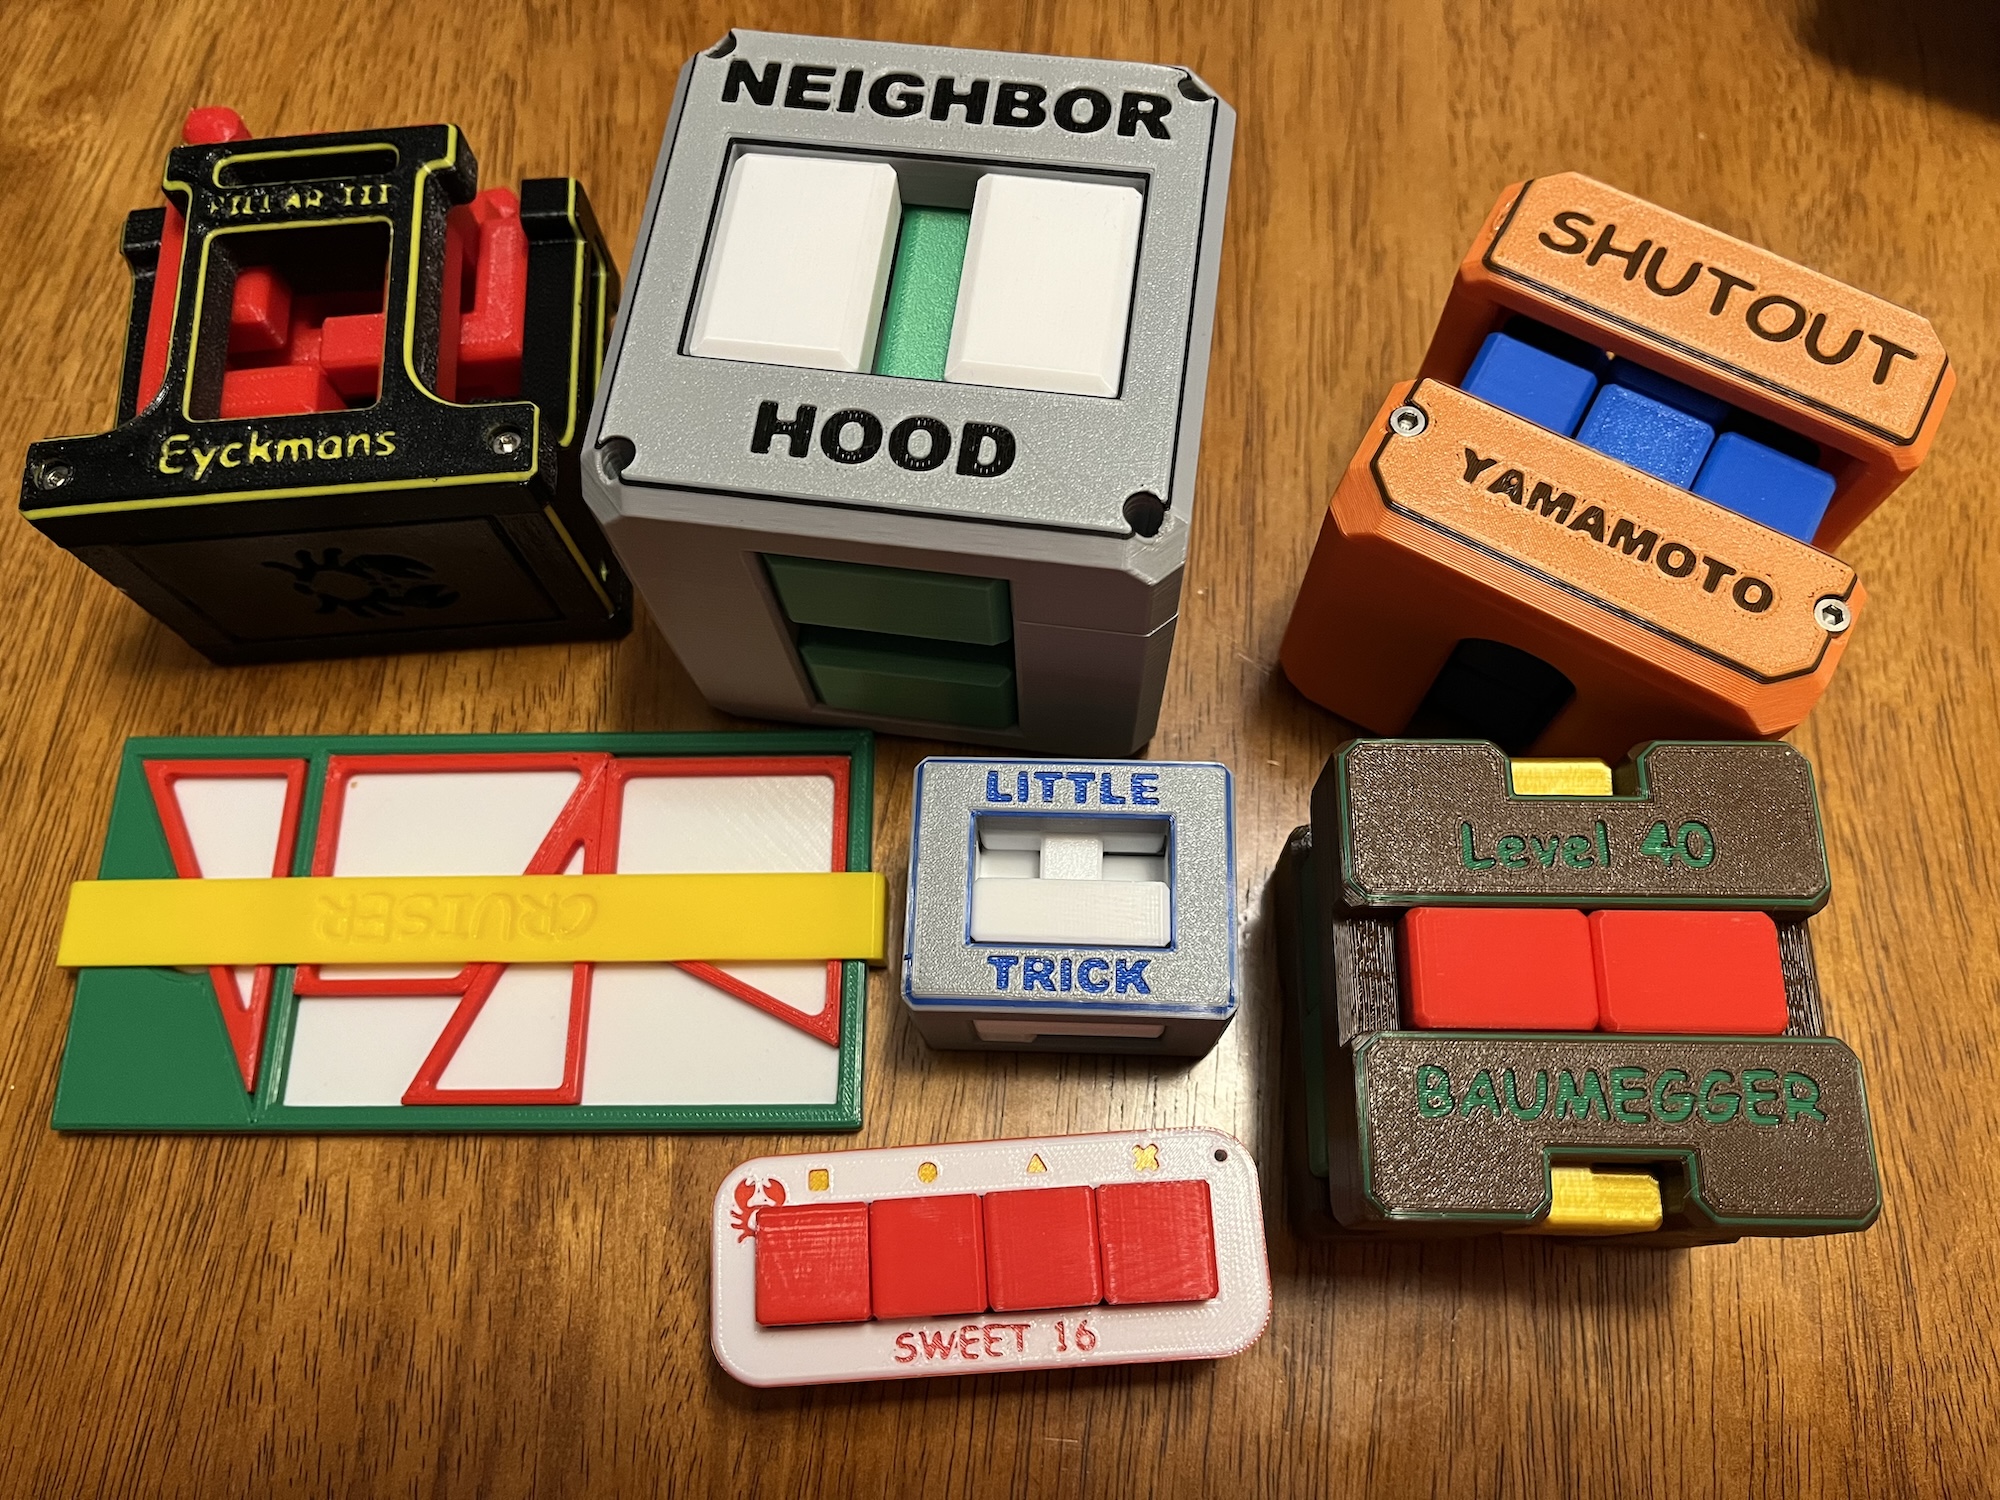
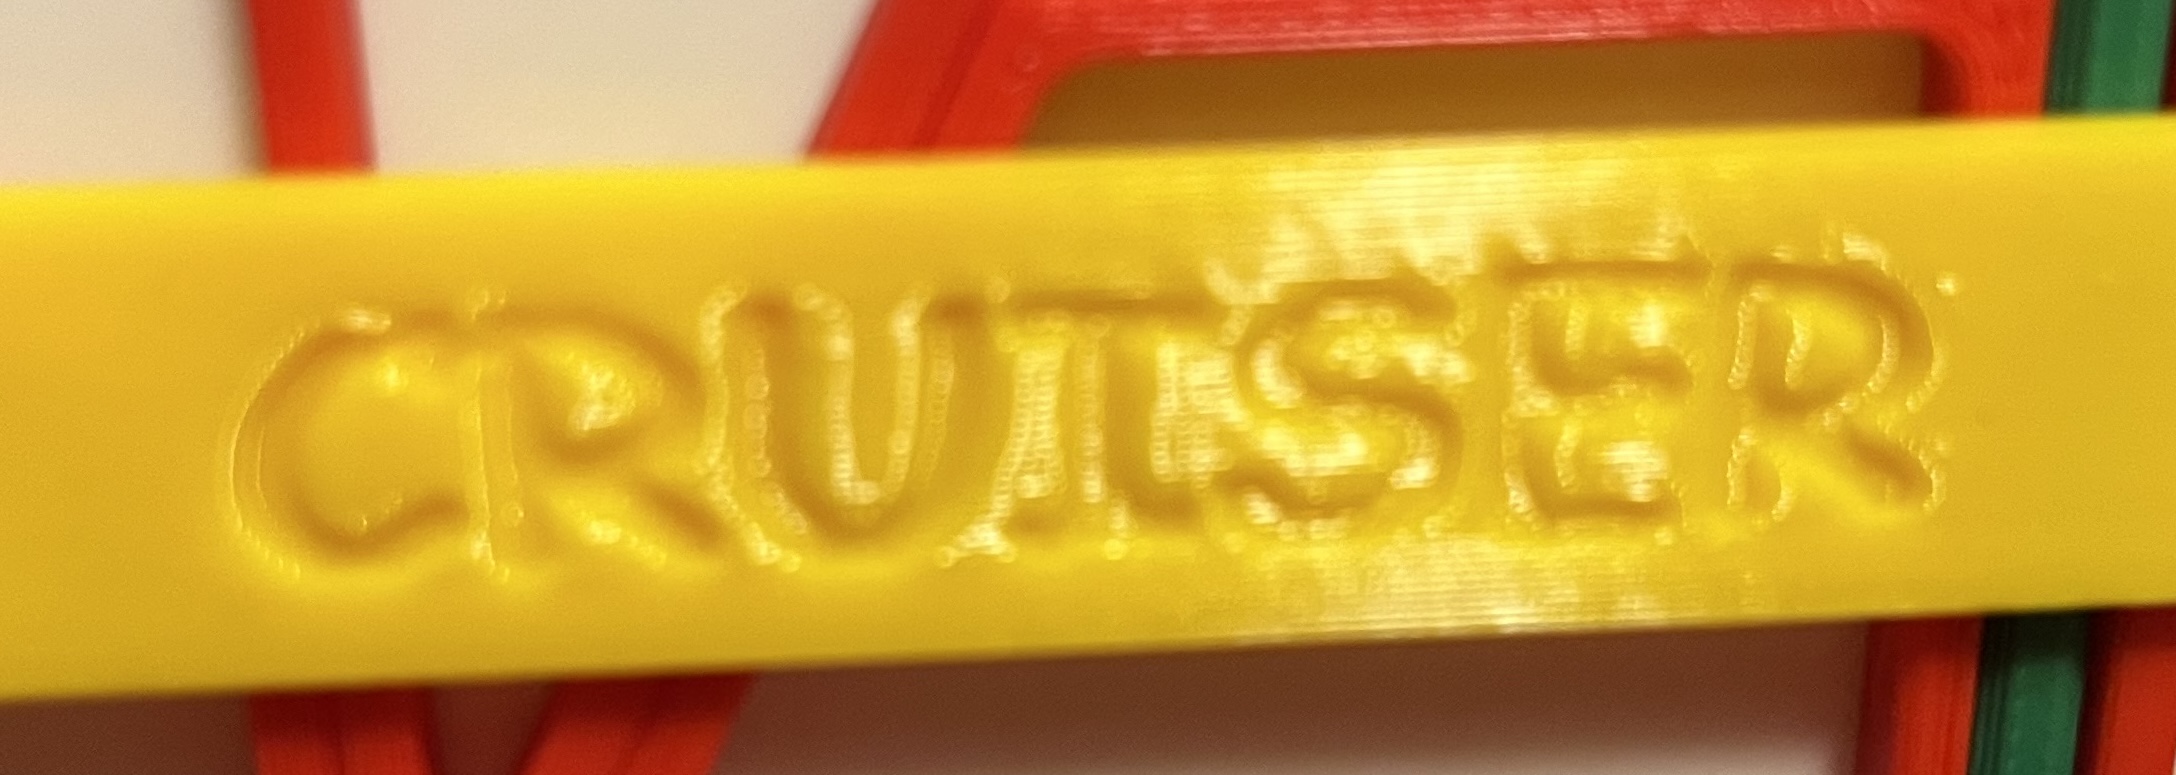
The "Cruiser" deboss here was printed vertically, which can give a bit better resolution, but notice the difference in legibility between contrasting color. I always get a bit of artifacts, but the limitation of my printer. I print these texts at both 0.2 and 0.3 layer heights, but ensure that you have about 0.6 to 0.8 mm of deboss depth and about 3 layers of the contrasting color. The nice thing about the MK3S+ is that color changes are dead easy and quick where printers with long tubes into extruder can be a PITA. That's where something like the AMS/MMU would be nice, which I don't have.
If you print your text on the top layer then you'll see the perimeters surrounding it and maybe using the modifier as suggested above might help, but I think using the "ONLY 1 LAYER" for the TOP SURFACE at the bottom of the LAYERS & PERIMETERS menu will fix this issue without having to do the extra modifier work.
Your picture is not quite high enough resolution to tell.. but you look like you've got more artifacts than I would like.. maybe slowing those layers down might help.. try 50% just to see. Using a sharper font like Arial Black ("Neighborhood", "Little Trick") is better than the Comic Sans ("Cruiser", "Sweet 16")
So you need to play around with your printer, using your filament choice and font and depth.. Text down, up and vertical. Change sizes and fonts from 4mm to 10. If you are really fancy there are ways to get different colours for contrast all in the same layer.. but without AMS/MMU can take some setup. I haven't tried that yet.
RE: Issue with debossed text
Manual MMU is not that hard to do once you have set up a printer profile for it. I involves not much more user interaction for changing filament than printing the colors on separate layers. And it gives you a smooth surface.

Screenshot of the font settings (text was created in PrusaSlicer) for the text "MicroB":

Too much folks, hold back a bit, the OP said:
I'm on my first week of 3d printing
@fooshee - Bookmark the two posts above for later. In a few months you will be ready to try them but for now stay with the basics. Your print quality is reasonably good and if you advance with baby steps you will get to more complex prints faster and with fewer mishaps than if you try to rush it.
I would already rate your print as good enough for the first month.
Every user builds their printer slightly differently and pre-built models are shaken up in transit so during the first few weeks of use the printer will run-in and settle its parts together; then you will have to go over the basic maintenance checks, lubricate and recalibrate. Even if you got everything dialled in perfectly today, it would all need re-doing.
Better to settle, temporarily, for a basic working printer and get some useful printing done, make your early mistakes, establish a routine and generally get used to the process. Then when you do your one month service you can take extra care knowing the new settings on your now stable printer are likely to last for several months.
https://help.prusa3d.com/article/regular-printer-maintenance-mk4_419000
Cheerio,
RE:
On the right picture, the line above the M and above the other text looks like a "seam" that is chosen to print "aligned". Briefly the seam is where the printer starts printing its layer and you get a little "dent". When they are aligned, it stacks on top of each other and you get a line. The slicer will try to hide the seam in edges, such as text and this can affect legibility. You can choose a "random" seam, but then the surface finish appears to have "zits". But you can use the seam painter tool to paint on the seam away from the text to aid in legibility.
So although you are new.. lots of things can affect legibility.. font size, font, orientation, deboss depth, seams, print speed, etc..
RE: Issue with debossed text
FYI: This is a good reference for some fonts that work well when 3D printing:
https://www.prusaprinters.org/prints/71231-font-swatches-tested-ranked
I downloaded the OverPass font from Google and used the .otf - to - .ttf converter mentioned in this thread to install the font in Fusion360:
Prusa MK4 since Jan 2024, MK4S/MMU3 since Jan 2025, Printables: @MikeB_1505898