.stl to .gcode - what am I doing wrong???
I've been happily playing around with my new Mk3S for the past few days. I successfully printed the 50m frog, Marvin, the PRUSA plate, the gear bearing, and Adalinda. They all come out pretty much textbook.
So, I wanted to find something new, so I tried to convert the retro rocket ship ( https://www.prusaprinters.org/prints/2849-retro-rocket-ship) from .stl to .gcode.
I found a great video on YouTube to help me understand PrusaSlicer. I set it up for the defaults for Mk3S and added the rocket ship. I chose the "grid" fill and used 25% infill. Print settings were 0.15mm Quality Mk3 (modified). The "modified" appeared after I changed the infill to "grid."
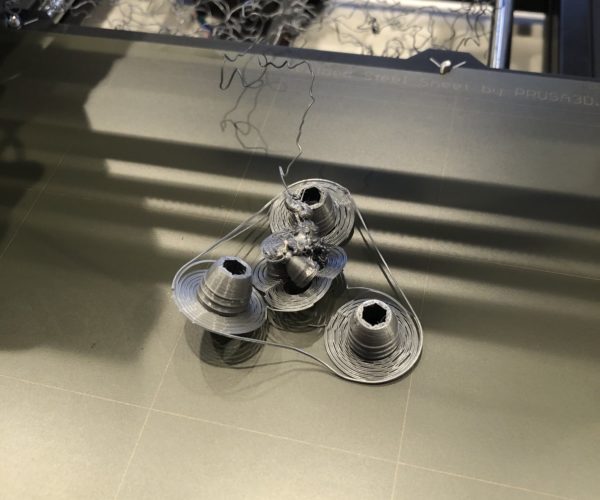
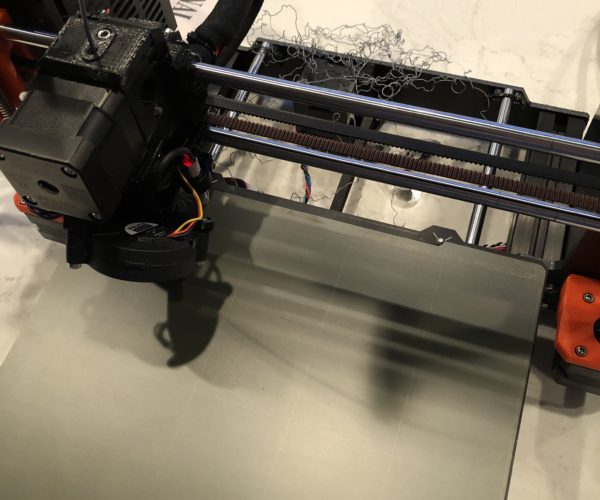
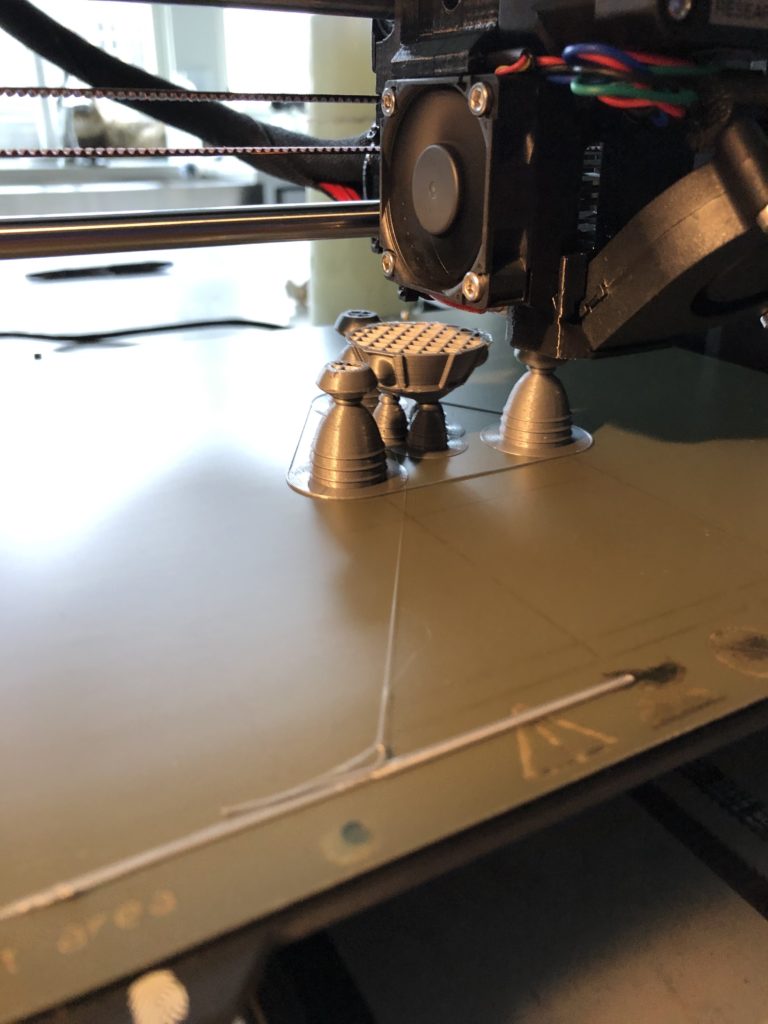
I tried to print, but it would get maybe 3 or 4 units up the Z-axis and the middle came unstuck from the platter. I did a little reading and found where I should add a "brim" so that there is more in layer 1 to adhere to so that it didn't warp off. That resulted in the model staying stuck on the plater a bit longer, but as you can see from the attached pictures, it all went south after about 20 minutes of printing. I came back to check on it and there was filament everywhere!
It's using the stock values of 215 and 60 for the temperatures.
RE: .stl to .gcode - what am I doing wrong???
I forgot to mention that I re-sized the spaceship to maybe 70% of it's original size for the print in my original post. Should have taken about 2.7 hours at that size.
I'm trying it again at 100%. (5.8 hours) One thing I've already noticed is that at 100%, the brim seems very uniform and the first layer looks flat and even. When I was trying to print the 70% scale version (scaled in PrusaSlicer) I noticed that the first layer was kind of lumpy, like it was bunching up a little bit in places. More like overlapping for just a little bit making some ridges slightly higher than others. This doesn't seem to be happening on the 100% version.
Is there more to scaling that just scaling the X,Y,Z axis?
RE: .stl to .gcode - what am I doing wrong???
Adhesion - or lack thereof - is due to contamination of the print sheet. Fingerprints are a problem. Alcohol is not sufficient to remove the oils, it mostly spreads them around as a micro thin layer.
Take the sheet to the sink, use a few drops of Dawn or Fairy dish detergent on a paper towel to scrub the sheet. Handle the sheet by the edges at all times. Rinse is very hot water for several minutes (gallons of rinse vs grams is why alcohol fails). Dry with fresh paper towel, and handling by the edges place back on the printer.
Use tools to remove parts, never touch the print surface.
It also looks like layer 1 is too thick; Live-Z too high.
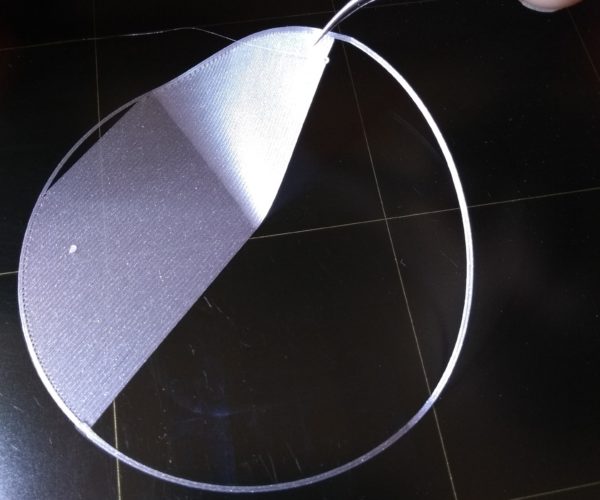
Print this cal circle, and adjust Live-Z more negative so the wafer is a solid sheet of plastic, no gaps between extrusions.
RE: .stl to .gcode - what am I doing wrong???
ps: brim is brim, scale doesn't affect it. If one print brim looks bad, and the next it looks normal, it is probably something reducing flow for the earlier print.
RE: .stl to .gcode - what am I doing wrong???
It did it again on the full-scale model.
I saw your recommendation on another post to thoroughly wash the plate with soap and water, which is what I did. (To the point that the water hydrophobically ran off.)
It still pulled off in the middle section. And that little bit there left in the middle of the picture is properly adhered. I had to pull it a little to get it to break off.
I'll try that cal-circle test in the morning. I'll admit it's very difficult for me to get the right magnification to see what the z-layer is doing. I need to find my USB microscope.
RE: .stl to .gcode - what am I doing wrong???
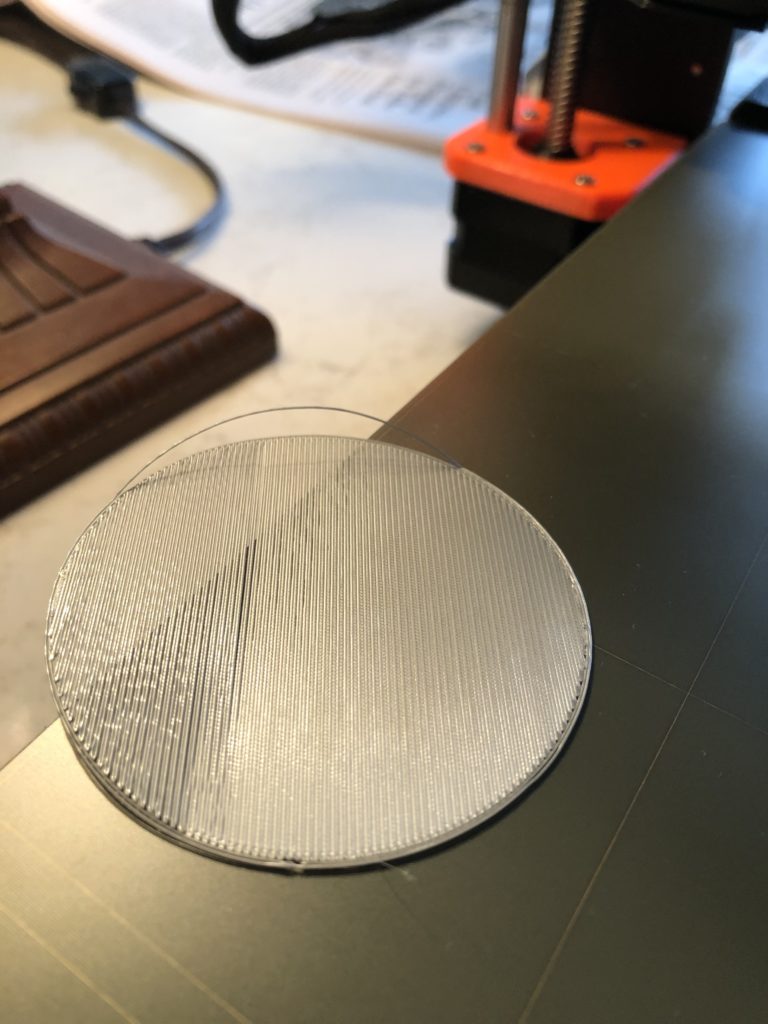
I went from -0.990 to -1.137. Seemed like the cross-over point to smooth was around -1.085.
Is this now in the sweet spot? This would be a nice addition to the assembly/test protocol in the user manual. I can't see the extrusion well enough with my 55-year old eyes to tell if it's individually too round or too flat. 😊
RE: .stl to .gcode - what am I doing wrong???
If its smooth on the bottom and you cant pull the lines apart then its at the right z height. If you go too far down it starts to drag filament around and can leave an irregular rough top texture.
RE: .stl to .gcode - what am I doing wrong???
Man - your Z sure looks way to high to me...
It should not be separate strands.
RE: .stl to .gcode - what am I doing wrong???
I'm on the right track! It was definitely the mis-adjusted Z. The print has made it way past the point where it used to go haywire.
When this print finishes, I'll play around with the circle adjustment again. Like I said, that step should be included in the manual. No way you can judge the right Z height looking at an individual line. At least, I can't.
RE: .stl to .gcode - what am I doing wrong???
Someone give him a link to the Live-Z topic. It is a life changer.
Glad you are getting there!
RE: .stl to .gcode - what am I doing wrong???
Also, the print sheet is looking better, too: it appears clean in the last images. But keep in mind it can look perfect but still have a film of oil. Fingerprints are a vicious foe. And yes, sometimes it takes multiple trips to the sink to get that oil off. But once you get the hang of it, it becomes second nature and you can tell when it's needed just by seeing what is going on with layer 1 as it prints. Better to stop and toss a partial layer than continue and toss 300 grams and 10 hours.
