Project: Carnival Mask chocolate copy with silikone casting mold
I decided to play around a bit with casting silicone and 3D scanning with meshroom. In this post, I want to introduce my project, share my knowledge and maybe gain some new knowledge.
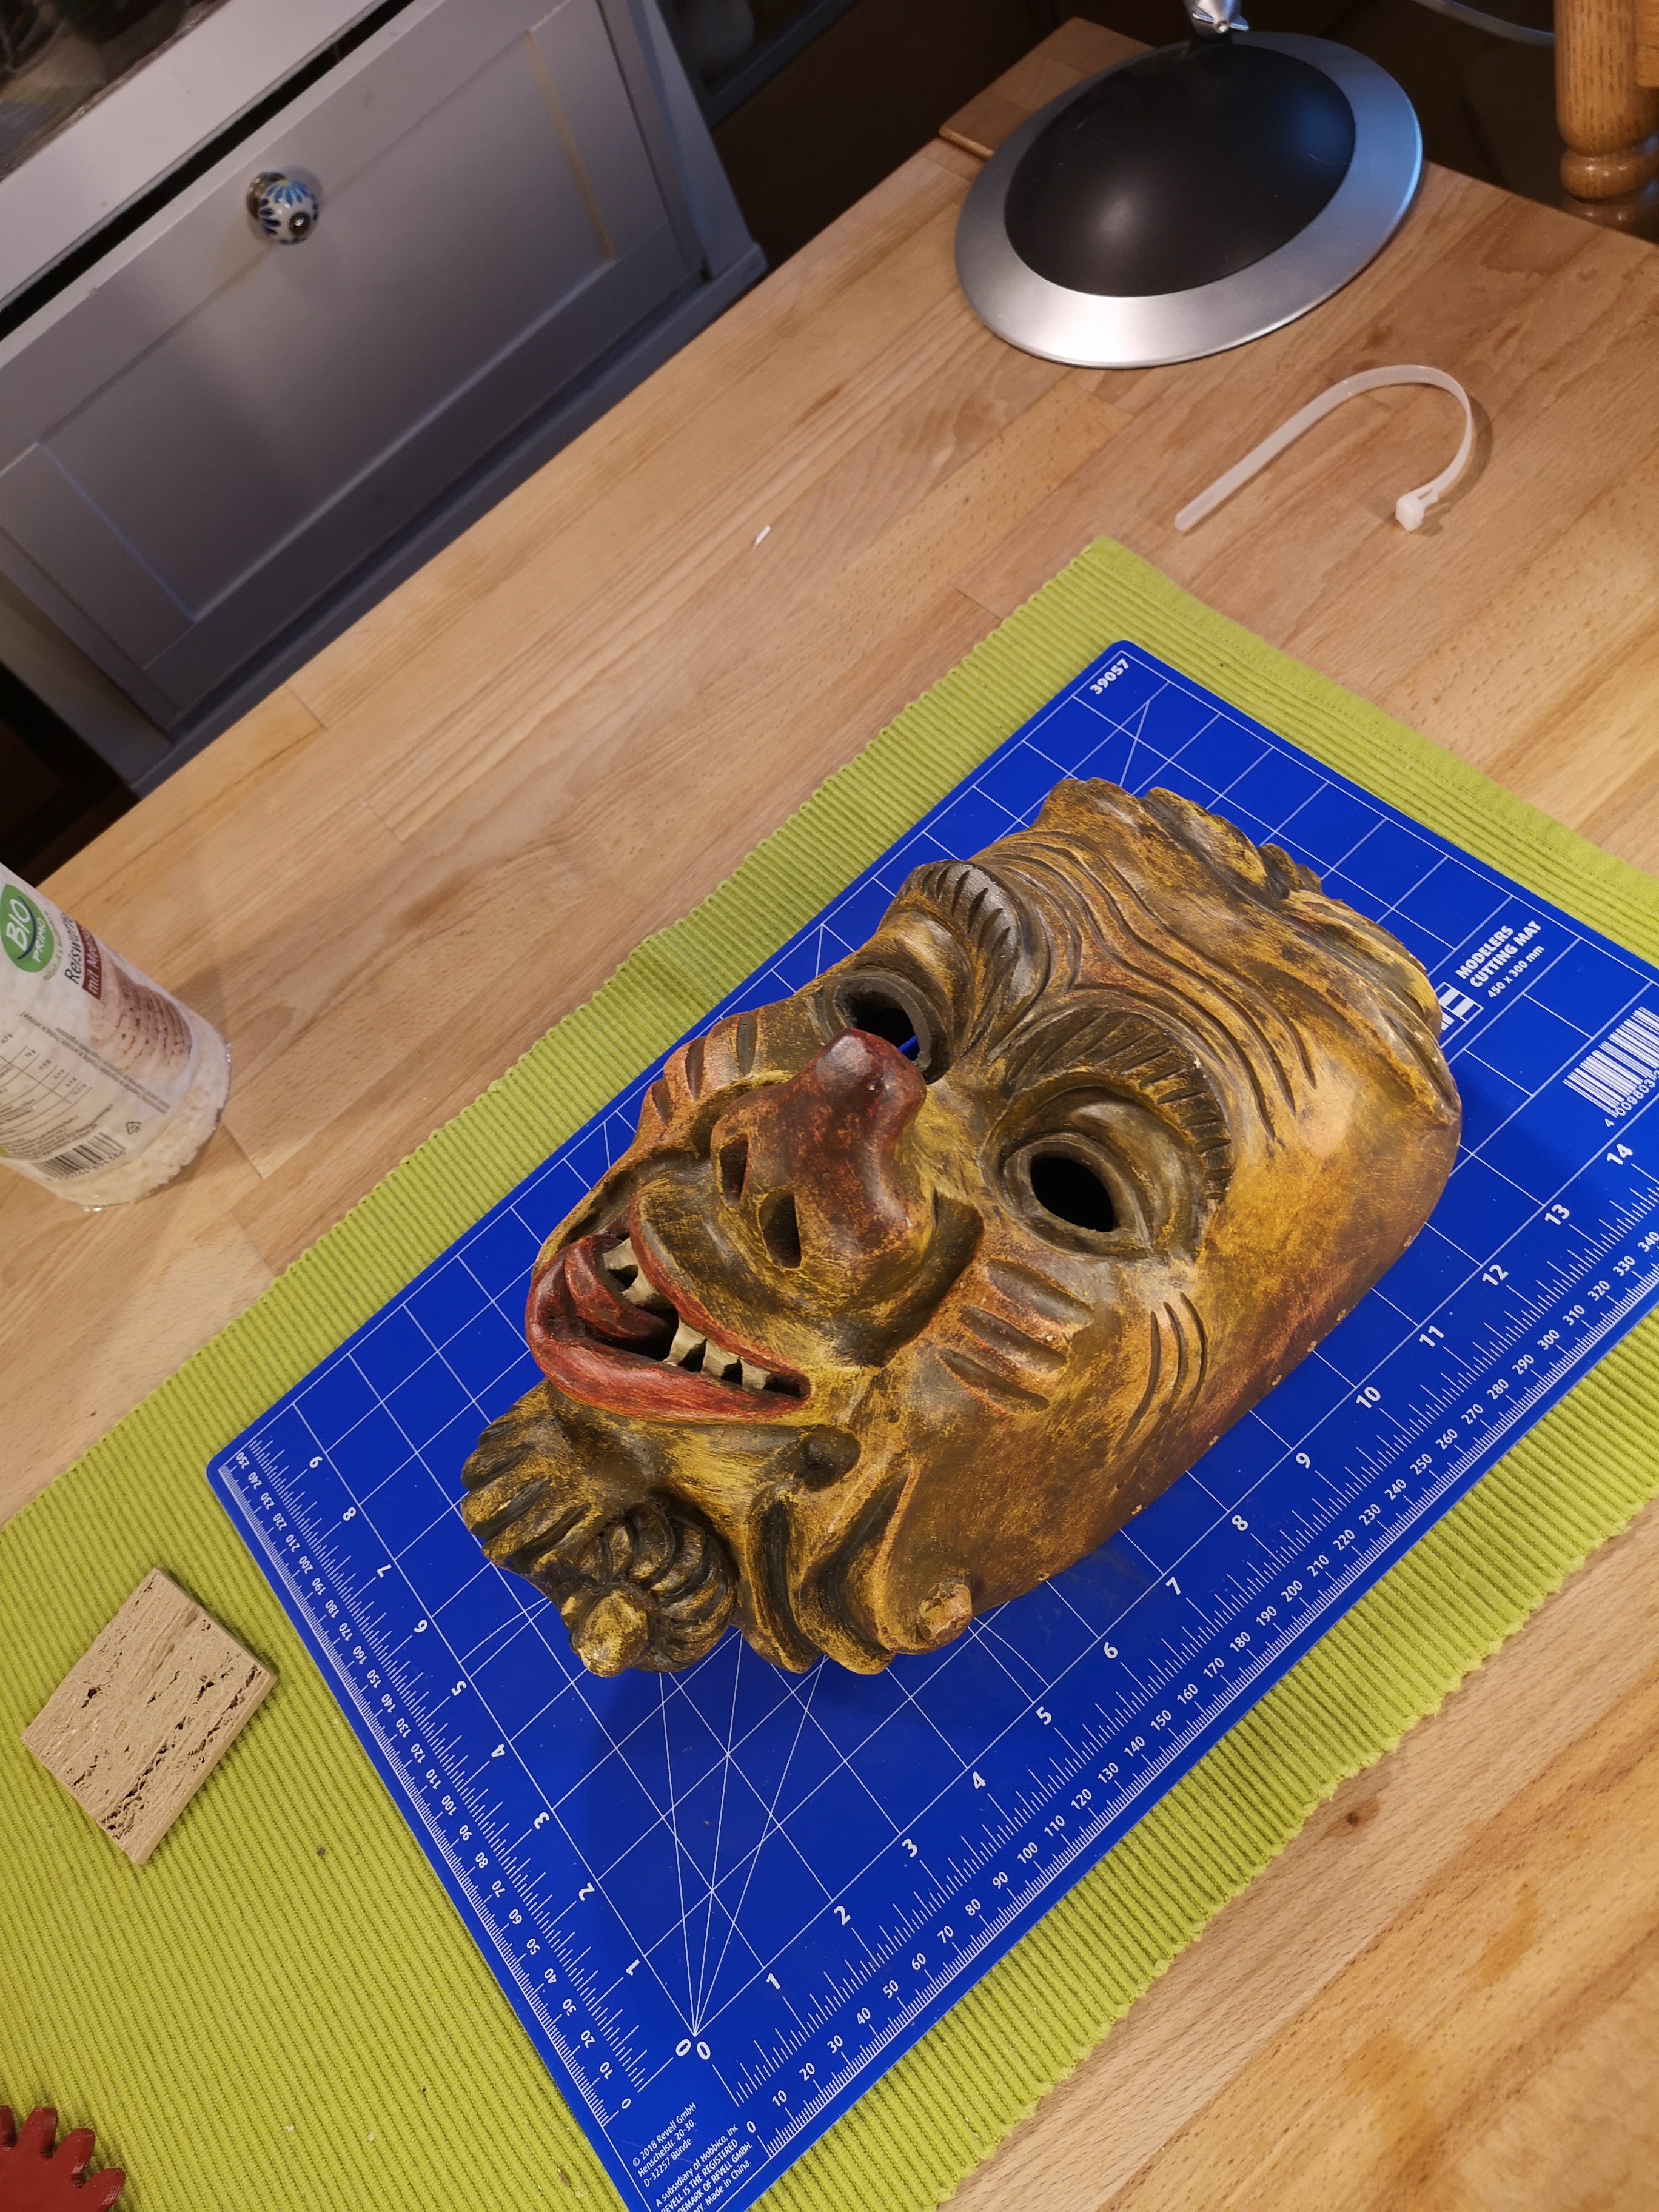

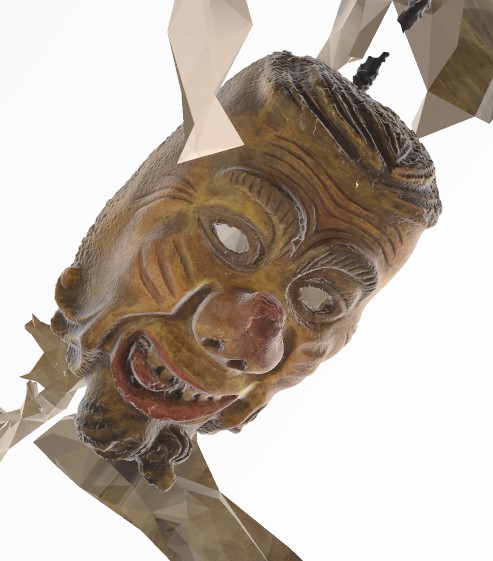
First, I obtained my target object, a mask worn by some people as a costume at the local carnival. It’s called “Kaujole”.
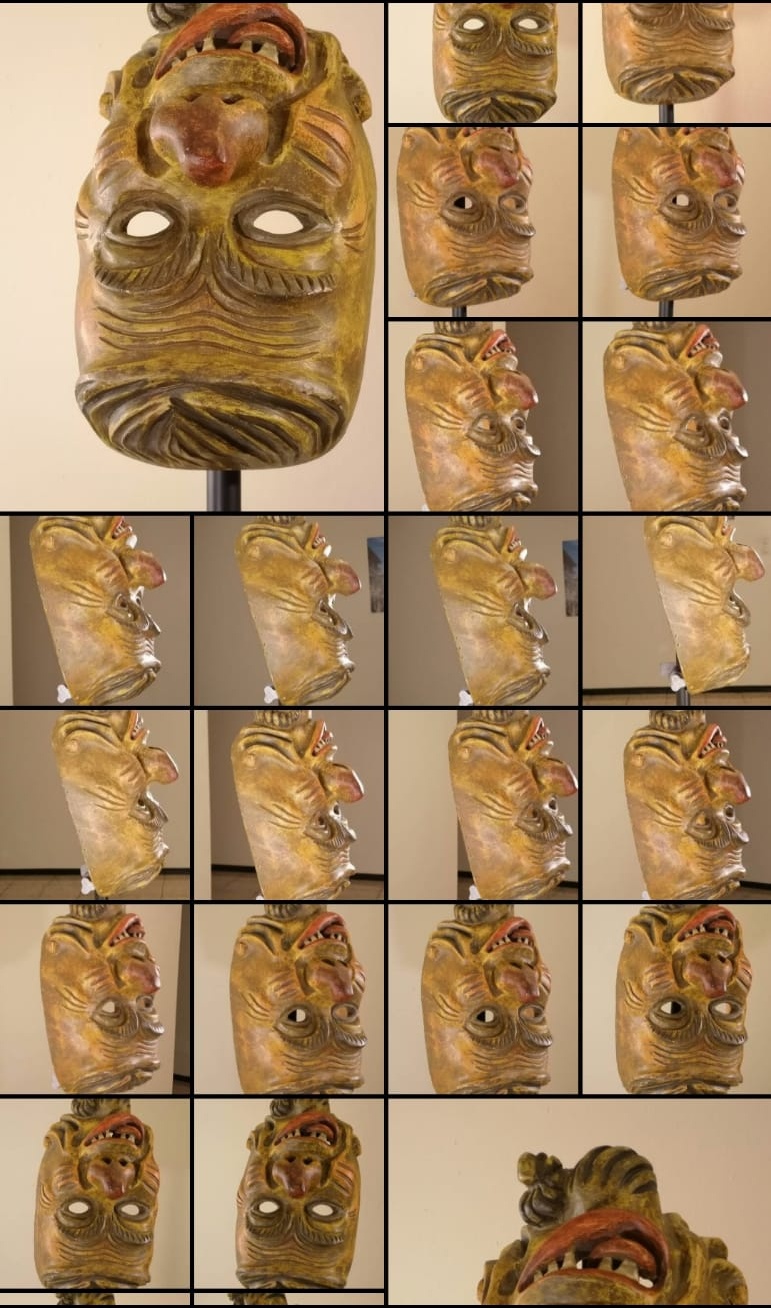
Then I tried to make a scan with Photogrammetry according to these tutorials which was not so easy at first attempt.
The silicone I used: https://trollfactory.de/produkte/silikon-kautschuk/haertegrad-shore/weich-shore-a25/7035/tfc-troll-factory-silikon-kautschuk-typ-6-lebensmittel-aprikot-weich-shore-22-1-1
There were some problems with my first setup and my hardware:
I have a RX 580 (AMD cards don’t work with meshroom)
In addition, the scan environment was too empty. With an empty background, the software can’t do pattern matching and get a structure and it’s more difficult to scan.
The mask is flipped top down, because in Blender the direction is not important. But it is much easier to hang it top down on my tripod with a G-Clamp on the topside of the mask (in the picture below).
At first I had problem with the Cuda card, but my nephew was able to help. He had a Nvidia 1060 in his gaming pc which did the job very well.
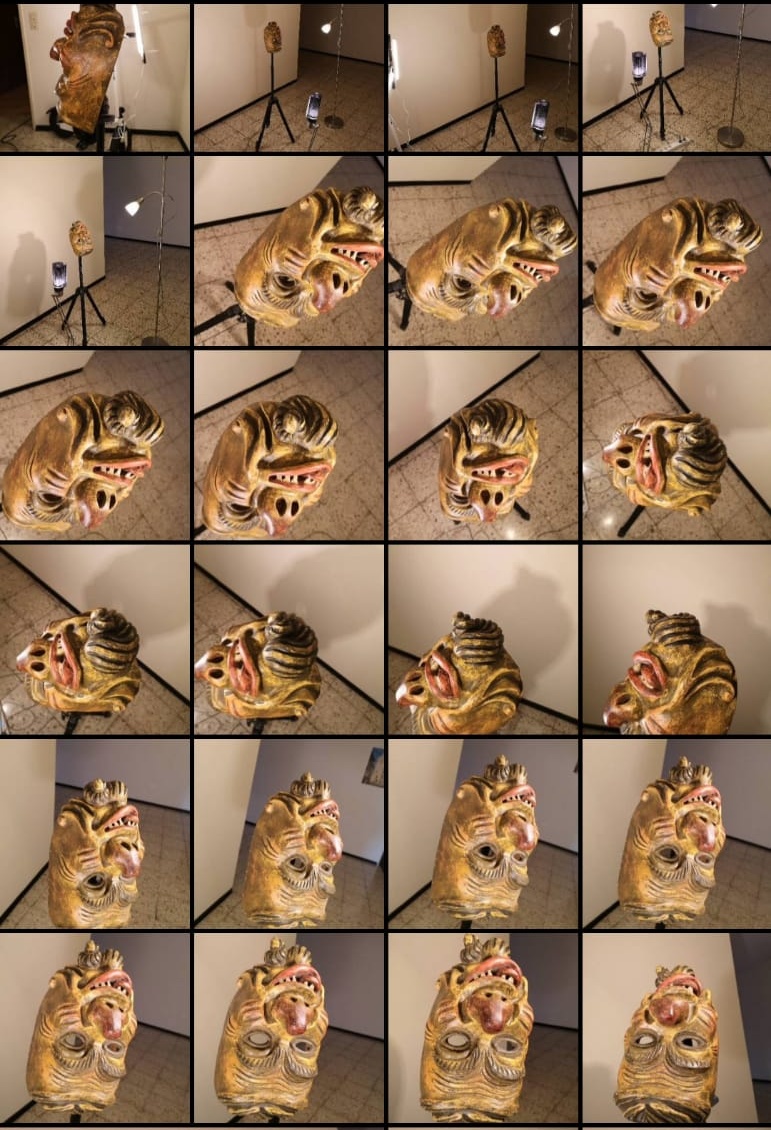
I made four photo shootings with my P20 Pro. The first and second on my floor, the third up in the room in my apartment house where the people can dry their laundry because the background there is very bright. The last, (the fourth) I made at my dining table and placed some objects with different colours and geometries around it to get some reference points for the software for better results.
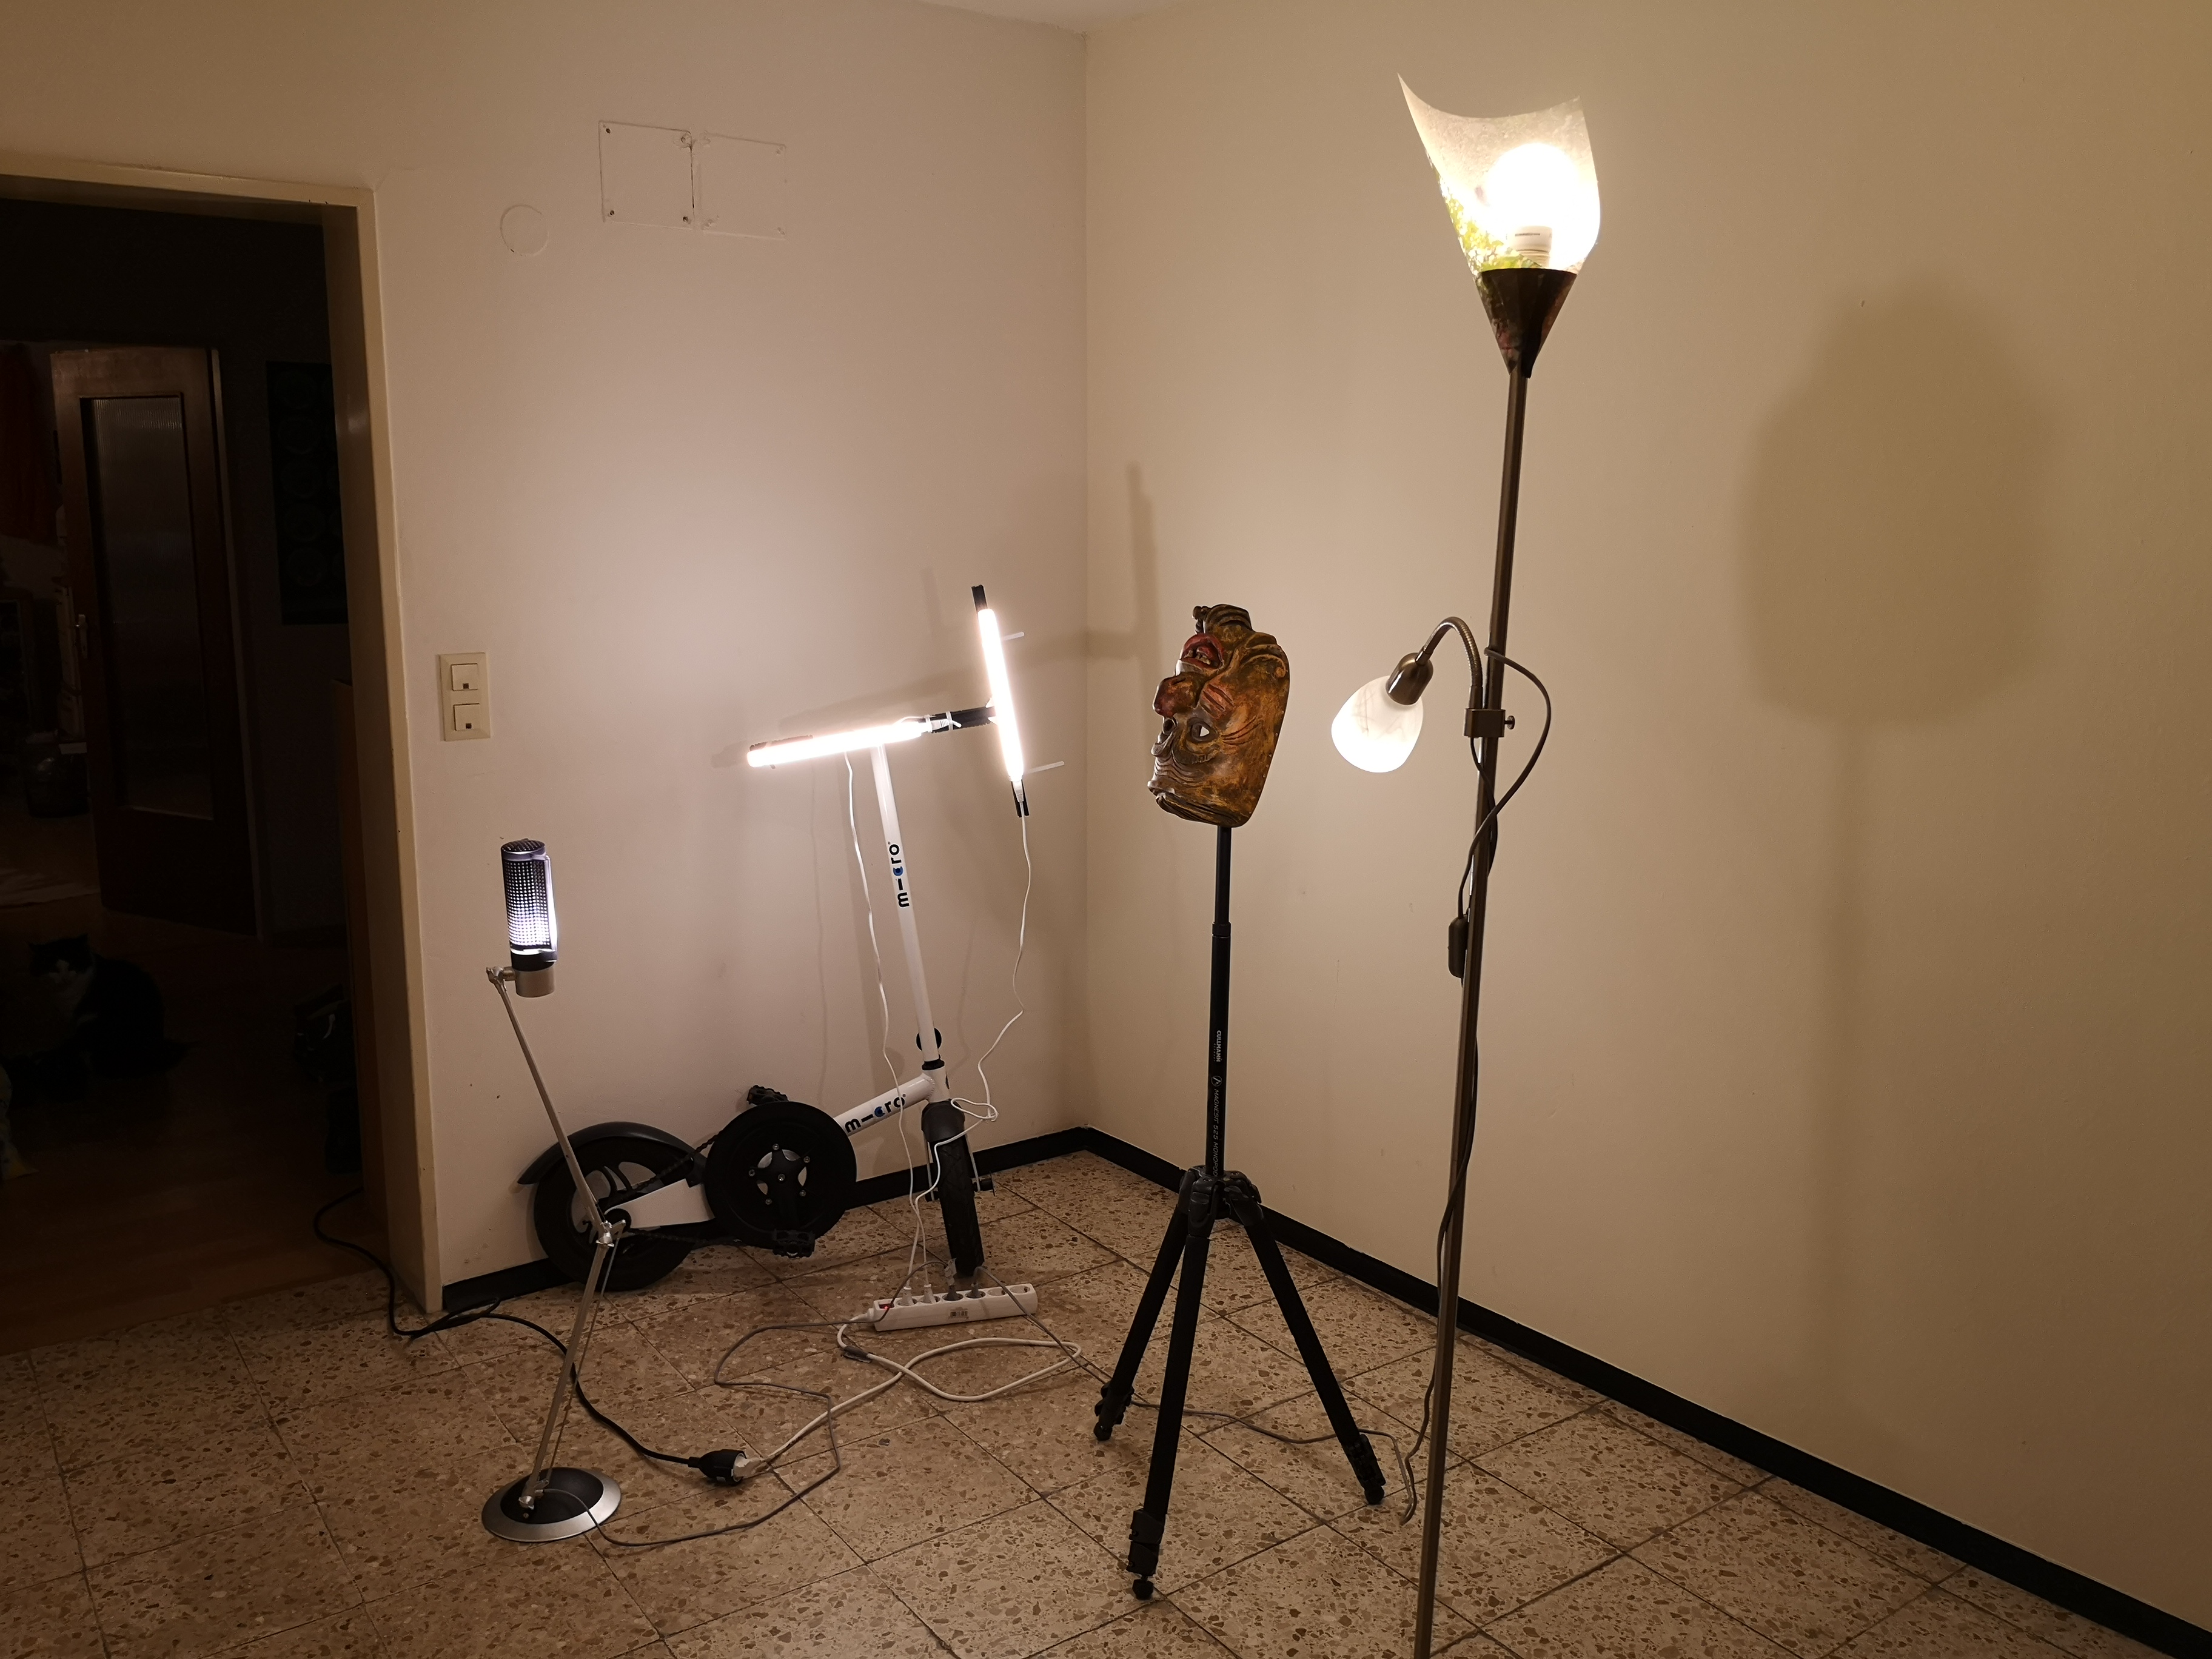
Setup from the first two shots.
First results.
Second shooting
The first scan was horrible and got many errors and much less details. I think, there were too few pictures and too less contrast in the background. This was taken from the first session.
The second scan, with the third set of pictures where even worse because of many white surfaces behind the mask.
The third scan was better. It was made from the second set of pictures from the corridor.
With some advice, I decided to once more take some pictures, as mentioned with objects around them this time. The result was even better.
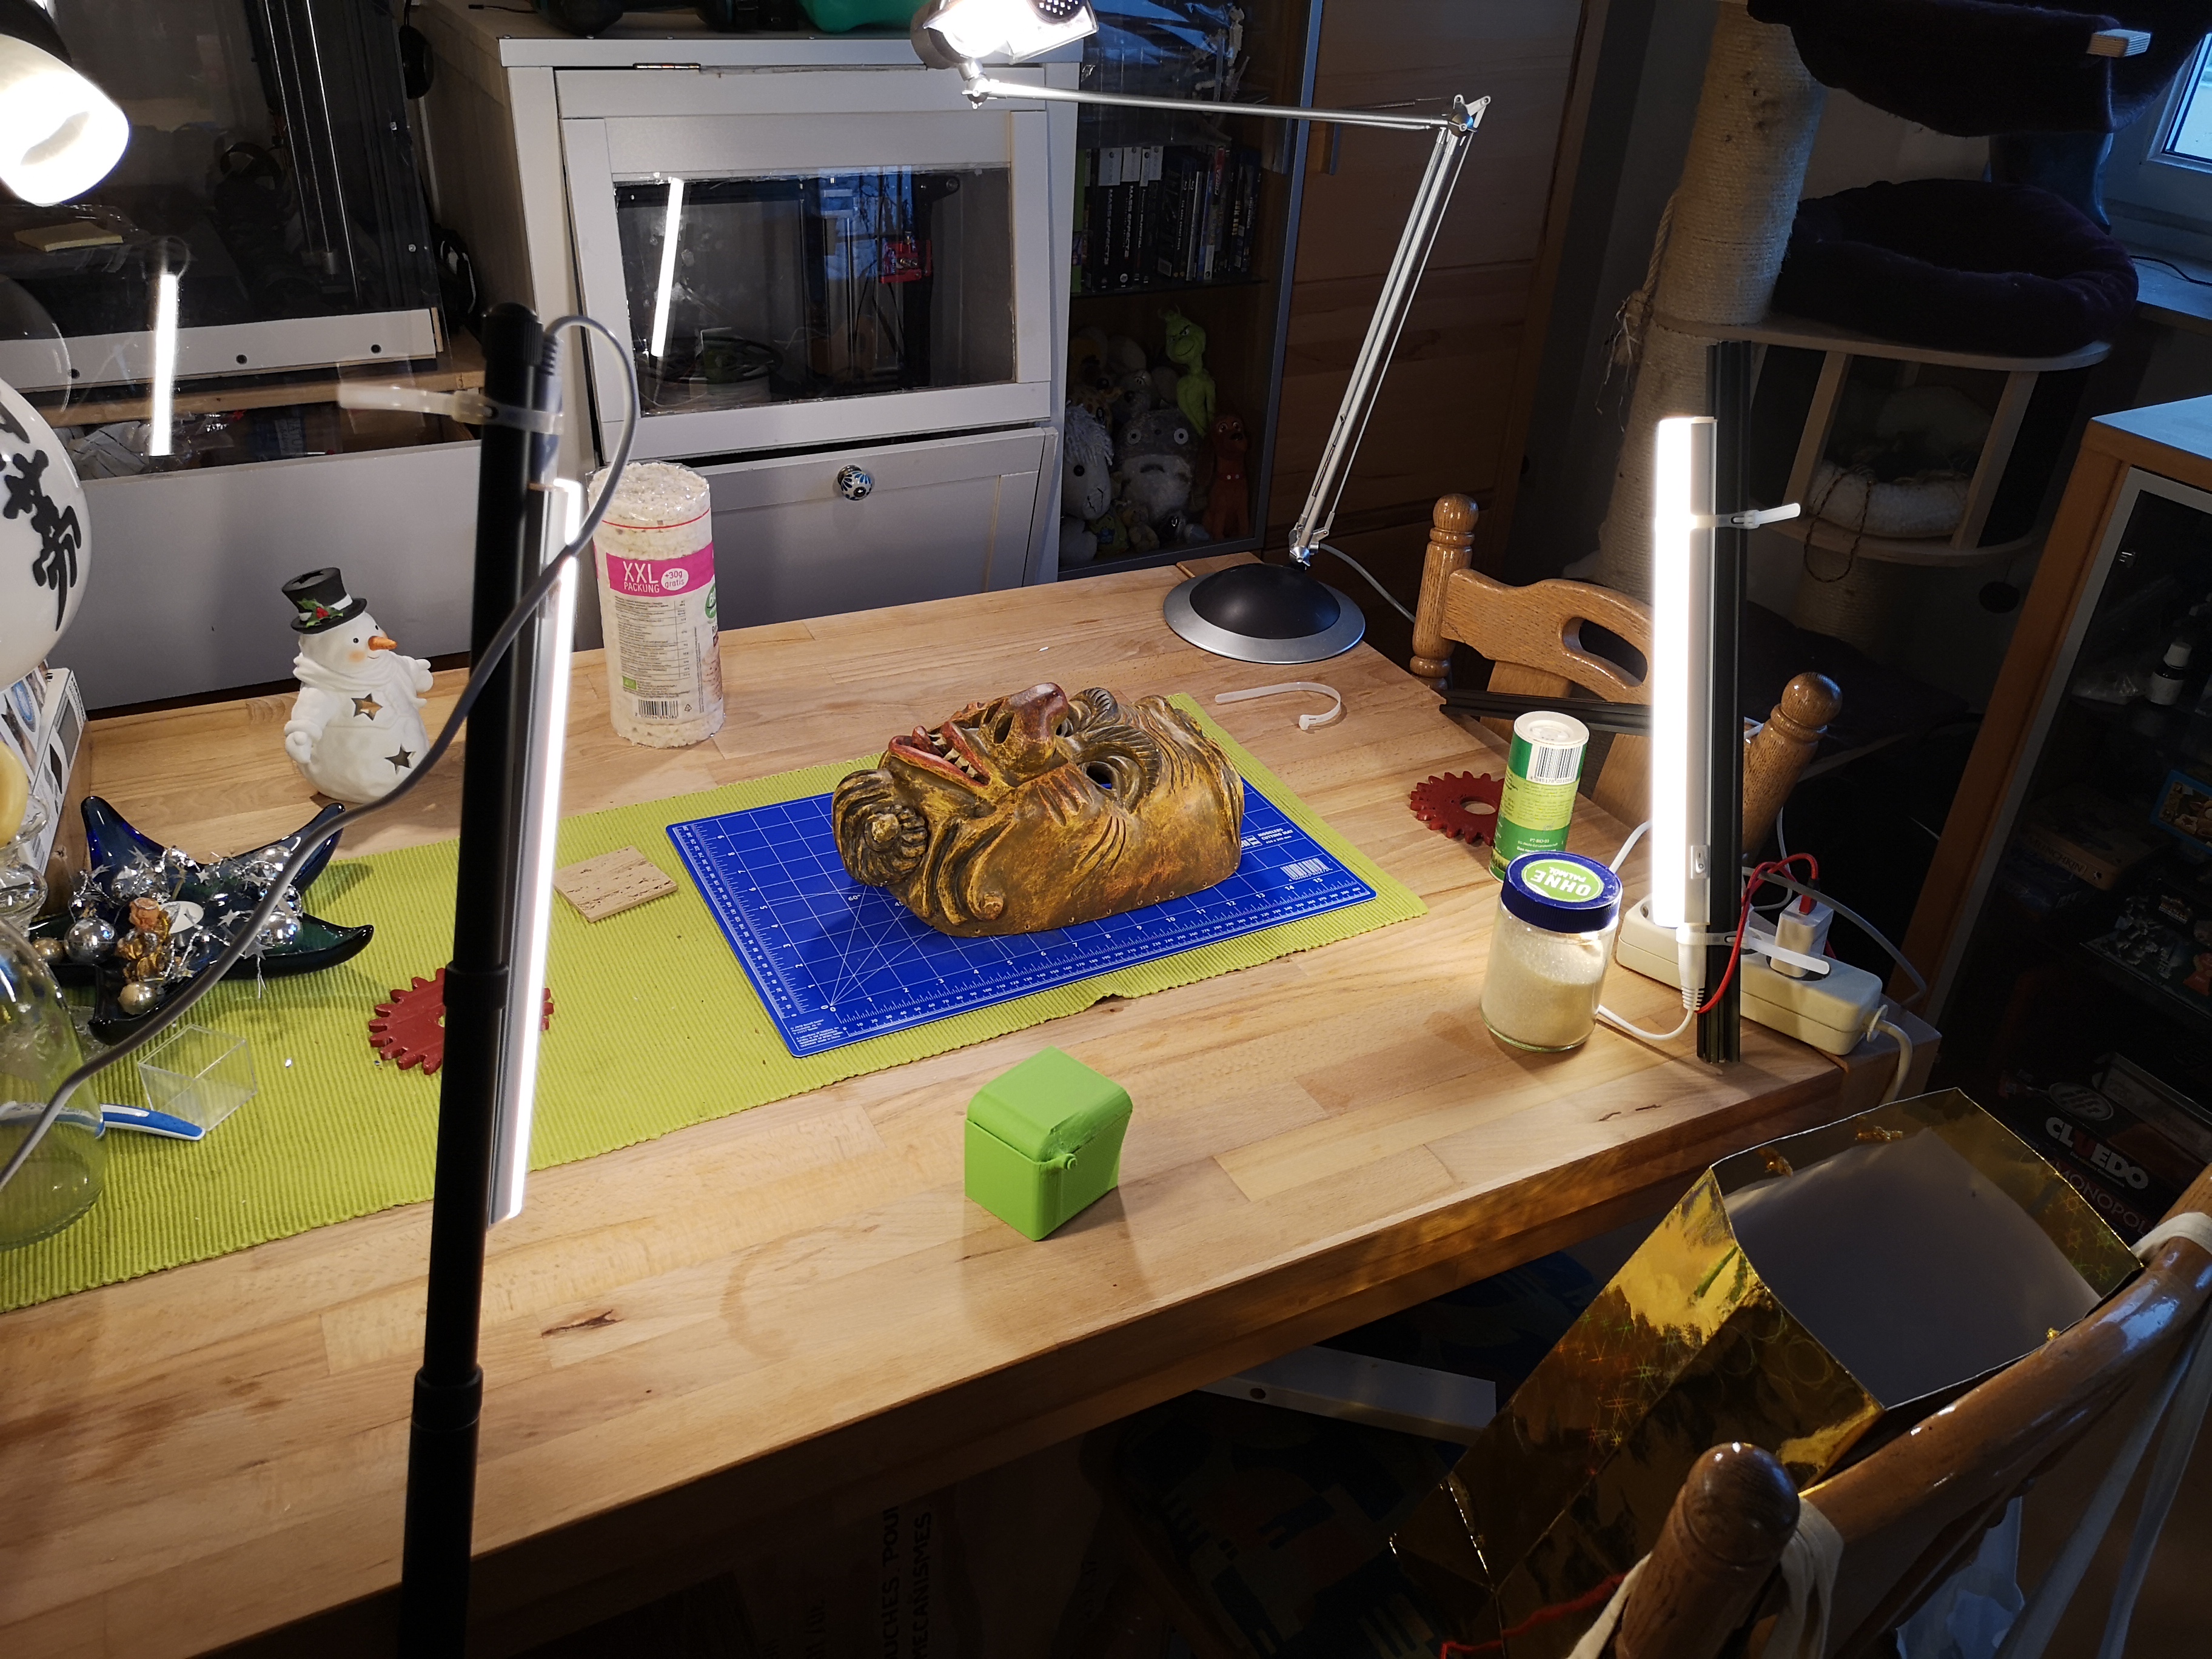
Setup of the last shooting.
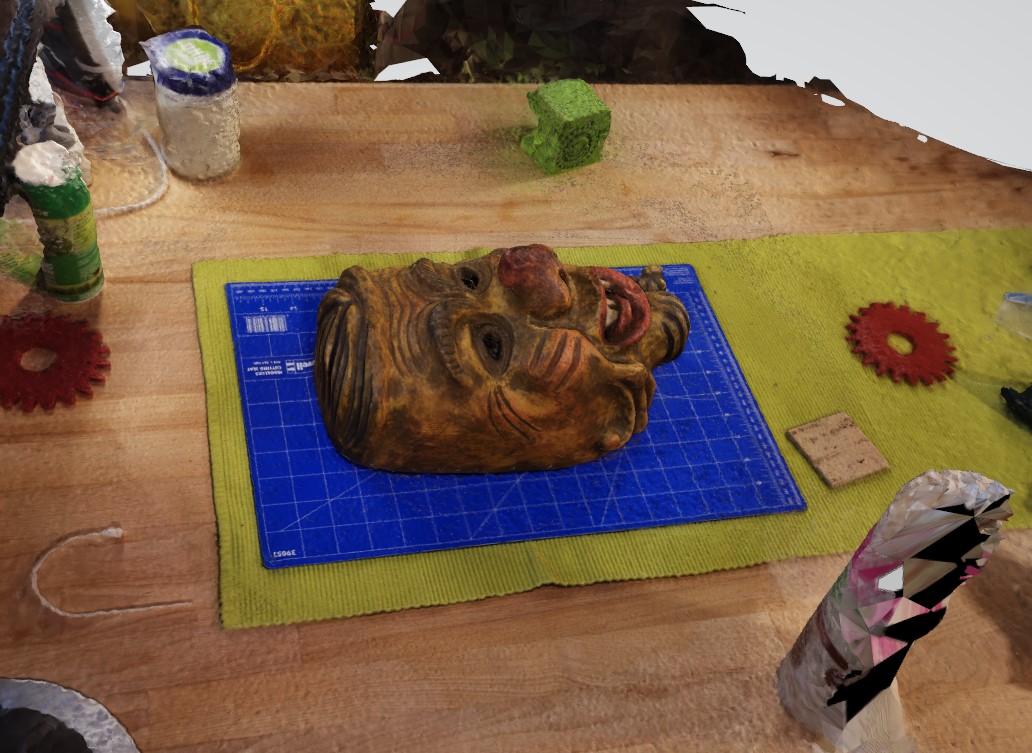
Result of the last scan on the table.
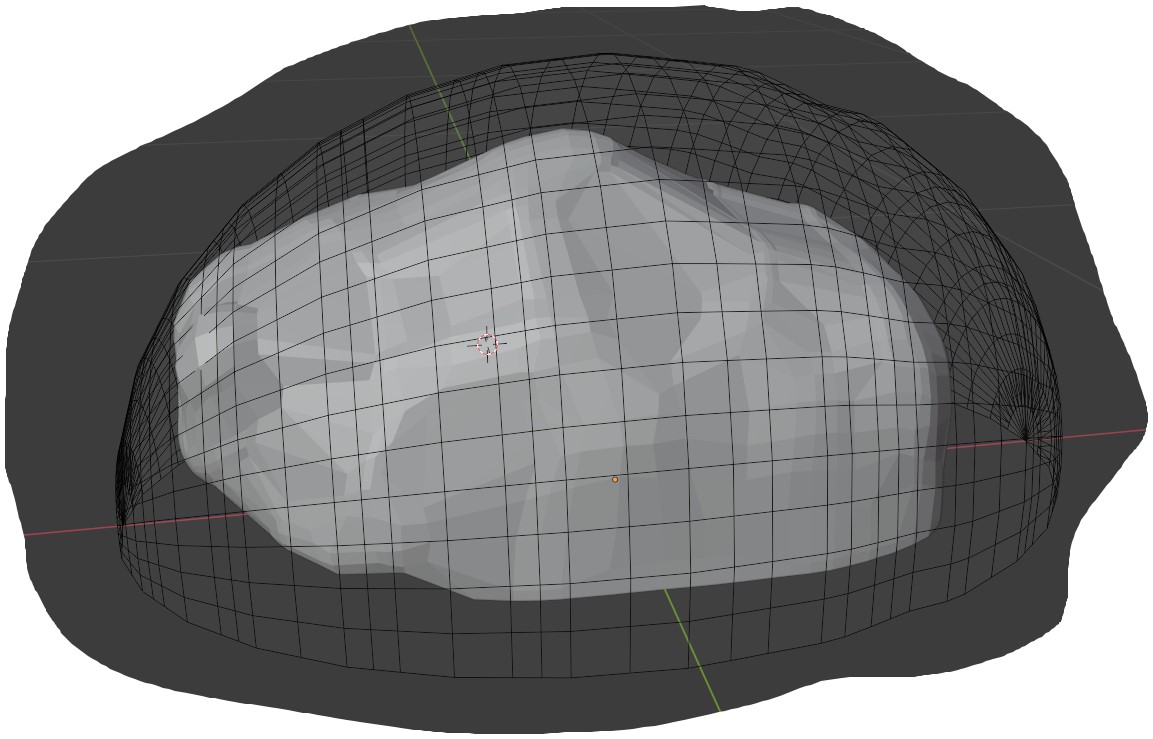
I imported it in my 3D Software of choice (Blender) and cut out the mesh which I needed. And then I used the sculpting tools, to fill some holes, to flat some surfaces, and grave some indents in the eyebrow and other regions.
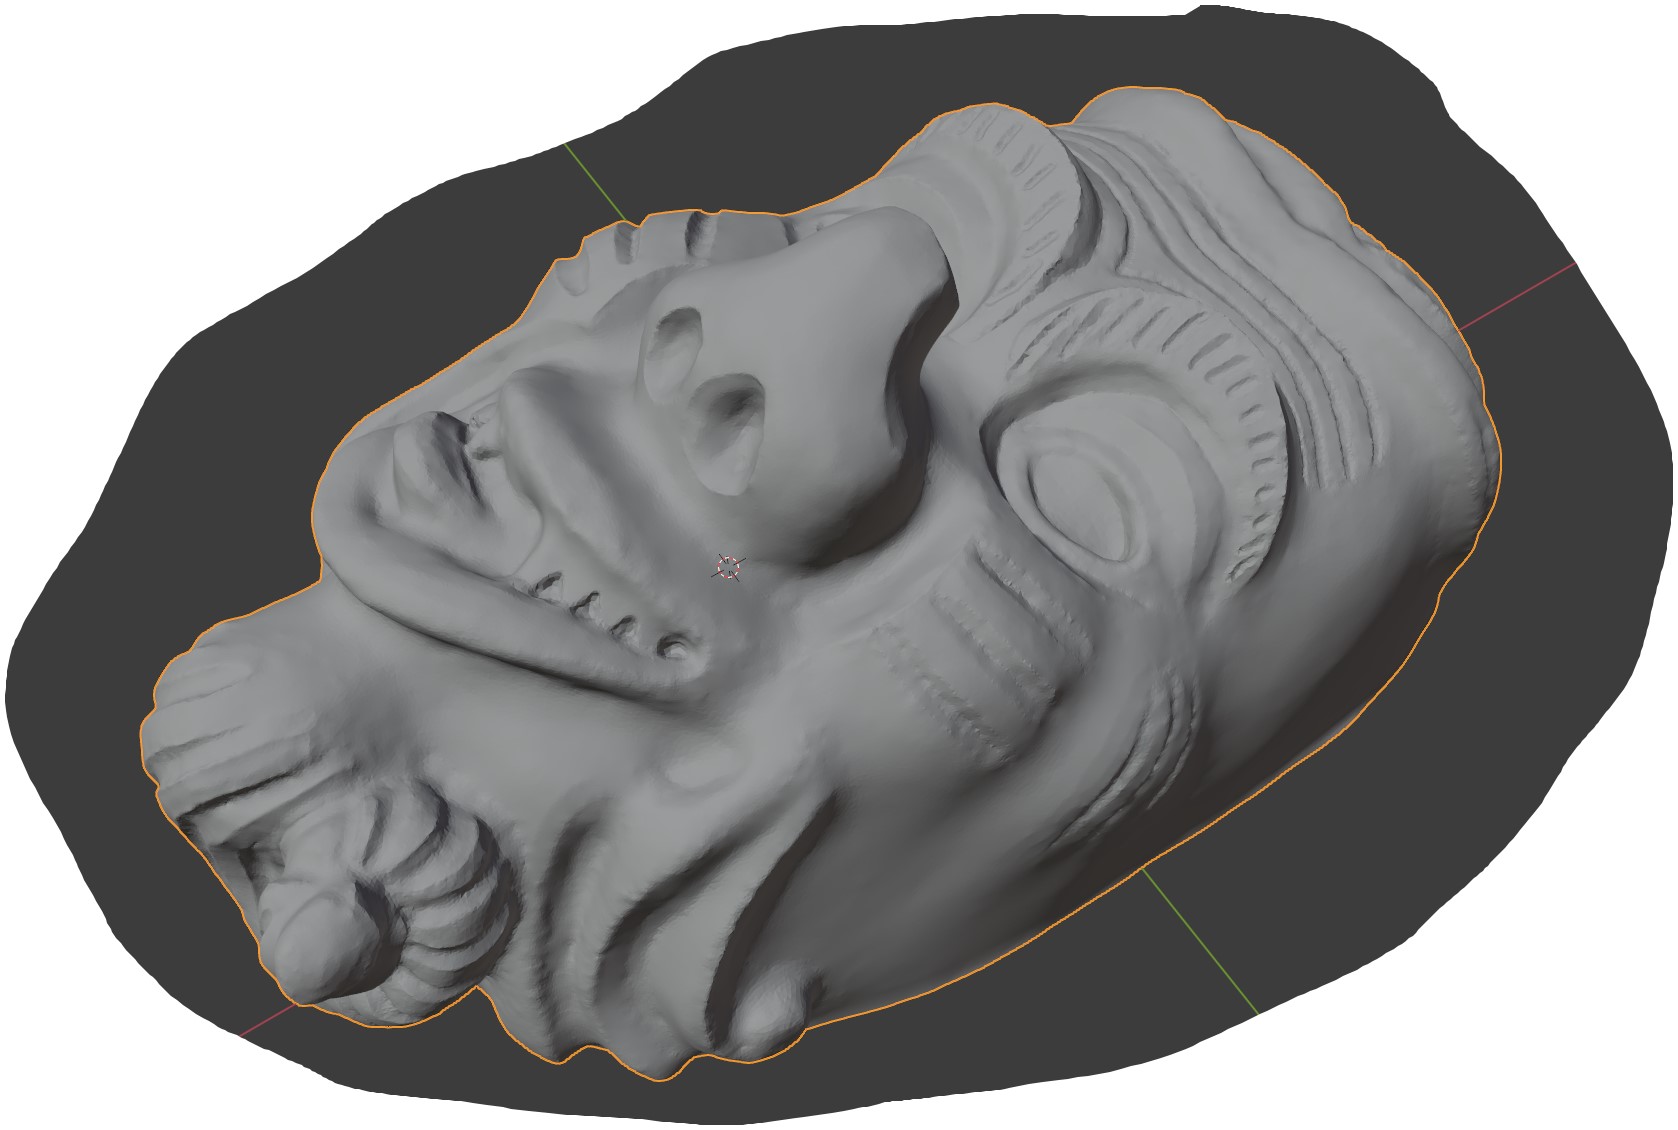

On the left, the finished smooth mask, on the right side the data from the scan.
In the process of postprocessing the print, I saw that the smooth brush and the crease brush were a nice combination, because at the border of the smooth brush was a sharp line every time. I swiped them so long to an edge which I shared with the crease brush until it disappeared in the edge. That increased the quality of the crease brush even more.
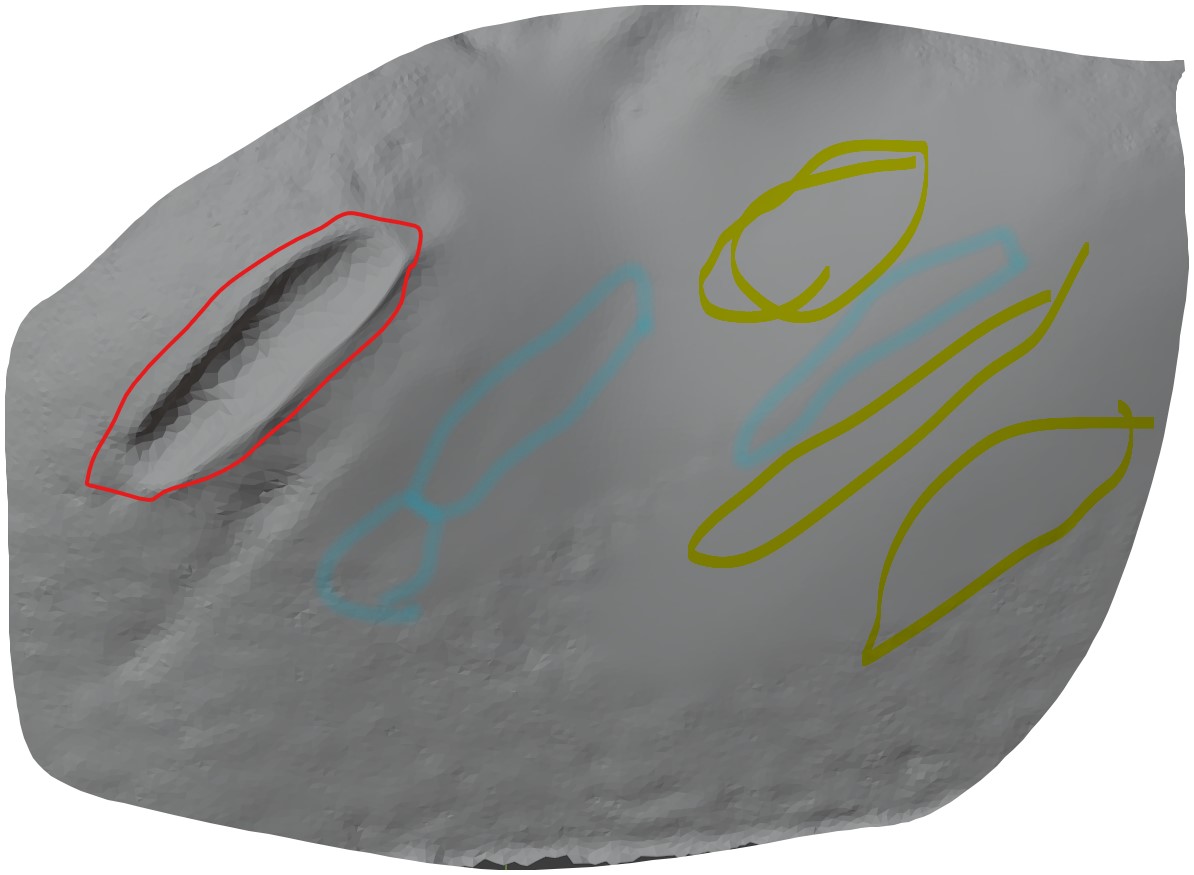
Red: Sharped edges. Yellow: Smoothed regions. Blue: Borders of smoothed regions with lines, which needed to be moved to the red edges to disappear.
After modelling the upper surface, I smoothed the lower edge of the mask where some errors of the mesh ocured and deleted some edges which where very close to each other because they resulted in errors with the solidify effect. This produced a volume from a flat surface because it adds a surface with a distance and fills the rim.
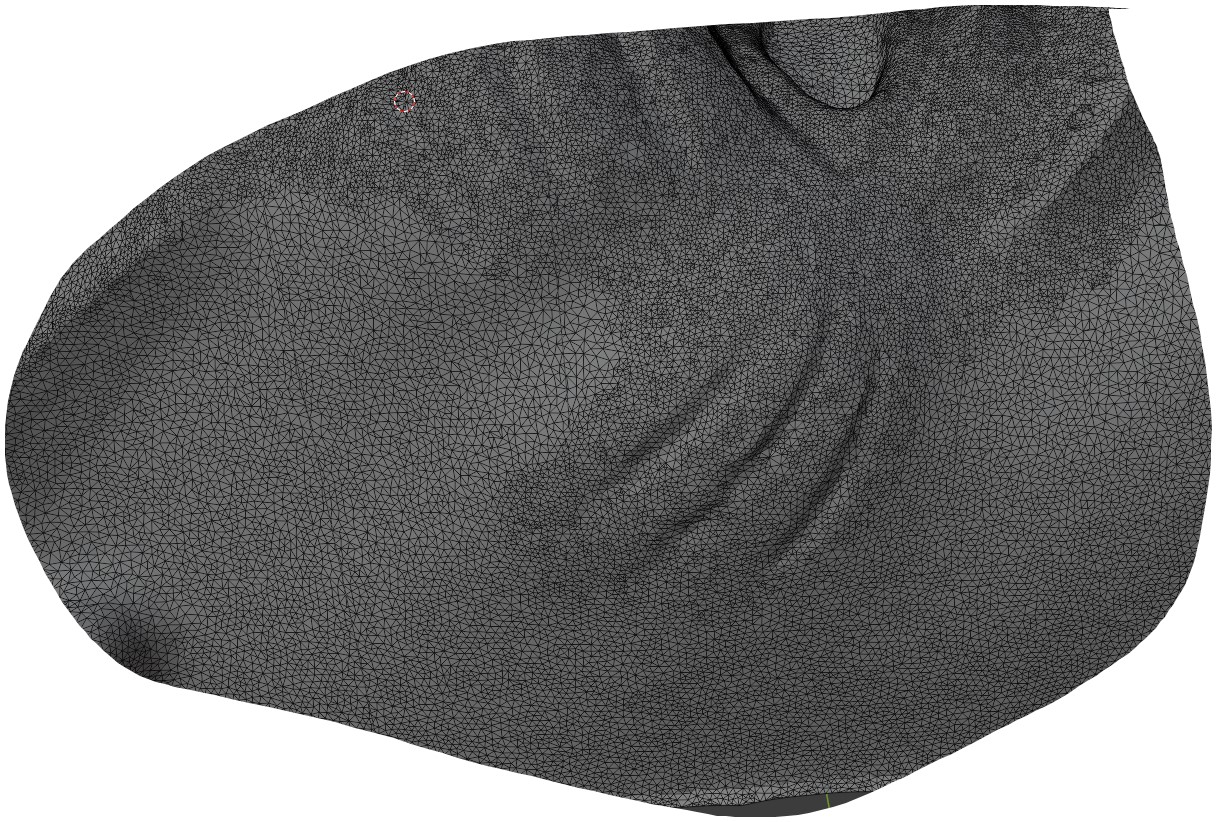
After that, I used the dynamic topology to reduce the polygons, where I didn’t need them to make the file is a bit smaller than 300mb. I did this mainly at the sides of the mask.
On the upper side of the screen, high detail, at the lower side, low detail. Default was high detail from scan.
To get a casting mold, I could glue it in a plastic square and cast the silicone above it and use it as a mold. Finished… Like in a tutorial from Prusa.
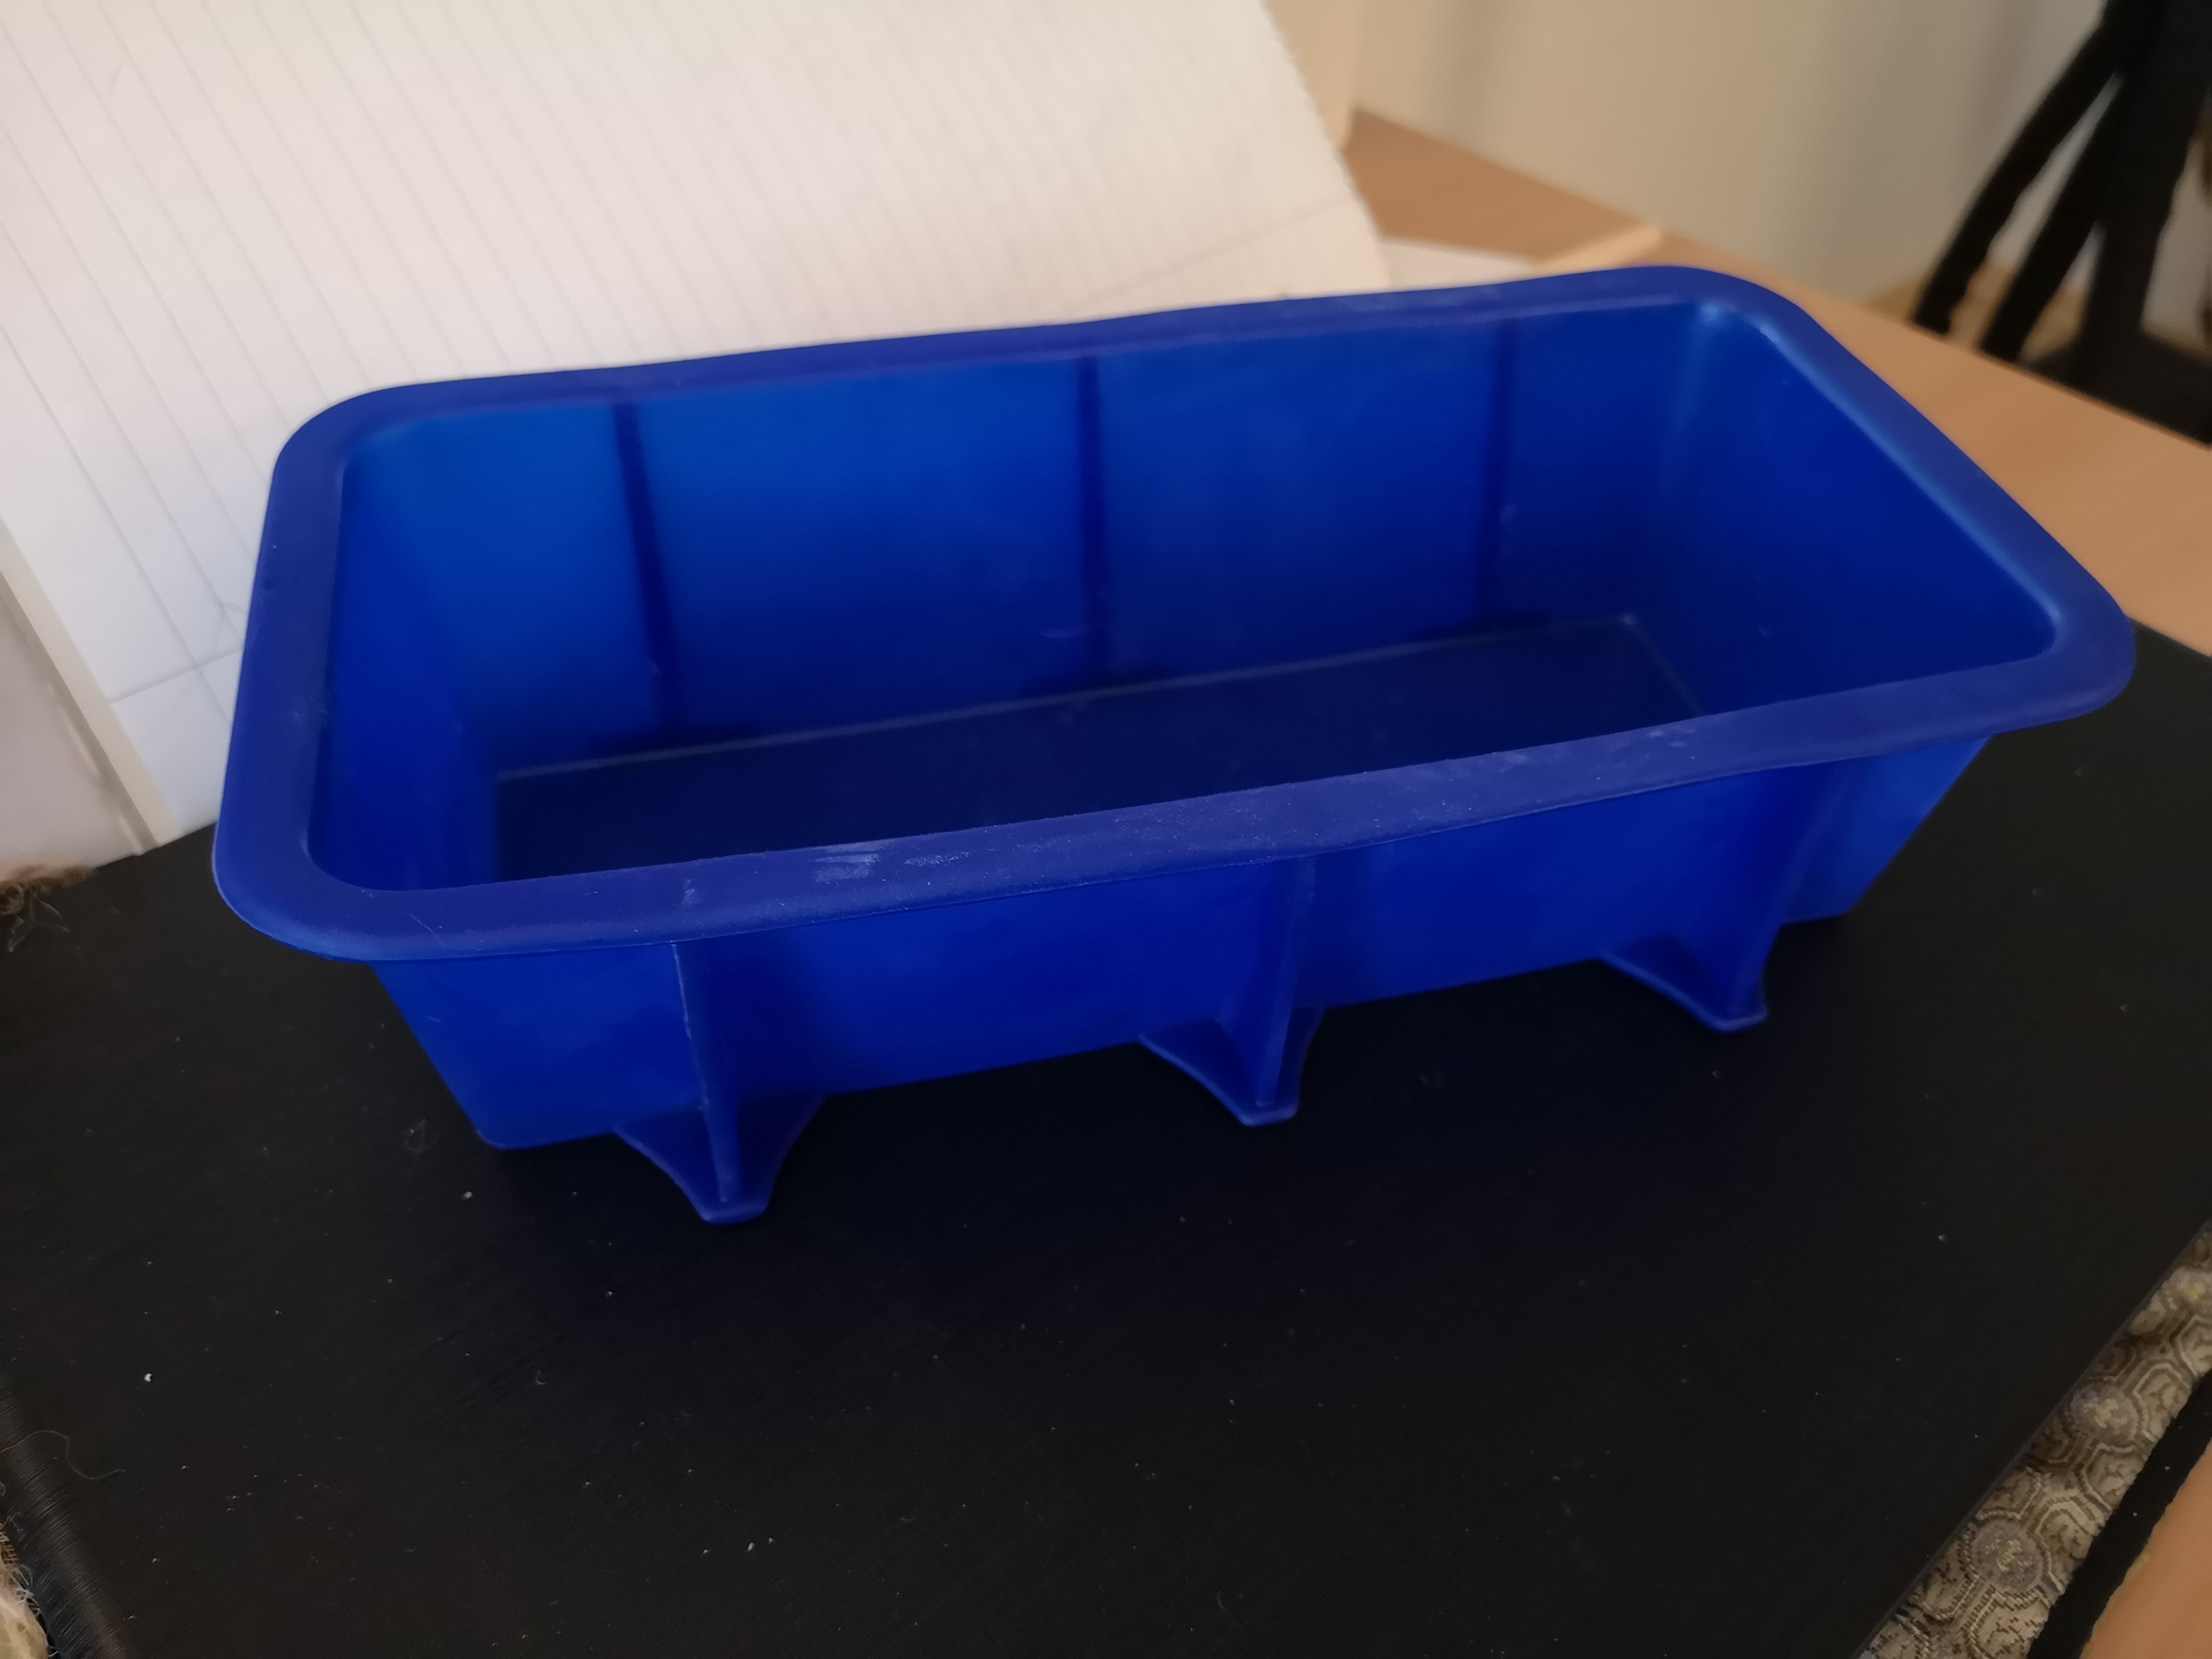
But that way, I would need a lot of silicone which is not for free. (Approx. 45€/kg) So I decided to design an outer frame, which was also inspired by a cake tin made from silicone which is mainly a thick film.
My very first idea was to make some dough with much salt and flour and some water like play dough, to get a frame. To get better and repeatable results, I switched to Blender.
At the beginning, I got some trouble because the Boolean operations in Blender are a bit buggy sometimes. But then I found a good method. First, I added a sphere and cut it in half. To get a frame which fits the masks surface I used a so-called shrink-wrap modifier to the mesh of the mask and set a distance value. This effect generates a surface above another surface with a different polygon count and structure. In the end this produced a rough surface with a certain minimal distance. Then I applied it to the mesh and made a box from it. From that box I subtracted some grid.
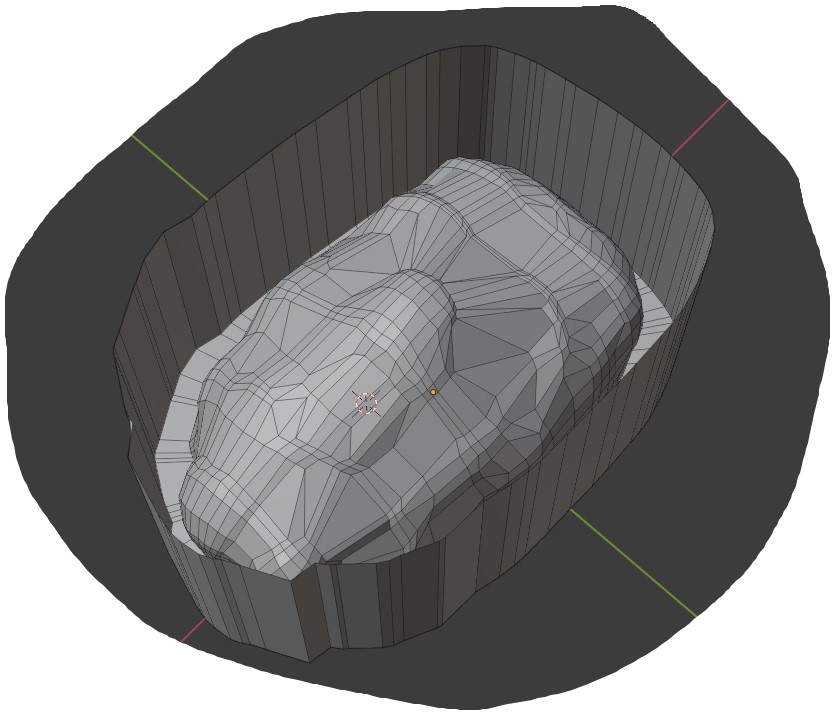
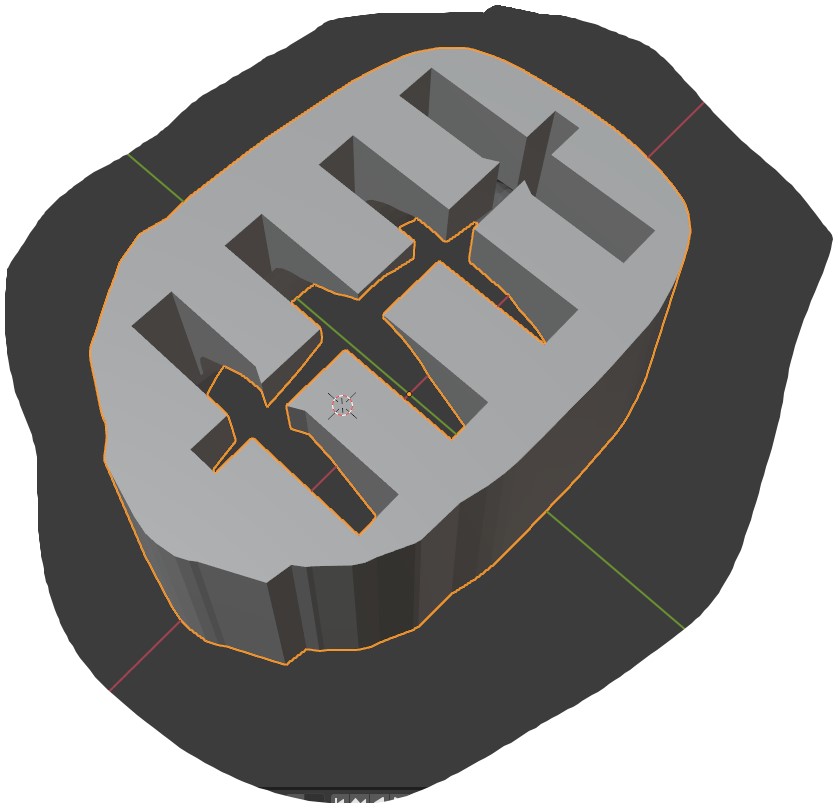
First picture is the mesh (wireframe) and the shrink wrap effect. The second picture shows the applied modifier and the edge extrusion to the side and the top. The last picture shows the object as a closed mesh with a grid will as top surface and a subtraction of the grid.
Now it came to printing. I used a nickel coated cooper nozzle 0.4mm and the silver filament from Prusa which was shipped with my MK3s.
First, I printed some test prints as hollow shells with a cheap filament where it seemed to be very nice.
The frame I printed with 0.12mm the mask I printed after that with 0.1mm layer height.
I got my molds but now I needed to place the frame and mask to each other in a way that they don’t move, but that still allow me to remove the silicone. I decided to take a sheet of 5mm polycarbonate. I needed a transparent and flexible ground. And I read that the casting silicone and glass would stick too well and I won’t be able to remove it properly. Transparency is needed to set the distance properly between the mask (core) ant the frame. To check this from below I need it transparent.
For my first attempt, I tried a solvent free glue for kids and tinkering (Uhu Flinke Flasche solvent free). I wanted to cast the silicone inside it but then, fortunately I decided to check for leaks and also the mass of silicone I need.
That turned out to be a good idea, because the water which I filled into the mould came out from below the frame. I needed to handle the water on my table, so I had no chance to measure the weight.
My thoughts for a nontoxic and easily removable glue brought me to the wax of a tealight. After my attempt to fasten the mask I got some drops of it on the mask. But I was able to brush it away. I tried to close the gaps As I realised how bad It was to apply, I decided not to glue the frame around it, because it wouldn’t be possible to remove the wax from the mask, when the frame is above it because I couldn’t reach it.
So, I cleaned it with a hard-plastic nylon brush, removed it and thought what I could use instead. I decided to use Vaseline because it’s nontoxic, sticky, watertight and compatible with my silicone and also because the reseller also sells Vaseline to make casting molds from several parts which should not stick together.
In the next step I applied some of the outside of the bottom side of the frame and on the bottom side of the mask. And it worked as planned and didn’t move.
This shows the casting mold from below with silicone inside and some Vaseline below the PLA parts, it was shot from below, because at this time, the silicone was still liquid.
Now, I was able to start the casting. I mixed the silicone with my scale which was vey easy, because of the well-designed bottles of the manufacturer where I was able to dose it very much properly and precisely in steps of 0.05g.
The removing of the silicone was a bit tricky, because I forgot to implement something like a grip hole to remove the core from the frame so in the end I needed to put a screw in the bottom side and use the hole with the pliers from the printer to pull the core out. Removing the object from the plate was very easy.

I tried to stick some gutted zipties through it, and it worked a little bit, but in the end, thy hurt the outside of the mold a bit.
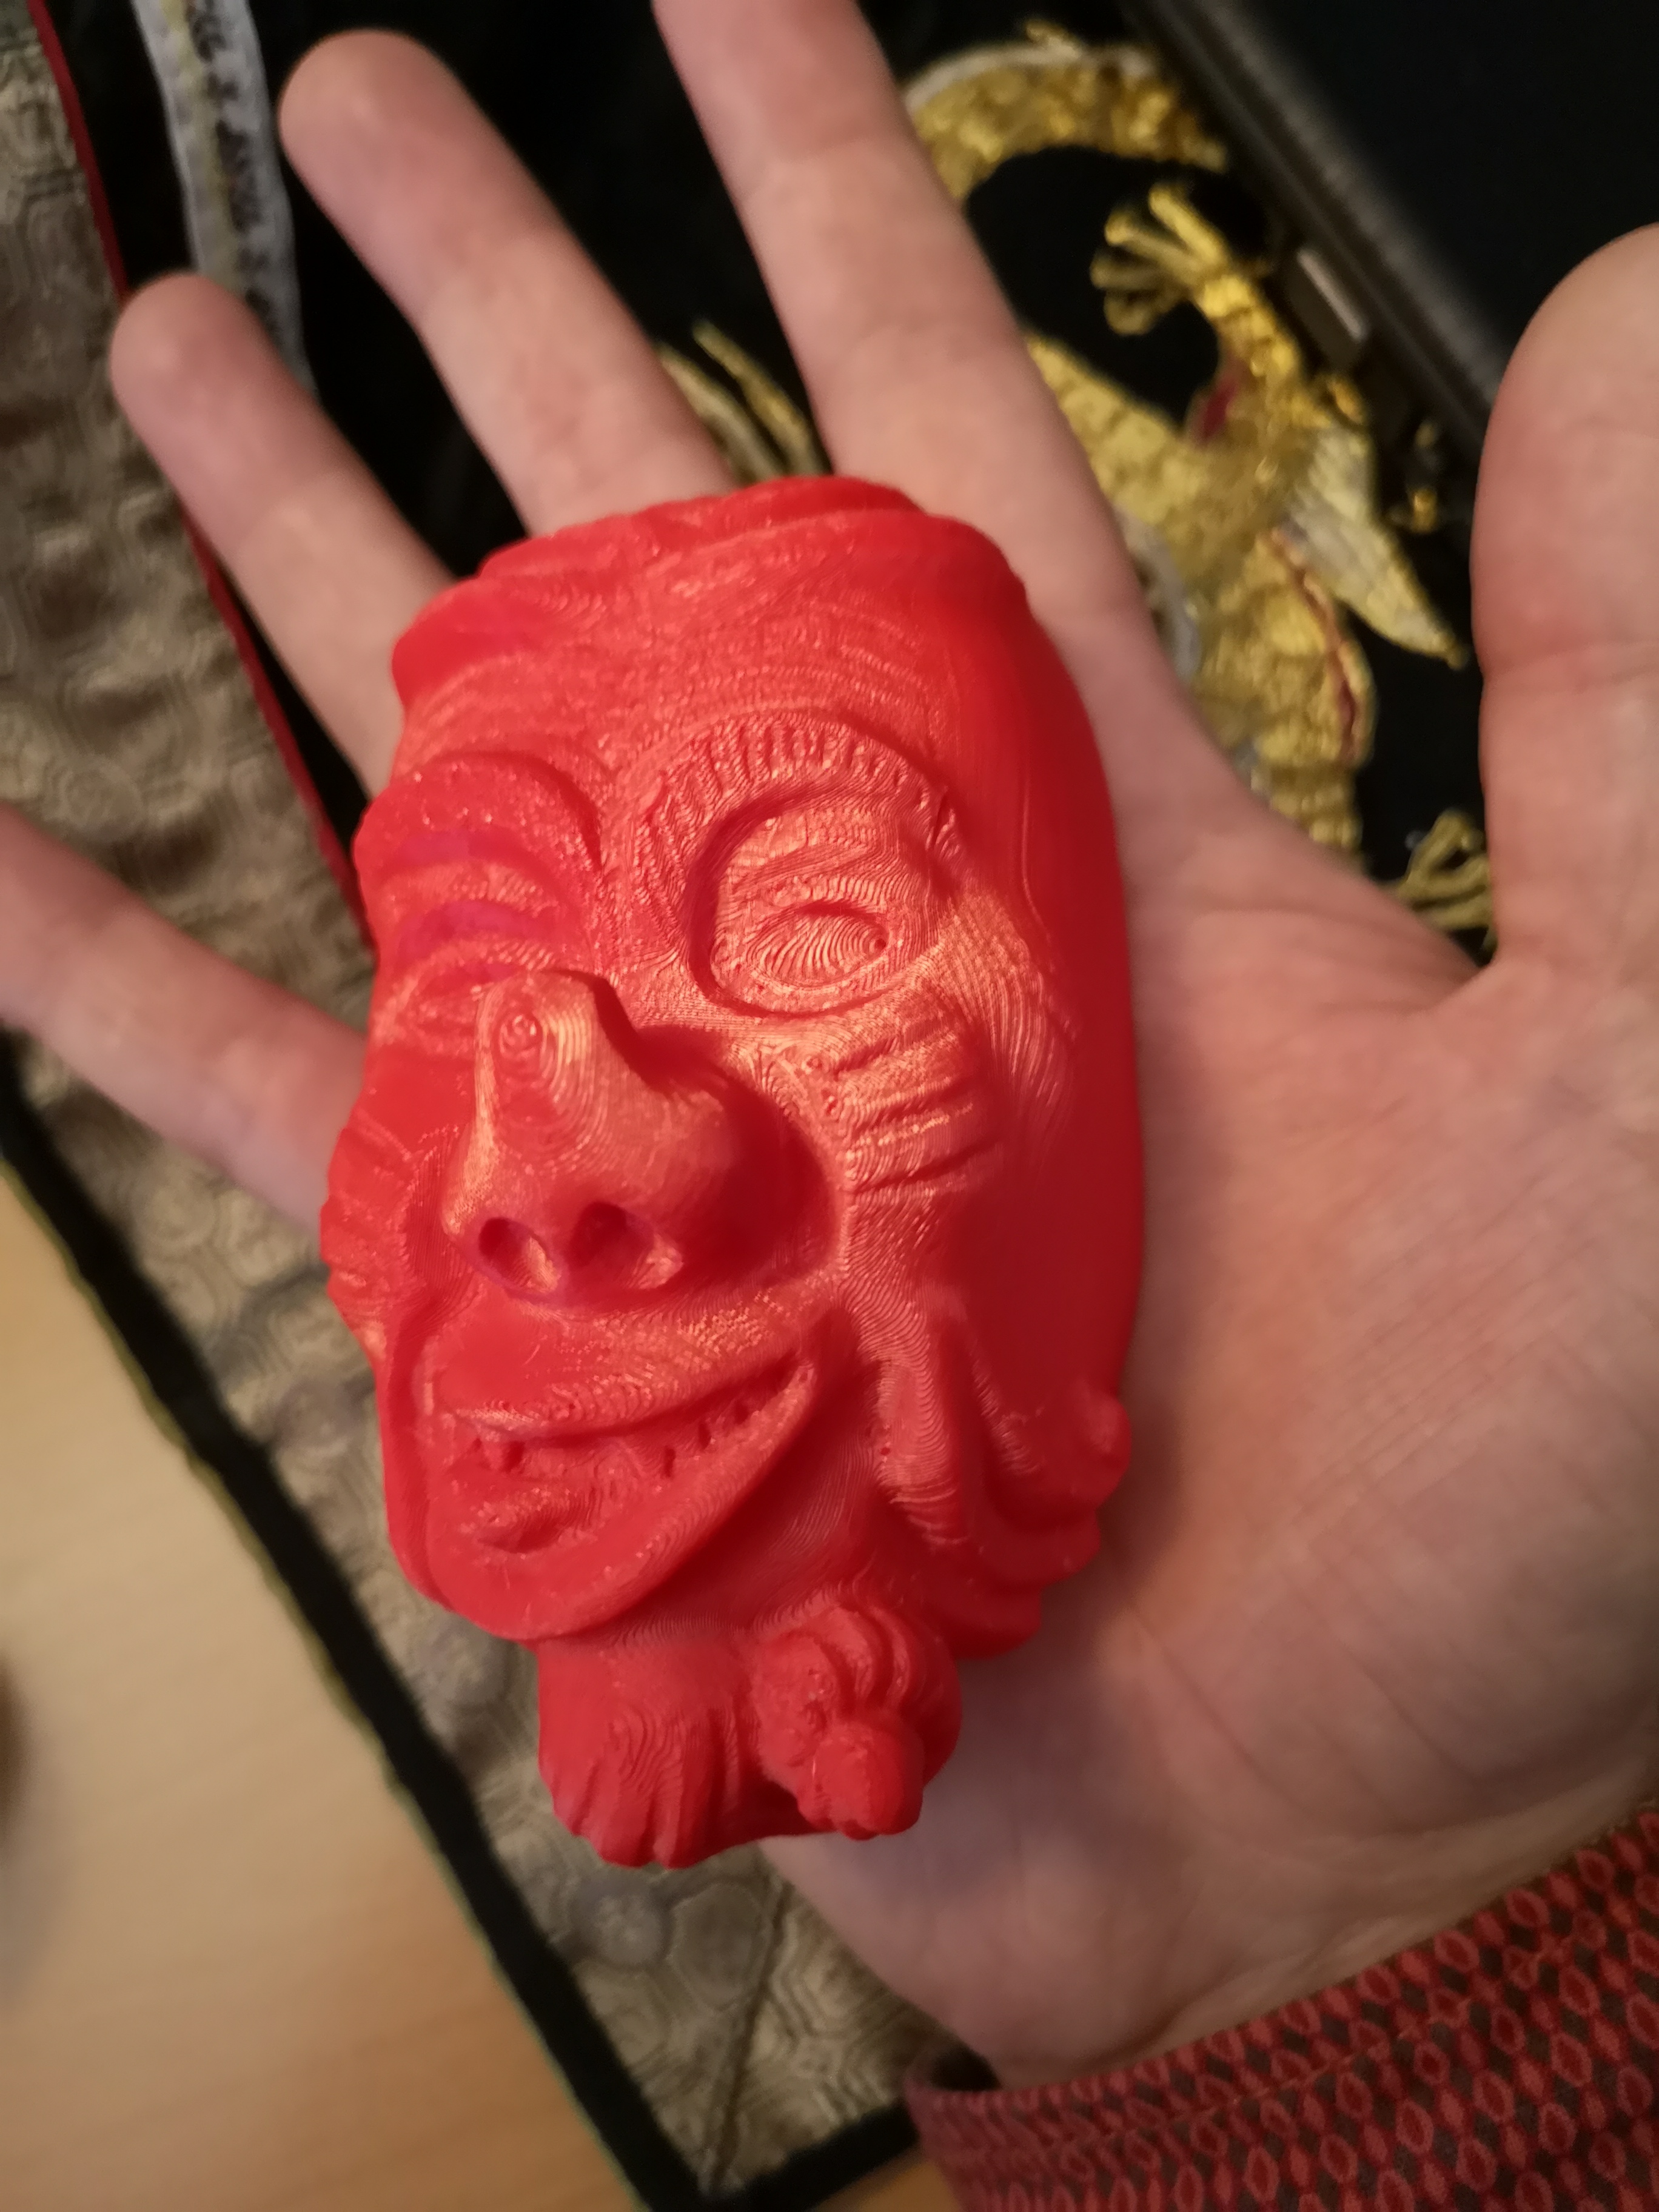
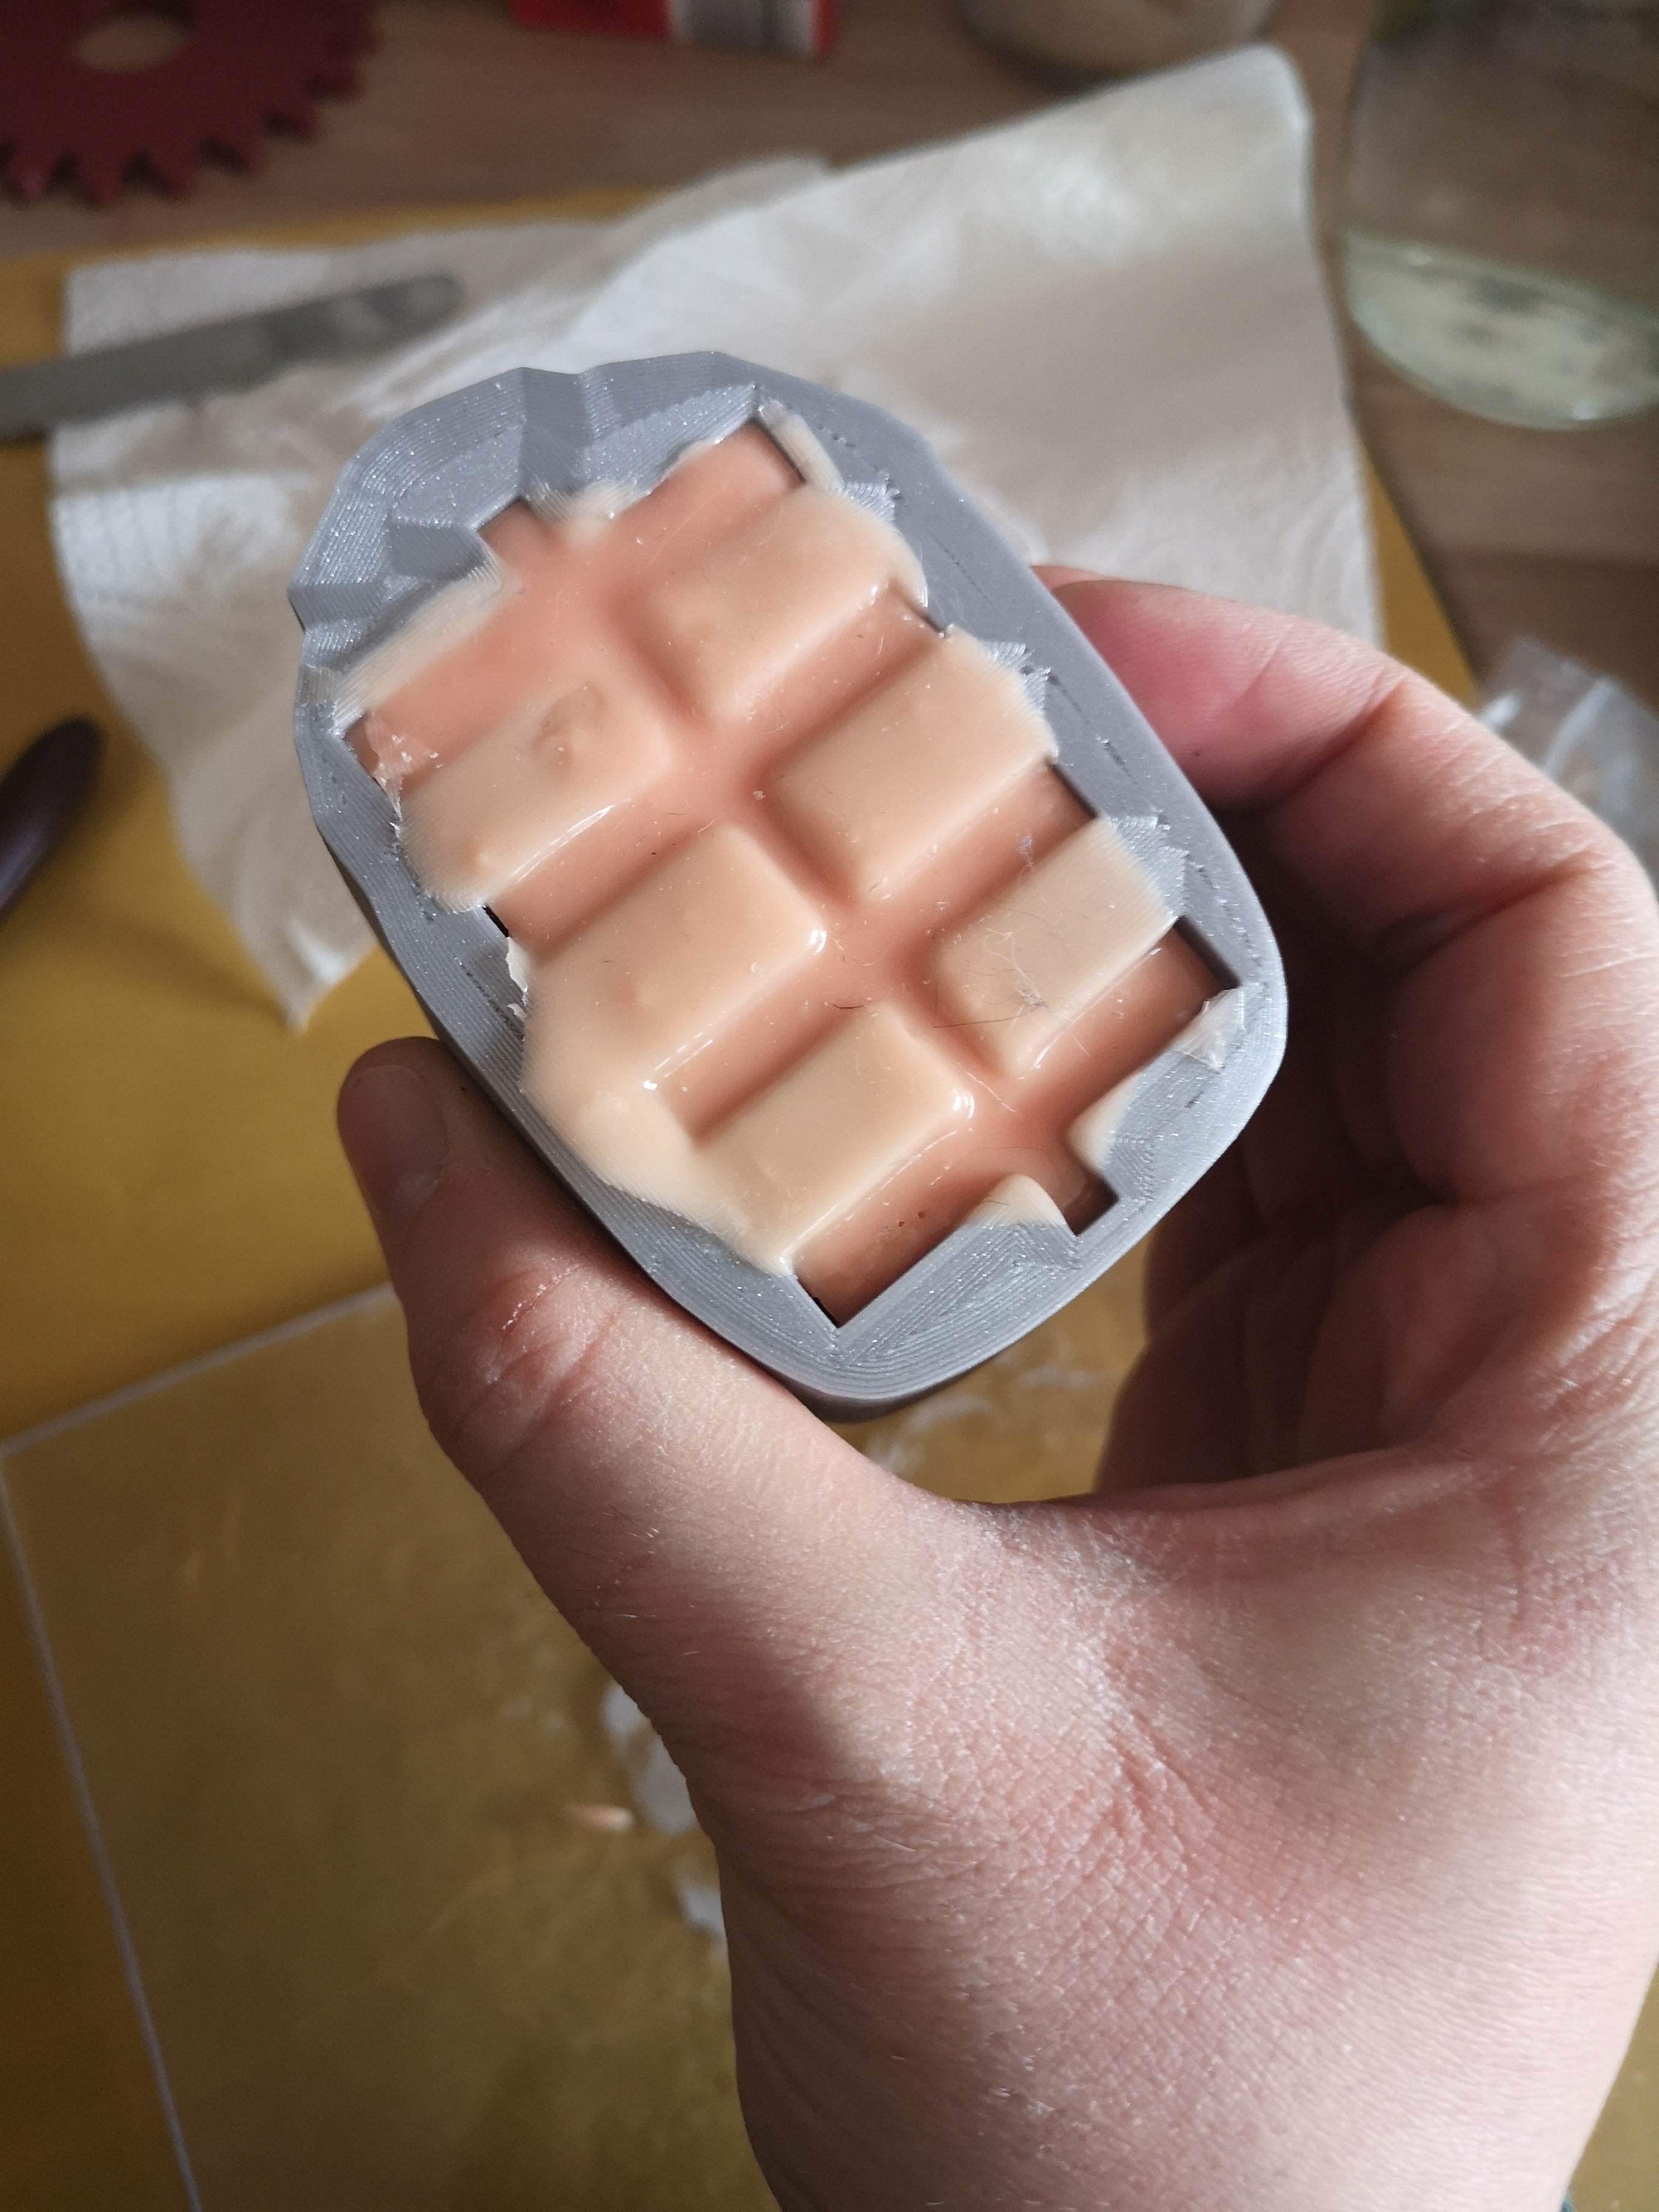
The last step, casting chocolate, was easy but it was a hard job to fill every cave in the mask.
Lessons learned:
Everytime think of how to remove the PLA from the silicone.
Vaseline is very usefull for tightening and gluing for temporarily things. Wax is not.
Before working on a photoscanned mesh, it is good to fix it. And Photogrammetry works best in chaos.
The silicone thickness of 3-4 mm is very good at this size.
My Uhu glue is water solable.
Shrinkwrap is way more than a tool for retopology.
Creasing edges is not only the creasing brush.
RE: Project: Carnival Mask chocolate copy with silikone casting mold
PS: If someone here is looking for a new employee of the month, I'm still looking for a job. (graduate mechanical engineering) More Information about me: https://www.xing.com/profile/Manuel_Matz/cv