Mini+, Can't figure out First Layer Calibration
I just assembled my Mini+, and I'm trying to do a first layer calibration. But the nozzle starts out to low, printing a super thin line, and I can't adjust it up. It starts at 0 and only goes down.
I tried redoing the SuperPINDA sensor height adjustment from the assembly guide, to see if I messed up that step, but I still get the same result.
Am I missing something? Should the nozzle start out high and always be adjusted down, or should it be possible to set the adjustment to a positive value?
Turn Mini off and manually move head down (by rotating Z rod) just to the point when nozzle touches the bed. Now check the distance between bottom of SuperPINDA and bed -adjust it to just about 1,5mm.
[Mini+] [MK3S+BEAR]
First Layer Calibration
I used a zip tie to set the SuperPINDA, that seems to be just over 1 mm. I tried adjusting it a tiny bit, but I can't really measure 1,5 mm super accurately. The result is still the same.
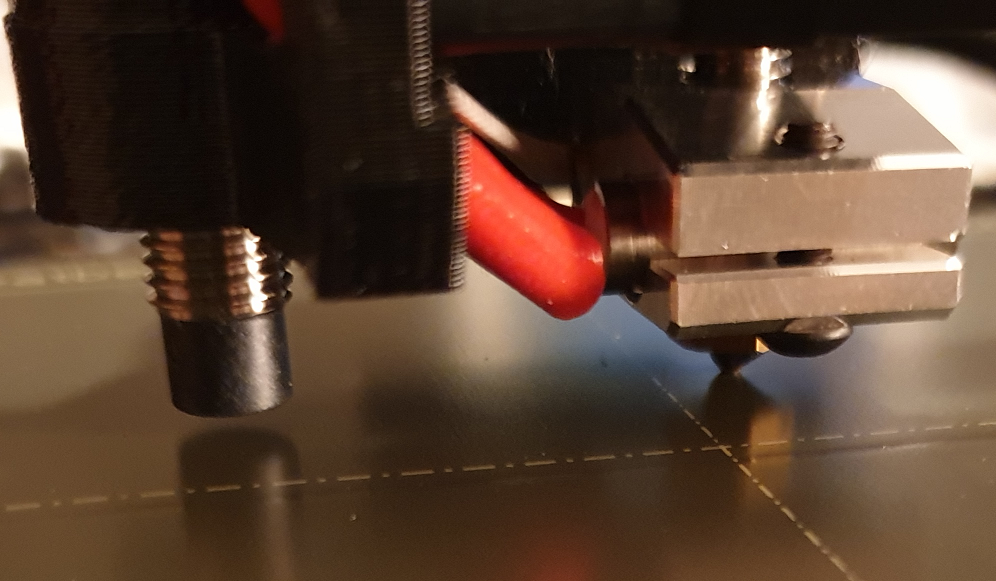
This is the nozzle and the sensor.
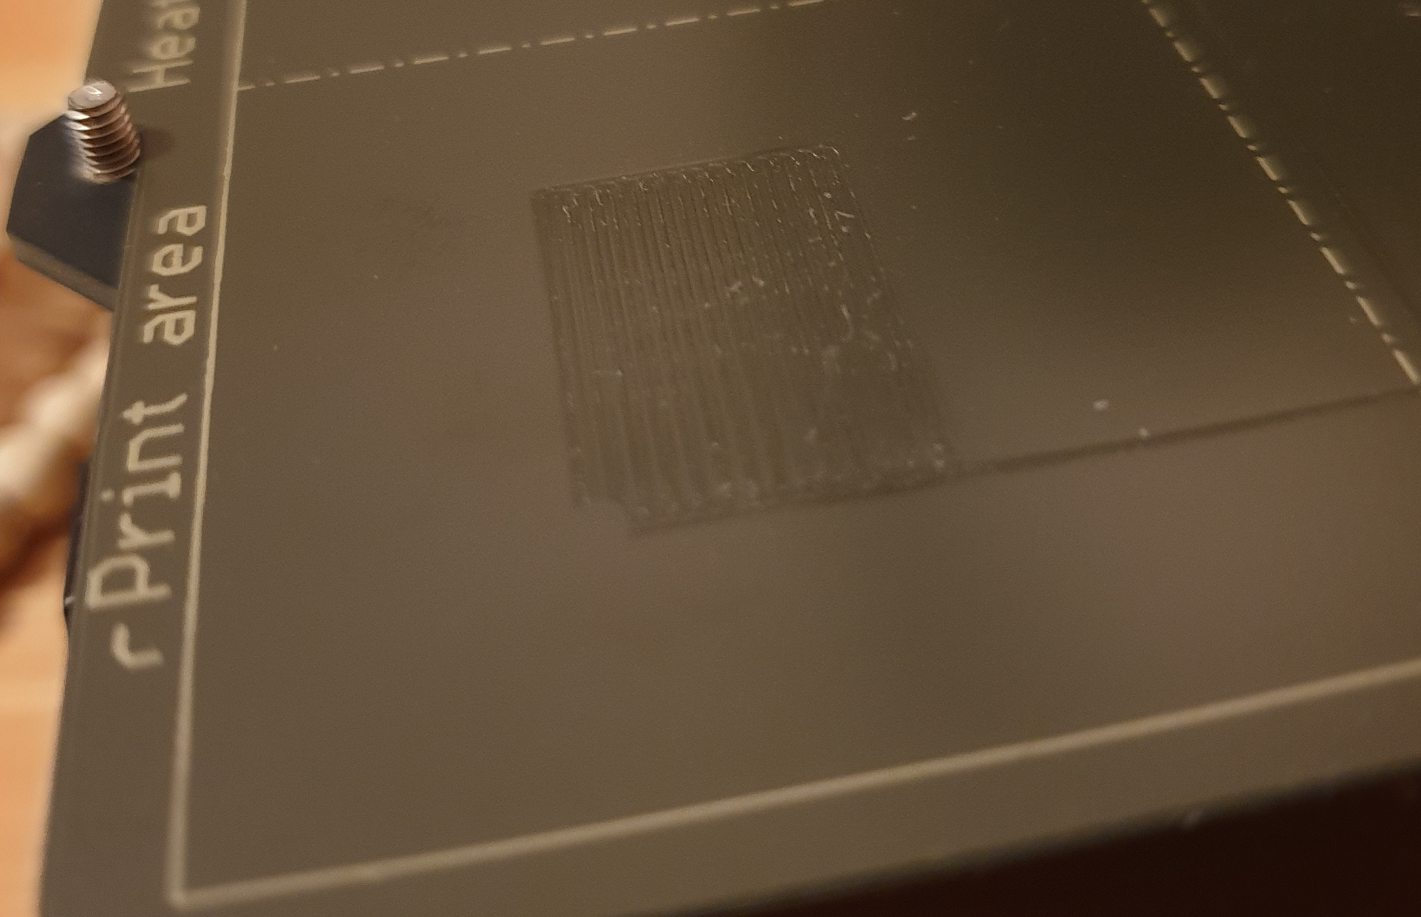
And this is the First layer calibration print at the 0 setting
Enter title here (I hate typing it in everytime I reply...)
If you have other printer, you can print out 1.5mm measurement like this: https://www.prusaprinters.org/prints/57192-super-pinda-spinda-spinda-height-adjustment-tool-m
I just finished assemble my Silver Mini+ ( https://forum.prusa3d.com/forum/general-discussion-announcements-and-releases/mini-with-silver-gray-extrusion-completed/#post-493585) and I did used the measurement I mentioned above and it worked like charm.
However, my black Mini+ that I assembled last or two months ago, I used zip tie measurement and it worked as normal. The Z offset was -1.600ish.
If you don't have a printer to print 1.5mm measurement - the steel sheet plate seems to be 1.5mm thick (I can be wrong), maybe you can put steel sheet under sensor and nozzle on heatbed.
But I'm struggled to understand how can it runs at 0.000 and still way too low... The picture of sensor and nozzle seems to be normal and it's still too low. That's what I don't understand. If my suggestion above does not work, maybe you can run Factory Reset (it's in Setting). I don't know if it will fix it.
It's hard to judge from that photo, but I think your SuperPINDA might be too high. Btw. having a 3D printer, it's highly recommended to also have a digital caliper.
But if you're sure, that your distance is between 1 and 1,5mm, then you need to check SuperPINDA's distance sensitivity (caliper required again). The procedure is:
Turn printer on and LED on SuperPINDA should be lit. Now move printhead down (by rotating Z-axis rod) until LED on SuperPINDA turns off -at that point nozzle doesn't touch print bed yet. Now measure distance between bottom of SuperPINDA and print bed. It should be about 2,0-2,3mm.
If distance is less than 2mm, then I would say SuperPINDA doesn't work properly. In this case, you can try to to lower SuperPINDA for about 0,5mm. That is, at the point when nozzle touches print bed, distance between SuperPINDA and bed will be only about 0,5mm -which is still enough for not to touch (damage) printed object. Now run fresh first layer calibration again.
[Mini+] [MK3S+BEAR]
RE: Mini+, Can't figure out First Layer Calibration
This is my first printer. I used a zip tie to set the SuperPINDA height, following the build guide.
https://help.prusa3d.com/en/guide/7-preflight-check_204705
And I have redone that step a few times now to make sure I got it right.
If I lower the print head to the point where the SuperPINDA LED turns of I can just barley fit 2 zip ties on top of each other. I think that is slightly more than 2 mm.
This space is for sale. Please contact [email protected].
If I were you, I would try factory reset and if it doesn't fix the problem, I'll contact customer service.
I took the printhead apart and reassembled it, but after that the Z-axis failed during self test. So maybe it was a problem with the Z-axis movement? It passed the first self test after assembly though.
The Z-axis can move, but during the test it just moves 1-2 cm before stopping. Loosening the screws that hold the X-axis to the vertical bearings did not help. I'll contact support when I get off work today.
Title
Crossing my fingers for you. I hope either loose the screw or customer service will help you.