First layer calibration iterations - how many?
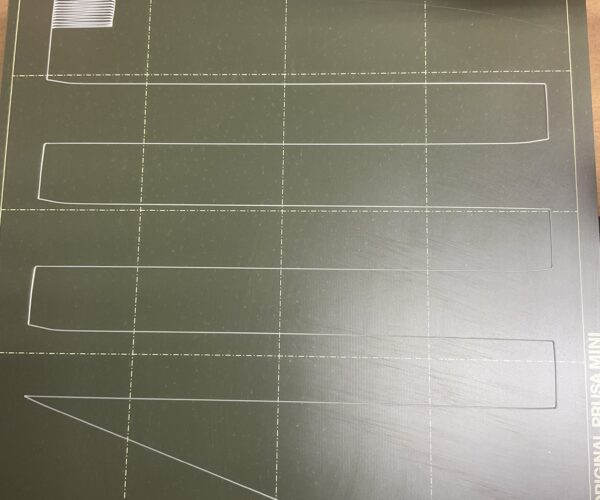
This is my time trying 3d printing and received a mini+ for christmas. I’ve run the first layer calibration step about 8 times thus far and still not getting nice squared corners with the z offset at -0.830. I know the z value is just relative but how many times is reasonable to get a first layer calibration that’s decent? Just want to know if i should just keep trying or when to try something else to adjust.
RE: First layer calibration iterations - how many?
This is the essential setting to get right and well worth the time, no matter how long it takes. From your picture, your offset is putting your nozzle way too high. There is no other setting that will compensate for your nozzle being too high. Stick with it and you will get there.
Mk3S+,SL1S
RE: First layer calibration iterations - how many?
Also, don't be afraid to make large adjustments. Sometimes it can be pretty offset, requiring you to go well past -1.0 to get it right.
RE:
This is my time trying 3d printing and received a mini+ for christmas. I’ve run the first layer calibration step about 8 times thus far and still not getting nice squared corners with the z offset at -0.830. I know the z value is just relative but how many times is reasonable to get a first layer calibration that’s decent? Just want to know if i should just keep trying or when to try something else to adjust.
You do it as many times as it takes. However, if you've made 8 attempts and you still don't have square corners then you're being too timid with your initial dial down.
There are 6 lines with 6 U-Turns, you should be able to get those U-Turns with nice sharp corners within 2 passes. Spin down the z-offset by 0.100 or more with each line until you have a perfectly square corner, if the next corner is also perfectly square you're close so let it complete and do the little end box. The end box should be solid with no gaps or ridges. Gaps mean you're too high, ridges mean you're too low. If you have gaps or ridges you want to fine tune it, only move the nozzle about 0.025 to 0.050 with each test, at the beginning you can move the nozzle .100, .200, or more but once you have nice square corners you're getting close and you don't want to dig into the build plate.
There is a short cut you can use though. Move the nozzle to the middle of the bed. Go into the Calibration menu and select Live Z Offset. Place a business card under the nozzle and lower the nozzle until it begins to grab onto the card. When the nozzle is putting light drag on the card stop there. You don't want the nozzle digging into the card or preventing it from moving, just applying some drag to it. Take note of this value. This will get you close to a good first layer. Now go in and use the first layer wizard, when it asks, keep the z-offset you have dialed in. If you make a mistake and zero it out you can quickly dial down to the number you got to with the business card.
-Bob
Prusa I3 Mk2 kit upgraded to Mk2.5s, Ender3 with many mods, Prusa Mini kit with Bondtech heat break, Prusa I3 Mk3s+ kit
RE: First layer calibration iterations - how many?
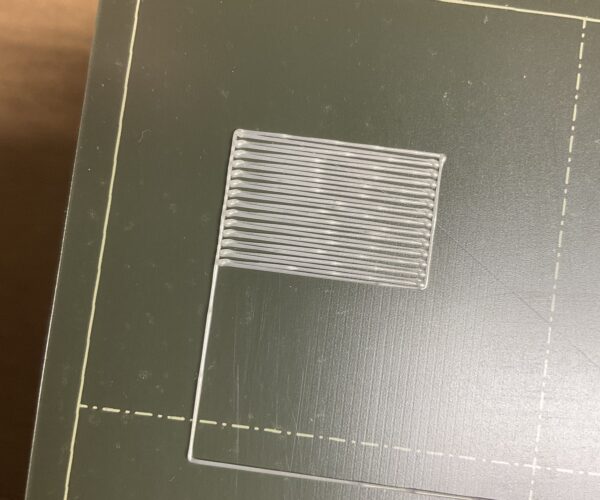
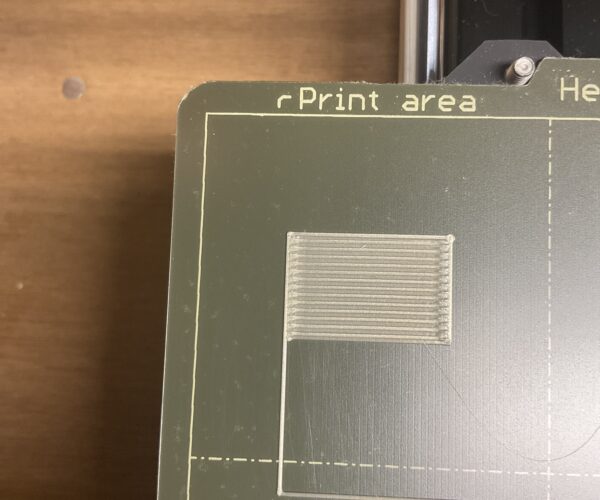
@bob thanks for the live Z calibration tip. Helped cut down the number of passes certainly. I got nice square corners but now question the little box. Instructions say “no gaps” but should I expect completely solid, not see any of the bed?
sorry if these seem like basic questions but i want to get it set up correctly now to avoid possible issues later when it might matter more.
RE: First layer calibration iterations - how many?
I would say you are still too high, though you can probably start adjusting slightly less at a time now. It should look fairly solid with a decent squish.
You are absolutely correct that you want to get it set up right now because problems with the first layer will only magnify as you go higher.
RE: First layer calibration iterations - how many?
It takes however many times it takes. That last calibration patch is still way too high. Keep lowering.
My first time out with my printer it took many, many times.
Mini+ (kit) - Revo Micro | Antler Cooling | WiFi (4.4.0RC1)
RE: First layer calibration iterations - how many?
It takes however many times it takes. That last calibration patch is still way too high. Keep lowering.
My first time out with my printer it took many, many times.
To build on this, and just for reference, my first time out, with the semi-assembled version of the mini+, my Z offset ended up being -1.9 or so (which is indicative of the pinda likely being too low). Just to give you an idea and so you are not afraid to continue going lower.
RE: First layer calibration iterations - how many?
You're still too high, you shouldn't see the bed between the lines in the little box, it should be a smoothish sheet of plastic. I say smoothish because there will always be a little texture, but the goal is to reduce the texture to a minimum. You are pretty close there, so move the nozzle in small increments, don't go greater than 0.050 per go at this point.
Prusa I3 Mk2 kit upgraded to Mk2.5s, Ender3 with many mods, Prusa Mini kit with Bondtech heat break, Prusa I3 Mk3s+ kit
It used to take many, many iterations; now I'm experienced and find it annoying to have to go a second time...
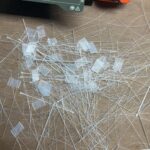
Your first layer needs to go lower, more squish. At the end of the calibration you are aiming to print a single layer *sheet*. It should be possible to peel it off in one and fold it without the threads seperating. If it breaks into lines it is too high, not squished enough. If it is a single sheet but with wavy lines or drag marks on it you are too low.
Cheerio,
RE: First layer calibration iterations - how many?
I just got new build plates, so got to do this again. The Fysetc smooth one took two tries to get it dialed in. The Ultistik textured one took more like 5 and I'm at -1.820 to -1.825. It's printing nice PETG first layers, though I could do with a bit more live Z fine tuning. I grabbed that 3x3 inch calibration file in prints and it helped a lot.
Mini+ (kit) - Revo Micro | Antler Cooling | WiFi (4.4.0RC1)


