Disaster first layer
I am a new user, I received yesterday, my first Purusa mini +, for my all is new, assembly ok, fisrt starts ok but i am problmes with calibration first layer, Disaster first layer
How can I correct the problem? I tried to change the plate and nozzle distance but without result.
Grazie
Andrea
RE: First layer sample
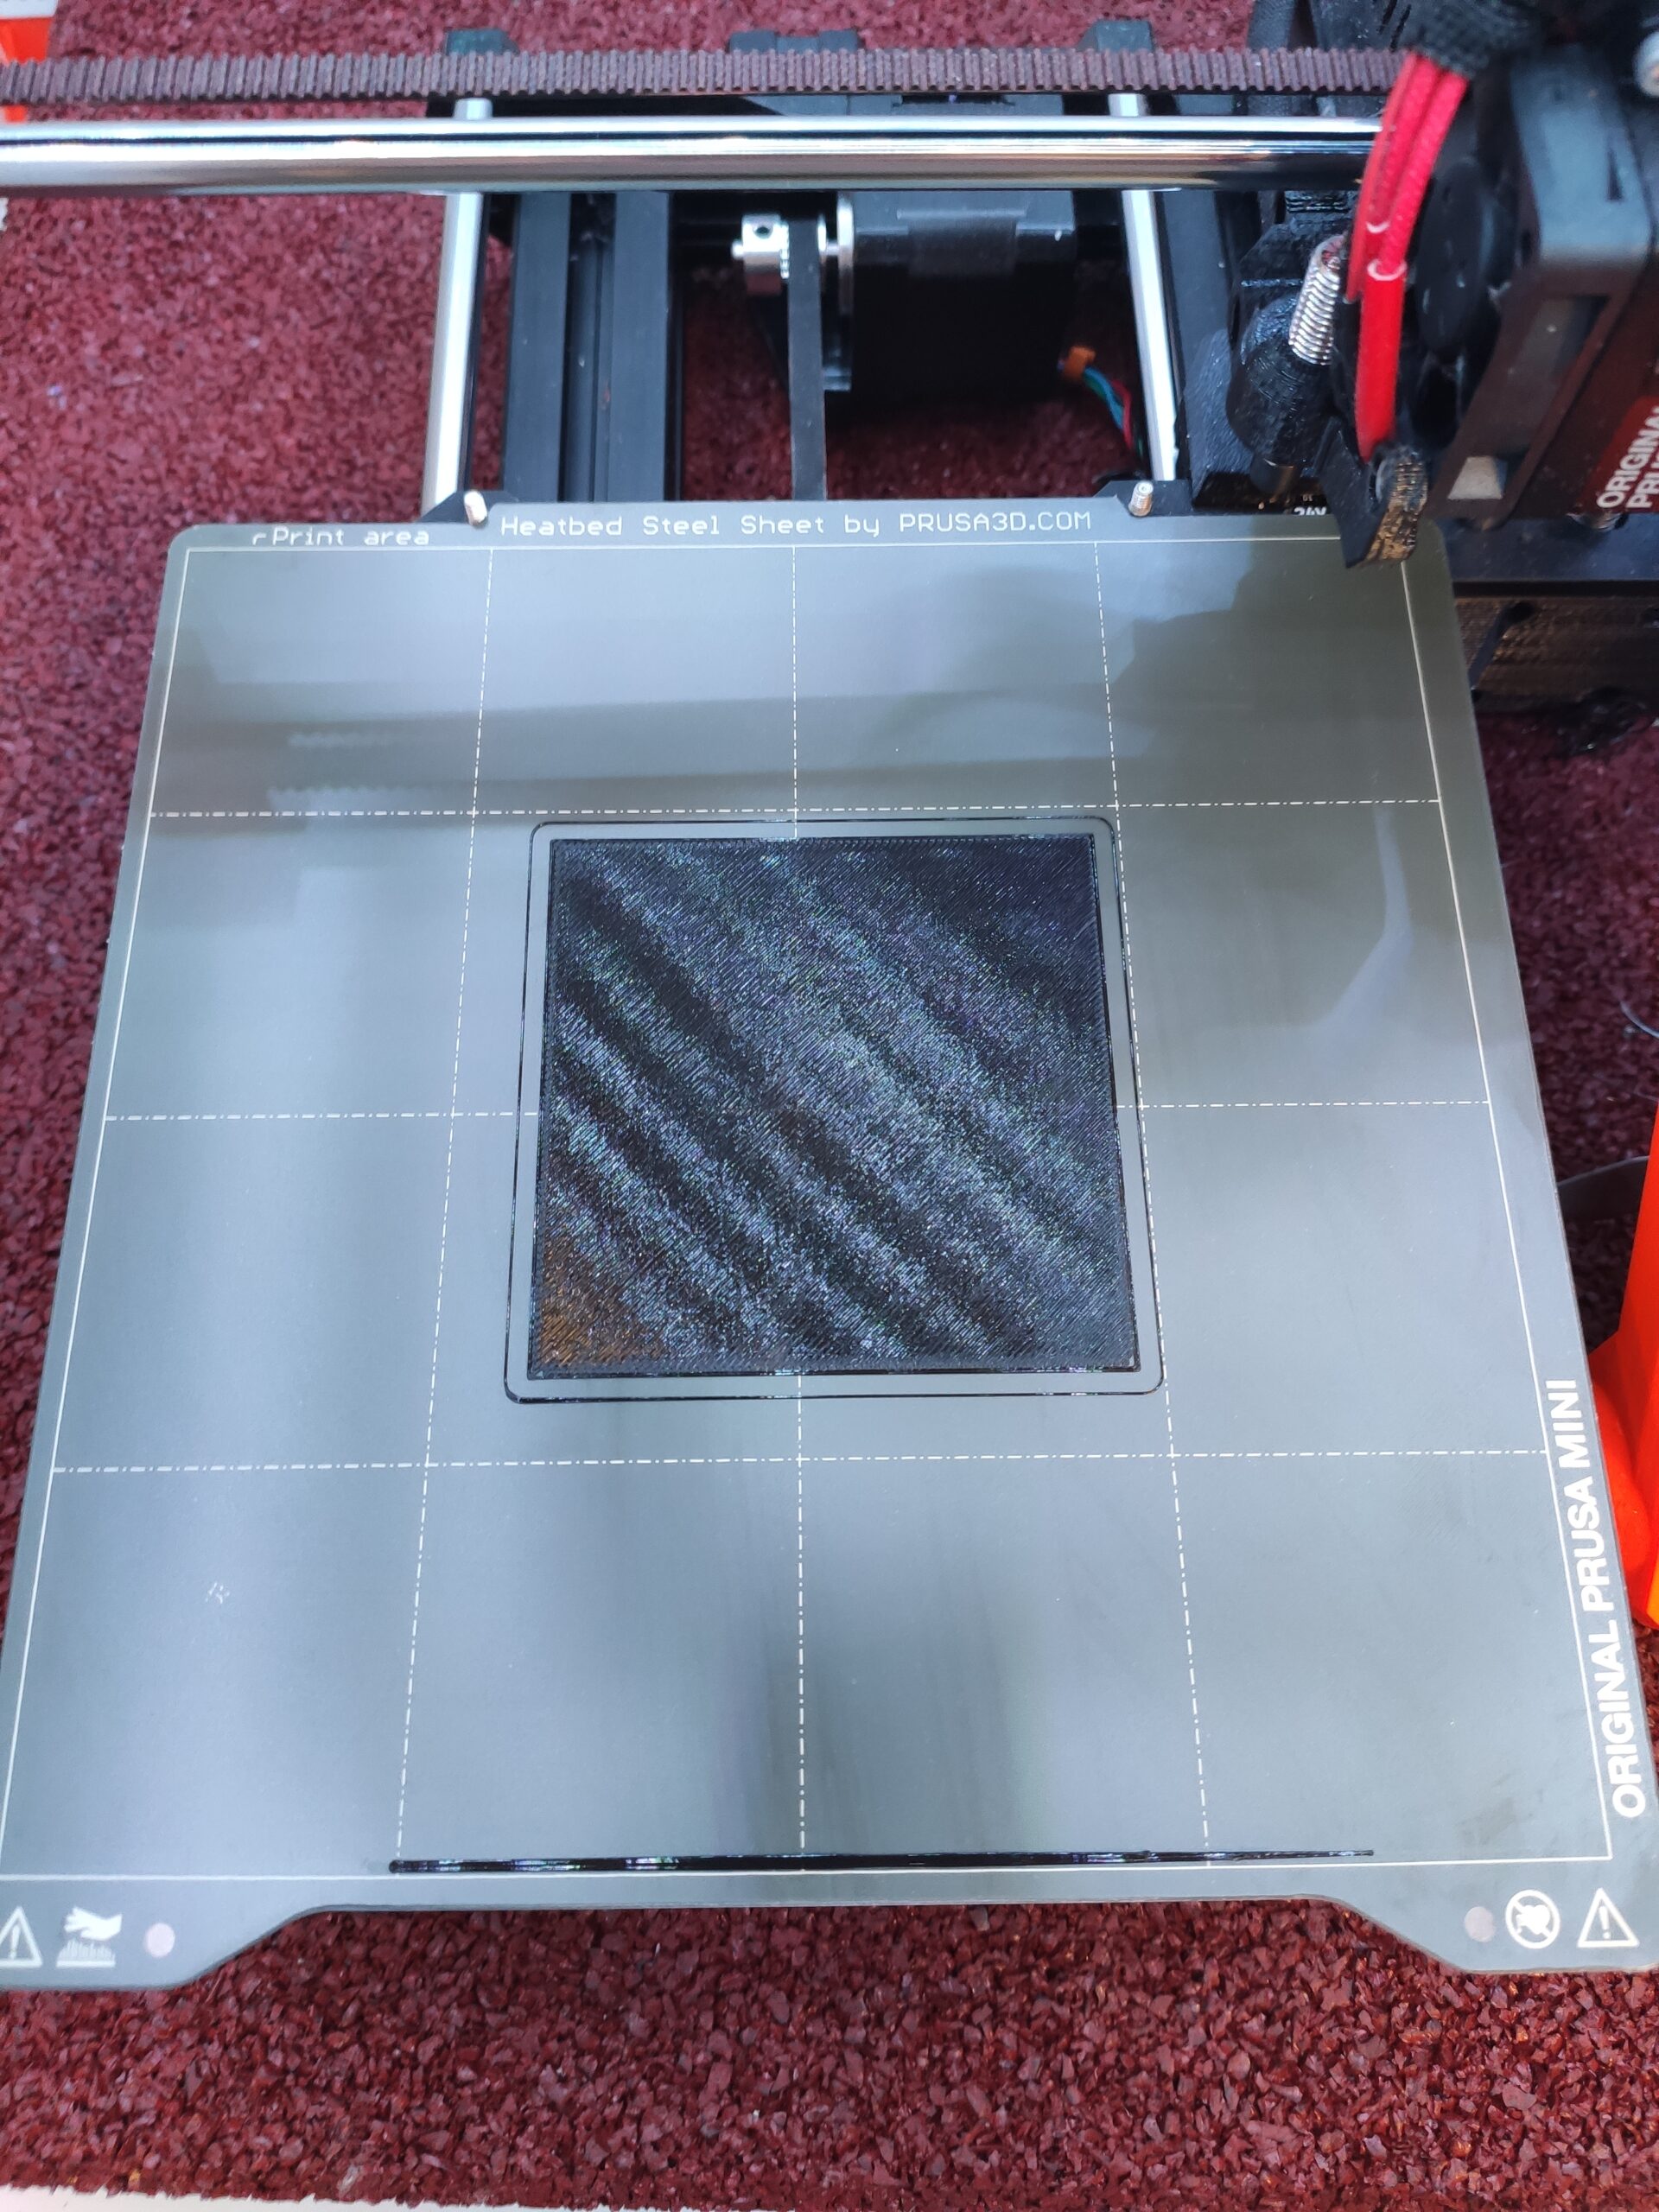
Are you trying with just the built-in first layer calibration pattern? If so, try Joan's 75 x 75mm square from here intstead: https://forum.prusa3d.com/forum/postid/331723/ (that whole thread is worth a read, by the way). It gives you much more time to adjust the nozzle height.
Post some pictures afterwards, and it'll help the experts on this forum guide you in the right direction.
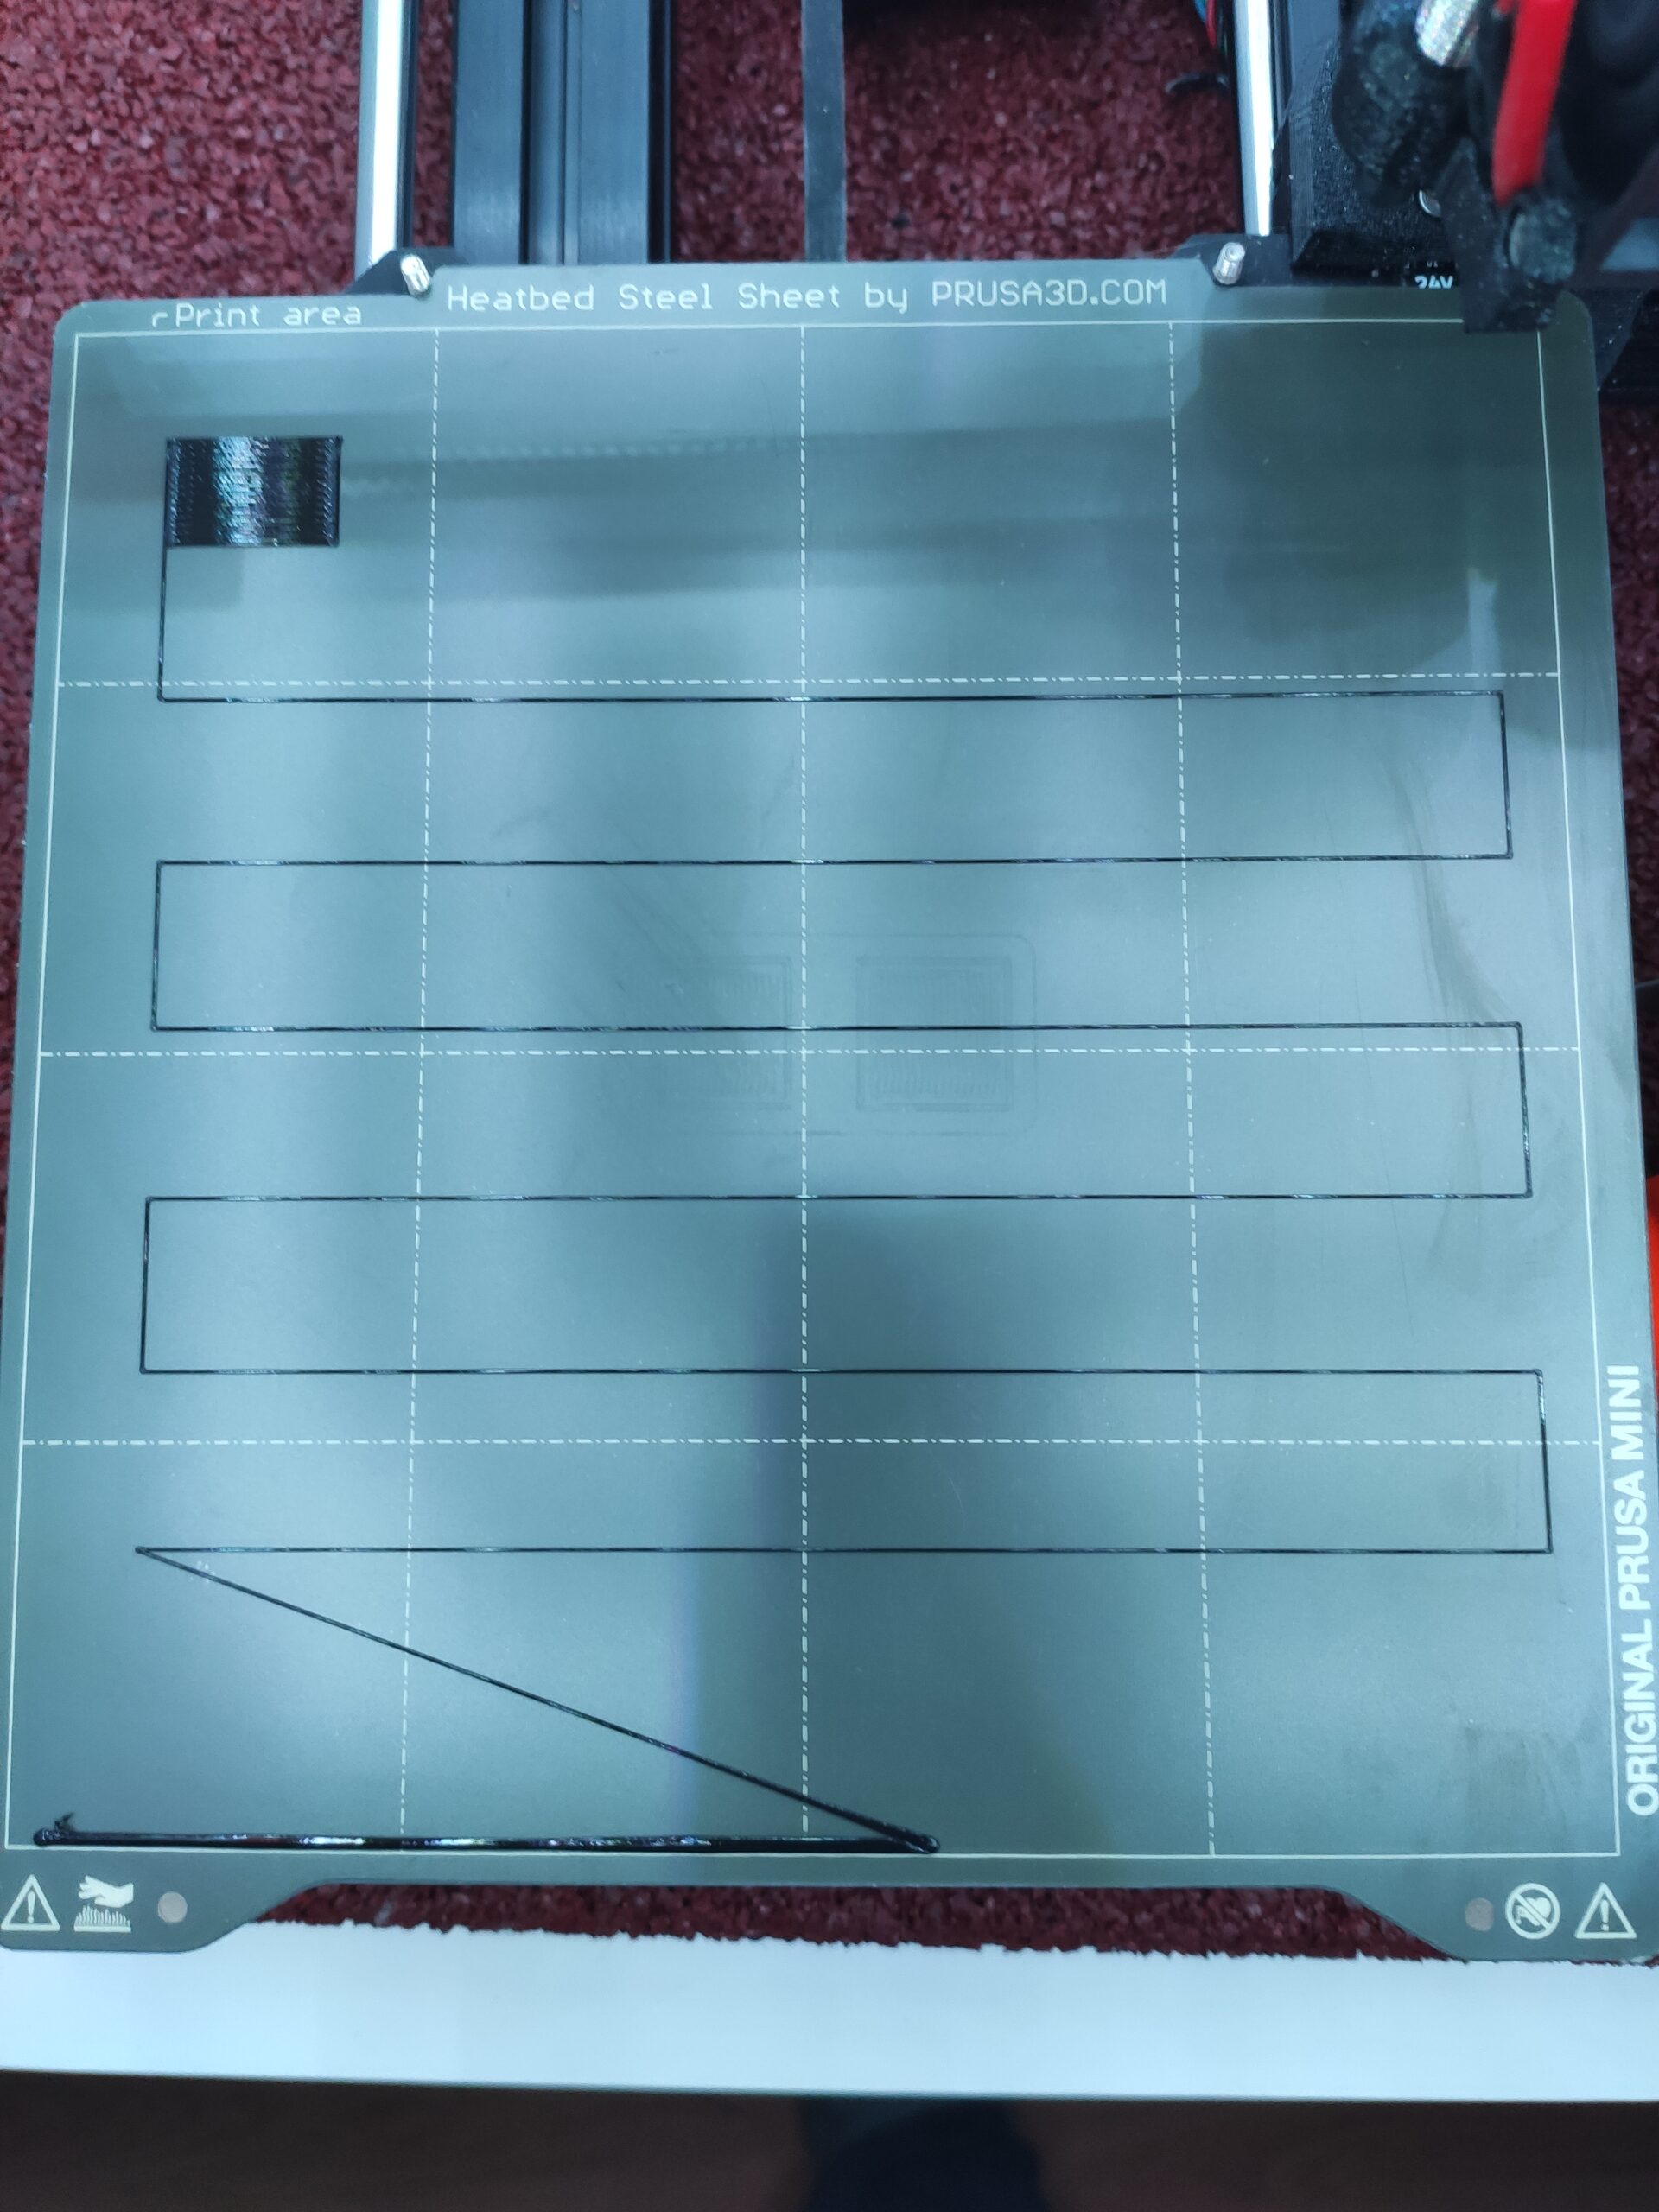
(edit to add a quick note - if you're seeing stringy, separate strands when the first layer goes down, your nozzle is still too high. This was my biggest learning lesson - go lower until the filament starts to squash together and gaps are reduced)
Live-Z is too high
[...] How can I correct the problem? I tried to change the plate and nozzle distance but without result.
Your Live-Z is too high (not negative enough). That's actually a good thing as it's easier to start high than too low. Continue to adjust Live-Z downwards (make it more negative) in increments of 0.06. Dial down smoothly and observe the extrusion on the build plate. You should get to a point where the lines start sticking cleanly and corners are sharp. You should be able to nudge an extrusion without it coming loose. Once the lines start sticking well, continue to lower (make more negative) Live-Z in increments of +-0.02mm until the square closes up.
As @andrewterry notes, this is much easier to do with a larger square-ish print. You can print the Prusa logo gcode if nothing else.
- Jeff Jordan's "Life Adjust" procedure is much easier to use and understand than the on-board Live-Z routine.
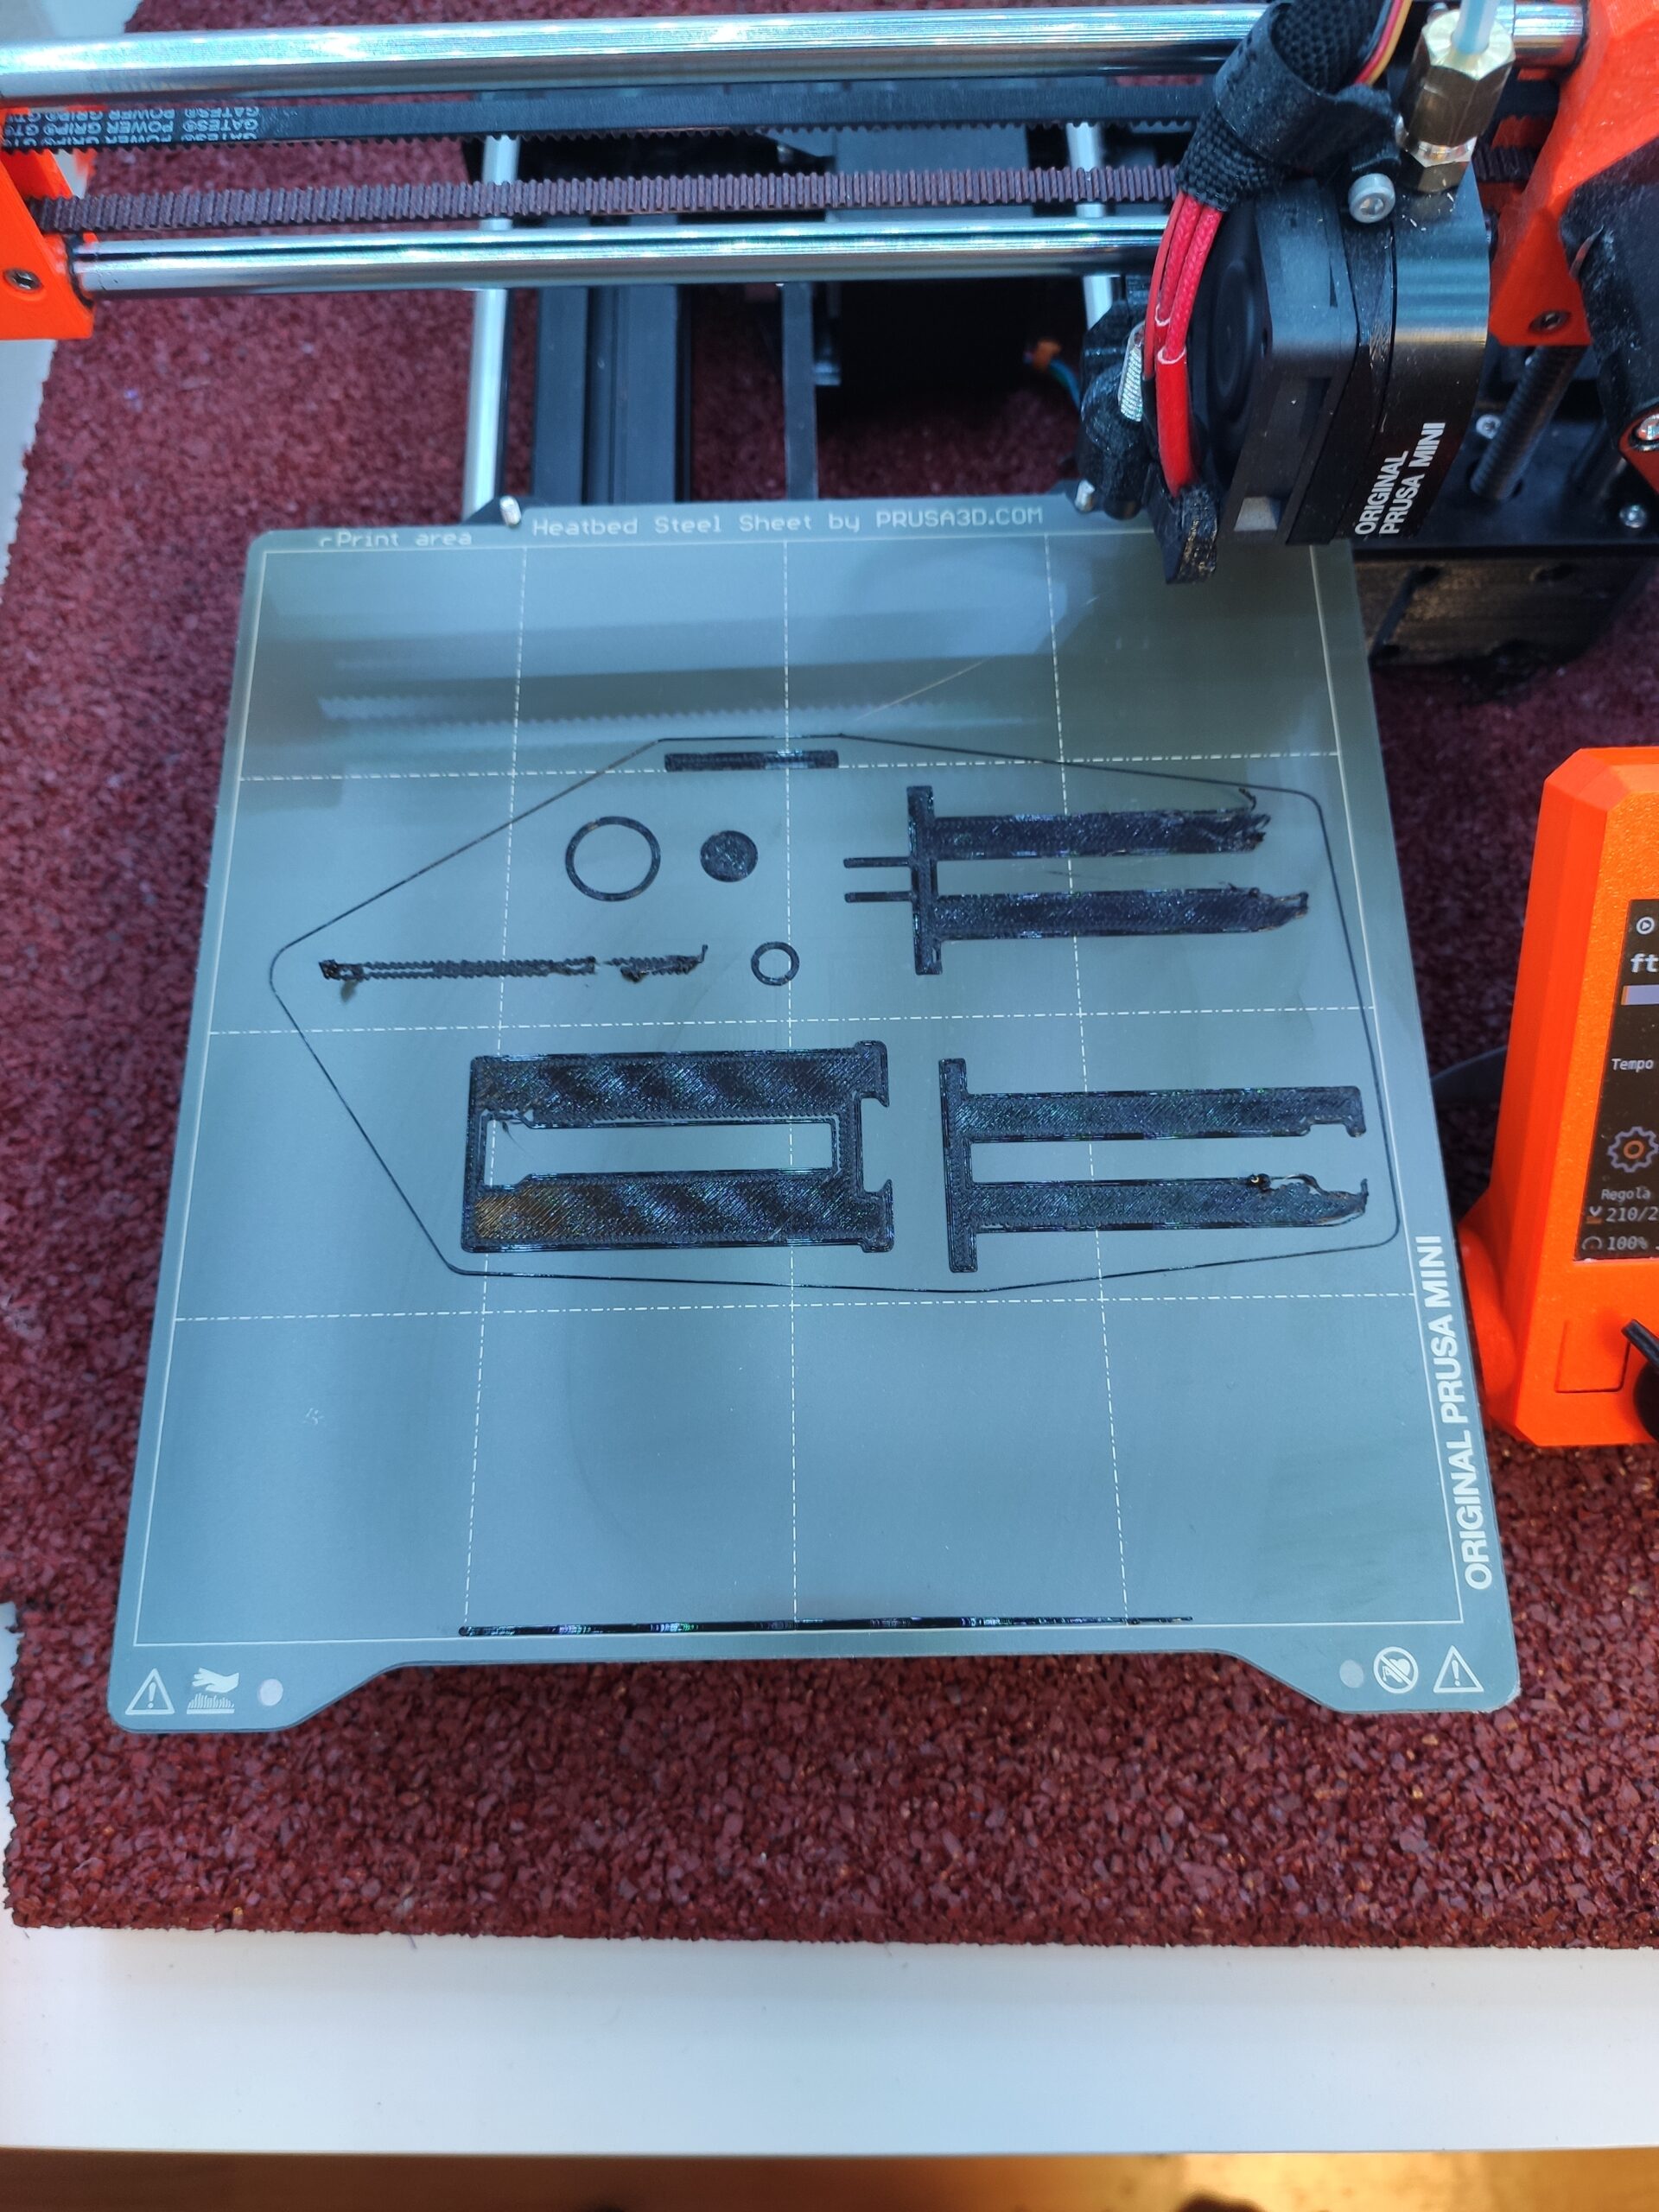
- I have test pattern prints for the Mini and some other printers here that you are welcome to use.
It is also very (very very) important that your PEI sheet be kept clean. A dunk under the kitchen sink with hot water and plain (e.g., Dawn) dish soap is recommended. Scrub it with a clean plain paper towel and dry it with another. Avoid touching the print area and do nothing else. Try doing your Live-Z adjustment with a clean build plate to improve odds for success.
THANK YOU
I just got my first 3D printer, the Prusa mini .... I also could not get a print to stick, thought I was following all the instructions. This answer with the details on how to check the first layer calibration. To make sure the lines were holding enough and what increments to keep adjusting to. You saved the day. Thank you so much,
RISPONDI: Disaster first layer
My Prusa Mini + prints the first layer badly.I changed the nozzle (E3D V6 0.4) ==> the problem persists I changed filament (new Prusa Black) ==> the problem persists I re-ran the nozzle leveling ==> the problem persists I always clean the plate with IPA 99.9%, I tried with acetone ==> the problem persists Some advice ?
RISPONDI: Disaster first layer
My Prusa Mini + prints the first layer badly.
I changed the nozzle (E3D V6 0.4) ==> the problem persists
I changed filament (new Prusa Black) ==> the problem persists
I re-ran the nozzle leveling ==> the problem persists
I always clean the plate with IPA 99.9%, I tried with acetone ==> the problem persists
Some advice ?

RE: Disaster first layer
From the image, it looks to me like -1.610 through -1.620 are good. The -1.630 is too low, and the -1.595 through -1.605 look too high.
I have slowed my first layer print speed a bit after having some issues with small openings on the first layer and that helped a lot.
Past that, I'll defer to more experienced experts.
Mini+ (kit) - Revo Micro | Antler Cooling | WiFi (4.4.0RC1)