RE: Revo Micro installation on my Mini+
@threepoint2, I am with you. I am ordering a replacement for the micro and won't even bother unboxing the V6 I was planning to put in the i3. I have gone through two phases of "help" from E3D, but now I am getting passed around. I never tried PETG. The darn thing keeps clogging again and again with PLA. Frustrating and yet another product that I think will work for some but is not yet ready for prime time. Oh, well comes with the territory/hobby.
RE: Revo Micro installation on my Mini+
so it just feels like this is a complete failure. Is there an option to return this ? I bought quite early and am well beyond any return period.
RE: Revo Micro installation on my Mini+
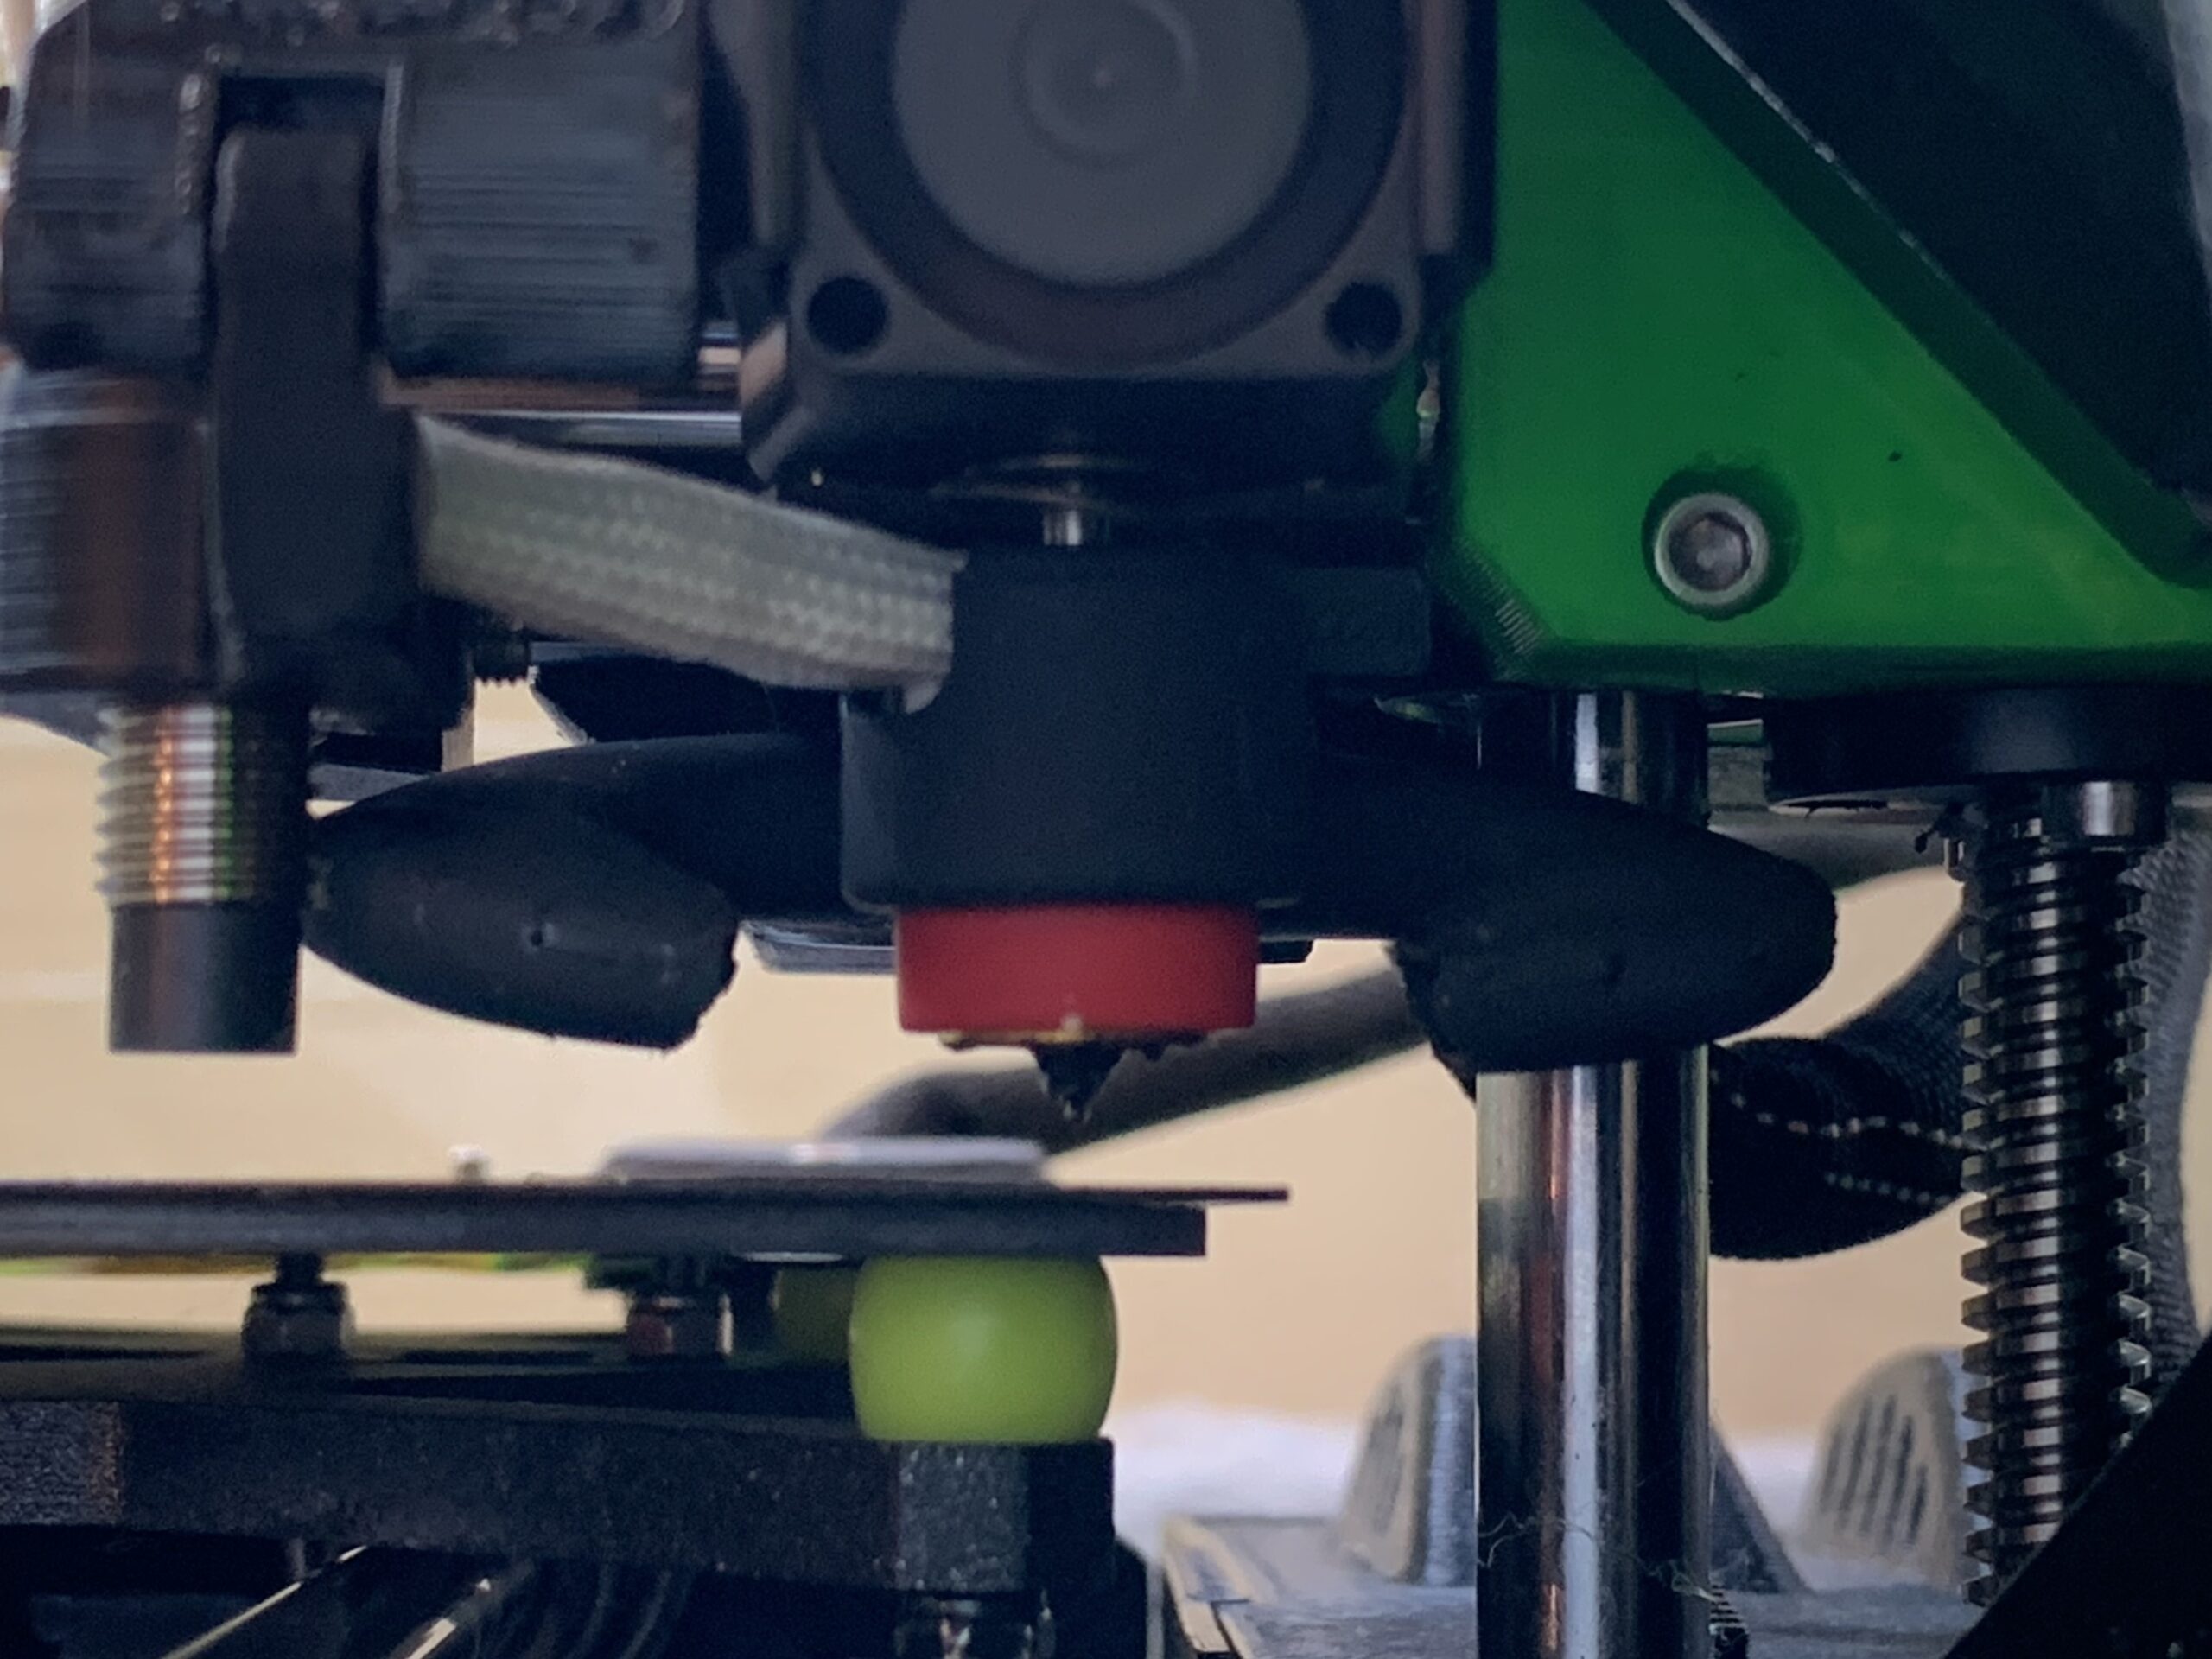
Actually there seem to be a big problem with connecting different fans to the hotend fan connector on the Buddy Board.
Prusa uses an over dimensioned. You can hear and feel the power of the fan if reseting the printer. It is multiple times as loud and airflow is about 3 times as high. So the printer obviously trottle down the fan speed by PWM. Massivly, to about 38%! This is a constant in the firmware. You can only change it with custom firmware.
If you connect another fan, this will also work only with 38%. So if you use the Revo hotend Version 1 and connect it to the Buddy Board as told in the instructions, of course you will get heatcreep. Coldend is Designer for nearly 3 times as much Air for cooling.
Actually there is a quite simple solution to solve this problem for free in 5 Minuten:
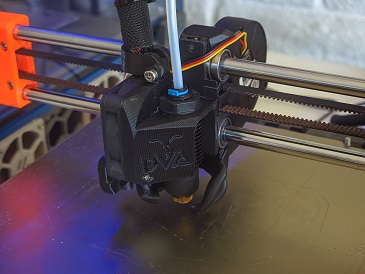
Remove the black cable of the fan connector and connect it to J21 pin2 (Green in the Photo). Red wire still is to be connected to the middle Pin of hotend fan connector.
Now the Revo fan works with 100% speed, a bit louder but no heatcreep anymore. Nearly all problems solved.

RE: Revo Micro installation on my Mini+
Thank you for this detail. So it would seem that using the V2 mount with the original fan should solve the issue correct ? It seems though that some are still having issues with the V2 fan.
RE: Revo Micro installation on my Mini+
Actually if the original fan works well in stock setup it should do so in v2 also. But this is not always the case. (I do not think the fans are produced in a very constant quality). I had so many heatcreeps...
I think it would be best to connect a Noctua directly to 5V and GND (pins in the picture). This should be about 50% more airflow than prusa fan @ 38%PWM. And quite silent.
I will do some experiments on weekend.
RE: Revo Micro installation on my Mini+
Jsut so I am clear, the stock Mini fan, I would remove the black wire and put it on the J21 Pin2 ? The other two wires remain as is ?
RE: Revo Micro installation on my Mini+
So, here is a welcome change. After a lot of guidance, directions, testing, feedback and a multimeter later I got a replacement heater core. Popped it on (literally) and now going into 24th straight hour of print time and so far this things is working like a freaking champ. Was just getting ready to pull it all out.
RE: Revo Micro installation on my Mini+
Jsut so I am clear, the stock Mini fan, I would remove the black wire and put it on the J21 Pin2 ? The other two wires remain as is ?
If you use the stock Mini fan and have often heatcreep, thats exactly what to do. As the fan runs 3 times as fast, this is loud and more cooling than needed. But you can use another, more silent fan like a Noctua, Sunon or Fysetc instead. Theese fans are slower, so effectly airflow is not 3-times as much as in stock configuration but 1.5...2.0 times, but thats already enough increase in airflow to avoid any heatcreep - and it is more silent due to the better quality of theese fans.
The third wire is just a tacho signal, telling the board "hey, i am spinning" (and how fast) and used for selftesting. If you do not connect it, you get an error message wich can be ignored. (for example if you use version 1 of Revo mount with Revo fan. That fan does not have tacho output)
RE: Revo Micro installation on my Mini+
How did your troubleshooting lead to a faulty heater core? Is there a resistance spec value for a good heater core?
So, here is a welcome change. After a lot of guidance, directions, testing, feedback and a multimeter later I got a replacement heater core. Popped it on (literally) and now going into 24th straight hour of print time and so far this things is working like a freaking champ. Was just getting ready to pull it all out.
RE: Revo Micro installation on my Mini+
I can not say authoritatively. I did find a sensor table on the E3D site but I don't believe/not sure it applies to REVO. However, at 200k resistance (the setting they asked me to use) the faulty device was at 86.2k whereas the working unit is closer to 100k at 96.3k. REVO didn't address these values when I asked but if the table was relevant for my average room temp the value should be close to 100K.
I was asked to do a PID as well, which I did. Checked the wiring, etc. etc.
In fact with the new heater core, none of the wiring was changed out. I just undid the two clips near the hot end side and without any gcode jedi tricks, I am printing. This is only PLA. I have not done PETG, but suspect there will be some temperature adjustments (Ref: CNC Kitchen video).
RE: Revo Micro installation on my Mini+
I'm happy to report that the fan mod that Oliver-Andre posted solved all my heat creep issues. I still do have issues with the filament curling and sticking to the nozzle causing some issues. I will try a homemade silicone sock next to see if I can make a largers sock than default
RE: Revo Micro installation on my Mini+
Hi Guys
I have been having massive problems with my revo micro install.
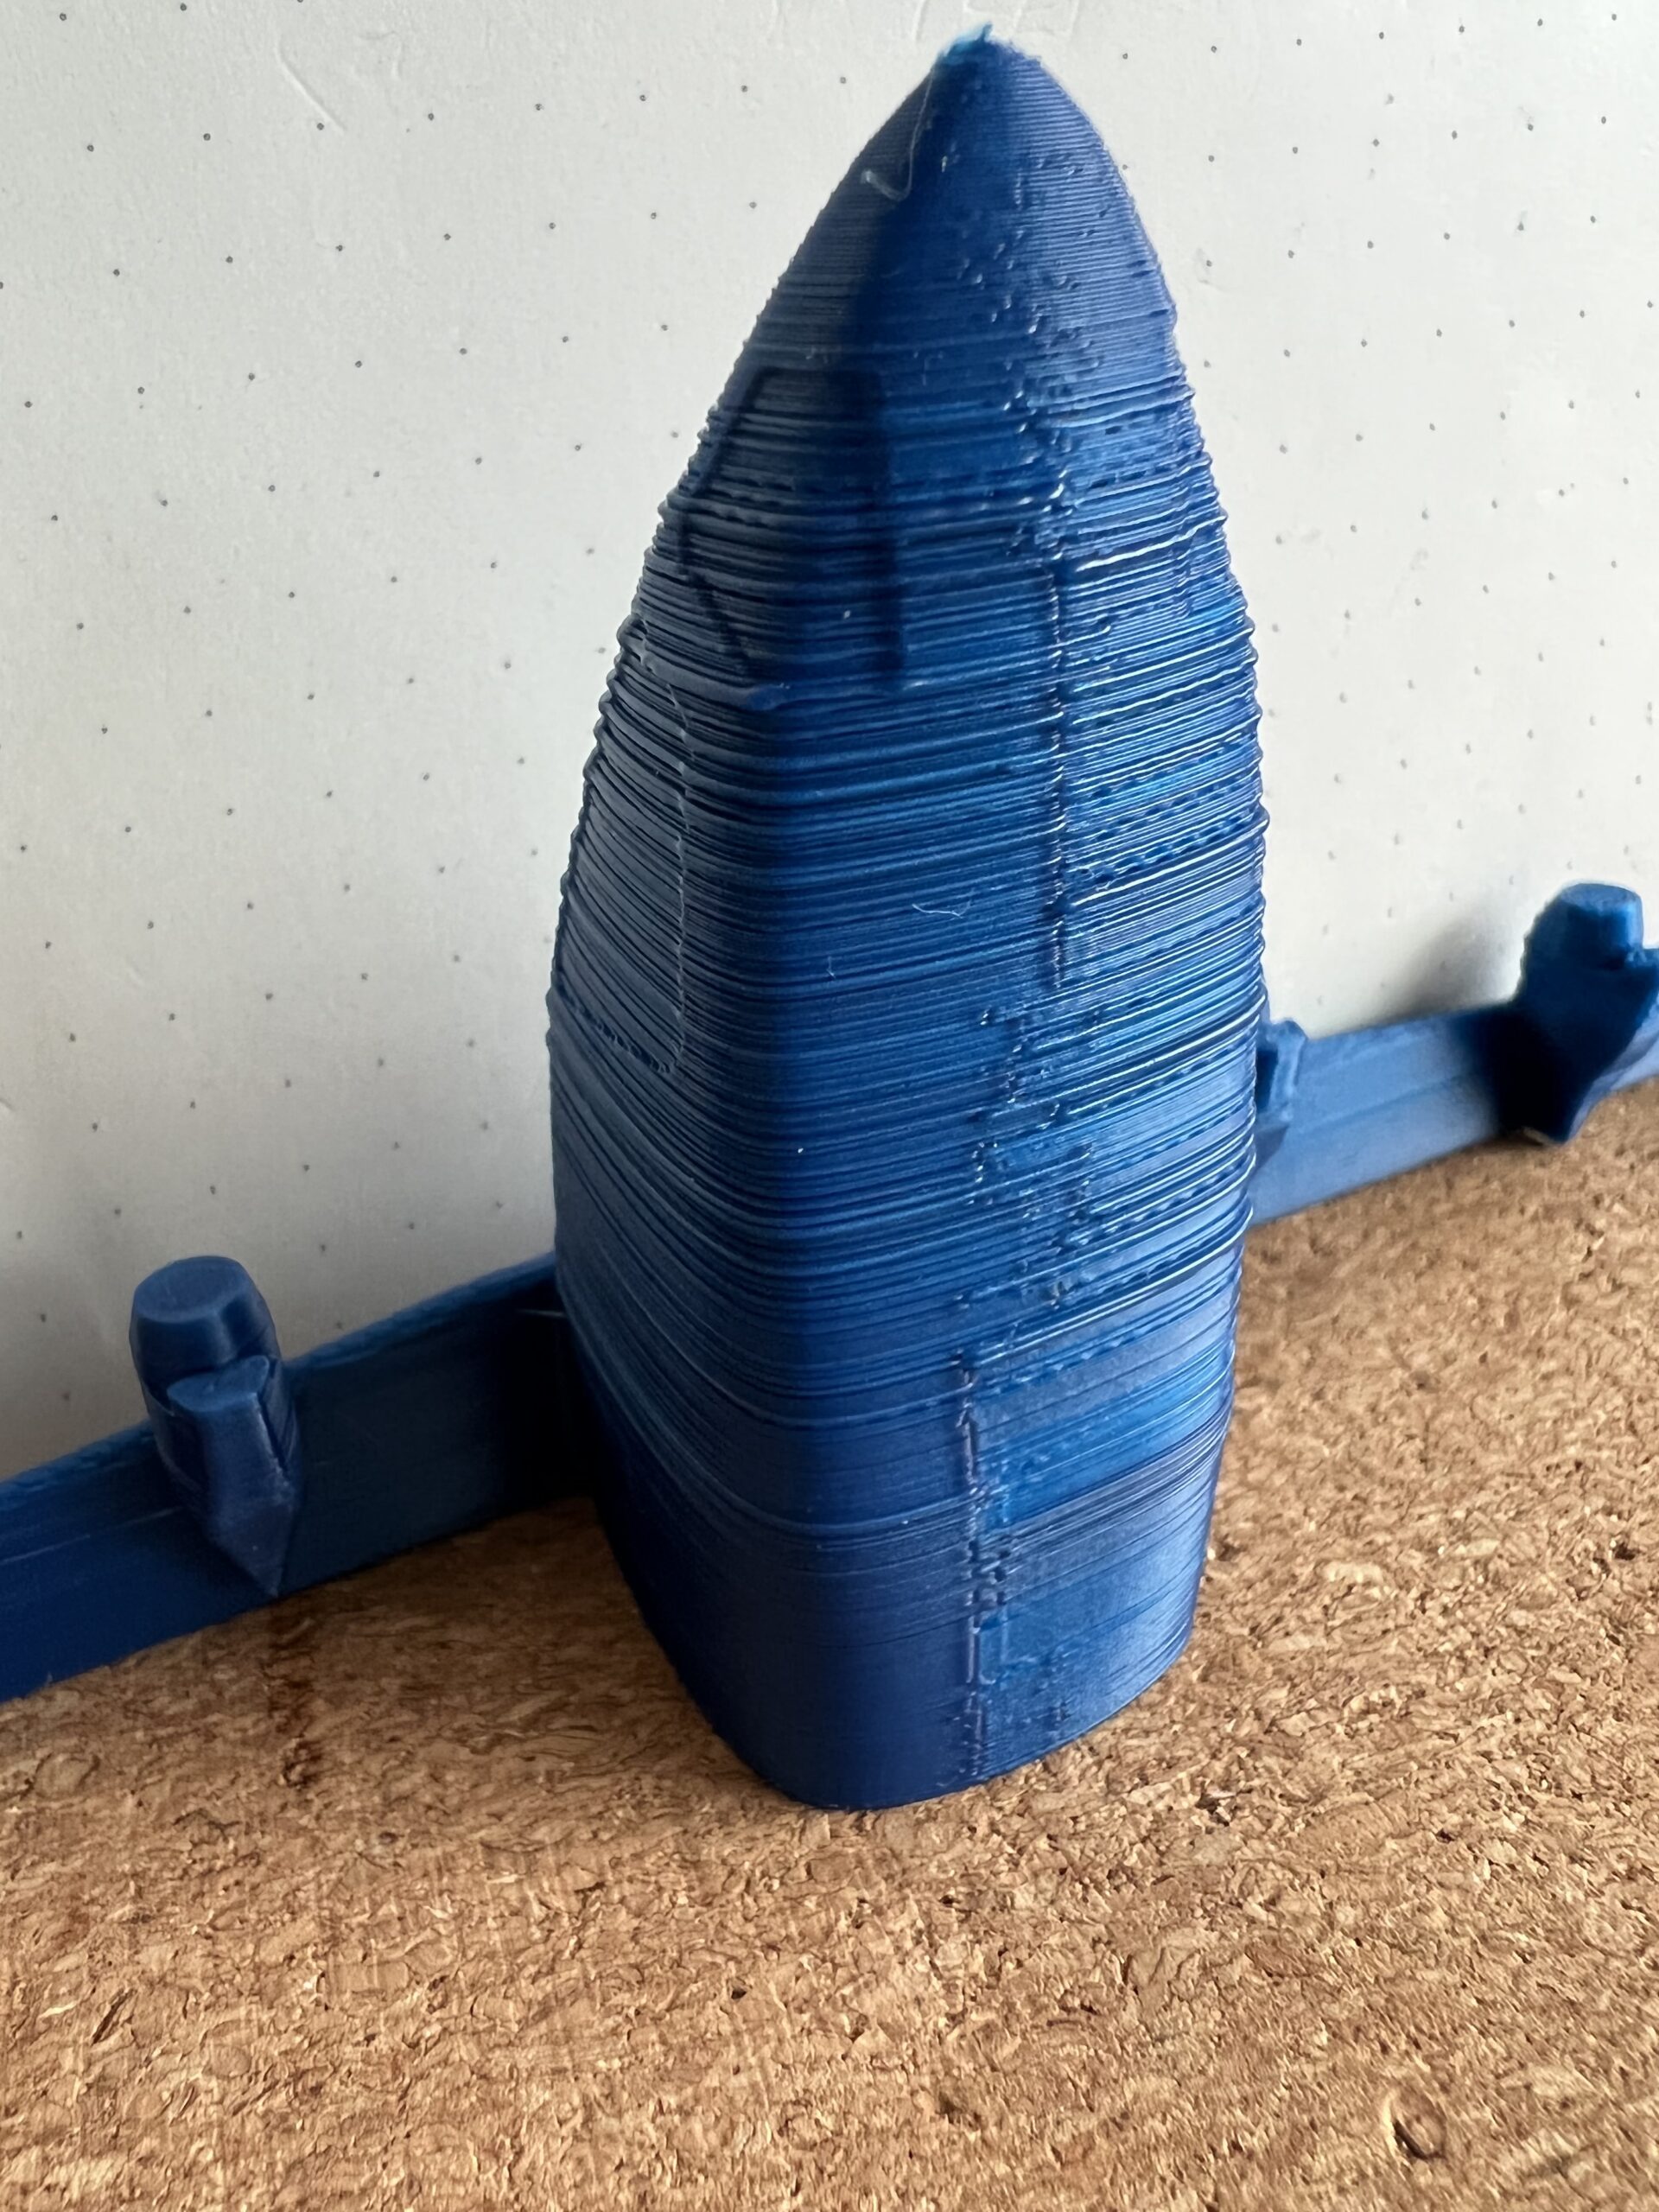
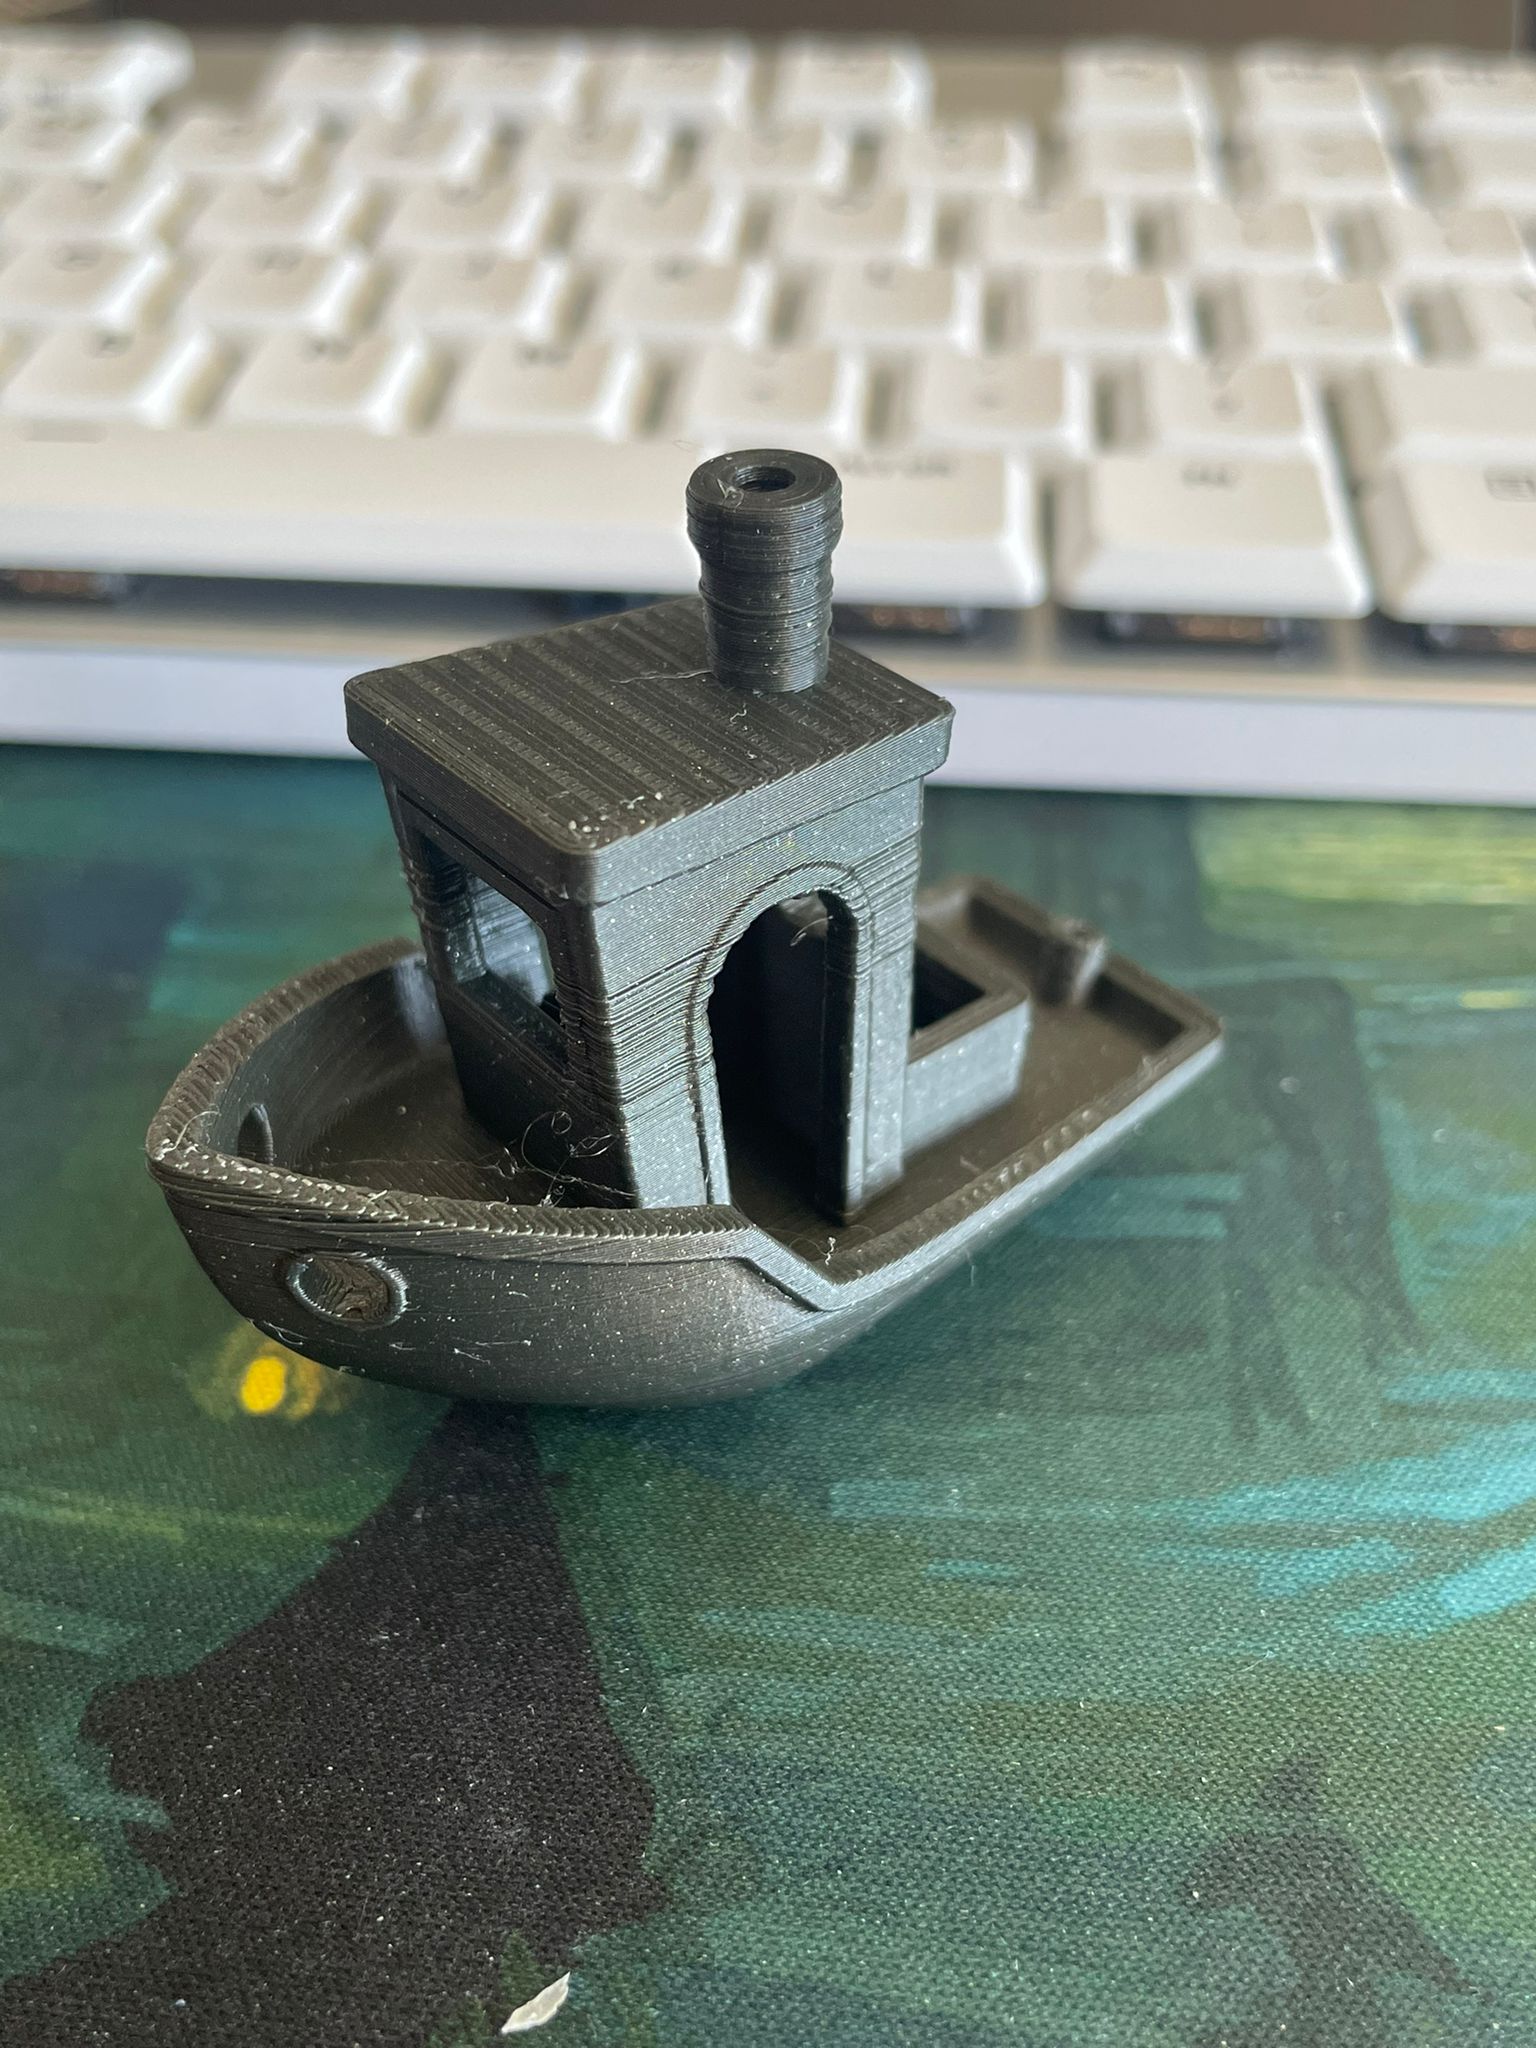
0.4mm nozzle with PETG at 0.2mm layer height worked perfectly. I am now trying to print 0.15mm with PLA, still with the 0.4mm nozzle, and the results are terrible (see below). It seems to work well for the first 5mm or so and then turns to crap.
Has anyone got any ideas for what may be causing this??
RE: Revo Micro installation on my Mini+
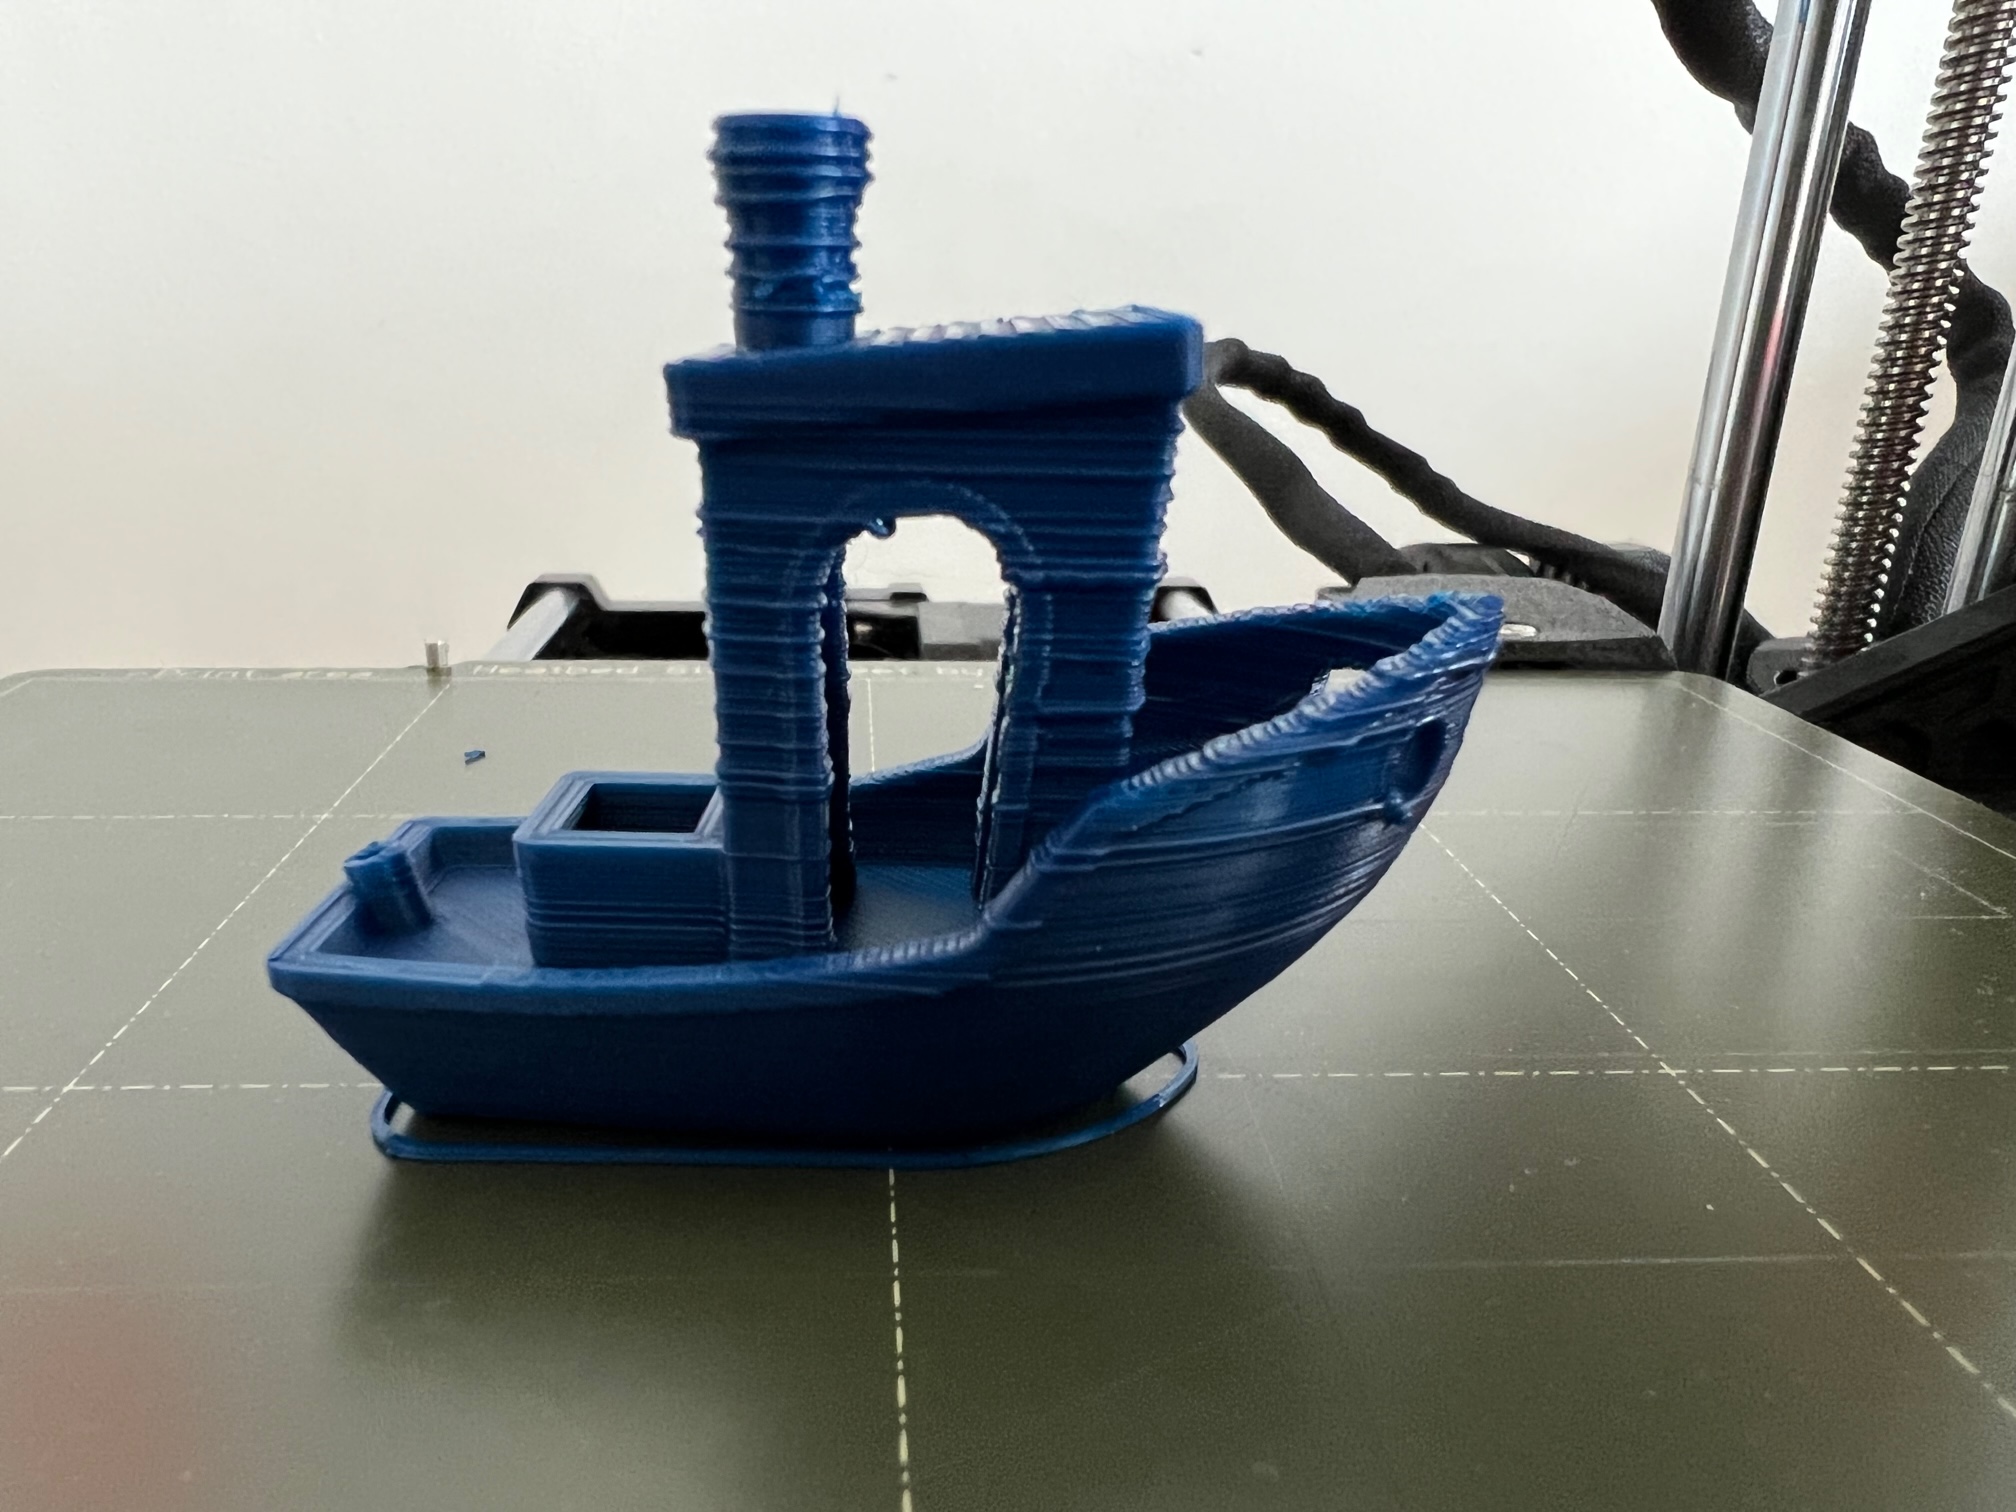
Quick Update. Using @pickworthi suggestions from the previous page helped dramatically but still not fully. Below is a before and after.
RE: Revo Micro installation on my Mini+
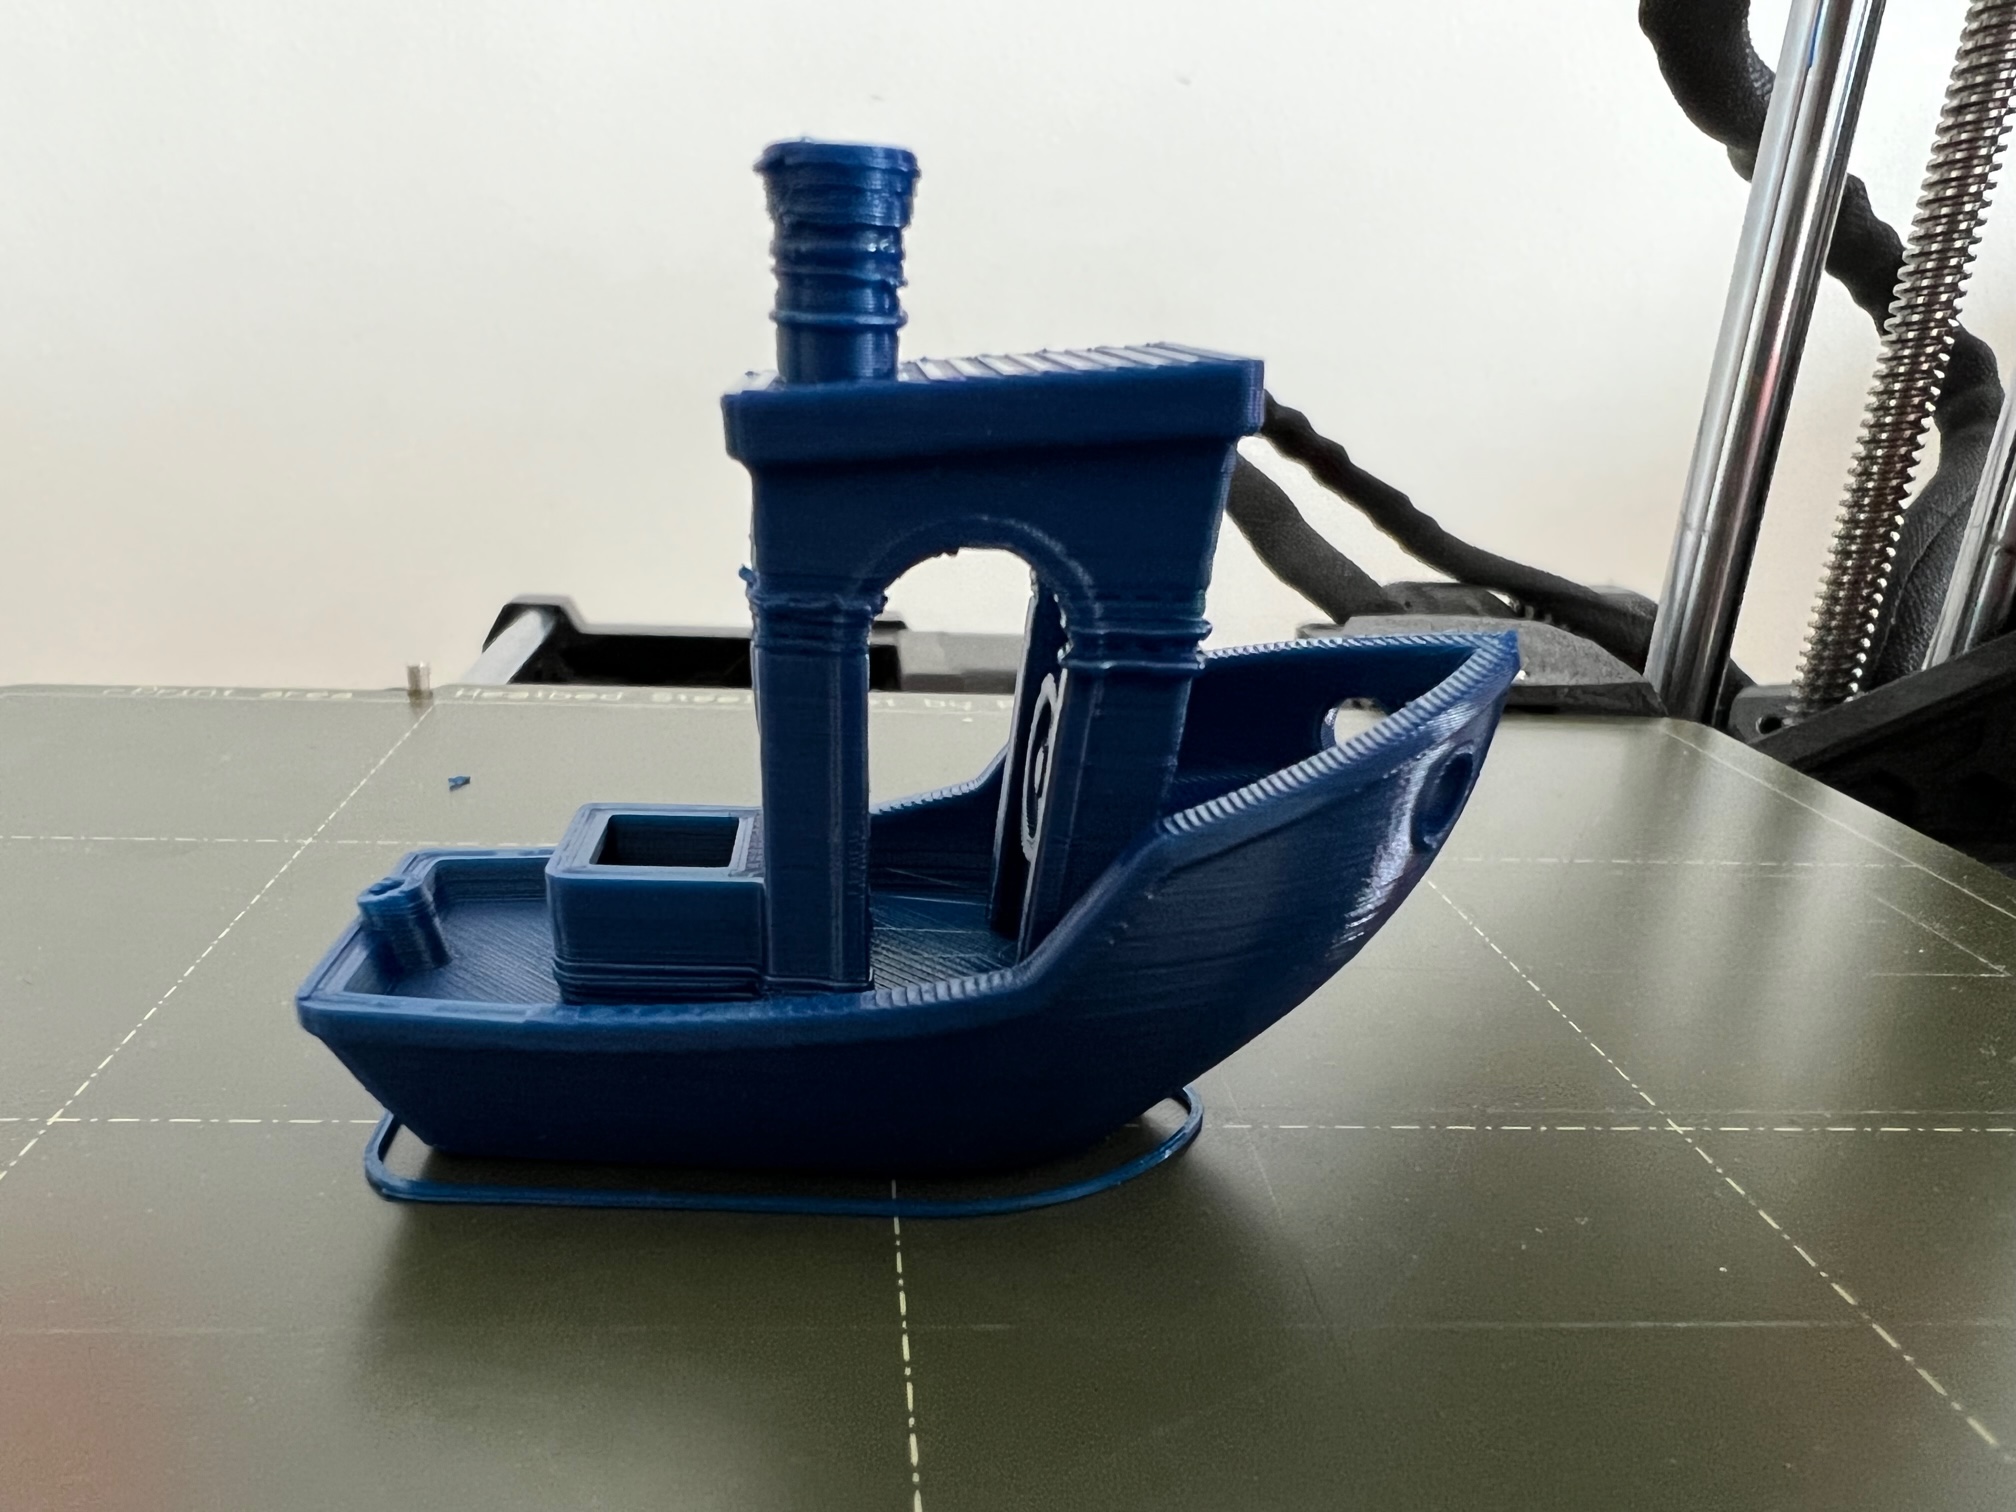
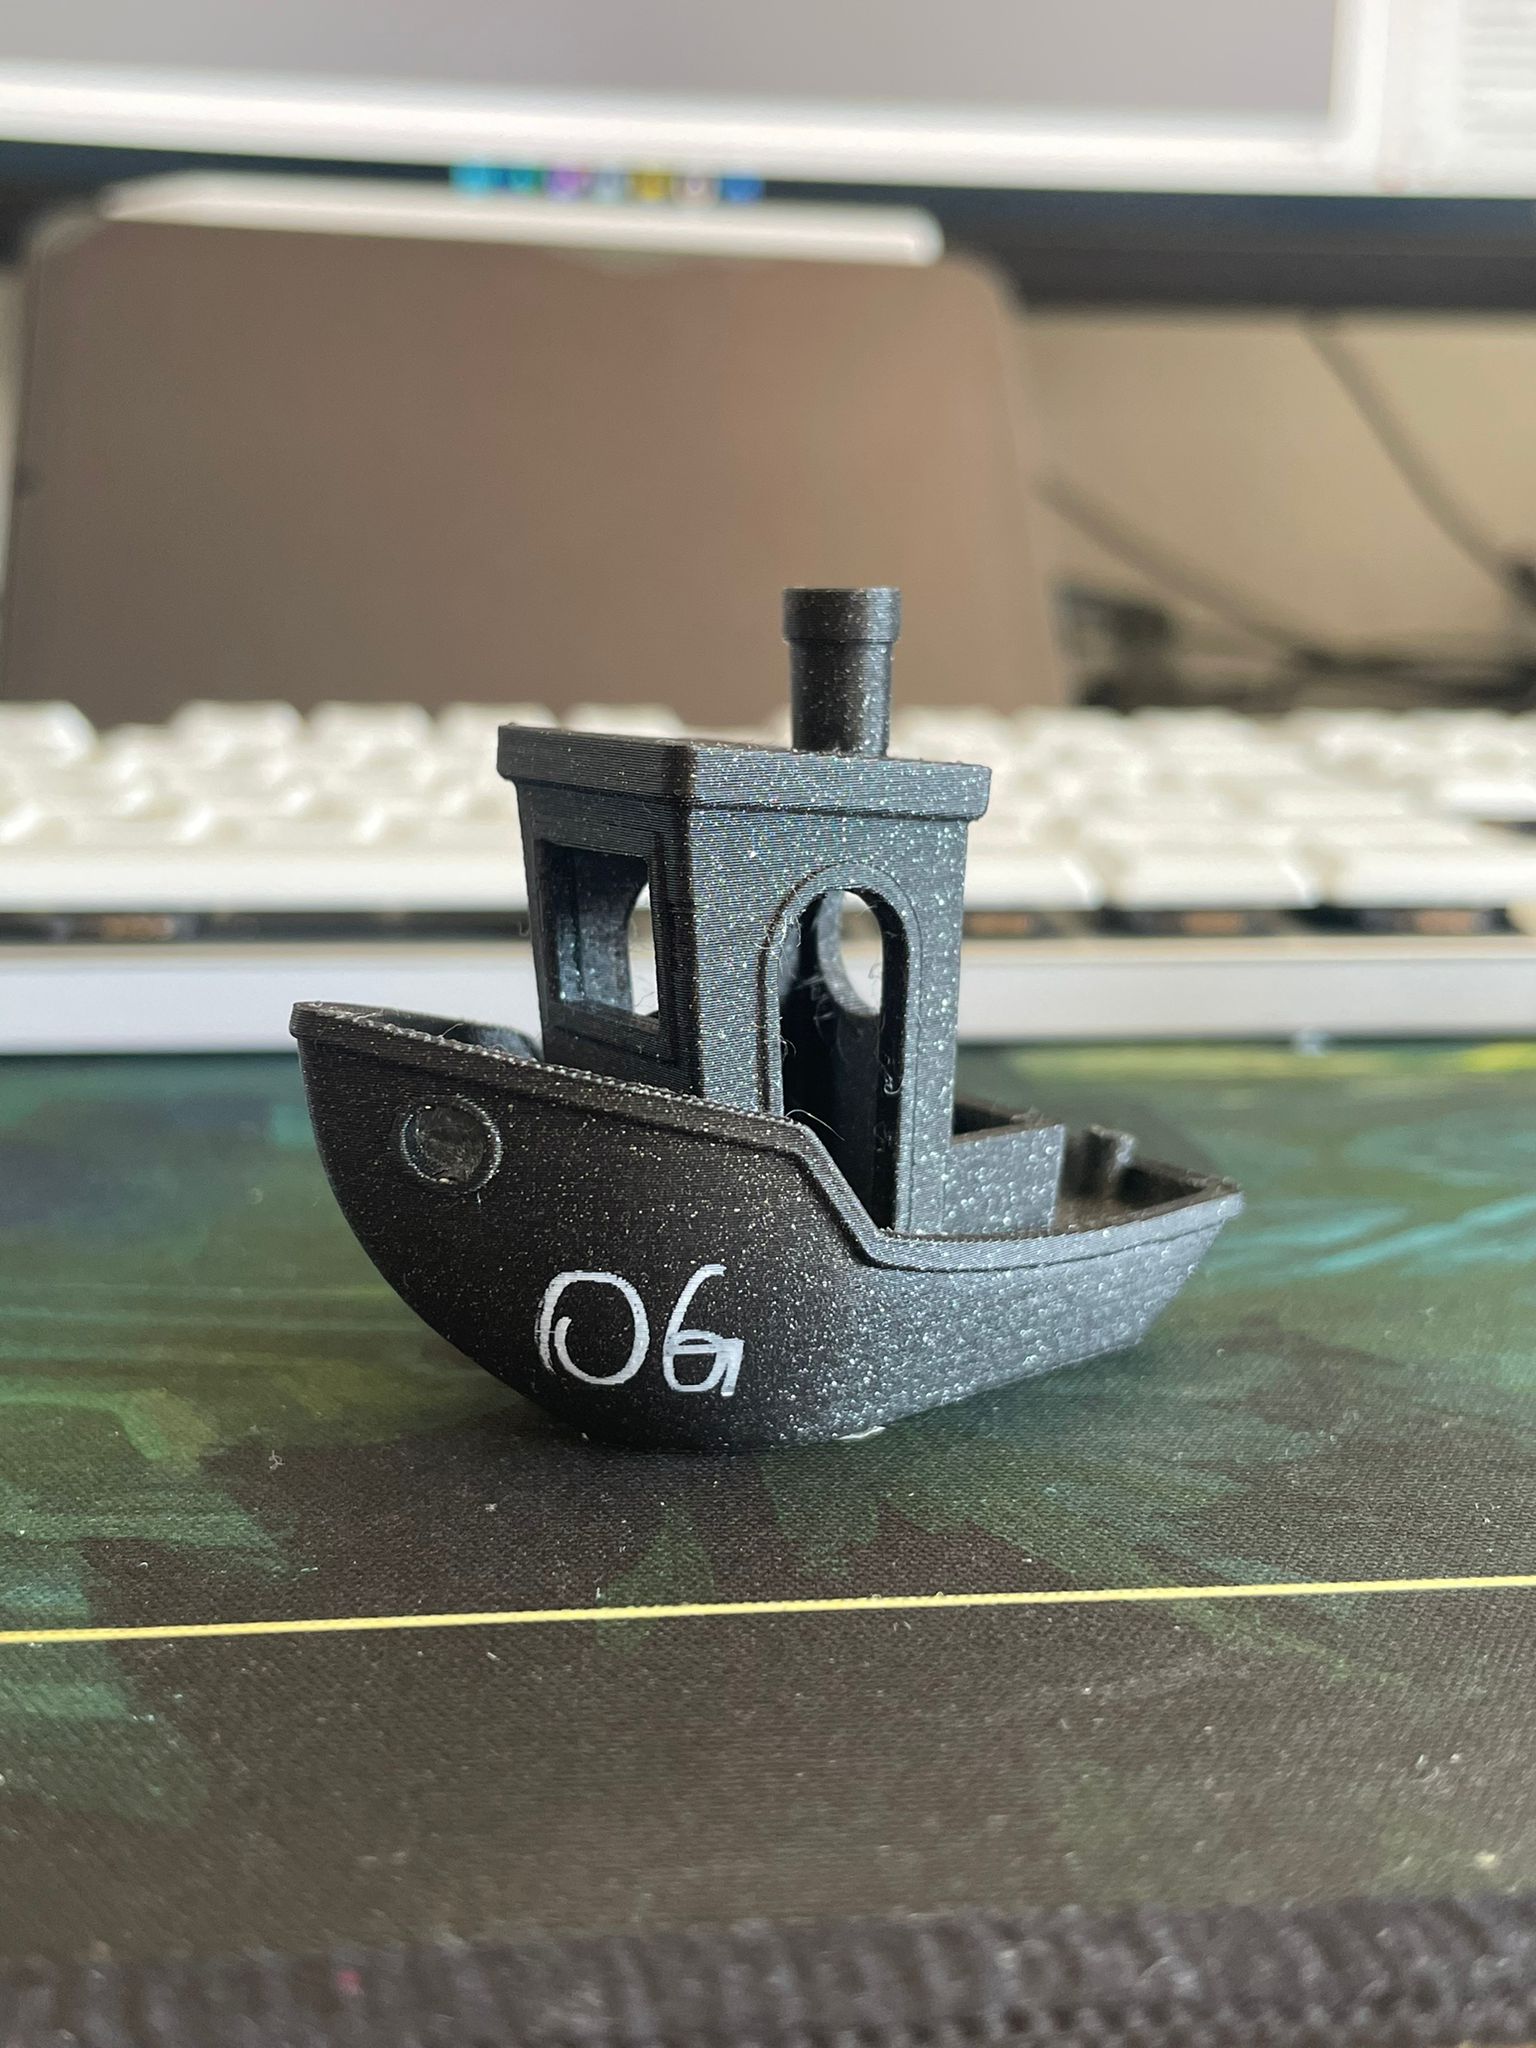
Follow up on this thread, I've upgraded my mini this week and installed the Revo Micro alongside with Bondtech IFS extruder.
All of these benchys were printed with Prusament PLA. I am using the antler carriage and no other mods.
The tweaks I've used are the ones @pickworthi mentioned on the point 3,
- "Min Print Speed" from 15 to 20 mm/s.
- "Slow down if layer time is below " from 15 to 5 seconds
- "Retraction length" from default (2.0) to 1.8 mm.
My PTFE tube has an inner diameter of 1.75mm, and I ordered one with the correct diameter as the mini needs it to be 2mm, the end on the hotend is cut straight, no chamfer or anything. The profile I've used to slice the benchy was the Generic PLA and then I've applied the aforementioned tweaks, everything else is default. If you'd like I can upload my benchy g-code here so you can test it.
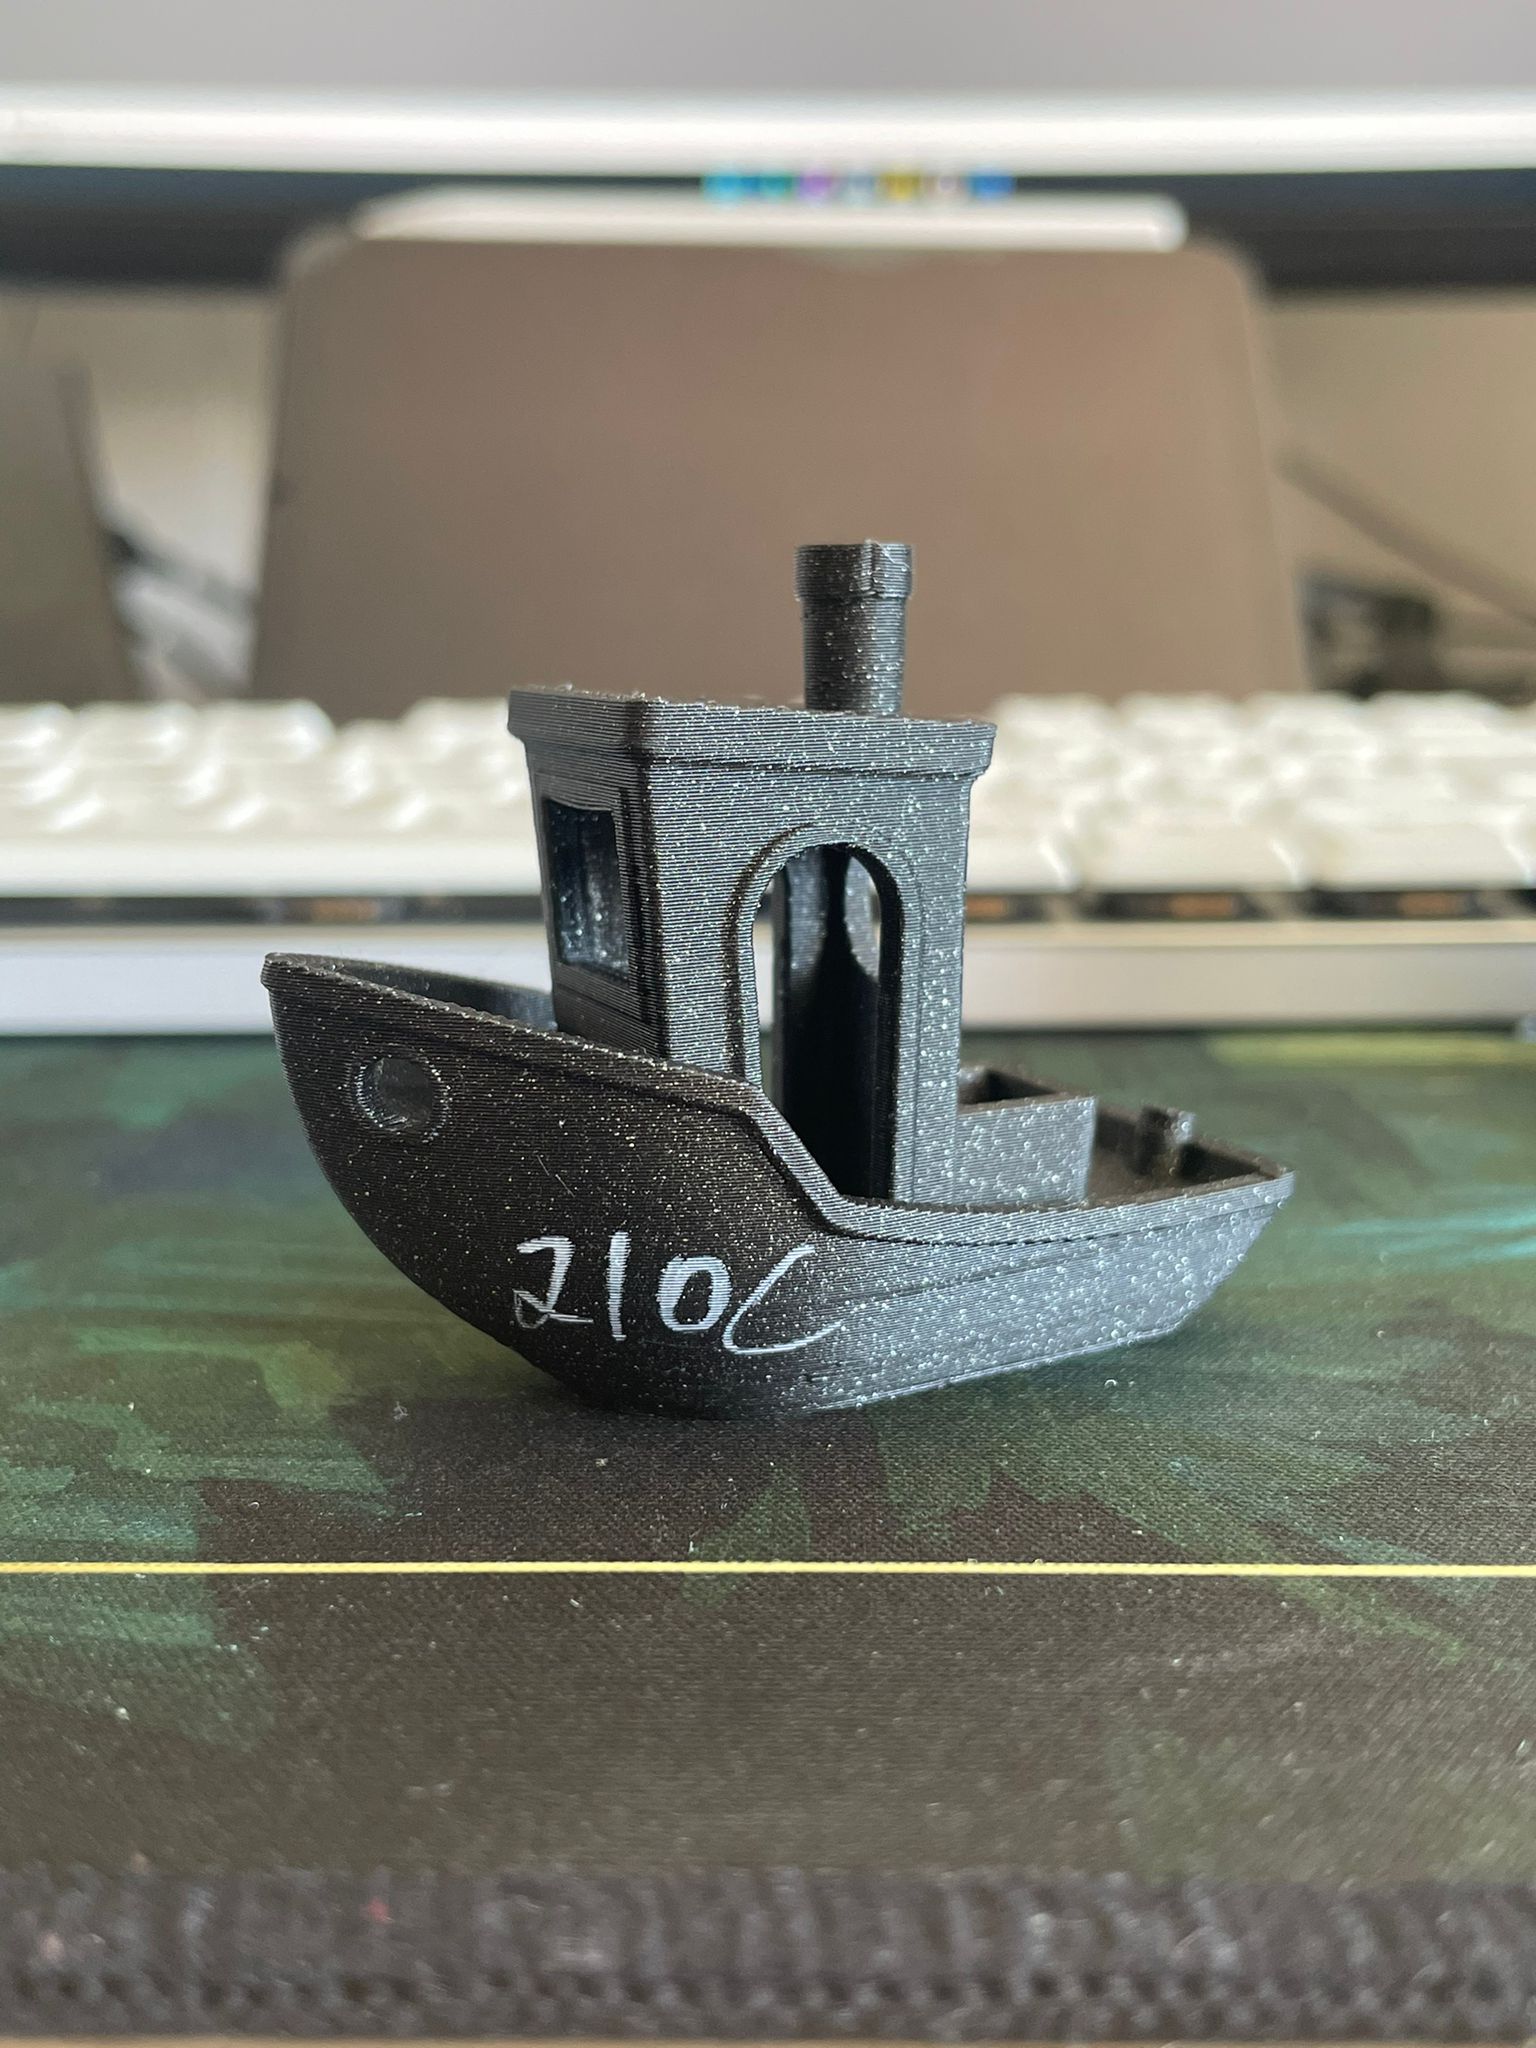
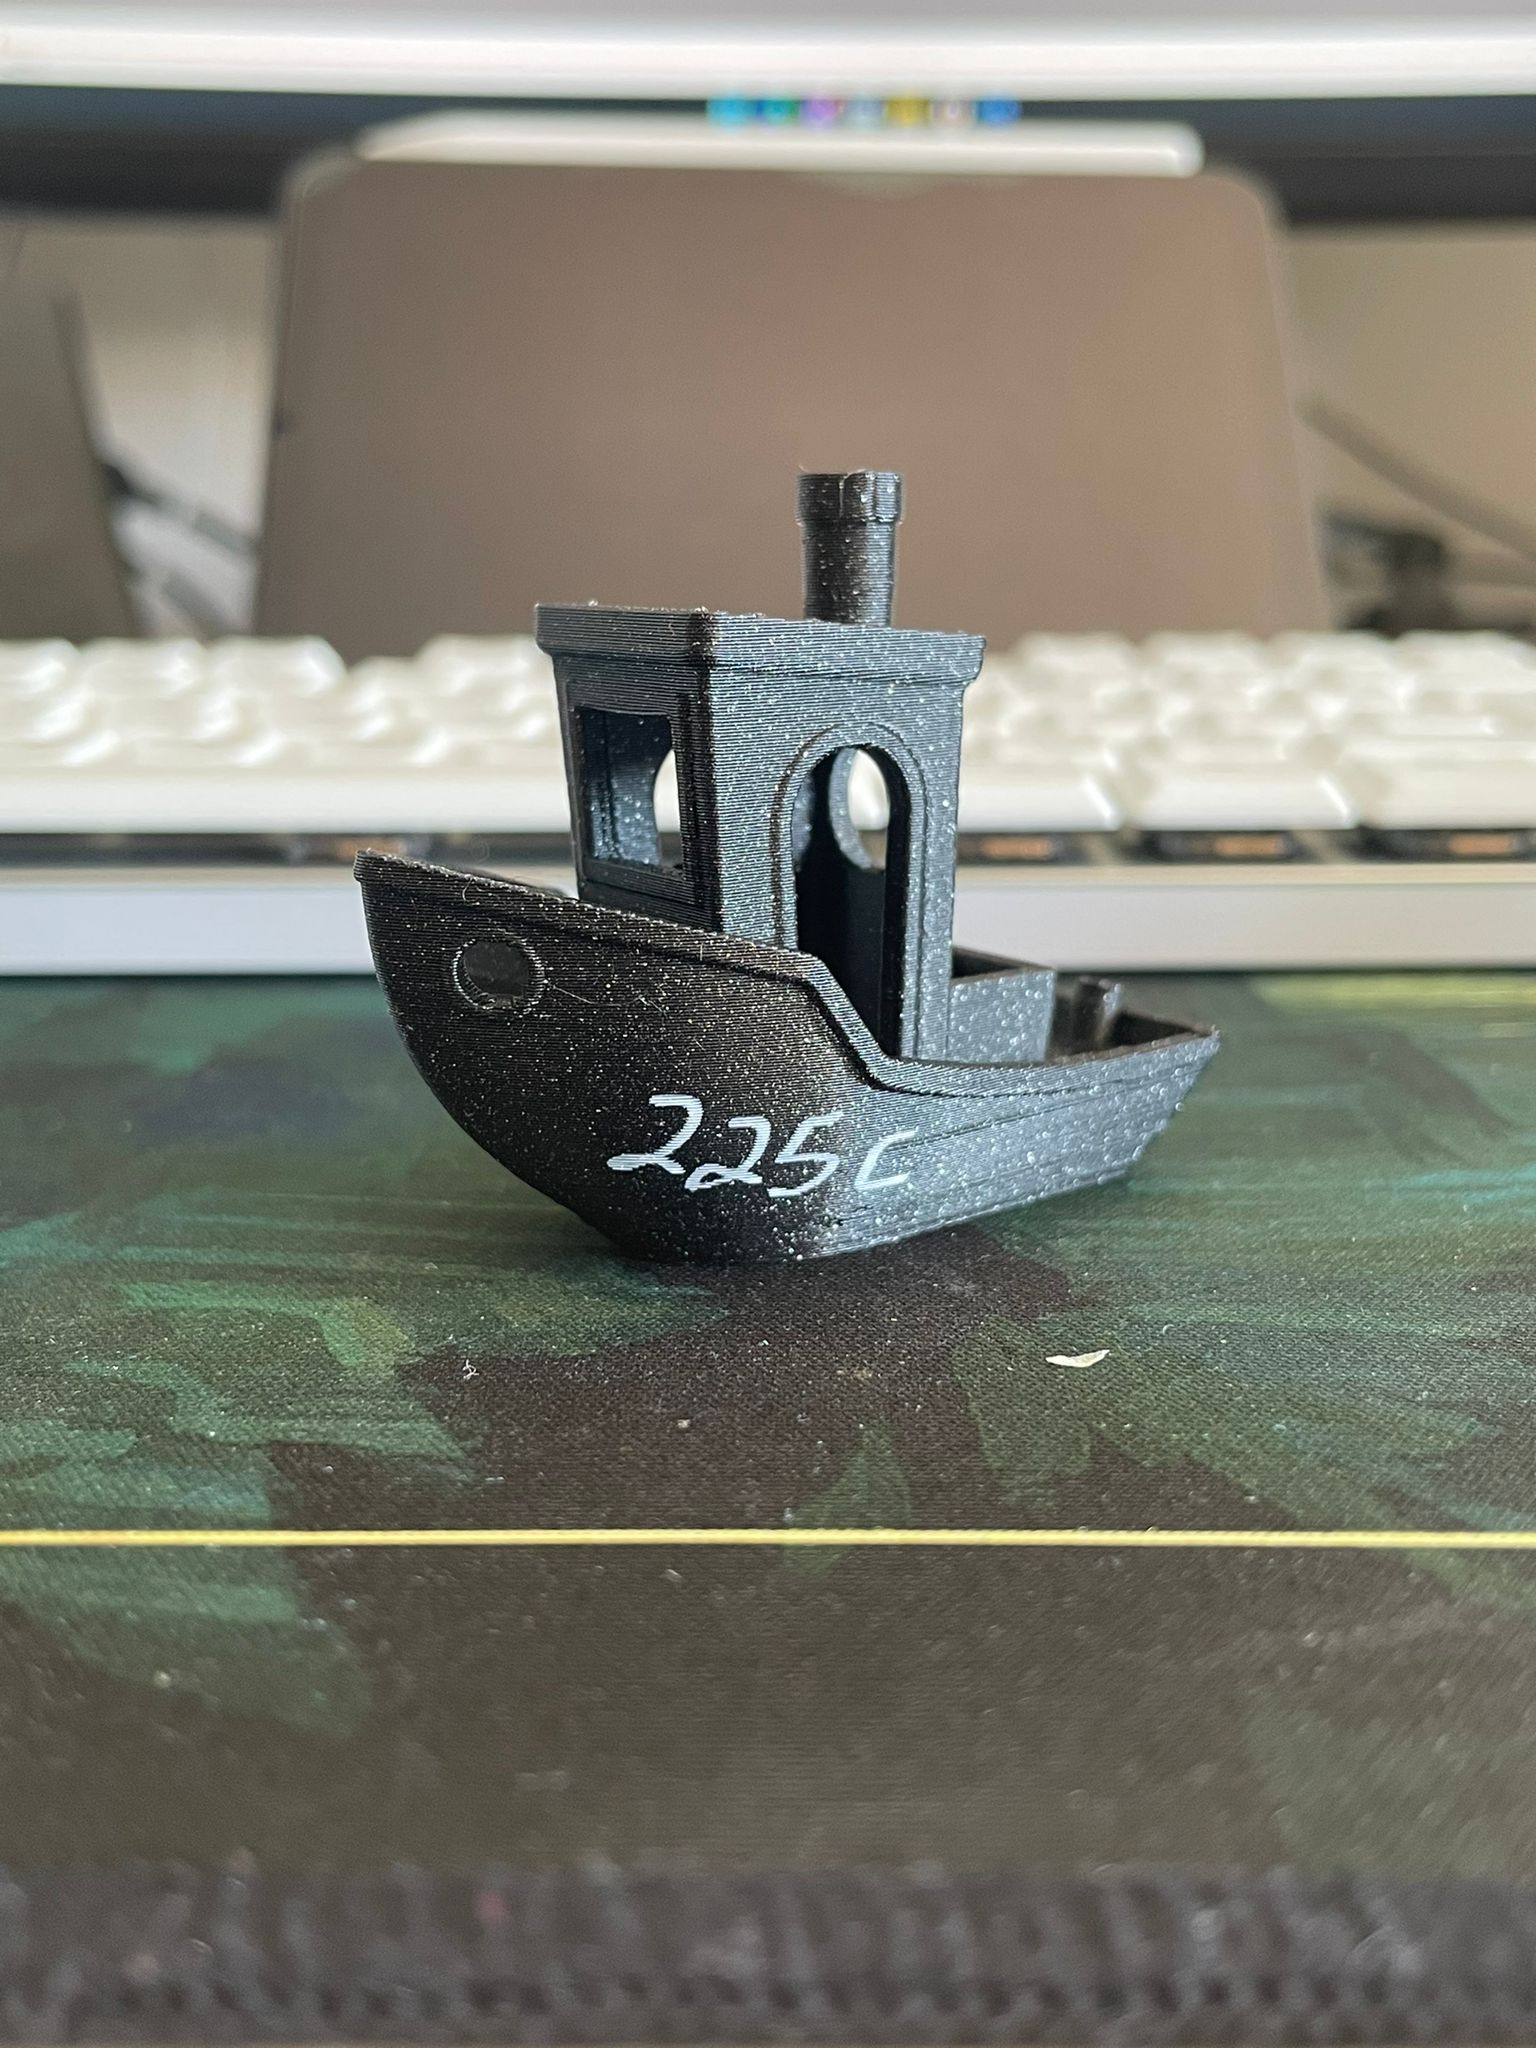
- The OG benchy was the first ever benchy I've printed with everything stock, just after assembling the machine
- The next one is the first benchy I tried with Revo Micro
- The next two are with the tweaks mentioned, I believe I could drop the temps by 5C leaving first layer at 225C and other layers at 220C (would need some testing)
I'm going to swap filaments to see if I can reproduce this and will report back if anything goes differently... Thank you everyone!
RE: Revo Micro installation on my Mini+
Quick Update. Using @pickworthi suggestions from the previous page helped dramatically but still not fully. Below is a before and after.
With the disclaimer that I am new to this and thus still learning......
I would suggest trying to drop the print temperature by a small amount (it seems common practice to move in 5C steps - not sure if system is accurate enough to use smaller increments).
Besides that, small changes to the other three settings in my post could be worth a try. Could be in either direction - so it will be a bit of a pain working towards a good outcome.
RE: Revo Micro installation on my Mini+
Now that the Revo Voron is installed and working in my Trident, I've taken the plunge and moved the Micro over to the Mini. I also swapped out the stock carriage with the antler cooling duct one. There's tuning to do, but the calibration cube came out decent. Oddly, I had to get far deeper into re-squaring the printer than I anticipated.
Mini+ (kit) - Revo Micro | Antler Cooling | WiFi (4.4.0RC1)
RE: Revo Micro installation on my Mini+
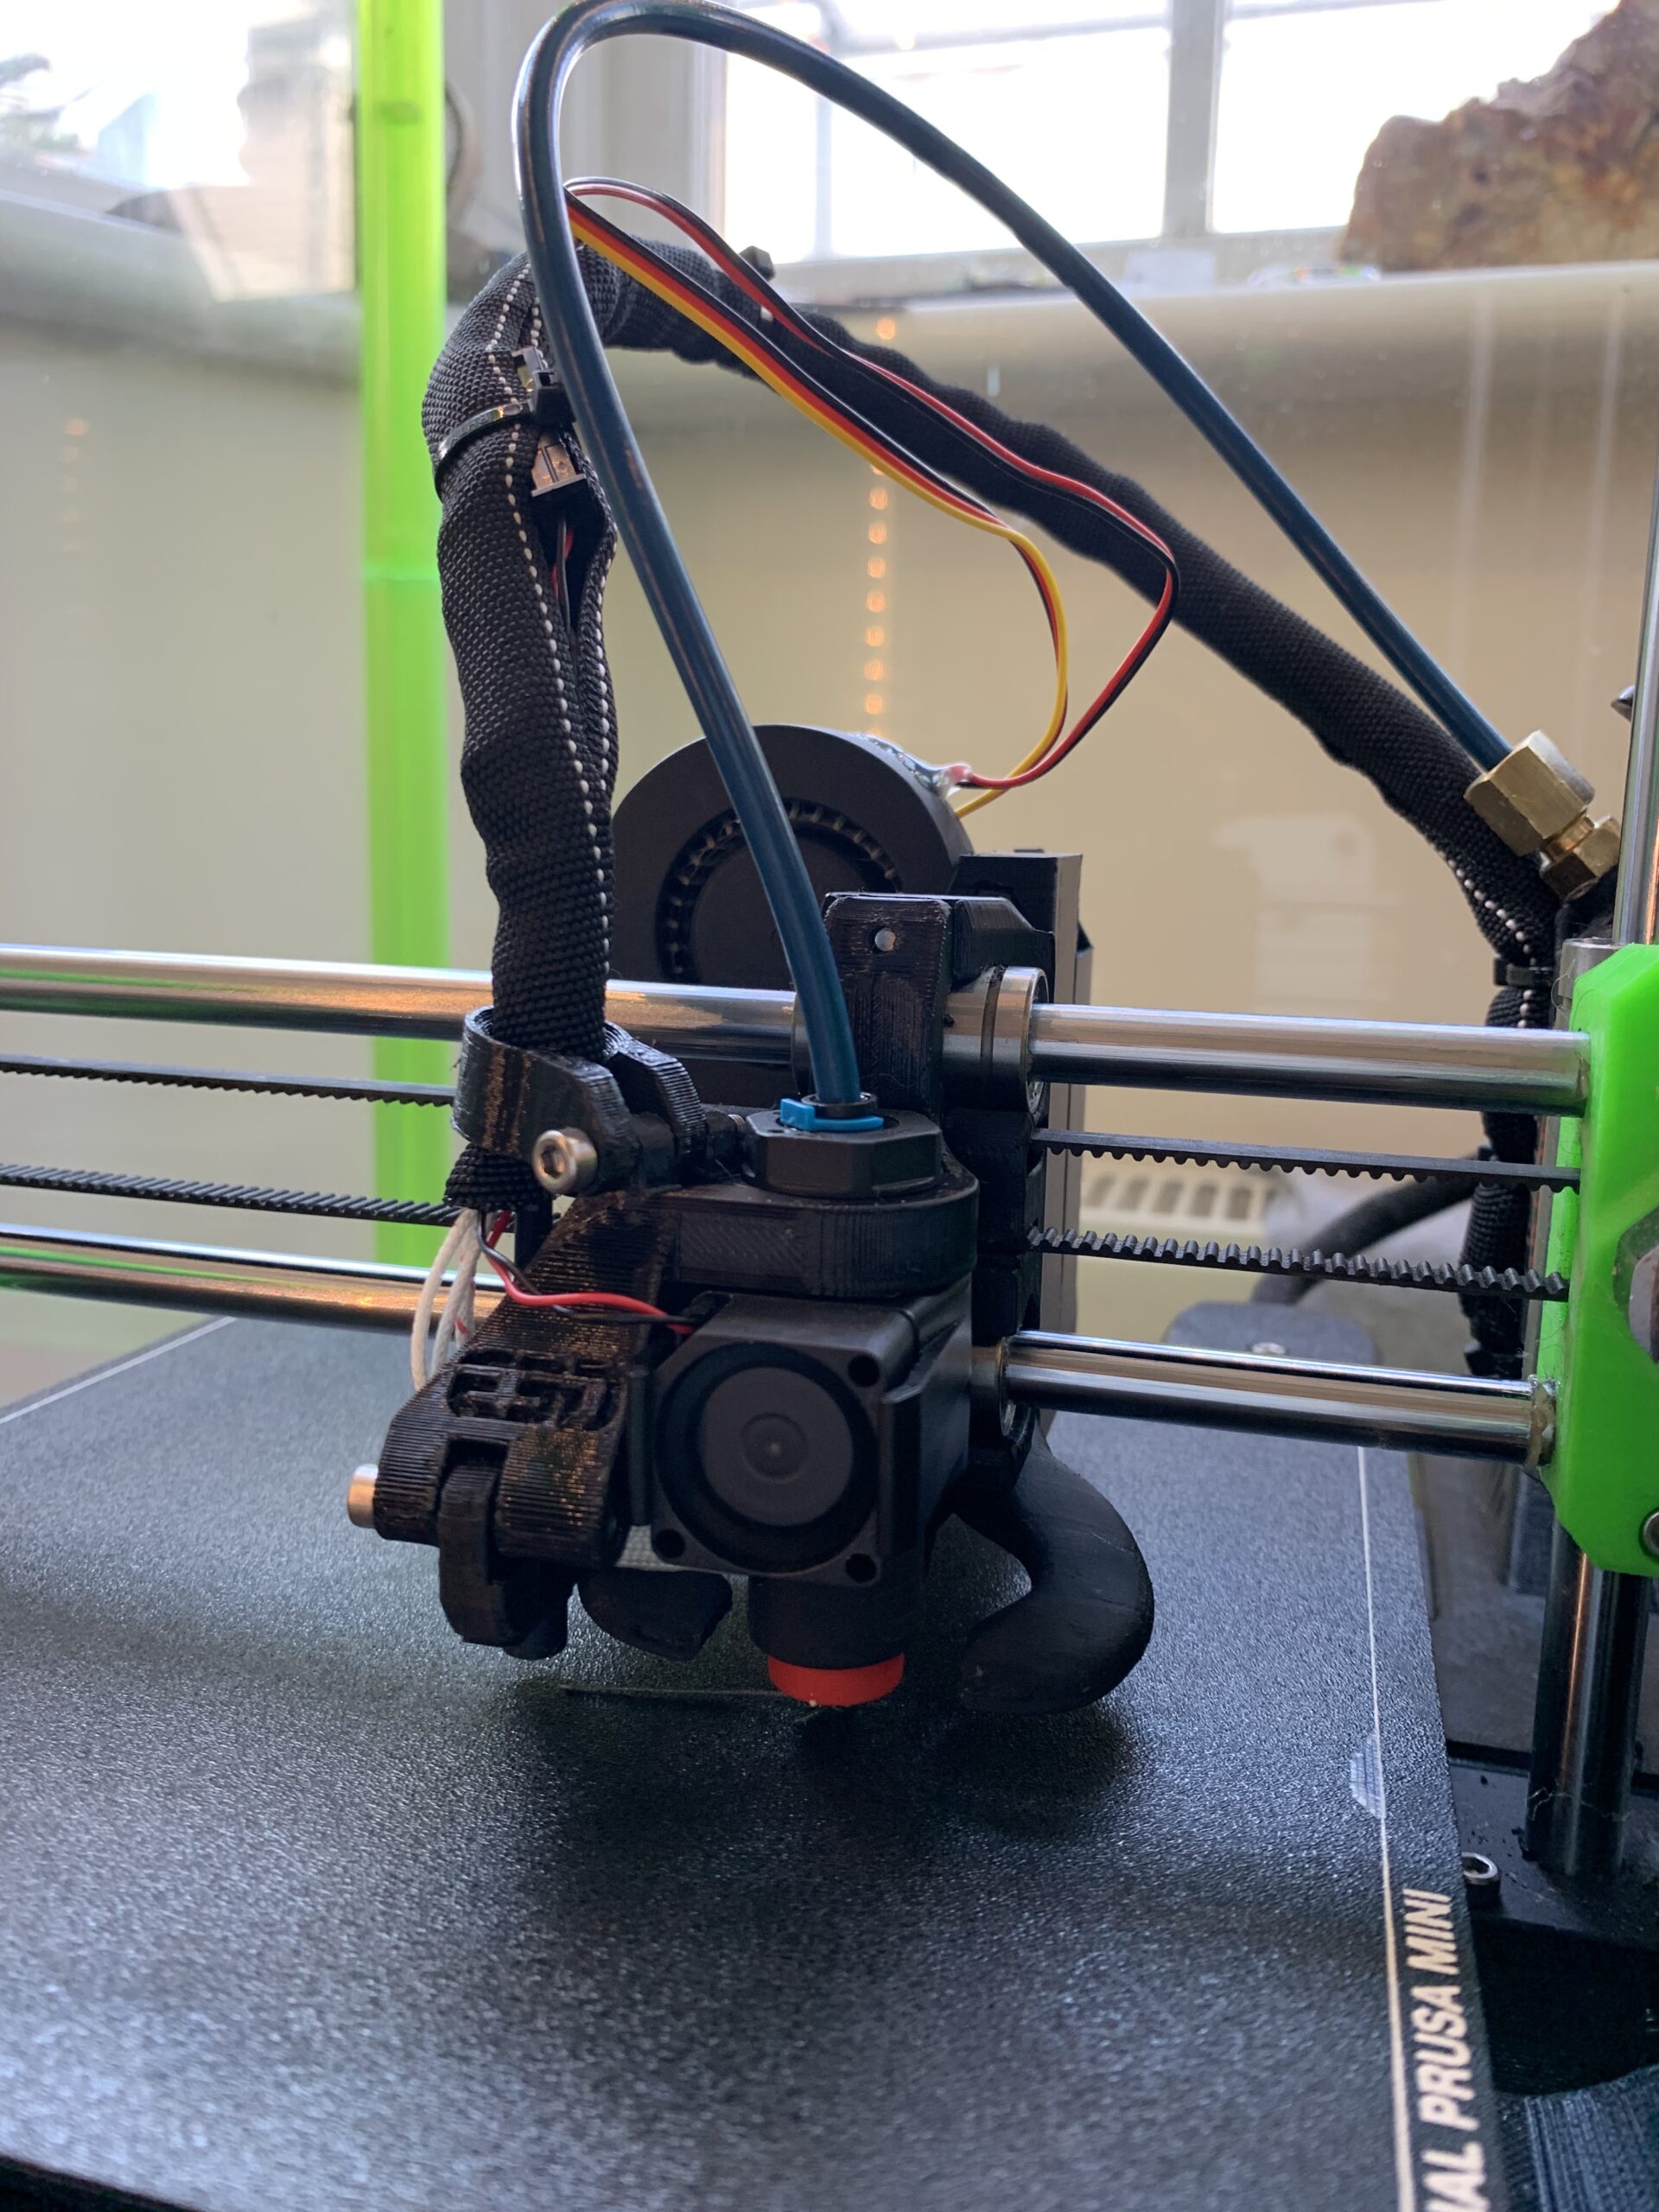
I don't know if other people were just unlucky, but I installed mine a week ago and I've been very happy with it. Very noticeable improvement on the stock hotend. Currently printed PLA and ABS with it, without any issues.
I do have a Bondtech extruder, and a Capricorn Premium XS boden. One day I will find a PC4-M8 fitting and not have a tiny bit of tubing in the extruder end.
RE: Revo Micro installation on my Mini+
One day I will find a PC4-M8 fitting
The day you find one that's push through we'll all be celebrating. They're like unicorns.
Formerly known on this forum as @fuchsr -- https://foxrun3d.com/
RE: Revo Micro installation on my Mini+
I will sell them for trillions!!!!
RE: Revo Micro installation on my Mini+
I don't know if other people were just unlucky, but I installed mine a week ago and I've been very happy with it. Very noticeable improvement on the stock hotend. Currently printed PLA and ABS with it, without any issues.
I do have a Bondtech extruder, and a Capricorn Premium XS boden. One day I will find a PC4-M8 fitting and not have a tiny bit of tubing in the extruder end.
That looks nice 🙂
Any chance of sharing the ducting mount design? I think I can see your print fan is turned 90 degrees - is that for better results or just looks?