RE: Prusa Mini Silicone Bed Leveling Mod
@vizon
DO you have a link to the article? And which update are coming... ?
RE: Prusa Mini Silicone Bed Leveling Mod
Hey there, i just wanted to say thank you !
I had a replacement Bed and axis. It was okayish but not that good (0.12 mm differences) After doing the solicone mod, i can use the whole print plate without any issues !
RE: Prusa Mini Silicone Bed Leveling Mod
While I am waiting for the Silicon Tubing to arrive - I was wondering if the 10mm length are really required to keep the bed stable enough ?
It seems to be much easier to mount with like 8mm length tubing pieces, the screws would then grab the nuts without compressing the heatbed in a single corner to reach the nut, eliminating the risk of potential damage to the bed.
Anybody tried this or has an opinion if/why this is a bad idea ?
RE: Prusa Mini Silicone Bed Leveling Mod
It seems to be much easier to mount with like 8mm length tubing pieces, the screws would then grab the nuts without compressing the heatbed in a single corner to reach the nut, eliminating the risk of potential damage to the bed.
Have there been any reports of the bed being damaged due to flexing during installation? (I was also scared of this) I wound up using a small c-clamp to slightly compress the area inward from the bolt until I could just engage the nut. After engaging all 8 I then tightened them to 7mm, then again to 6mm, each time following the order in the instructions (sides then corners). I don't know if I needed to be so cautious, but it certainly worked.
RE: Prusa Mini Silicone Bed Leveling Mod
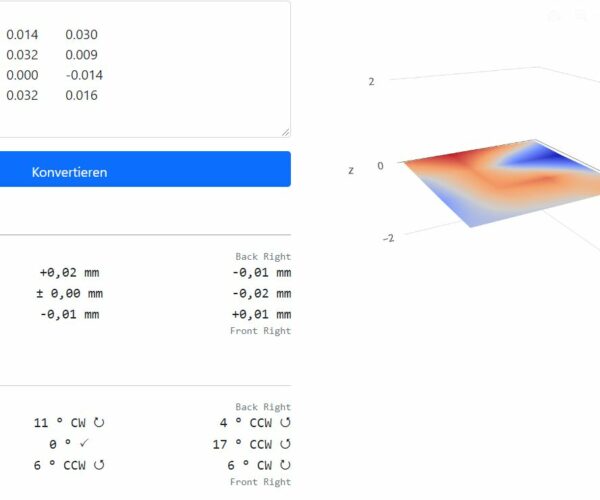
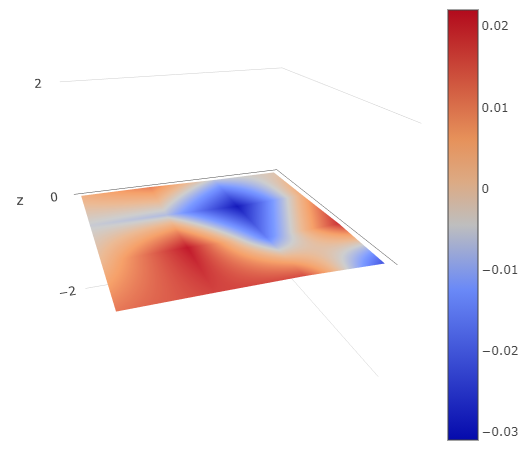
Octoprint is a fine thing, but not essential for leveling the bed. Since the Prusa MINI, unlike the MK3, displays the offset when you drive over the entire bed. So I leveled my bed and it's faster, at least in my opinion, checked everything with Octoprint and everything is perfect and within 0.05mm.
Daniel, Could you share your procedure? How did you get the offset values and did you convert them before putting them in the Prusa Mini G29 converter page? Thanks!
RE: Prusa Mini Silikon Bettnivellierung Mod
Octoprint is a fine thing, but not essential for leveling the bed. Since the Prusa MINI, unlike the MK3, displays the offset when you drive over the entire bed. So I leveled my bed and it's faster, at least in my opinion, checked everything with Octoprint and everything is perfect and within 0.05mm.
Daniel, Could you share your procedure? How did you get the offset values and did you convert them before putting them in the Prusa Mini G29 converter page? Thanks!
It is very easy when you do the bed leveling and move the axes using the printer X/Y menu. You can see how the Z offset changes. Then you need to turn the screws up or rounder, then repeat the leveling and see what changed , then adjust again. This saves you OctoPrint or Pronterface.
RE: Prusa Mini Silicone Bed Leveling Mod
Wasn't quite right what I said, maybe the nozzle offset should be set to zero if the Mini moves to Z1mm or 2mm after leveling it. I am not sure right now.
Take this value as the difference and move the hotend from one corner to the other and see how the Z offset changes when it is, for example, 1.2 mm. You have to turn clockwise to bring this value to 1mm. Do the leveling again and see what has changed. It's a little hard to explain.
RE: Prusa Mini Silicone Bed Leveling Mod
Stop, the value when he goes home, take this Z value as the difference and then bring it to this value when setting, it's been a while.
RE: Prusa Mini Silicone Bed Leveling Mod
i do the mod today at my mini.
What do you think, should I be happy with this or keep tightening the screws a little bit more?
I have always made the adjustment in warm condition ,that was correct or?
Every time i send the g29 command i received new values.
RE: Prusa Mini Silicone Bed Leveling Mod
have a question again... is it important to get all to zero or is the difference important?
RE: Prusa Mini Silicone Bed Leveling Mod
@daniel
Thanks for your explanation, unfortunately it's not entirely clear to me. But my question was just out of curiosity, not necessity, so don't tire yourself unnecessarily trying to explain it further 😉
For the Mod I ended up using Pronterface.
RE: Prusa Mini Silicone Bed Leveling Mod
Thanks everybody, especially Benji for this great guide.
I am happy with the results!
RE: a few questions
looking forward to attempting this mod for my mini's
also ordered parts for the nylon nut loc mod for my mk3s+ but may consider going down the silicon mod route for my mk3 anyone done similar and found it more future proofing ? compared to just using nuts over silicon tubing .
Can I also ask when it comes to the mini and X Y skew. Ive printed the 100 x 100 square and found their not square so how much do you know to shim it and in which direct would you shim it towards to correct the skew.
Ive used a digital level on my X to make sure its at 90 Degrees to my bed.
RE: a few questions
Can I also ask when it comes to the mini and X Y skew. Ive printed the 100 x 100 square and found their not square so how much do you know to shim it and in which direct would you shim it towards to correct the skew.
Trial and error 🙁 It's not an exact science.
Lock nuts?
Is anyone still doing this or is there a better way? If "this is the way" can anyone tell me if a 4mm lock nut height is low profile enough?
RE: Lock nuts?
Is anyone still doing this or is there a better way? If "this is the way" can anyone tell me if a 4mm lock nut height is low profile enough?
Nobody has listed a better way yet, but then I think only a tiny number of Mini owners want to do this so very few people are probably looking for better ways. Also, this was inspired by a mod for the Mk3 and I don't know if anyone found a better way with that.
I think 4mm is just about okay, but I am not measuring it, just looking.
Octoprint on Mini
What Raspberry Pi did you guys have to connect it to the Mini? I have the Zero W and it’s not connecting. Trying to get the bed visualizer working
Pi Zero Not possible
You need a Pi 3B at a minimum, I think Octoprint even stats a Pi Zero wont work. I personally use a Pi 4.
What Raspberry Pi did you guys have to connect it to the Mini? I have the Zero W and it’s not connecting. Trying to get the bed visualizer working
My Mini has: A SuperPINDA + Bondtech Heatbreak + Bondtech Extruder installed
Low profile lock nuts
The only one that it is absolutely required to have a really low profile is the one in the back middle. That one needs to be low profile, the one I'm using is 3mm (the same Amazon one linked from the instructions). The others I'm using these from McMaster-Carr in the US: 18-8 Stainless Steel Nylon-Insert Locknut, M3 x 0.5 mm Thread, 5.5 mm Wide, 4 mm High
One thing to note is that you will have different length screws too, the 16mm M3 screw will catch the nylon on the 3mm nut but for me it wasn't catching on the 4mm one (unless I wanted to really crank it down which defeats the purpose). So for those I went with an 18mm screw. It sticks out a bit but clears everything underneath.
MINI+ with FW:4.3.3, Bondtech IFS Extruder, drilled out PC4-M8 couplers, 1 piece Capricorn bowden.

