Ksd9700
Anyone used a ksd9700 temperature sensor with a fan on here for their enclosure? Just looking at buying a few in a temperature range and note that they are supposedly for contact only, not air - any success stories?
Best Answer by Eef:
PS de ksd9700 reacts also to airtemp (bit slower).
RE: Ksd9700
Ah ok - nobody then. I’ll let you all know how I get on!
RE:
hej, you are fast.
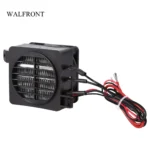
Maybe good to know. I just build a heater using one like this: 
12Volt, 100 Watt. Using a Meanwell PSU,
(Before I had a 220V heater/blower, what stopped blowing (fan broke) and heated up till melting point. I was lucky the enclosure was heated up to about 30 degrees, so the thermostat shut it off. Otherwise I would maybe have not written this message).
Because I do not want a fire. I took some steps:
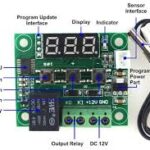
- Added a W1209 thermostatic switch, (what only can do about 10 Amp)
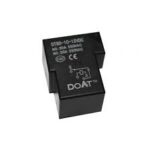
- So added a relay 30 Amp 
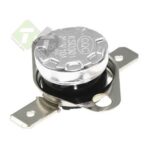
- The Heater can be divided in two parts. So I added the Ksd9700 (65 degrees) to one side. (it can only have 6 AMPs!). If precisely fits inside the enclosure of the heater. Attached with super glue. So as soon it is 65 degrees it turns the heater into a 50 Watt heater.
- I also added a thermic switch. Made a hole in the side of the heater and pushed it in the hole from the inside. Fits. 
It can have 30 AMPS and switches of at 75 Degrees.
Printed a mount for all the stuff and it is now heating the enclosure, upto 23 degrees (so I do not get mintemp errors on the printer). When the printer runs it becomes easily above 30 degrees
The heater takes about 10-20 minutes to get it to about23 degrees Celsius.
And I sleep well because of the triple safety.
We will do what we have always done. We will find hope in the impossible.
RE: Ksd9700
PS de ksd9700 reacts also to airtemp (bit slower).
We will do what we have always done. We will find hope in the impossible.
RE:
Thanks @eef much appreciated. Like your heater idea, but to be honest I simply can’t consider something like that. I’m going to hook up a 5015 fan to a lower temp ksd9700 and then a 120mm high flow one to to another sensor set 5 degrees above.
well, that is the plan anyway, got to get print the bits first and then fit my quick release PSU and screen kits before modding the enclosure with the fans 😁
RE:
NB: For ventilation: I open the door 🙂
PS Why not 2 x W1209. They can switch about 6-10 Amp and set precisely for cooling/heating as you want.
On printables are nice enclosures. Put them on top of the enclosure.
We will do what we have always done. We will find hope in the impossible.
RE: Ksd9700
If my plan does not work then this is going to be the backup - thanks for the info unfortunately I cannot open the door - the whole setup is in my garage which can get a bit draughty (hence the enclosure, but I’ll need a fan).
definitely going to look at those control boards though - no idea regarding current draw though because I’m a mechanical engineer not electrical (or klanky not sparky)
NB: For ventilation: I open the door 🙂
PS Why not 2 x W1209. They can switch about 6-10 Amp and set precisely for cooling/heating as you want.
On printables are nice enclosures. Put them on top of the enclosure.
RE:
My smart enclosure uses a BME688, which is placed right in front of the filtration fan. It is designed for air temperature measurement (as well as volatile organic compounds — it's the sensor that autostarts the filtration system at the right speed when it's needed). This positioning provides for maximum temperature homogeneity in the case. Follow the link in the first sentence (to this forum) to copy my build.
(It would be more than welcome if you modded the electronics of my project to heat up the air in the enclosure, although I'm not super confident the ESP32 would be very happy past 50 degrees Celsius inside. ESPHome supports PID control so it's totally doable.)
RE: Ksd9700
Thanks for the reply - I’ve been following your make but unfortunately got completely out of my depth with the electronics side, looks good though and you certainly went through it to get everything working (RIP one camera unit). I’ll have a look at the bme688 amd see if I can understand what it does 🙂