Z-lift useful by default?
Hello,
What are people's thoughts on z-lift (z-hop) being enabled by default on in PrusaSlicer? I'm used to z-lift being enabled by default many years ago when I started with a Robo 3D R1. I was using Slic3r at the time, and I know that it's the underpinning of PrusaSlicer. I've noticed z-lift enabled by default on PS profiles for my MK3S+. Other slicers, such as S3D don't enable Z-lift by default, and so other printers of mine don't generally do this. I suppose it can reduce stringing in some circumstances, but of course, it adds time, and potentially even some minor accuracy concerns if the Z-steppers are having issues.
My prints are coming out perfectly with default settings. However, I'm curious what the schools of thought are here. Thanks for sharing!
If your prints are coming out perfectly, I would suggest that you don't change anything...
Z hop is intended to prevent scratching if the nozzle passes over a previously printed section of a layer, and to reduce the chances of a print collision, if there is warping, or over extrusion... and the nozzle collides with the edge of the print, as the nozzle moves during the printing process.
I generally use Z hop, for all filaments except TPU.
A large Z Hop, can noticeably increase print time. I generally use 0.4mm
If you are losing positional accuracy through Z hops, you probably have a problem elsewhere...
Some printers are more fussy about layer height than others... and 'Golden Numbers' were recommended for these printers to reduce the chances of microstepping errors, Prusa printers don't seem to have this issue in normal situations. if you are using a non prusa printer, you might be wise to use a Z Hop value, that is also a 'Golden Number'
Golden Numbers, were a factor of the number of steps that a stepper motor needed to make a full revolution, and the diameter of the toothed wheel (or pitch of the leadscrew)used drive the belt or carriage , so they may be different if for example the motor has 16 tooth wheels or 20 tooth wheels, or the leadscrew pitch changes between printers
regards Joan
I try to make safe suggestions,You should understand the context and ensure you are happy that they are safe before attempting to apply my suggestions, what you do, is YOUR responsibility.Location Halifax UK
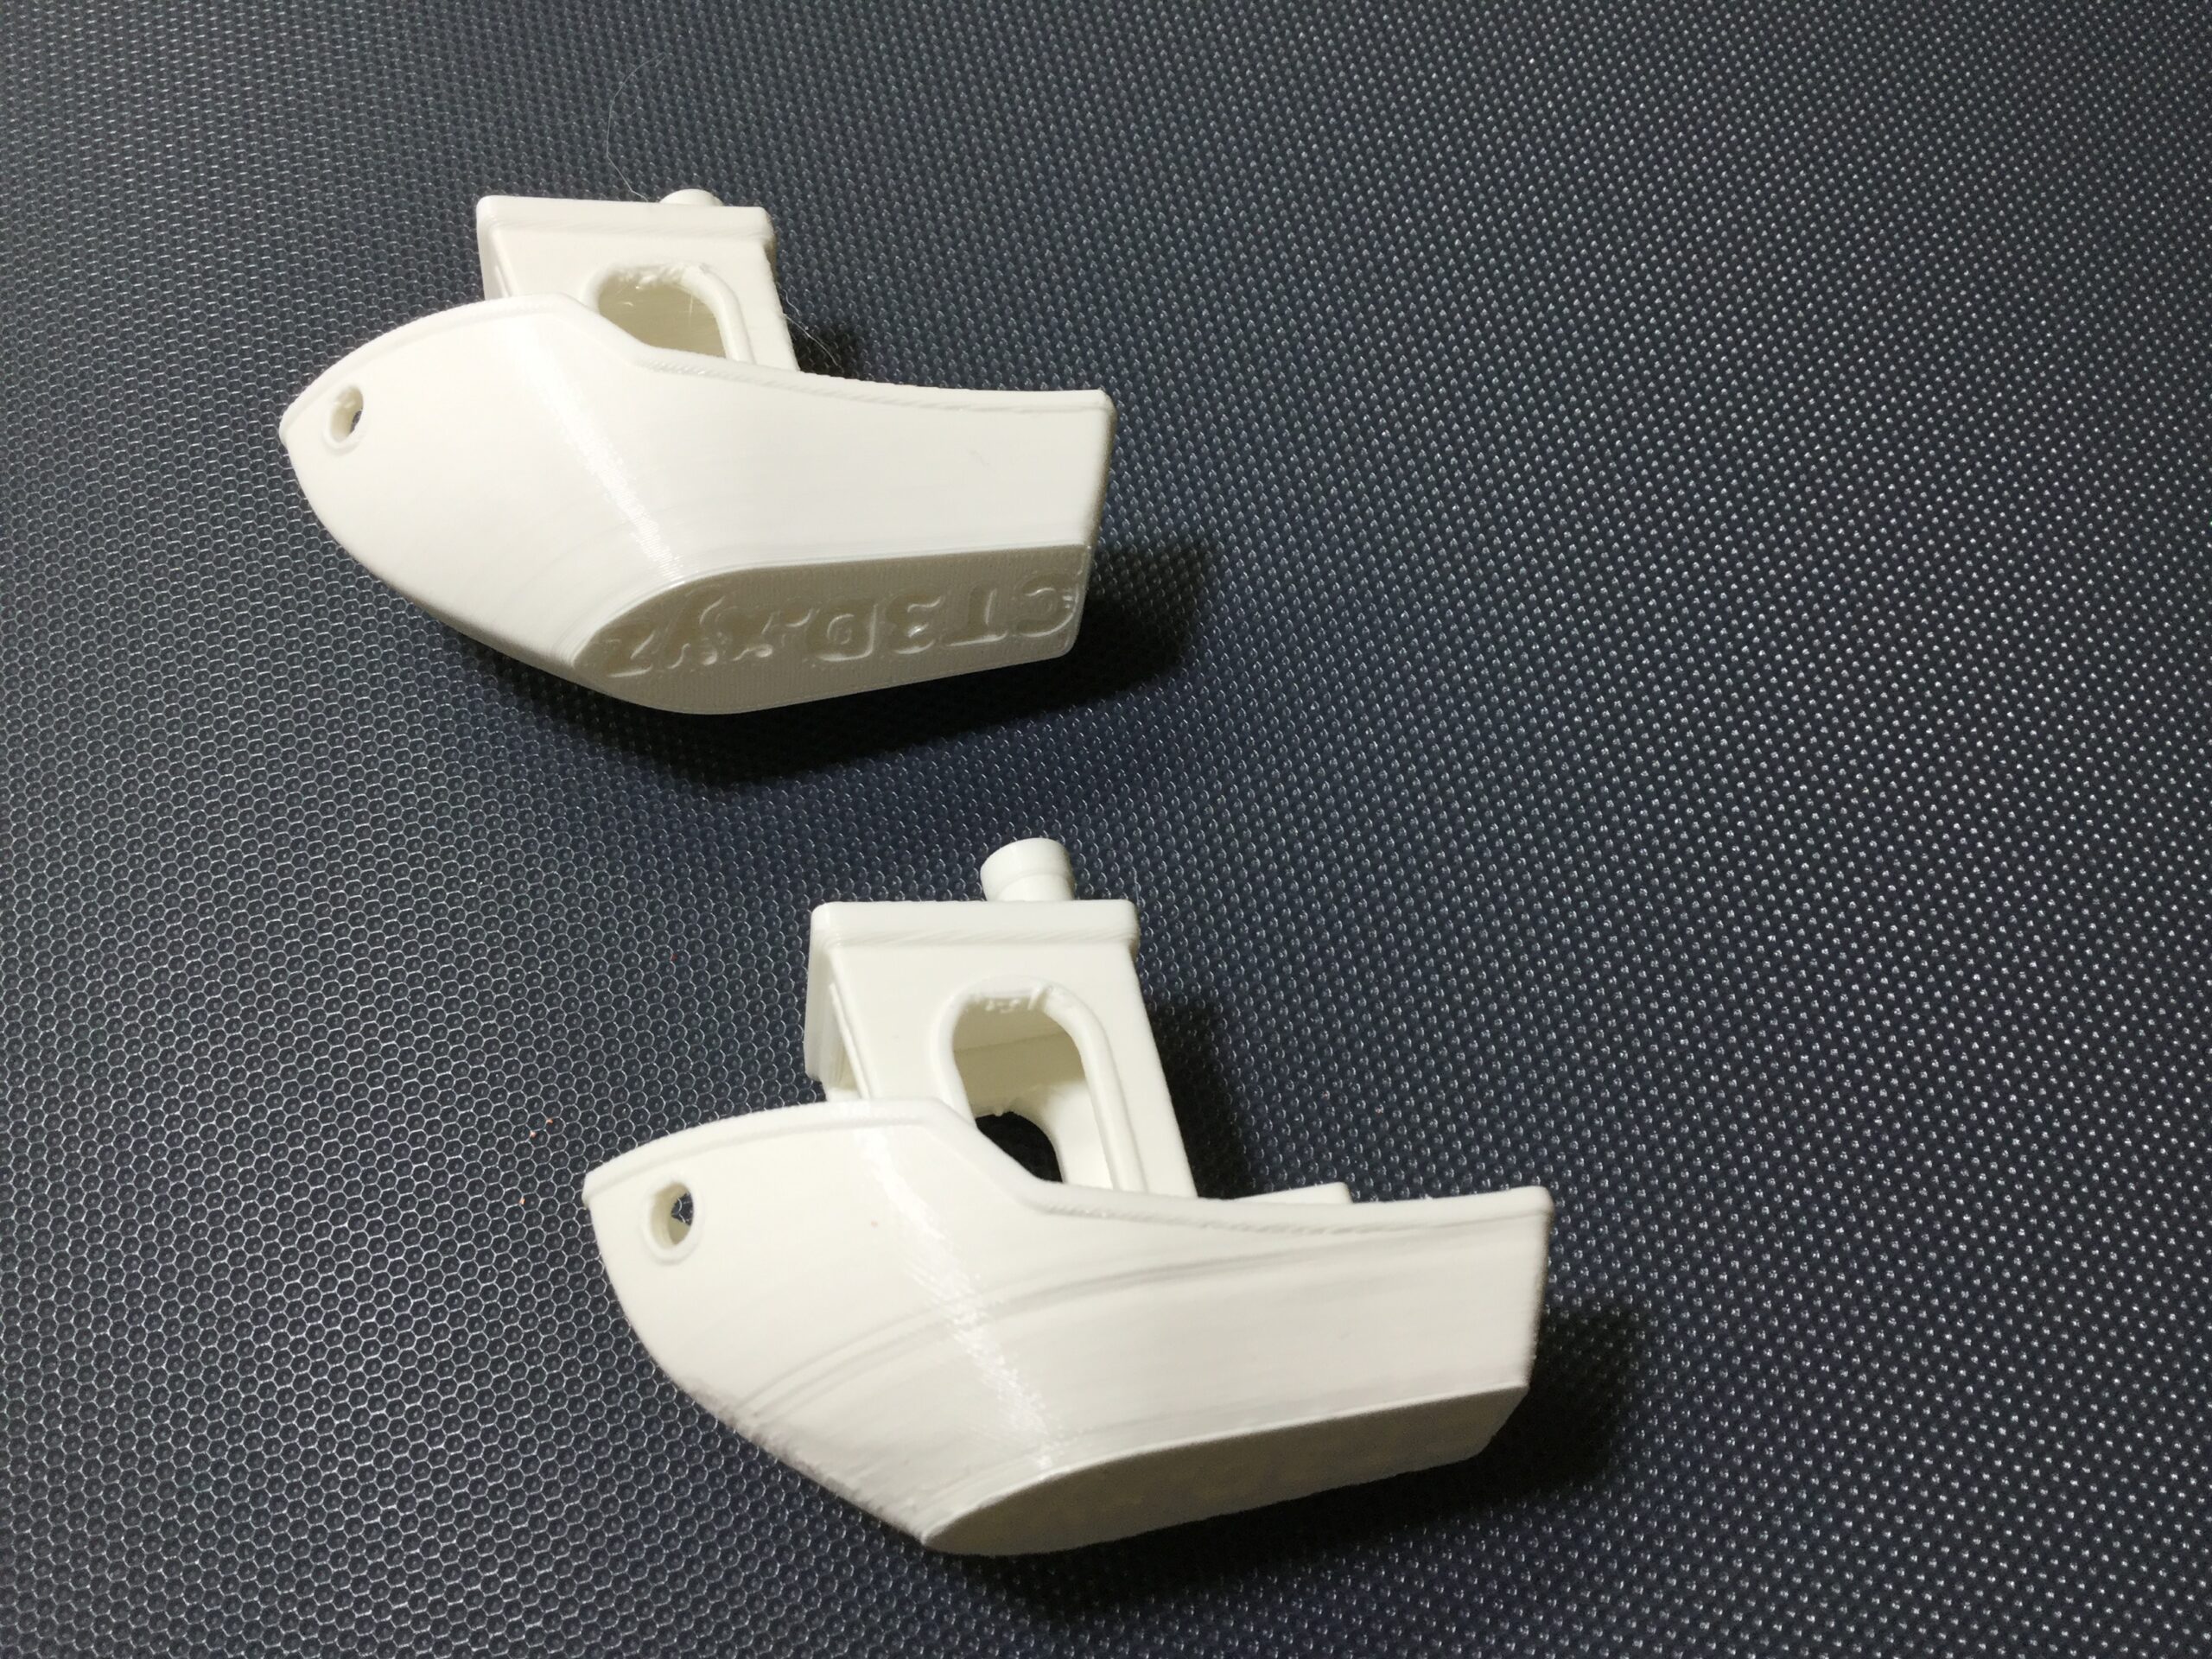
Benchies
The upper benchy is printed with z-hop at the default value and the lower benchy is printed with z-hop set to 0. I found this persuasive: leave z-hop at the default value.
Mk3S+,SL1S
Z-hop zero when printing PETG
Z-hop helps avoiding detachment of parts from the build plate as @joantabb explains.
When printing PETG I normally set Z-Hop to zero to minimize stringing as the nozzle is wiped when traveling over the surface. PETG sticks very well to the build plate and here the chance of detachment is small.
Have a look at my models on Printables.com 😉
Thanks!
Thanks all for the replies. It falls in line with what I've been thinking, but it's great to hear experience. @sylviatrilling, your photographs are a fantastic confirmation. I've left the settings as default. The MK3S+'s positional accuracy seems phenomenal, no print quality issues, so I've left it on.
Filament settings matter
Thanks all for the replies. It falls in line with what I've been thinking, but it's great to hear experience. @sylviatrilling, your photographs are a fantastic confirmation. I've left the settings as default. The MK3S+'s positional accuracy seems phenomenal, no print quality issues, so I've left it on.
As others have noted, z-lift/z-hop is intended to raise the nozzle slightly on XY moves to avoid having any nozzle ooze scar top surfaces. It can also help with minor print lifting or nozzle oozing catching and releasing the part.
I found that properly calibrating my extrusion multiplier for each filament greatly reduced over extrusions which in turn resulted in far less nozzle oozing. In many cases, I was able to disable z-lift completely (set to 0). In practice, I leave it at 0.4mm just to provide a bit of clearance. If you are experiencing fine stringing, z-lift can actually aggravate it. Again, extrusion multiplier calibration eliminates this problem.
If you're only using filaments for which you have a well-tuned preset, you probably don't need to adjust it.
Notes on dealing with fine stringing and calibration here.