Why is this slicing corrupted
Hi!
I designed two simple "pipes" in FreeCAD and when I load the exported files to the slicer and make the slice I got a cracked and maybe so to say a corrupted slice.
I can't figure out why are the crack and corruption there when I zoom in, but if I print it out the corruption are still there.
In the attached file are a screen shoot, the FreeCAD project file and also the exported files for slicing.
What do I do wrong?
Am I doing something wrong in FreeCAD or maube something in my settings in PrucaSlicer app?
I have an Ender3 V2 printer with a 0.4mm nozzle and I use PETG filament.
How can I make a smooth slice and print?
Any suggestion pls. I would really appreciate.
Thank you.
RE: Why is this slicing corrupted
Zip compreee your files before attaching them. I don't see an attachment.
Formerly known on this forum as @fuchsr -- https://foxrun3d.com/
RE:
Sorry for my failure to upload the attachment.
for some reason I can not upload the .zip file.
I have the option "Attache file: [Choose file]" and if I select my file and press "Add Replay" but the file is not attached.
The .zip file is around 200Kb.
RE: Why is this slicing corrupted
Try again. I believe you have to have a minimum number of posts to attach things.
We need a copy of your prusa slicer project file, so get the reported problem, then use File>Save Project as to save a PS 3mf file. The 3mf contains the files used but more importantly all the settings you are slicing with. Add that and whatever pics you want into the zip and try again. Also make sure it is .zip. I think the forum can have issues with other archive types too.
RE: Why is this slicing corrupted
I will try here again...
I put everything into the .zip file.
btw. until the upload is not solved, here is a screenshot about the slice.
You can clearly see the crack line in the slice.
This is not the only one crack line.
I need to print a pipe system where water and alcohol should flow, but the printed part's are not sealing good enough.
I assume my design is a pipe with a wall thickness of 0.8mm and a radius of 6mm and 25mm long.
Nothing complicated.
When I slicing and print it it is upward oriented on the printer bed.
So the printer will print circles from the bed through the Z axis up to 25mm.
Nozzle diameter is 0.4mm.
Nozzle temp is 230C
Layer height is 0.2mm but tried also with 0.1mm, almost no diference.
Printing speed is 60mm/S.
Filament is PETG.
Other setups are all default setups.
Version of PS is 2.7.2

RE: Why is this slicing corrupted
First of all the slice is not 'corrupt'. Its normal. What you are seeing is the seam. Every printed island on every printed layer (except for certain very specific models printed in something called vase mode) will have a seam. This is the point where a perimeter loop starts and ends.
As the extrusion is not a point source, ie it has width the lines generally don't touch when planned. The slice preview is just showing that fact. If you turn on the show seams option from the slice preview key it places a small white dot in those locations to highlight that fact.
In normal printing seams are unavoidable. Slicers generally try to hide them in corners but this part is circular so no corners to hide them in. You can change the position of seams using the Print Settings>Layers and Perimeters>Seam Position setting. You can also use the seam painting tool to define locations to put a seam. You WILL have a seam. Some people like to randomise the placement, others like them in nice lines to make post processing easier (ie sanding).
https://help.prusa3d.com/article/seam-painting_168620 and https://help.prusa3d.com/article/seam-position_151069 are the 2 knowledge base articles about seam options and placement.
On a real print how noticeable it is depends on many factors. You can tune your printer and the settings to minimise it but it will still be there. Thins like retraction amounts and speeds, wiping etc. There are many many setting to adjust that can effect it. And once its done for one filament it wont necessarily be the same for a different filament.
Bowden printers like the ender generally have more problems with seams due to the nature of their filament feed paths and generally need more tuning. YMMV
The seam could present as a bulge (so slightly too much filament extruded) or a small gap in the perimeter (so slightly not enough material extruded).
btw you should turn up the output quality on your cad software as those stl files are very low and should be much smoother. I dont use fusion but I know it has settings for that.
Also In the interest of long term health I should also point out that printed parts are not generally recommended around food and drink(you mentioned water and alcohol). No matter the material they are printed in (even if food safe) the small ridges and microgaps are ideal for breeding bacteria. The general cleaning methods of high temperature doesn't work so well with printed parts.
Here is a model with a 'ok' tuned seam as an example. You can see the seam running down the middle of the left hand object on its side.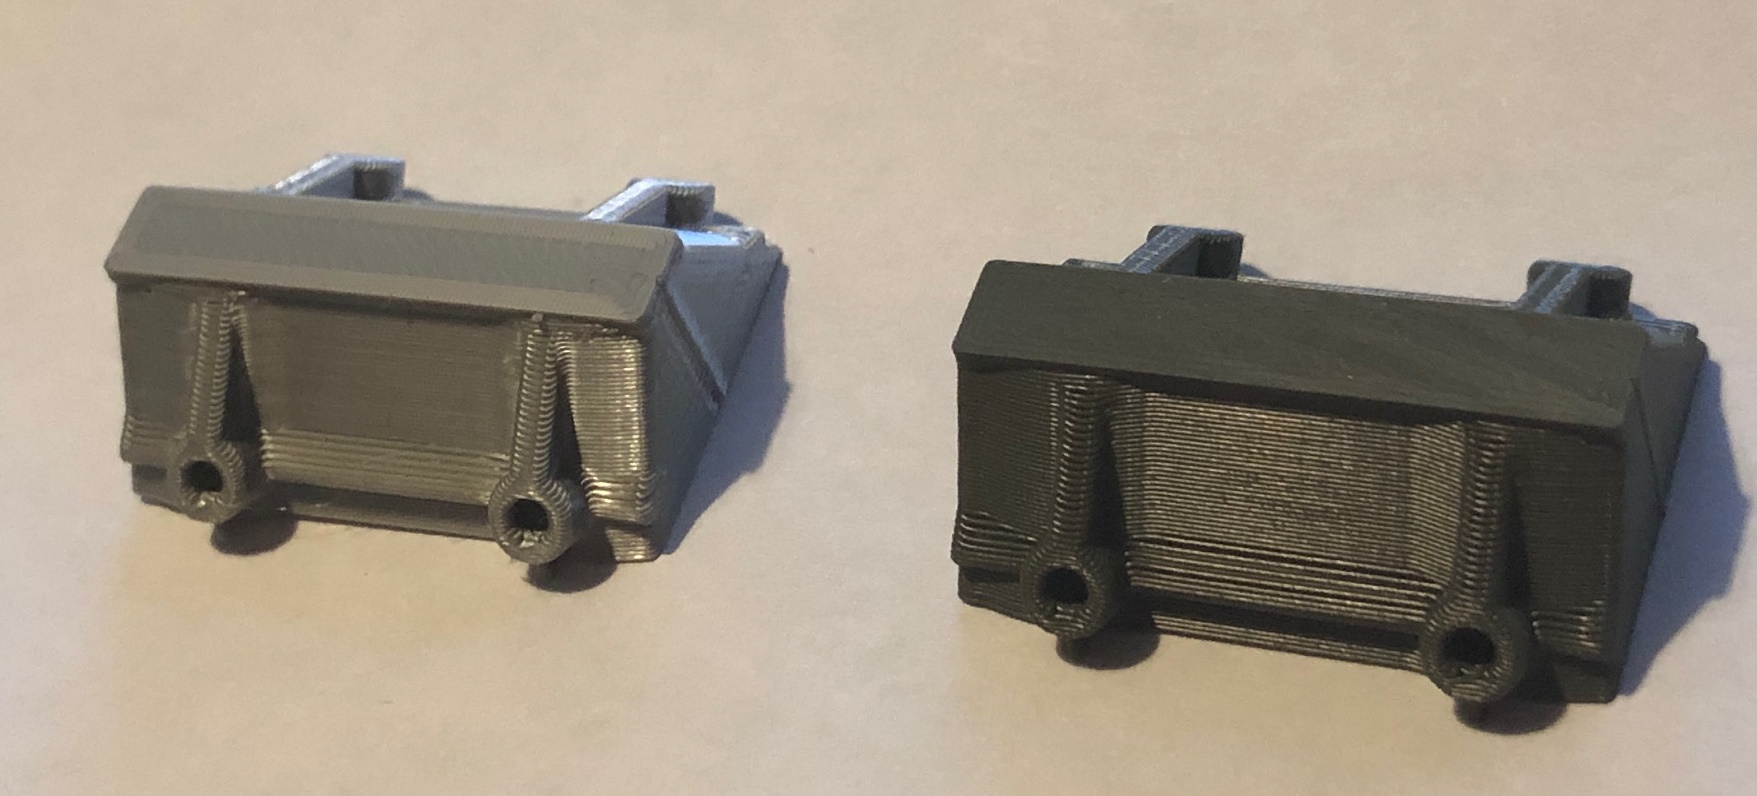
... and if you are printing watertight parts see these blog posts:
https://blog.prusa3d.com/watertight-3d-printing-pt1-vases-cups-and-other-open-models_48949/
https://blog.prusa3d.com/watertight-3d-printing-part-2_53638/
Cheerio,
RE: Why is this slicing corrupted
Guy's thank you so much for such of nice explanation, I really appreciate your time and effort to help me understand what is going on.
I'm new in this field and my major goal why I stepped into the 3D printing world is cos I'm always working on some experimental project's
in my home lab for DIY devices and never will use for drinking from my models or eating etc.
I'm familiar with FreeCAD only, for now. It is a free software and has parametric modeling capability which I prefer.
I din't know does the stl file can be exported in more or less quality. This is something new to me.
I have some questions to this:
1. In my version of FreeCAD I found how to setup the STL file. There is a "Maximum mesh deviation" settings and it is set to 0.10mm.
Is this a correct settings or I should set it so some other number?
2. I have a Creality Ender3 v2 printer which I really love, is there any preferred "Maximum mesh deviation"
setup or how can I determine which setup is the best form my printer?
3. How do you checked the quality of my stl file?
Thank's for any info.
My best regards.
There is no 'right' accuracy figure. STLs reduce the part to its surface polygons, in many cases they can be very big but in tight curves they might be very small...
What many of us do is to design and prototype at a low level of accuracy, test-printing with minimum perimeters and fill until the part approaches workable condition when the accuracy and the amount of filament used are bumped up to a practical level. Each part has different accuracy requirements.
Cheerio,