RE: Stacking - How to set up in PrusaSlicer?
Found that playing with extrusion width you can strenghten or relaxing the separation process.
Due to print time I#m using layer height 0.3mm. The gap between parts also 0,3mm.
And using a part which is 5.1mm high (multilple of 0,3mm, then there are no rounding effect in slicing).
Extrusion with 0.55mm.
BTW, I uploaded some stacked versions to thingiverse, https://www.thingiverse.com/thing:4268628
But those models are for european DIN A4 format and the so called 888 perforation.
(tw0 holes from sheet edge, two from other sheet edge using a office perforator with 888 mark)
Maybe it helps somebody .
Today I#m gonna start my first 25 stack - hope it works.
RE: Stacking - How to set up in PrusaSlicer?
I've had luck by just adding a box object in in PrusaSlicer. Transofrm it to .4mm wide, and adjust the height to match your printed object. Then just enable thin wall detection. As you can see in the screenshot below it just adds a single line of filament between each object, which doesn't noticeably impact separability. You could probably get away with just a small dot even instead of a whole line, but this works fine.

RE: Stacking - How to set up in PrusaSlicer?
@jmsaltzman
Curious how many cylinders you're using. Just one? I tried this with a couple 0.5mm cylinders, but still got the empty layer warning. Perhaps 0.5mm is just too small? I'll try the 1mm.
RE: Stacking - How to set up in PrusaSlicer?
@casey-p
Thanks for the screenshot, makes it totally clear. I'm going to try this, perhaps enabling thin wall is the key.
RE: Stacking - How to set up in PrusaSlicer?
@casey-p
Man I tried this and STILL getting the empty layer warning. What the heck am I doing wrong??
RE: Stacking - How to set up in PrusaSlicer?
Try exporting the plate as an STL, then re-importing. That will merge it all into a single file, which worked for me. I just did a single .25mmx5mm box like my screenshot shows, and as long as I export and then open the file it works fine.
RE: Stacking - How to set up in PrusaSlicer?
I also had one cylinder, diameter 0,5mm already inserted in the CAD.
And curiosity - the 25 stack sliced well, the 5 stack also, but the 3 stack refuses to detect this cylinder material and throws an error.
Tried to change to 0,7mm, still an error.
Tried to move the xy position (in case its any rounding issur - still an error.
For getting forward, I took the 5stack, cut it using prusaslicer and it could be sliced.
Maybe a bug?
But as far as I can say - one vertical cylinder is enough. A tiny dip anywhere in the otherwise empty layer - but Prusaslicer must decide to detect and slice it.
RE: Stacking - How to set up in PrusaSlicer?
OK I'm getting awesome results right now in PETG with .25mm layers and .2mm separation between models in Z, using a 1mm diameter cylinder "pin" which helps it slice without issue. You can see the green bits peeking through between the visors, behind the left temple nub:
RE: Stacking - How to set up in PrusaSlicer?
@casey-p
Man I tried this and STILL getting the empty layer warning. What the heck am I doing wrong??
Looks like you did load individual objects instead of individual parts of one object.
RE: Stacking - How to set up in PrusaSlicer?
@jmsaltzman: congrats!
Could you please poet, how both sides of one part looks like after separating?
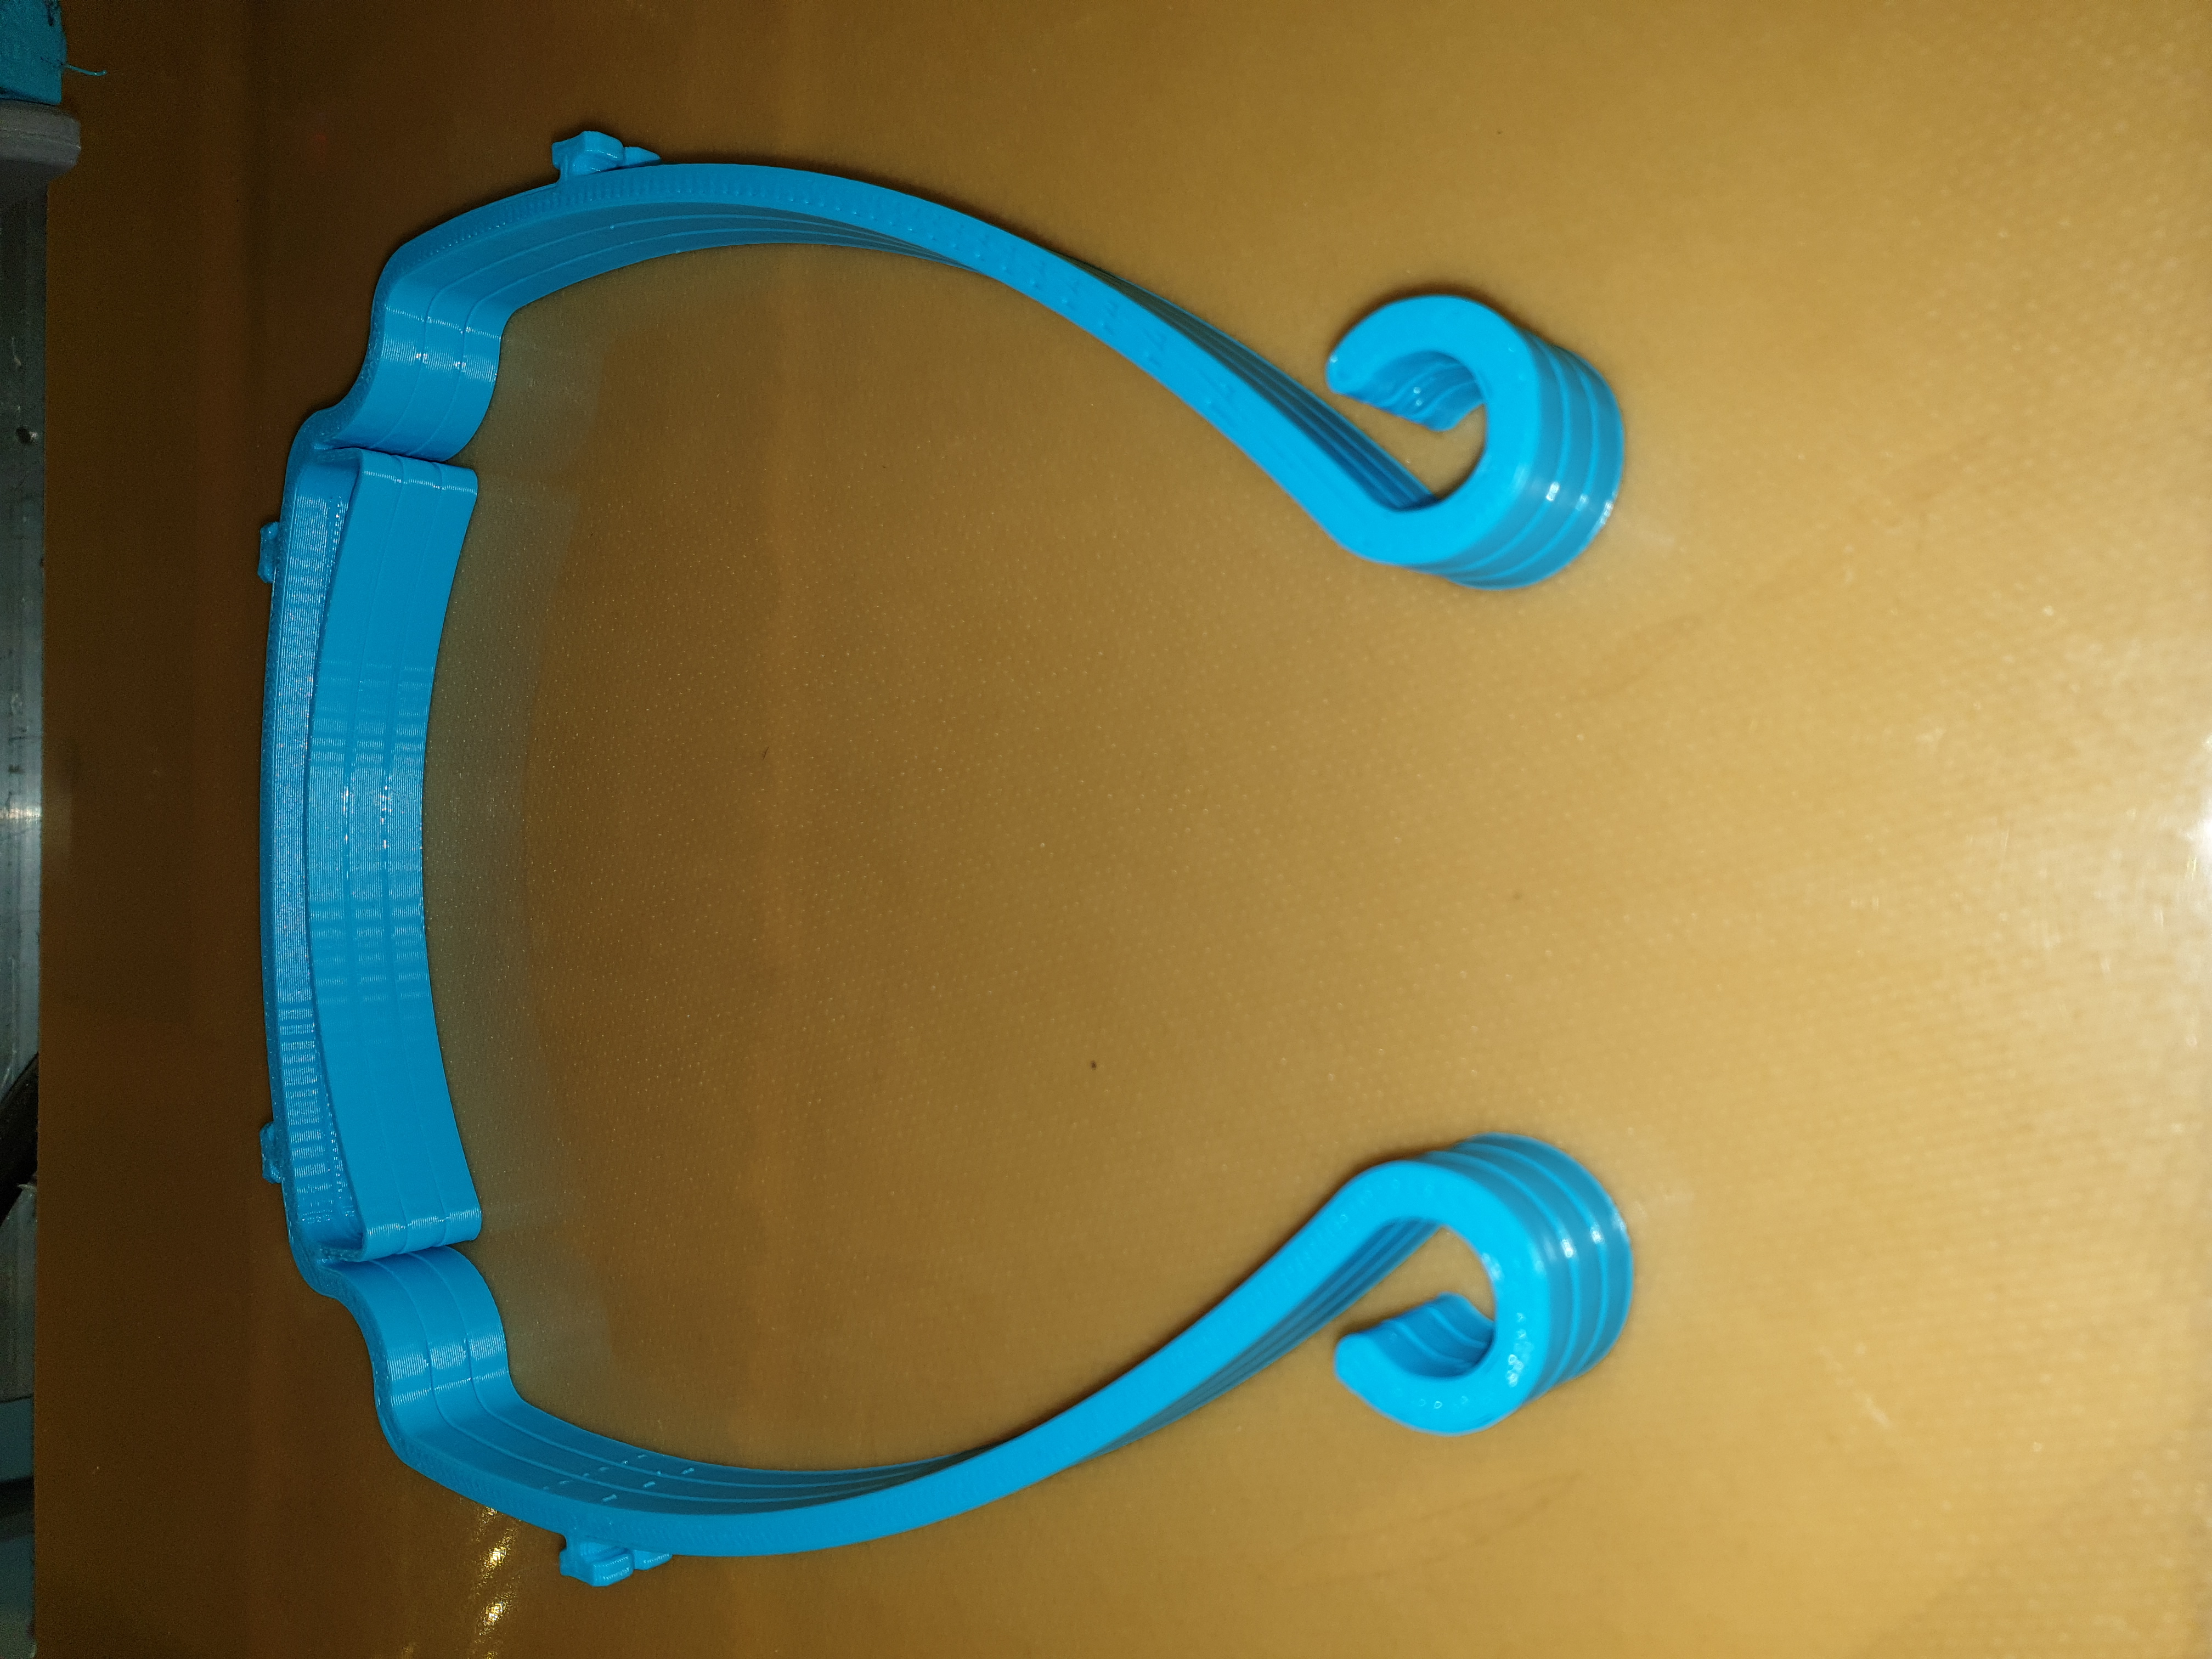
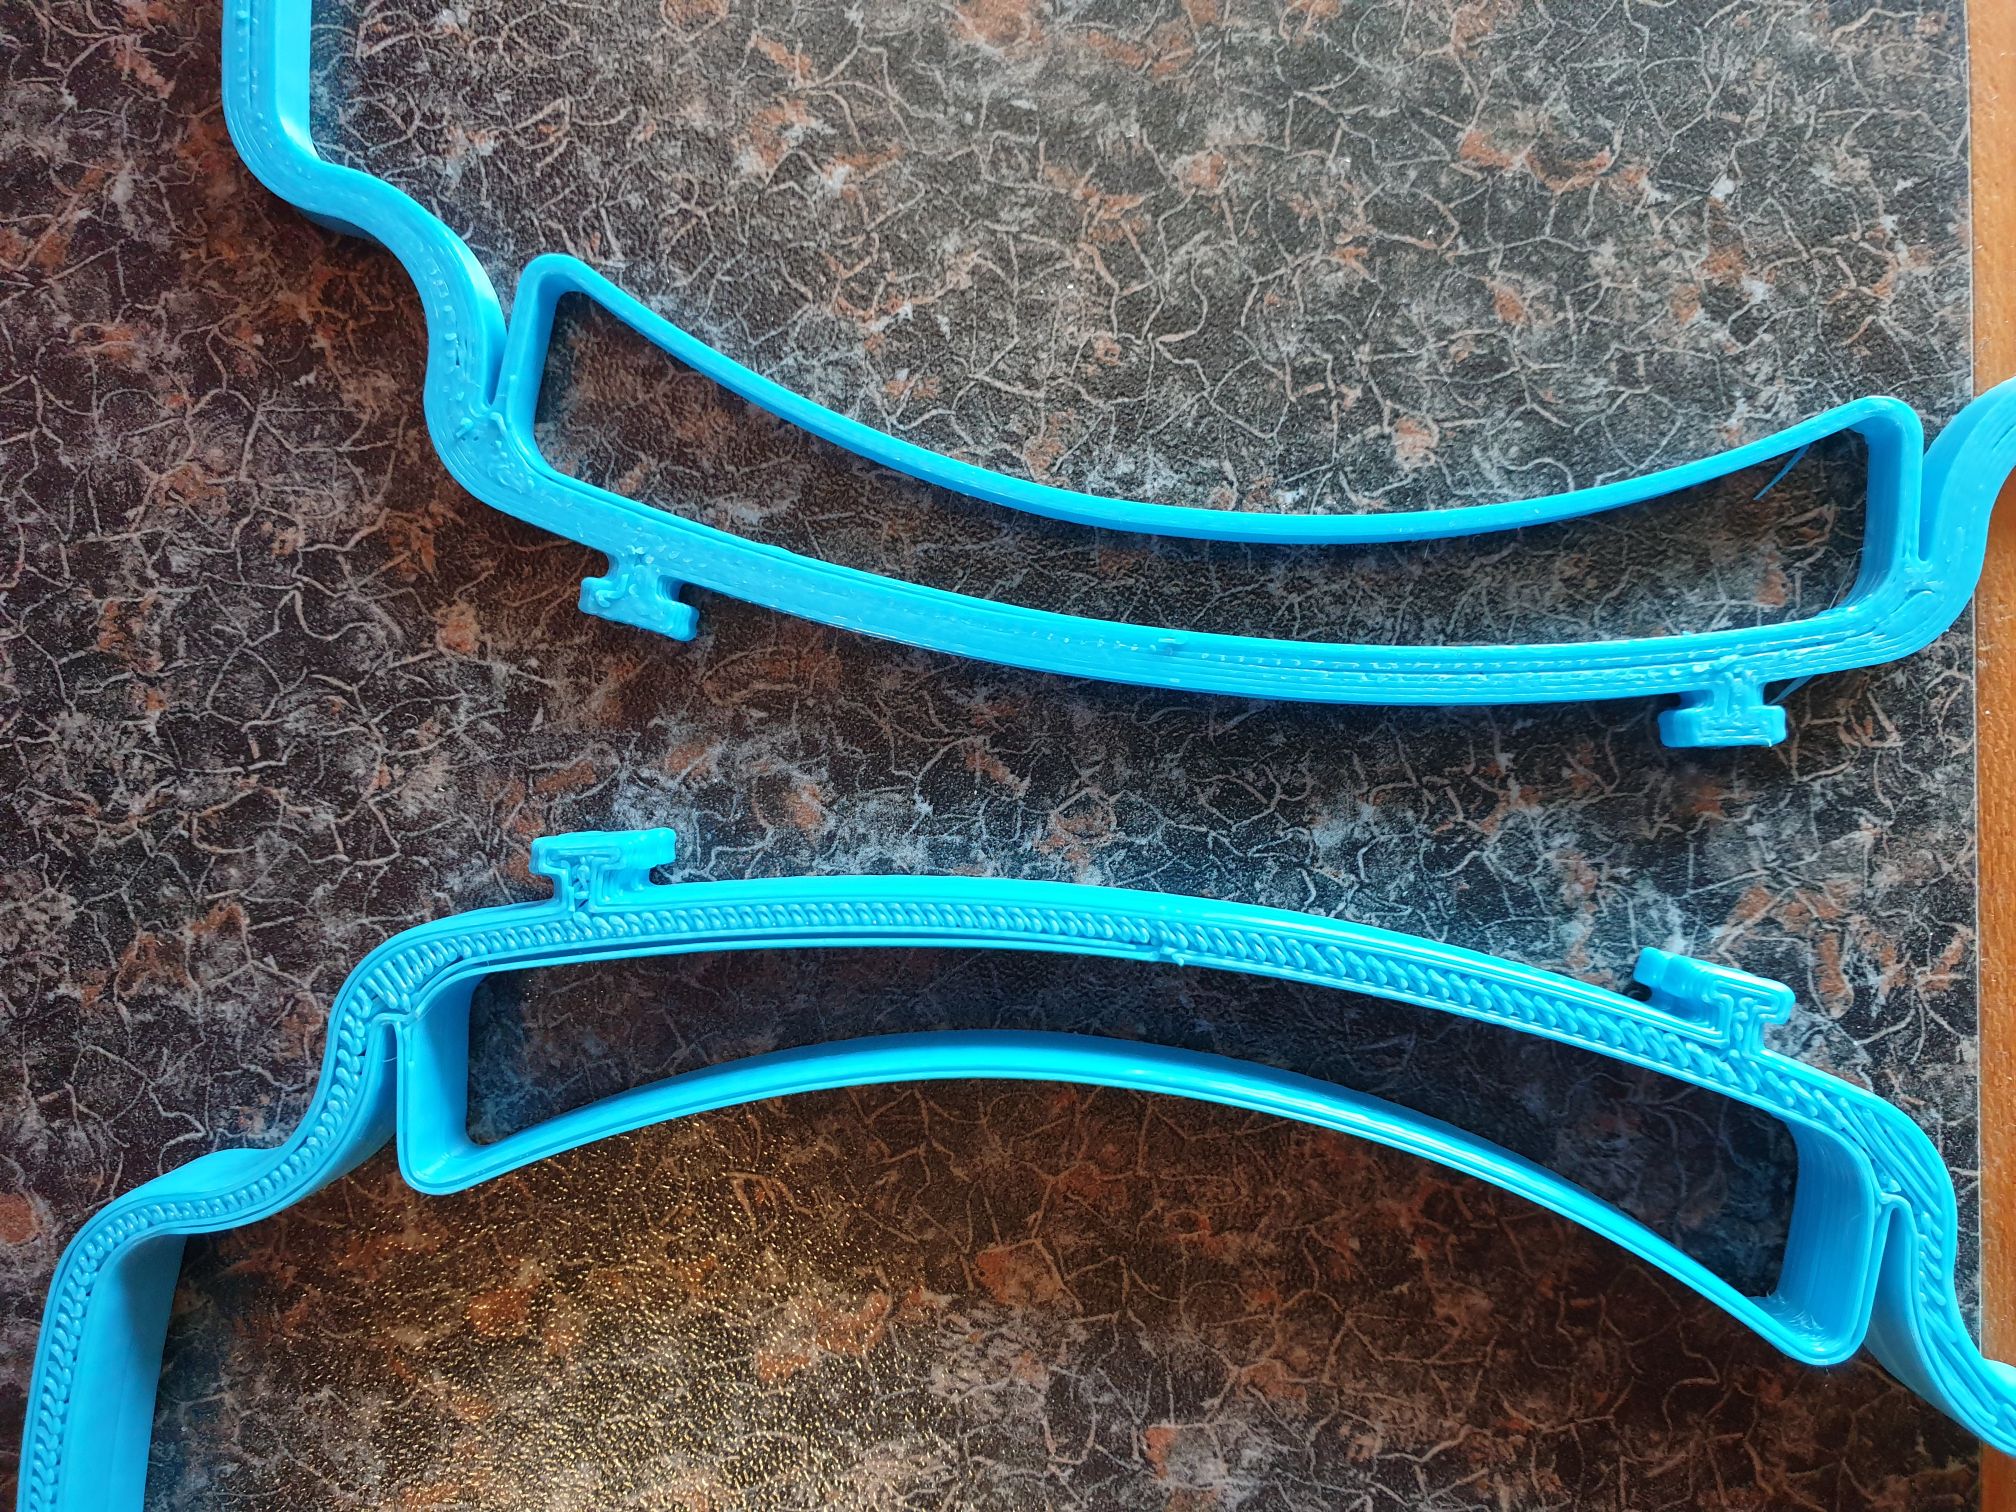
Here are mine. First is a stack of 3,
Second image: Top side is quite good, bottom side is not too bad, maybe acceptable.
RE: Stacking - How to set up in PrusaSlicer?
@georgecoffindesing: do you have "thin wall detection" checked?
and the pin diameter must probably be more the extrusion with.
RE: Stacking - How to set up in PrusaSlicer?
@jbaader
That's why I remodeled it (at least the North American 6-hole version). I uploaded it just now.
RE: Stacking - How to set up in PrusaSlicer?
Also of note about this design: my spouse is a physician and said the visor being closed is a key feature. The open variant prints better of course, but is less protective.
RE: Stacking - How to set up in PrusaSlicer?
Two important points to help on the stack:
1 - turn on Printing Settings > Layers and Perimeters > Quality > Detect Bridging Perimeters.
This will improve a lot the quality besides reduce the problems.
2 - the created shape to act as a support need to be under the external perimeters, at least, and respect bridge distances.
Another thing (perhaps better in another topic, so I'll do not be long here): not all face shield models are good only for be fast to produce. They have to allow the use of a transparent polymer with 240 mm in width, which has to be at approx. 35 mm from the forehead. They also must have more than 10 mm at height. This must be the width of the installed rubber too. Remember: who will use, will do it for a long time, several hours. It must be comfortable to be usable.
RE: Stacking - How to set up in PrusaSlicer?
I used a modeled object to constraint the support creation to be between two stacked objects, acting as a support enforcer.
The PrusaSlicer extends the support creation to the sides and also to the bed, even if I did add there a support blocker.
Is there some way to turn off this? To keep the support inside the object limits?
Thanks.
RE: Stacking - How to set up in PrusaSlicer?
@gutenberg-
Thanks, I do have Detect Bridging Perimeters on, and the nail/spike/cylinder is just another 3D object. Again, my stacking is working really well. In my latest version, I'm keeping all layers at .25mm-- first layer, subsequent layers, and separation between models. Since the model is 5mm tall, each one slices the same, and tho bottom surface of the top model in the stack is as good as the second one.
As for specs on the design, I'm not designing my own, but made a minor edit of the NIH (US National Institutes of Health) approved design. So the 10mm thickness and other details aren't a concern.
RE: Stacking - How to set up in PrusaSlicer?
Something that I've found on a stacked model that has an air layer between vertically stacked parts (with pins between), that I can make it easier to pull apart by increasing the cooling fan speed for bridging. But careful with that setting. On my first attempt I set it to 100% cooling fan for bridging (I'm printing PETG) and I had what looked like adhesion problems in the middle of my stack. (Sorry, forgot to grab pictures...)
This is on the MakerNexus remix which only has filament on the bridging layers in the support structure for the pins. I had to add cylindrical pins near all 4 ends to keep them from curling up, and even with that I've had to lower the bridging fan speed. Currently testing 75%.
See my (limited) designs on:
Printables - https://www.printables.com/@Sembazuru
Thingiverse - https://www.thingiverse.com/Sembazuru/designs
RE: Stacking - How to set up in PrusaSlicer?
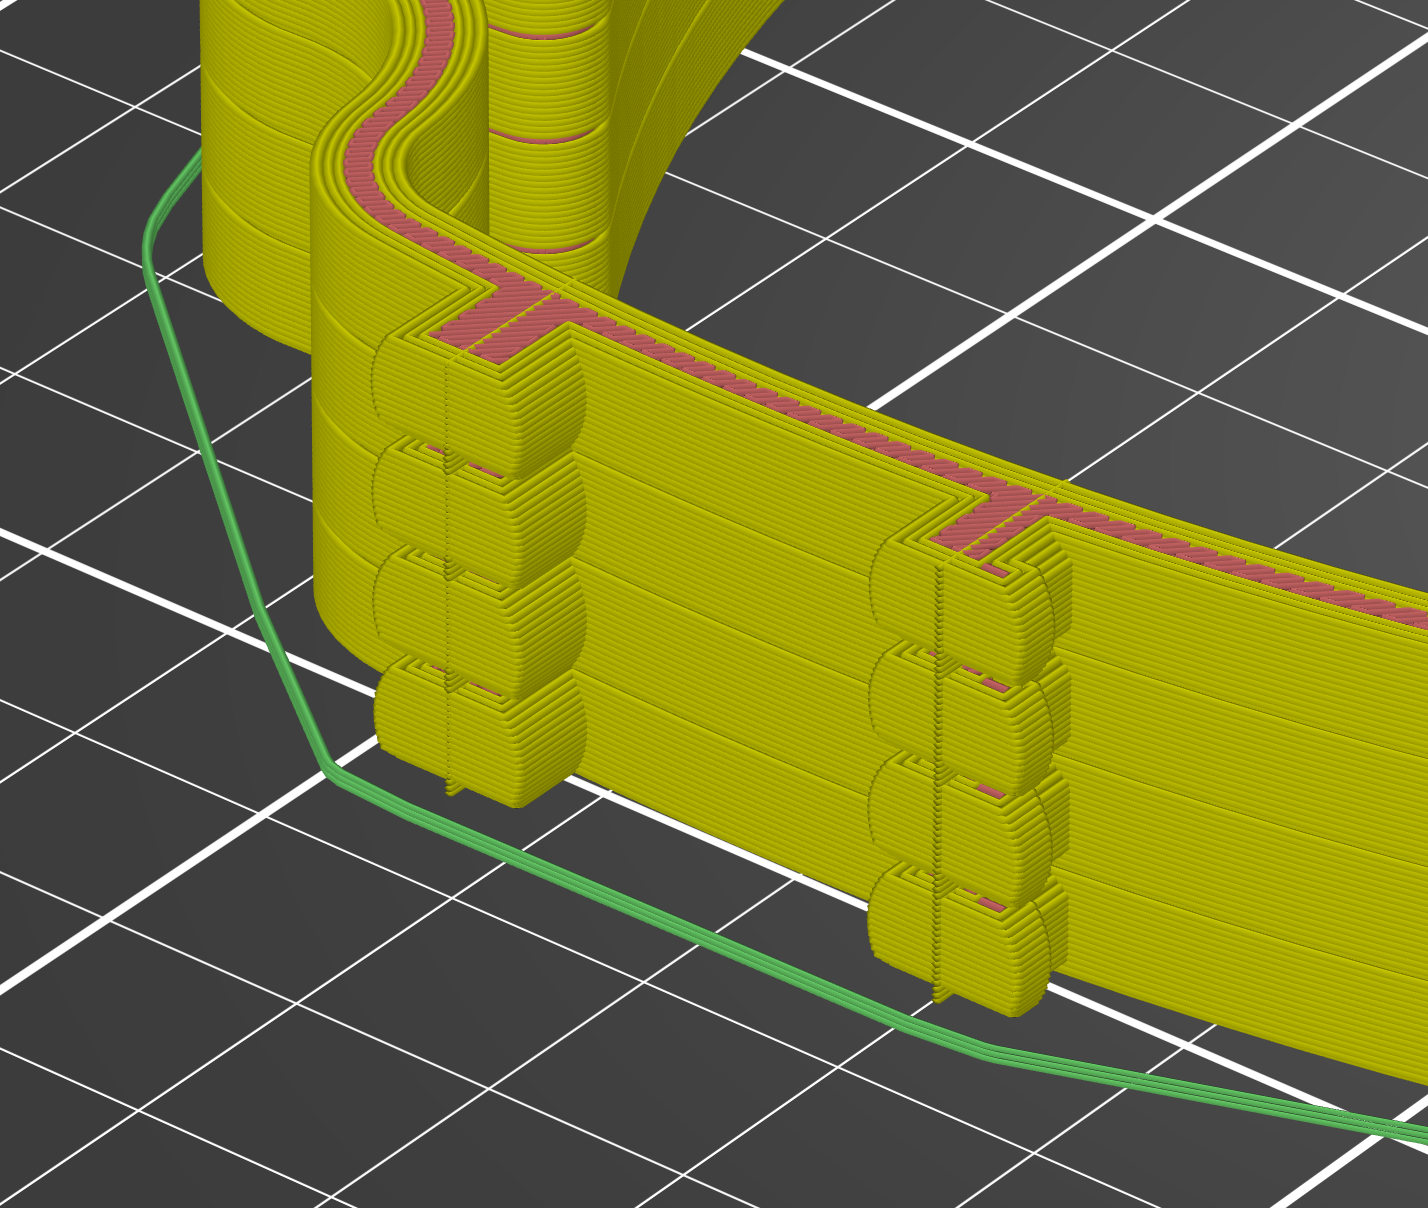
It is interesting to see different way to reach stacking.
Regarding the "Detect Bridging Perimeter" (DPB) I got better results when switched off.
Here is why:
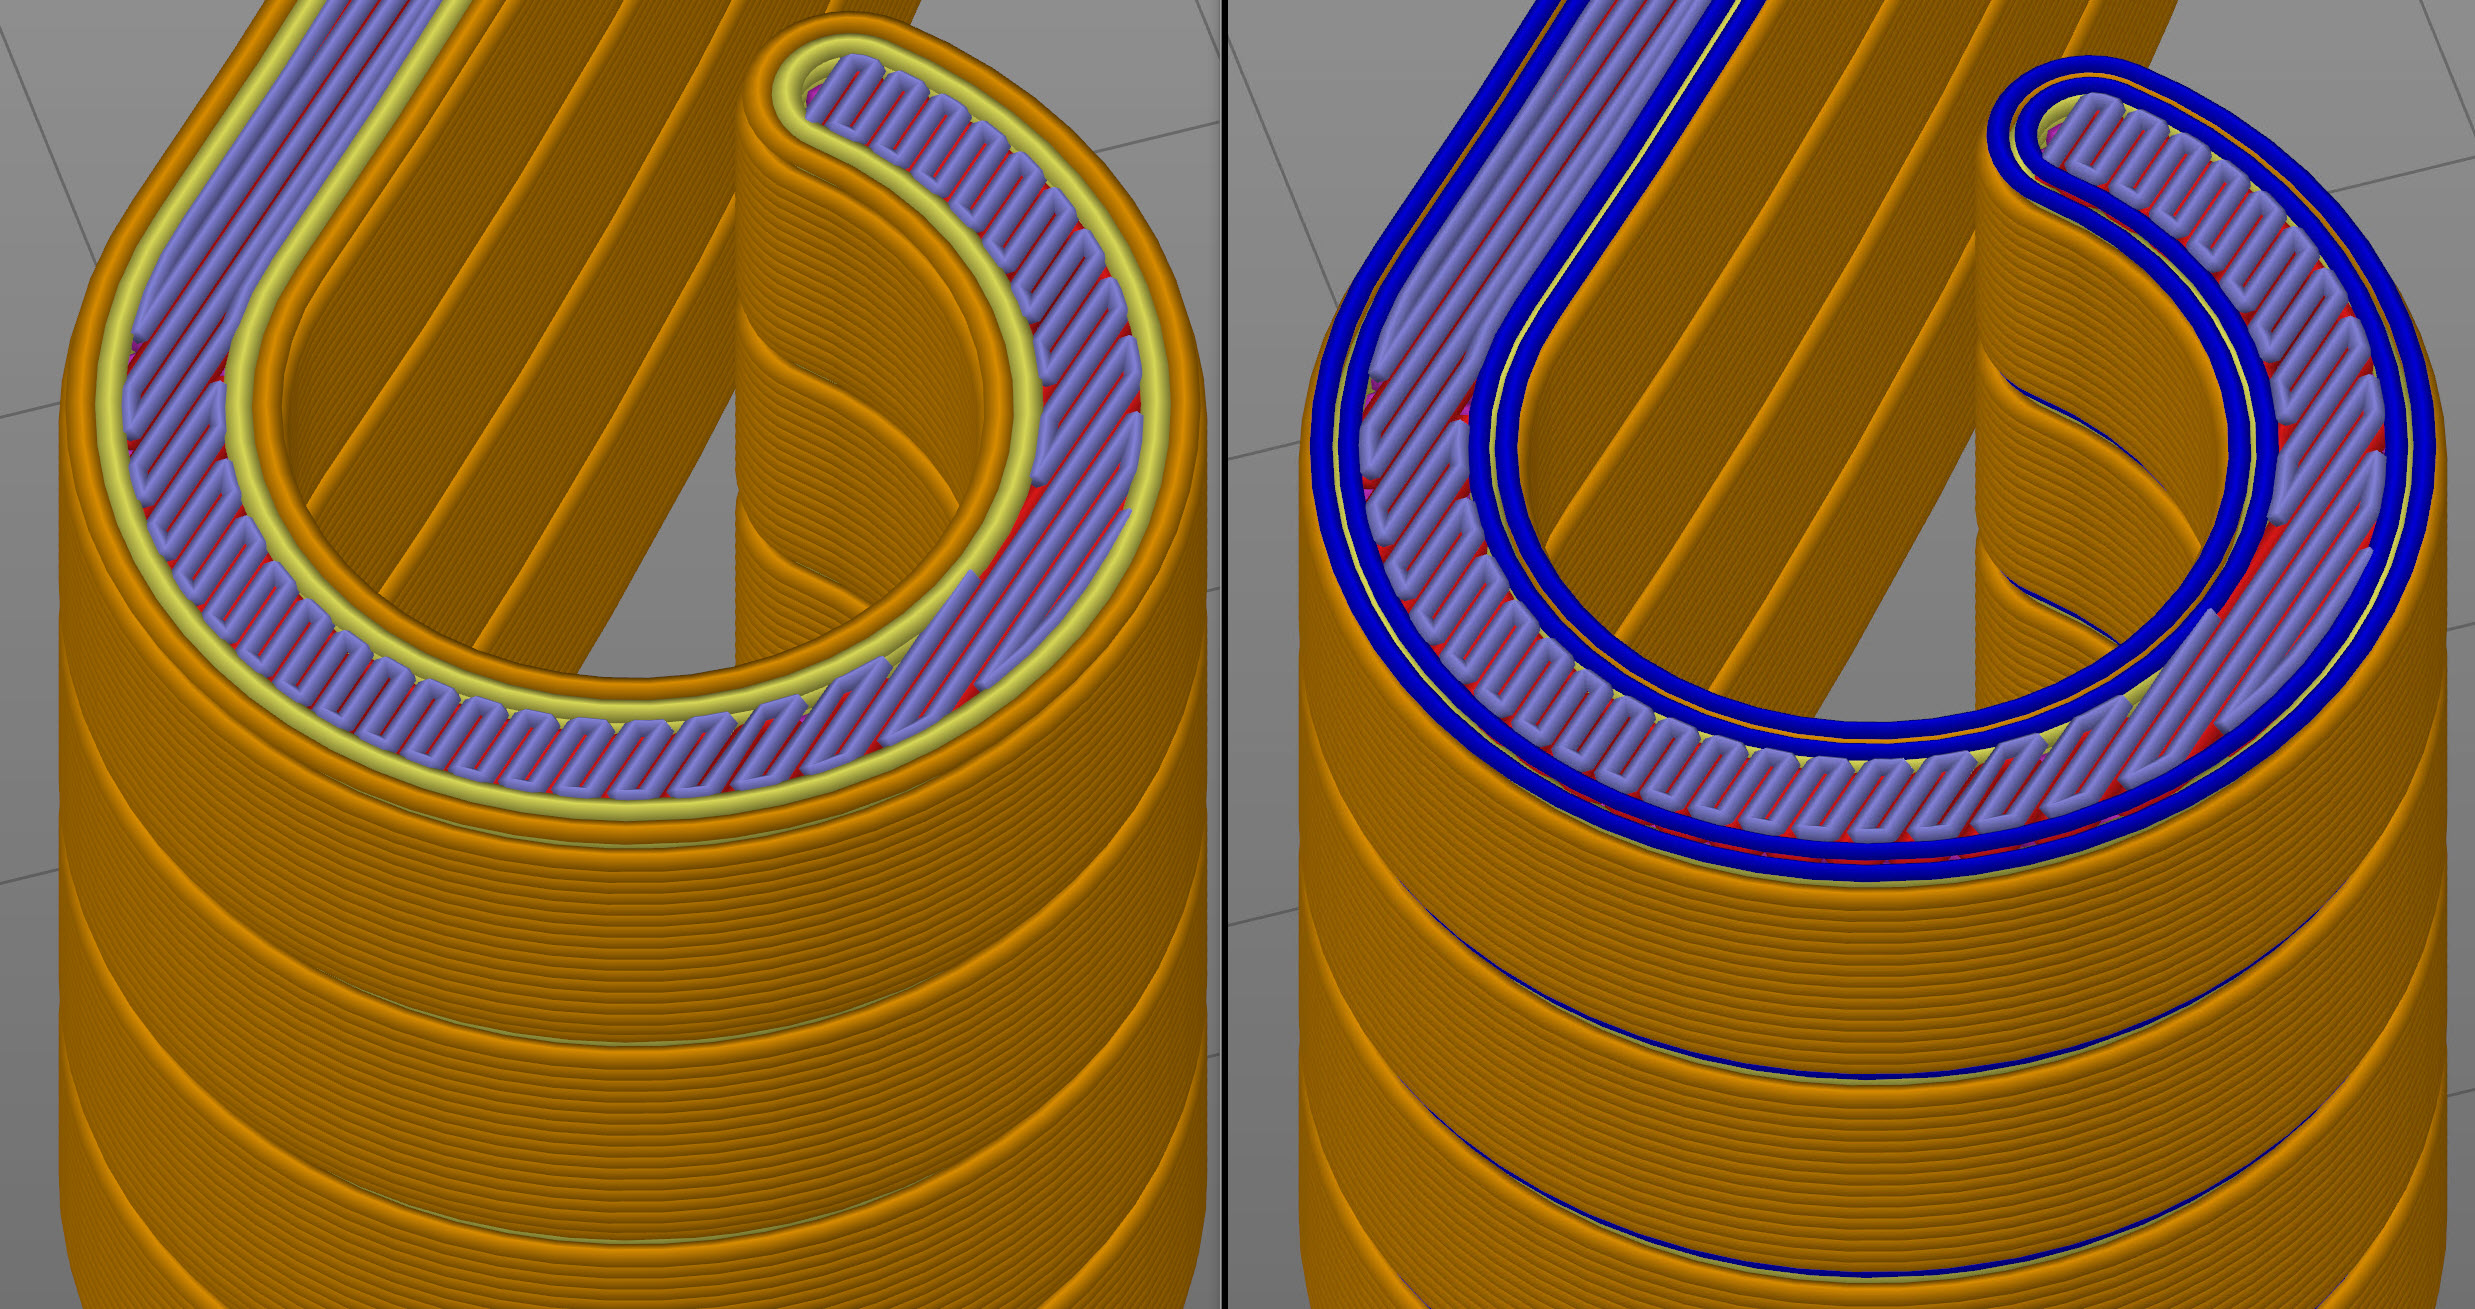
left: DBP off, I got thicker perimeters. DBP on: thinner perimeters
I found no parameter to influence the with of the bridgin perimeters.
Those thin bridging perimeters sometimes take an abbreviation through the air in inner radii in some of my stacked prints
which I found better with DBP off.
I just want to understand and find good stacking settings. Probably there are other influencing parameters as well as material properties.
For your information I added the project file. The surfaces of separated parts are looking like shown in the image I posted some days ago.
Layer 0.3mm space is 0.3mm, part height is 5.1mm, extrusion with 0.55mm
RE: Stacking - How to set up in PrusaSlicer?
@jmsaltzman,
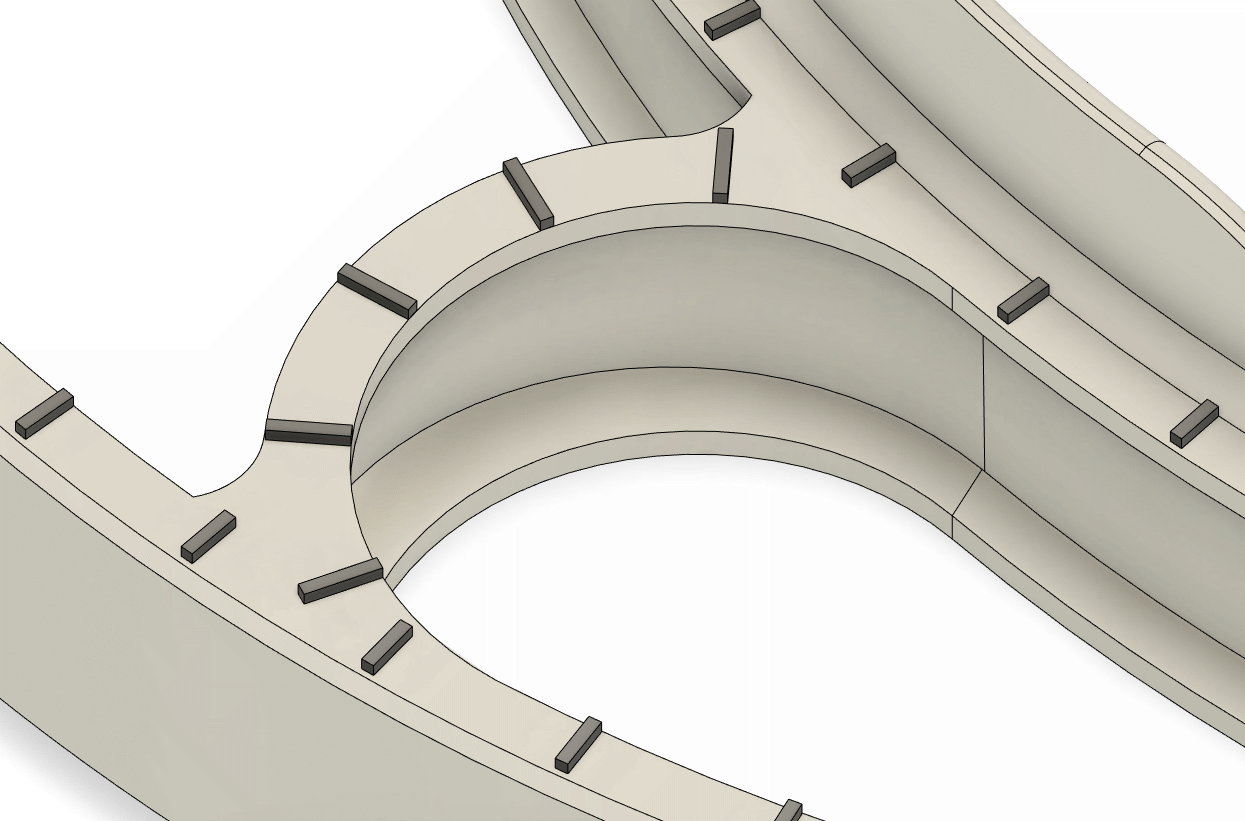
I used a little box scattered through paths.
I tested them spaced 4 mm, 6 mm, 8 mm and 10 mm.
4 mm was a little difficult to separate; 10 mm let the upper layer drop and fix itself on the previous,
So I used 8 mm and the Detect Bridging Perimeters. I have had good results.
Here a link to the model where I applied this.
https://www.prusaprinters.org/prints/29698-shield-gb-model-d-stackable
RE: Stacking - How to set up in PrusaSlicer?
Is there anyway to get the support type whimsy stuff it prints for overhangs as a base layer between stacked parts?