Shrink area under supports
Hi guys,
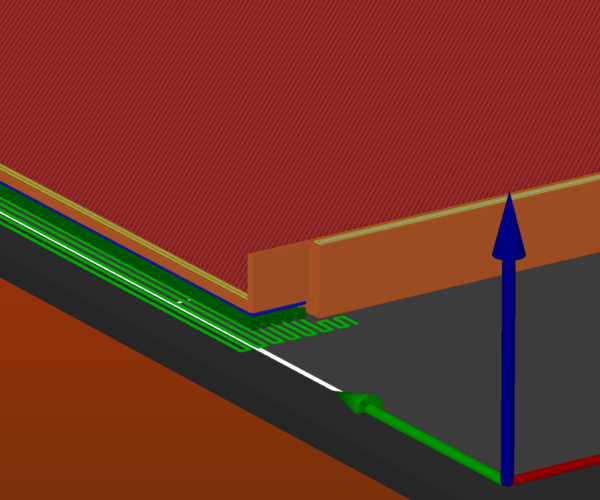
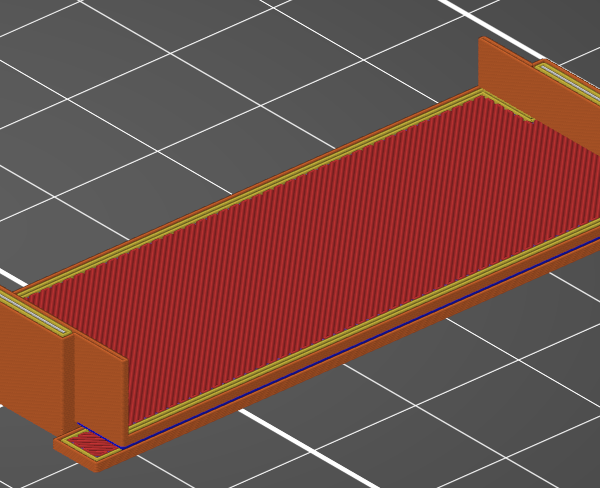
i am trying to print a part which is nearly as big as the printable area. This was my intention at least... Unfortunately i forgot about that first layer under the supports. Is there any way how to shrink that area? I hope the attached image describes my problem well.
Many thanks in advance,
Thomas
The only option you have is to use PS2.4. Its still in alpha at the moment so in all likelihood contains bugs but it does have the new snug supports method which is about the only thing that will sort that out properly.
Right click on the part > Add Support Blocker > Box
Stretch the support blocker box to the length of the side, position it off the plate to trim back the edge of the support - and slice.
Because the box is a modifier and won't be printed Slicer will allow it off the plate.
Cheerio,
Do i really need a title for a response?
Thanks for your fast responses! I think i'll try @diem's approach first. If that doesn't work (for me) ill try the alpa version.
BR, Thomas
🙁
Right click on the part > Add Support Blocker > Box
Stretch the support blocker box to the length of the side, position it off the plate to trim back the edge of the support - and slice.
Because the box is a modifier and won't be printed Slicer will allow it off the plate.
Cheerio,
It seems this doesn't work. Looks like that first layer is excluded from the blocker. Guess i'll download the alpha tomorrow then.
RE: Shrink area under supports
By all means try it but a blocker doesn't actually act as an area to keep support out of, it defines areas on the model to stop support being generated for. As such a blocker has to intersect the model. So if you have that lip supported its going to grow and add the support base. A such I suspect it wont work. You can define a smaller area of the lip so it doesn't support it fully which *might* reduce the bottom support layer but thats kind of defeating the point of having the support.
As for the title, thats a new requirement for the forum since the last update. However just type space in there.
As such a blocker has to intersect the model
But it only has to intersect the model by a fraction of a perimeter.
Cheerio,
RE: Shrink area under supports
By all means try it but a blocker doesn't actually act as an area to keep support out of, it defines areas on the model to stop support being generated for. As such a blocker has to intersect the model. So if you have that lip supported its going to grow and add the support base. A such I suspect it wont work. You can define a smaller area of the lip so it doesn't support it fully which *might* reduce the bottom support layer but thats kind of defeating the point of having the support.
As for the title, thats a new requirement for the forum since the last update. However just type space in there.
You are correct, that's exactly how it behaved. I tried to move the blocker until the "support-support-layer" was in the printable area. At this point the support was nearly gone. After reading the Changelog for 2.4, snug supports seem to be what i need. I will try that tomorrow after work.
@tmsmr
PS alpha 2.4 snug supports have promise, however if the snug supports don't work out for you, save the 2.3.3 version of the .3mf project file, Zip the file up, and post it here, and I'll show you how to fix this.
Good Luck.
Swiss_Cheese
The Filament Whisperer
RE: Shrink area under supports
The snug supports don't work either, the surrounding area at the first layer stays the same. Those two possible solutions sounded so promising.
@Swiss_Cheese: That would be awesome! The file is attached (Why did you want me to zip it? The 3mf file seems to be a zip archive already)
One of us is confused
@tmsmr
I looked before I posted, I checked back and looked again, and I looked again after reading this,
@Swiss_Cheese: That would be awesome! The file is attached (Why did you want me to zip it? The 3mf file seems to be a zip archive already)
Forgive me I'm old, however I'm not seeing a zipped up .3mf project file attached anywhere in this thread.
Regards
Swiss_Cheese
The Filament Whisperer
Tmsmr it didn't attach because its not a zip file. While the 3mf format is a type of archive its not one that the forum is configured to recognize and so wont accept.
@neophyl, thanks for the explanation.
Seems like the forum doesn't like Zip-Files from the Mac OS Archive utility (Maybe because it produces *.3mf.zip files from single 3mf files?).
@swiss_cheese: I hope it works now 🙂
@tmsmr
Glad you were able to get that sorted, I fixed your support problem. You didn't mention you were printing on a Mini, I don't have one of those, however I was able to use the profile to setup the file. I'm guessing you are somewhat new to 3d printing based on the settings I'm seeing in the project file. so please let us know how this goes for you, and if you need any further assistance, I left your settings intact, and simply fixed the support issue. If/when you encounter other settings issues, I have two other techniques I use to fix these situations, they require a bit more experience & understand to adjust but are more effective then the Prusa supports. For now, I went with Prusa supports as they were set.
Good Luck
Swiss_Cheese
The Filament Whisperer
Thanks @swiss_cheese, this looks good!
Yes, i'm kind of new to 3D-printing. I kept using the default profiles provided by Prusa and only changed settings when i was sure i would need them. I assumed using the provided presets is the way to go... Could you give me some examples of the biggest "mistakes"?
Besides having your file containing the adjusted supports, i tried to reproduce your steps - without success. I changed almost all settings in your version back to their default values and the result is still good. So i think its only about those 2 "Generic boxes"? I can't find any modifiers on them. Could you give me some pointers how you did that :)?
Br, Thomas
@tmsmr
I normally will not use default supports for PETG, I wouldn't use prusa supports for this application, the reason being is they would be to difficult to remove and not necessarily leave a good looking result. I would normally turn off "Prusa supports" and use the shapes that you mentioned, the "Generic boxes" and I would space them under the area that needs support and adjust the height to barely touch, with practice this type of support can offer a better support experience with PETG, make removal easier, and the finished appearance more smooth. layer heights of 0.1 on a model this low can make this difficult with PETG and you could get away with 0.15 or 0.12 and have a strong, faster printing experience with a nice appearance, and easier to remove supports. I suggest shrinking your model down in the X & Y leaving the overhangs and Z height intact and experimenting with contact distance to get a feel for this, play and learn.
No supports using "Gen Box Shapes"
(The Spacing is Important)
(In this example, I'm using 3 different layer heights at the same time, and can adjust them each independently.)
Using separate objects, as apposed to adding shapes to an object will allow you to fine tune the heights much easier.
(Although both methods have pros and cons.)
(This is an example of the proposed test rig)
You can use something like this to rapidly test your supports, it takes maybe 15 or 20 min, before committing to a longer print.
the Test should be representative of the features you intend to have, I mean the infill angle, the length, perimeters, extrusion width 😉, everything, however shrunk down to save time and material.
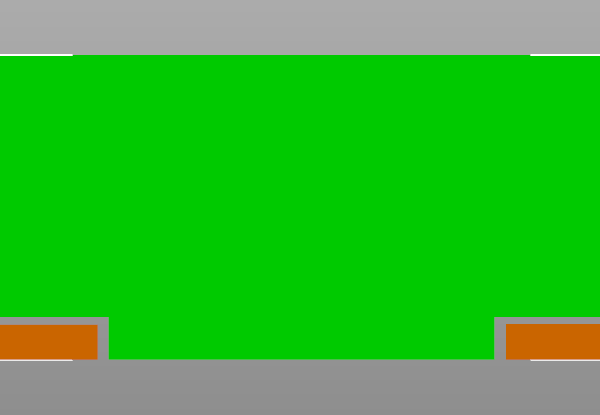
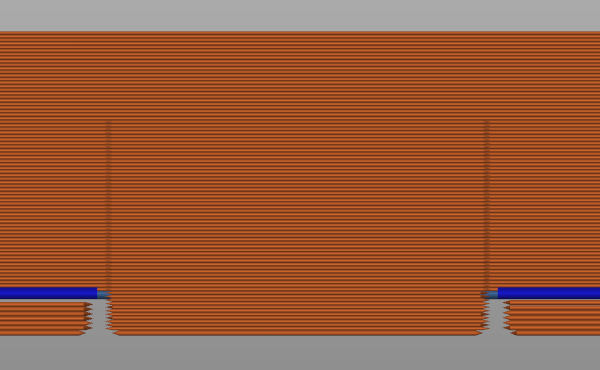
What I did with the "Generic box" shape in the file I sent you was use it to block the default supports in that area, you can't do this with a support blocker, however one could call this a support blocker. it's designed to be removed with the supports. the method described above is only one way, I know others but as I mentioned they require a better understanding of the program, you seem like you can figure this out.
I hope this Helps,
Swiss_Cheese
The Filament Whisperer
I almost forgot
In case it wasn't obvious, you can use these methods to print right at the edge of the plate boundaries, right up till it turns blue, and your are in full control over that.
The Filament Whisperer
@swiss_cheese
Wow! Thanks for detailed explanation! This method looks promising. I wondered what you meant with "not using Prusa supports", i assumed there are alternatives in the sense of add-ons or something like that. Now i understand what you mean. I have indeed problems removing the supports currently, often requiring drills for holes and sanding for the surfaces.
As you proposed, i will try out this approach with different block heights and settings. What i don't understand yet is: When the best distance between the supportive block and the part is figured out, why would they not stick together really hard? Is it only because the first layer of the part is not "pressed down" by the extruder leaving the filament in round shapes instead of fully melting in the last layer?
Thank you!


