Seam-like artifacts around deretractions
(I wasn't sure whether to post this in the CORE One or PrusaSlicer category, but since I can seemingly resolve this issue by using OrcaSlicer I have decided to post it here.)
When I slice a model using PrusaSlicer for my CORE One (with Prusament PLA Blend) using essentially default settings (tweaks to seam position, scarf joint, infill pattern, enable skirt) I am seeing seam-like artifacts around where deretractions happen. This is definitely not the actual seam as indicated by the g-code preview. The best way to demonstrate this is through example; you can see the deretractions here in the preview:

You can also see the seam indicated by the white line at the rear of the model. The finished part clearly has seam-like artifacts around these points of deretraction.

I ran a full suite of calibrations to rule out poor maintenance, but the problem remains. Would appreciate any guidance on this. I noticed the problematic deretractions are on the innermost perimeter so I'm increasing the number of perimeters to 3 to see if that mitigates it.
Here's the exact project file I am using for this test: moai-seam-test.3mf
RE: Seam-like artifacts around deretractions
Update: The problem is still present after trying with 3 perimeters instead of 2. Looking at the volumetric flow preview, I think it may be the scarf seams causing these artifacts instead. Disabling them to see if it makes a difference.
RE: Seam-like artifacts around deretractions
Alright, disabling scarf seams fixed this specific issue. But I am also running into another very similar issue with a different model (similar enough that I'm not sure it warrants a new thread).
PrusaSlicer seems really intent on putting retractions/deretractions here around this corner of the model:

And when printed, I get these artifacts:

There are also retractions/deretractions on the back of the part:
When printed, they are not nearly as bad but still clearly visible:

I'm not really sure why PrusaSlicer is performing retraction here. It's also notable that these are distinct from where it says the seam should be.
I performed pressure advance calibration and that does not appear to be the issue.
Slicing the same model in the same orientation in OrcaSlicer with (ostensibly) the same preset does not produce the artifacts, because the retractions are at the seam instead.
Here is the file: transit-tracker-frame-test.3mf
RE: Seam-like artifacts around deretractions
The (de)retractions causing problems in your models are on the inner perimeter. It's just that they are visualised large enough to see "thorugh" the outer perimeter in prusaslicer.

For the Moai model they persist even through 3 perimeters. So it makes sense that you've found them to be related to the scarf seams, which are adjacent to the internal seam.
A lot of retraction problems and seam problems are, in some way due to pressure in the nozzle, and therefore pressure advance becomes critically important for high speed. We have mastered the printing hardware and our software interacts well with that but the interaction between these two things and the viscosity and rheology of the thousands of filaments on the market is not something most of the community is aware of.
In this Moai case the slicer is moving from the inner perimeter, printing at 7.5mm^3/s; to the outer perimeter moving at 0.234mm^3/s. This is a volumetric decceleration of about 100mm^3/s/s. The liquid filament just cannot change its flow that quickly, and not only that but the pressure advance needed from the printer changes significantly at high and low flow rates.
Prusaslicer only allows one pressure advance value to be applied per filament, which is 0.033 for this filament. But it's guaranteed that a much higher value is needed at this low volumetric flow rate. Temperature, filament additives, nozzle wear, line width, layer height, acceleration, and printhead speed also play a role, interacting with each other in ways that I lack the expertise to explain concisely.
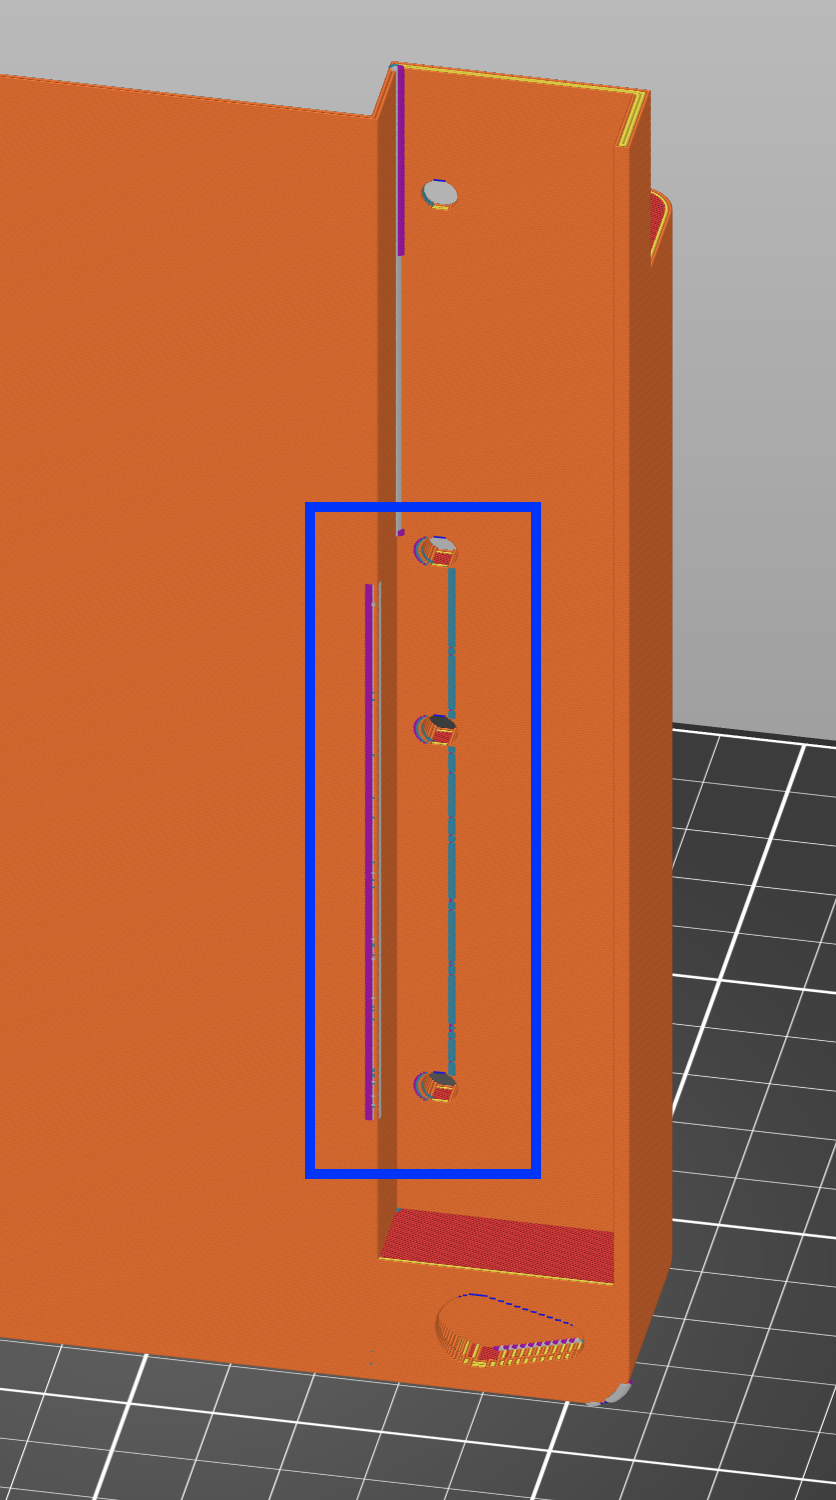
On your transit tracker frame test, the "retractions" are on the internal perimeter, not the outer wall. It is performing a retraction here so that it can start the external perimeter (the "seam") in a discreet location. This time there is a travel move actually crossing the external perimeter, so any oozing that still happens after the retraction has the potential to impact the outer wall when it gets printed. Here is a screenshot of the part of the model you photographed which shows the travel moves of the printhead.

Here is a single layer view of this imperfection:

The same thing is happening with the other imperfection in this model. An internal retraction finishes, and then immediately crosses the site where an external perimeter will be printed later.

The vol flow rate leading up to this internal seam is 21mm^3/s, which is quite high, then the retraction itself is 45mm/s of extruder speed, which would be the equivalent of (un)printing at 1148mm/s printhead speed.* I am currently learning about the interaction between these settings myself, it seems like most people are barely aware of the issue, and many suggestions I've been given are workarounds.
I think the combination of retraction and pressure advance that you have set up is not able to do its job at this volumetric flow rate. I guess there is some ooze escaping after the retraction, and this is causing a problem when the printhead reaches this outer perimeter later on. I have found that stringing is easy to prevent, and I get great results on retraction towers.
My towers all look like this:

But some of my perimeters look like this (pressure advance is increasing for each layer in this print).

So, how can you tackle this?
- Turn on "wipe while retracting". This can help by smoothing out changes in flow rate and making the ooze happen in a place it doesn't matter. Or it can make the problem worse if your pressure advance setting is incorrect because it means areas near seams will have very different flow rates to the main walls and corners.
- You already have "travel lift" (aka Z-hop) enabled, but it's a ramping lift and the angle is very gentle at 1deg. Try increasing it to 70deg or more to force the nozzle to be pulled up before it moves sideways. This should give both time for the volumetric flow rate to stabilise and space to try and avoid creating a trail that is collided with later.
- Consider using Orcaslicer and the Adaptive Pressure Advance feature. This has needed quite a few hours of tuning and right now the only progress I've made is accepting that I have to print at 12mm^3/s even though my hotend has no problem pushing out 18mm^3/s (PETG).
- Reduce the printhead speeds you're using so that changes between extrusions have smaller differences. (I hate this workaround, but it does work, and it means you can completely avoid filling up your brain cells with information about fine tuning printers to account for filament gloopiness)
- Lower your retraction speeds a bit. I haven't found this has much impact.
- Change filament. I haven't experimented with this pathway much, but some filaments flow more like predictable paste and less like runny honey, so they maintain pressure better.
Hope this helps!
*Actually, the extruder acceleration of 5000 means the average over a 0.7mm retraction is only equivalent to 400mm/s or so, but that's still a very high volumetric flow.
RE:
Wow, thank you for such a clear and detailed explanation! I will play around with the solutions you suggested. So far I've just used OrcaSlicer for parts where this tends to happen; something about its slicing algorithm places these in less problematic areas that reduce these artifacts.