RE: "Manual" multicolor
@joantabb
I love this solution. It's very clever and works great for the small jobs I typically print.
The only issue I'm having is the slicer (PrusaSlicer 2.2.0) puts a toolchange at the very beginning, so there's an unnecessary filament change that has to be edited out before printing. Not a big deal, but wondering if there's a way to get around it.
I'm still new at gcode and haven't found any parameter that might distinguish the first tool change to use in an IF expression. Has anyone else experienced this early toolchange and found a workaround other than manually editing the file?
Thanks,
Michael
RE: "Manual" multicolor
@michael-weston19 - I have experienced that as well.
My part has three tools, thus two tool changes as the first material is loaded before starting the print, as you would do with every single-tool-one-colour-print.
My workaround is to just comment out the first M600 line in the gcode file. This is what the first 76 rows of the file look like:
; generated by PrusaSlicer 2.2.0+win64 on 2020-09-21 at 06:53:08 UTC

;

; external perimeters extrusion width = 0.25mm
; perimeters extrusion width = 0.25mm
; infill extrusion width = 0.25mm
; solid infill extrusion width = 0.25mm
; top infill extrusion width = 0.25mm
; first layer extrusion width = 0.30mm

; external perimeters extrusion width = 0.25mm
; perimeters extrusion width = 0.25mm
; infill extrusion width = 0.25mm
; solid infill extrusion width = 0.25mm
; top infill extrusion width = 0.25mm
; first layer extrusion width = 0.30mm

; external perimeters extrusion width = 0.25mm
; perimeters extrusion width = 0.25mm
; infill extrusion width = 0.25mm
; solid infill extrusion width = 0.25mm
; top infill extrusion width = 0.25mm
; first layer extrusion width = 0.30mm

M73 P0 R555
M73 Q0 S556
M201 X1000 Y1000 Z1000 E5000 ; sets maximum accelerations, mm/sec^2
M203 X200 Y200 Z12 E120 ; sets maximum feedrates, mm/sec
M204 P1250 R1250 T1250 ; sets acceleration (P, T) and retract acceleration (R), mm/sec^2
M205 X8.00 Y8.00 Z0.40 E1.50 ; sets the jerk limits, mm/sec
M205 S0 T0 ; sets the minimum extruding and travel feed rate, mm/sec
M107
M862.3 P "MK3S" ; printer model check
M862.1 P0.25 ; nozzle diameter check
M115 U3.8.1 ; tell printer latest fw version
G90 ; use absolute coordinates
M83 ; extruder relative mode
M104 S240 ; set extruder temp
M140 S105 ; set bed temp
M190 S105 ; wait for bed temp
M109 S240 ; wait for extruder temp
G28 W ; home all without mesh bed level
G80 ; mesh bed leveling
G1 Y-3.0 F1000.0 ; go outside print area
G92 E0.0
G1 X60.0 E8.0 F700.0 ; intro line
M73 Q0 S556
M73 P0 R555
G1 X100.0 E12.5 F700.0 ; intro line
G92 E0.0
M221 S95
G21 ; set units to millimeters
G90 ; use absolute coordinates
M83 ; use relative distances for extrusion
; M600
T0
M900 K30; Filament gcode
;BEFORE_LAYER_CHANGE
G92 E0.0
;0.2


G1 E-0.80000 F2100.00000
G1 Z0.150 F10800.000
G1 Z0.200
;AFTER_LAYER_CHANGE
;0.2
G1 Z0.350
G1 X86.797 Y77.450
G1 Z0.200
G1 E0.80000 F2100.00000
M204 S500
G1 F1200.000
G1 X88.018 Y75.821 E0.04438
G1 X89.612 Y73.948 E0.05363
Everything above the last paragraph is just the header of the gcode; the last paragraph is the start of the geometry specific moves. The outcommented line is nine lines before the last paragraph, and starts with a semicolon that is the symbol for comment at the start of the line. The M600 is ignored, the print skips the redundant filament change. Works for me.
Obviously, the file has a lot more lines below that - ~500k in my case. There's two more M600 commands in the code further down to change the filament colour.
RE: "Manual" multicolor
@michael-weston19 , @bodo
The following Perl script will comment out the first 'tool change' for you:
#!/usr/bin/perl
# Copy (gcode) file except comment out first line including 'M600' - toolchange.
use strict;
my $done=0;
while(<>){
  if($done){
    print $_;
  } else {
    if(/M600/){
      print ';',$_;
      $done++;
    } else {
      print $_;
    }
  }
}
Copy it as detool.pl , make it executable and use it from the command line like this:
# detool.pl /path_to/slicer.gcode > /path_to/printer.gcode
It should work as-is on almost all Linux distros including Raspberry Pi, on Macs and on a great many other systems; if you have a very unusual setup you might need to change the first line to point to your Perl installation. If you use Windows you will have to install Perl from somewhere and maybe pay for it.
Of course, if the printer is already loaded with the wrong filament, don't use this script; begin the print as usual and use the first change to load the one you prefer.
* * *
@joantabb
For some reason I hadn't seen this thread until now - you may have heard the clang of a very large penny dropping.
Thank You.
I can now cannibalise my MMU for spare parts without that niggling doubt that some day I might want to re-fit it.
I presume that like me you found the MMU impractical for true multi-material printing and only really of use for colour changes - which, except for the odd label or scale marking, are of no interest to me.
Like you I had found it possible to change filaments manually but it was a real hassle - until now. Your blindingly simple ploy of limiting the second colour to two layers transforms the process and if you invert the print and label on the bed it's only a little more bother than watching the first layer go down as usual.
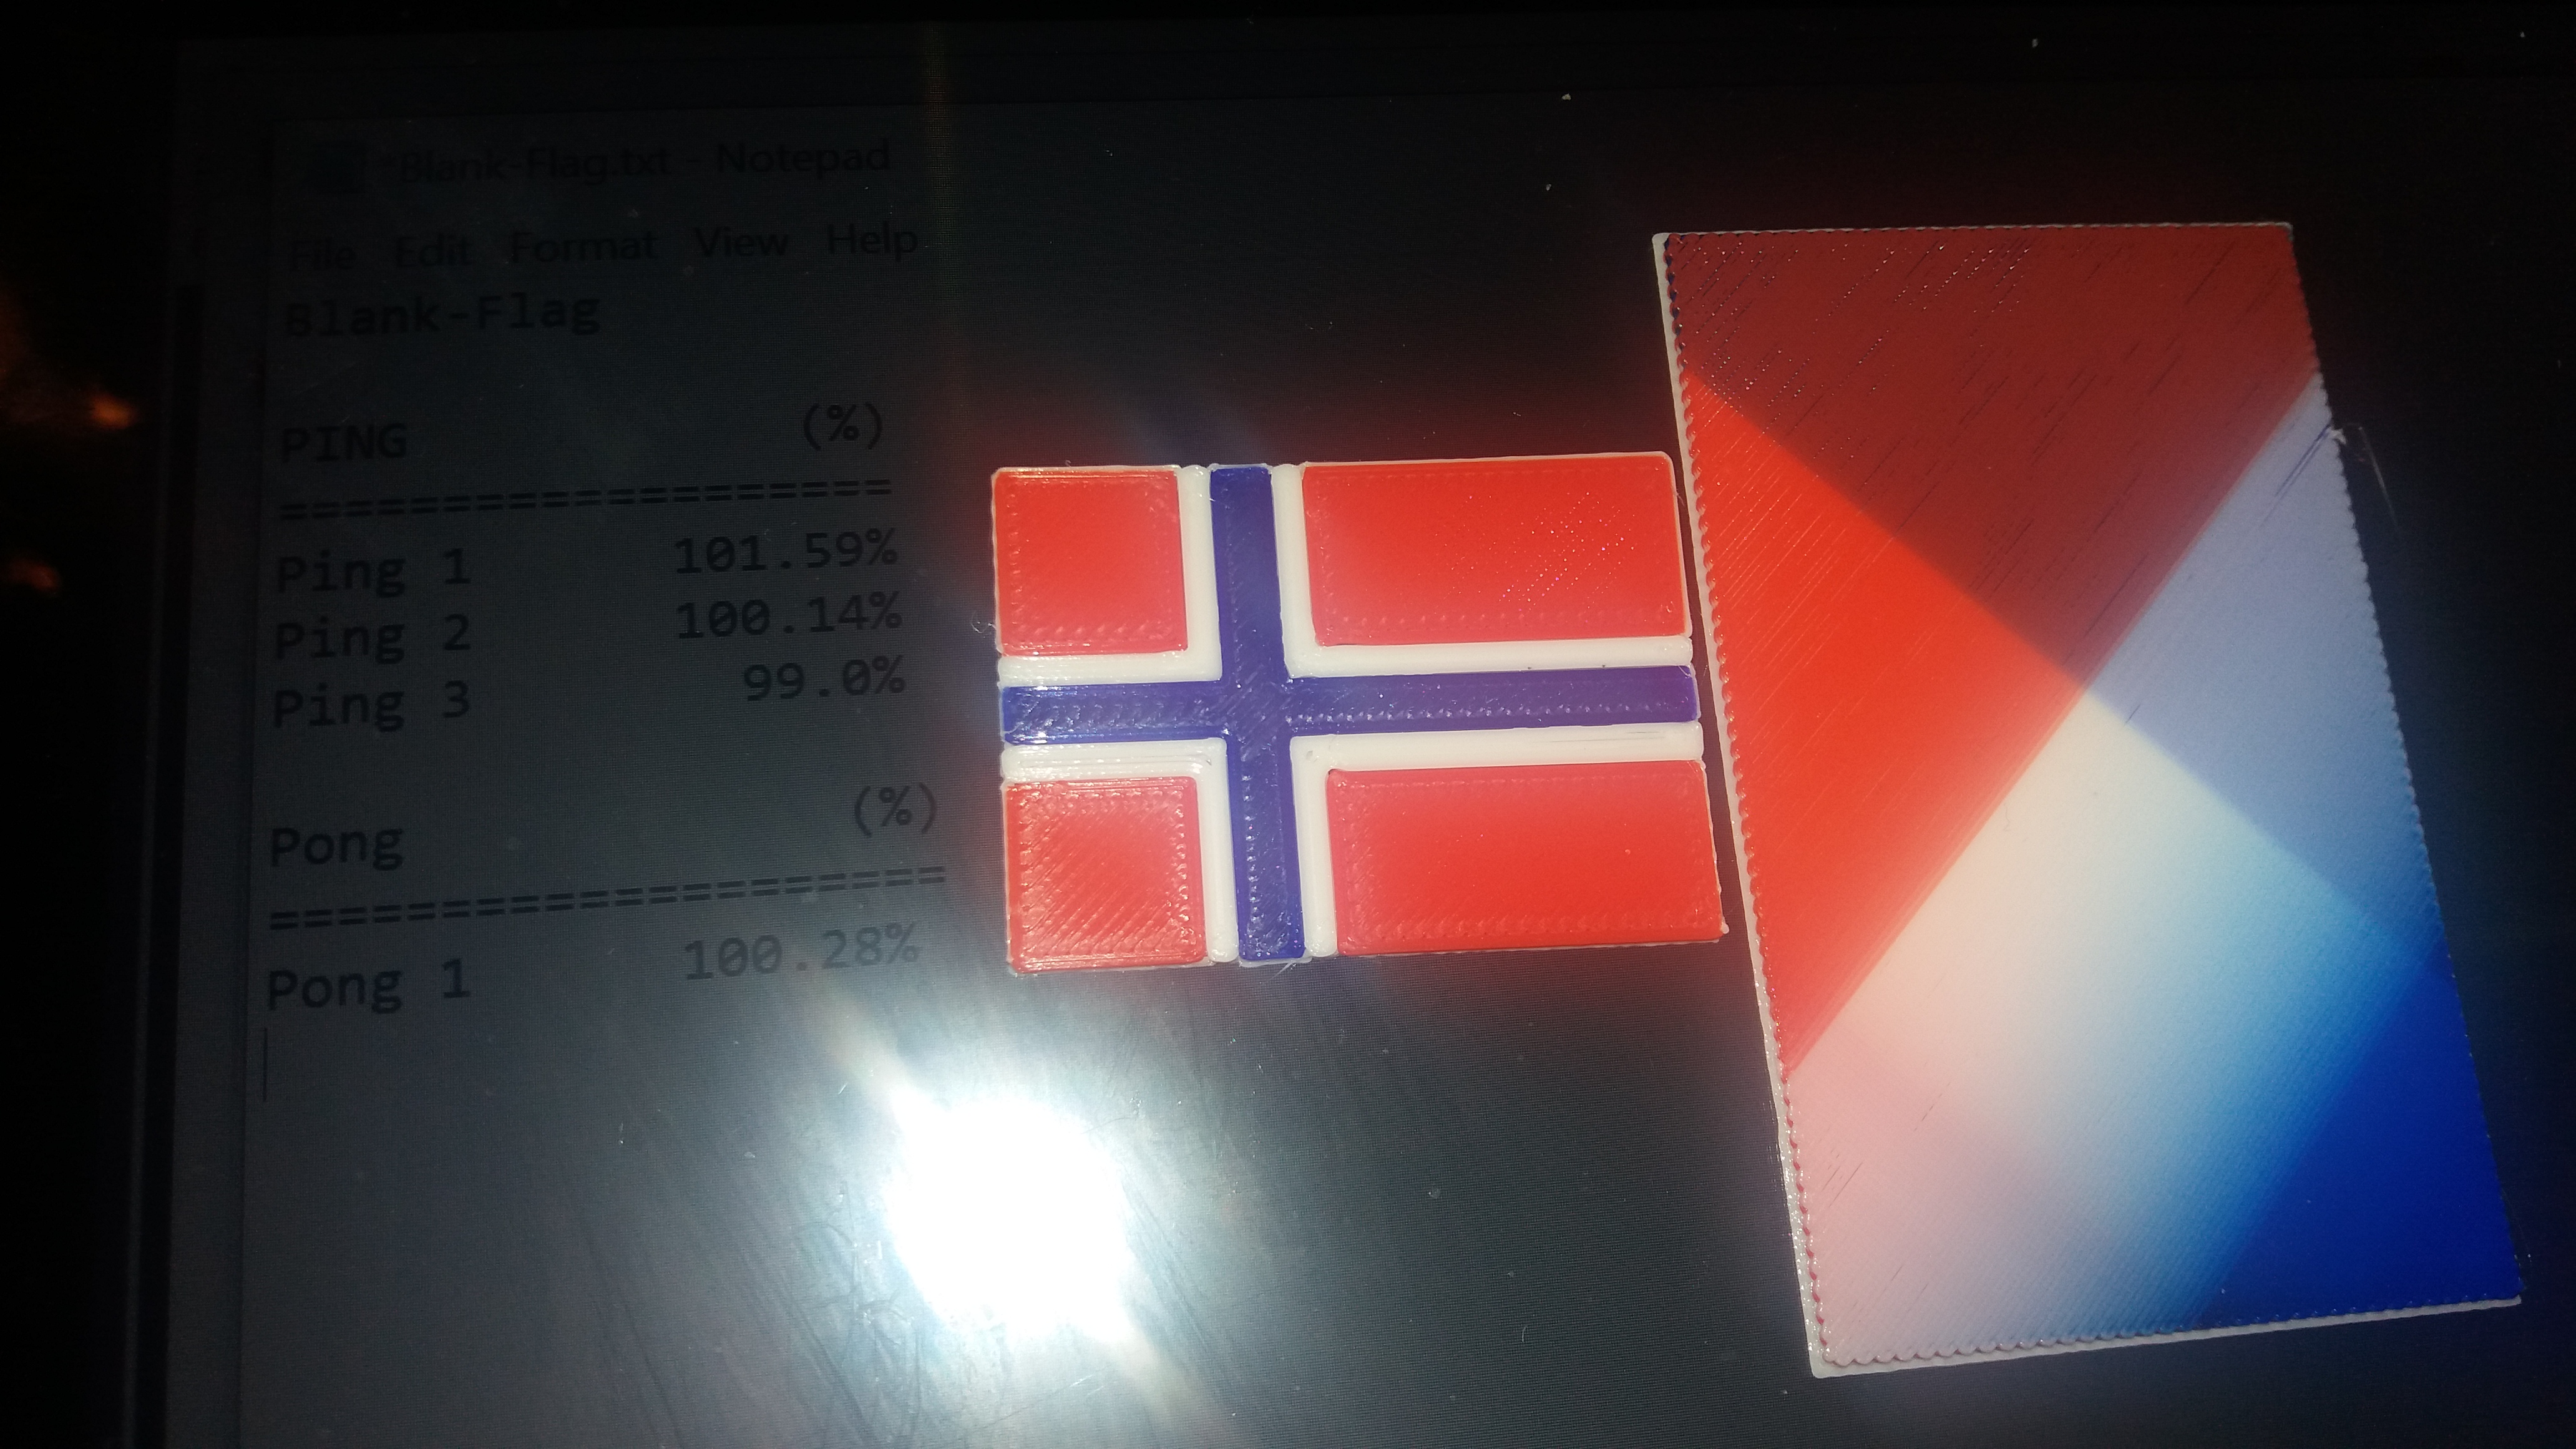
Does it work?
Attached is a picture of a pair of left-handed, 1mm scales that would have been almost impossible any other way. Not perfect, but extremely good for a 0.4mm nozzle.
RE: "Manual" multicolor
Thank you, @diem - script works well on Kubuntu 20.04!
RE: "Manual" multicolor
@joantabb
What a tremendous trick .. virtual multimaterial print. Worked "like a charm" like on guy said
There is one shortcomming ( sorry I am german so i might pick the wrong words):
In many case one wants to print what others have designed, so your STL is - designated for multocoloring - is in ONE piece and you must cut it AND manualy ( at least vertically ) need to repostion them ( stack) on top of each ohter.
ANY TRICK here as well??
This is why I want to ask one thing I did not find an aswer elsewhere:
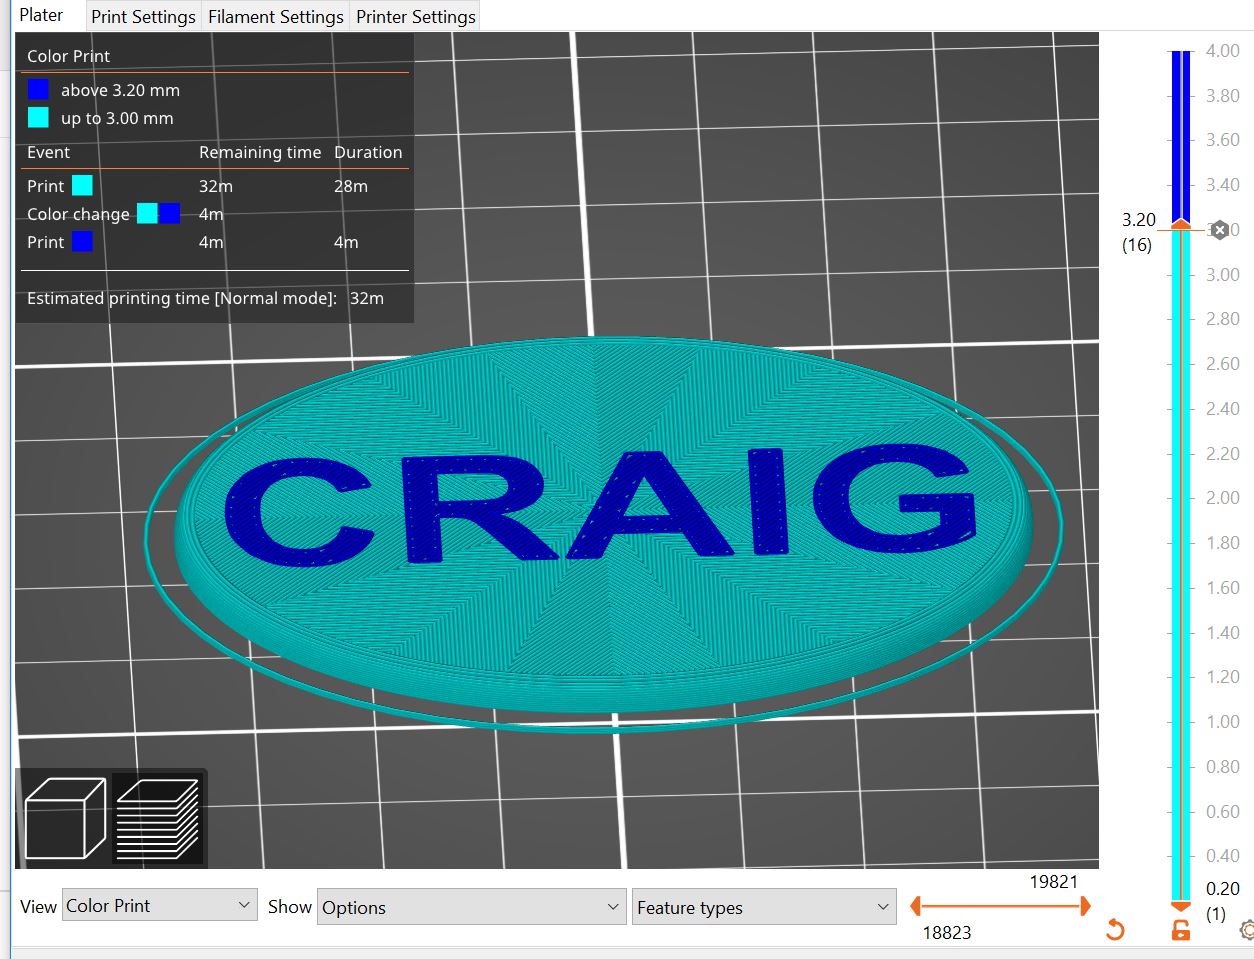
Let us asume an example of 10 Layers, each 0.2 high and the last layer shall have e.g. text in a different color.
When in Prusa Slic3r I want to intoduce the color change, I WOULD chanle the color when the arrow on the roght to the sliced object representation is NOT at the top, but one layer below.
IS IT CORRECT, that Prusa Slic3r a color change is VALID for THE LAYER you CURRENTLY SEE instead of
beeing valid for the FOLLOWING LAYERS???
this constantly confuses me.
Thank you a lot
RE: "Manual" multicolor
It can be simplified.
When you set up your virtual multimaterial printer profile, go to printer settings > Extruder n(each of them) and set the Extruder Color to a different colour for each one, then, when you slice, you can see where each is used.
If you want to change part of an existing STL file but not a whole layer you can use a modifier. Right click on the part and you can add a simple shape or load another STL with which to modify the part, right click on the modifier and one of the options you are offered is to change the extruder.
Hth, Cheerio,
RE: "Manual" multicolor
@diem
thank you.That s basically clear.
What i wanted - NOT using the Virtual Multi Extruder approach - is th deifinitely understand the link between the view on the object and the layer representation wher to change color - here continously sit my confusion ( and experience ).
So .. let us assume a block ( box) and a few letters on top.
The letter shall have a diff color and both sits in ONE single STL. So I use change color.
At what LEVEL Indicator position to I change:
when I already see the FIRST letter layer?
or when i see tha LAST block / box layer?
I would think on last BOX layer ( for future layers ) but the slice representation logic seems to be different / other way round .
Keen st see the answers 😉
RE: "Manual" multicolor
@jpg_master
The top layer you see is the first layer that will be the new filament. The latest version of Prusa Slicer will show it a different colour - though that won't usually match the colour you choose.
Cheerio,
RE: "Manual" multicolor
@diem
Thank you very much. This meets what I experienced ... not what I expected.
I wnted for sure to exclude, I made a fault.
thanks and have a good weekend.
RE: "Manual" multicolor
@jpg_master
Change colour when you see the first letter layer
regards Joan
I try to make safe suggestions,You should understand the context and ensure you are happy that they are safe before attempting to apply my suggestions, what you do, is YOUR responsibility.Location Halifax UK
RE: "Manual" multicolor
@joantabb
thank you.
so the layer level indicator would read:
"this layer you look at and the following layers above". ... i always thought it would read: "From the next layer on, the color .. etc is"
NOW it is crystall clear.
joan, thx
RE: "Manual" multicolor
@jpg_master
Multipart models are a little more difficult than single STL's If you add the parts individually, you cannot move in Z plane.
The Image Below is a Bit Busy, but please work with it... 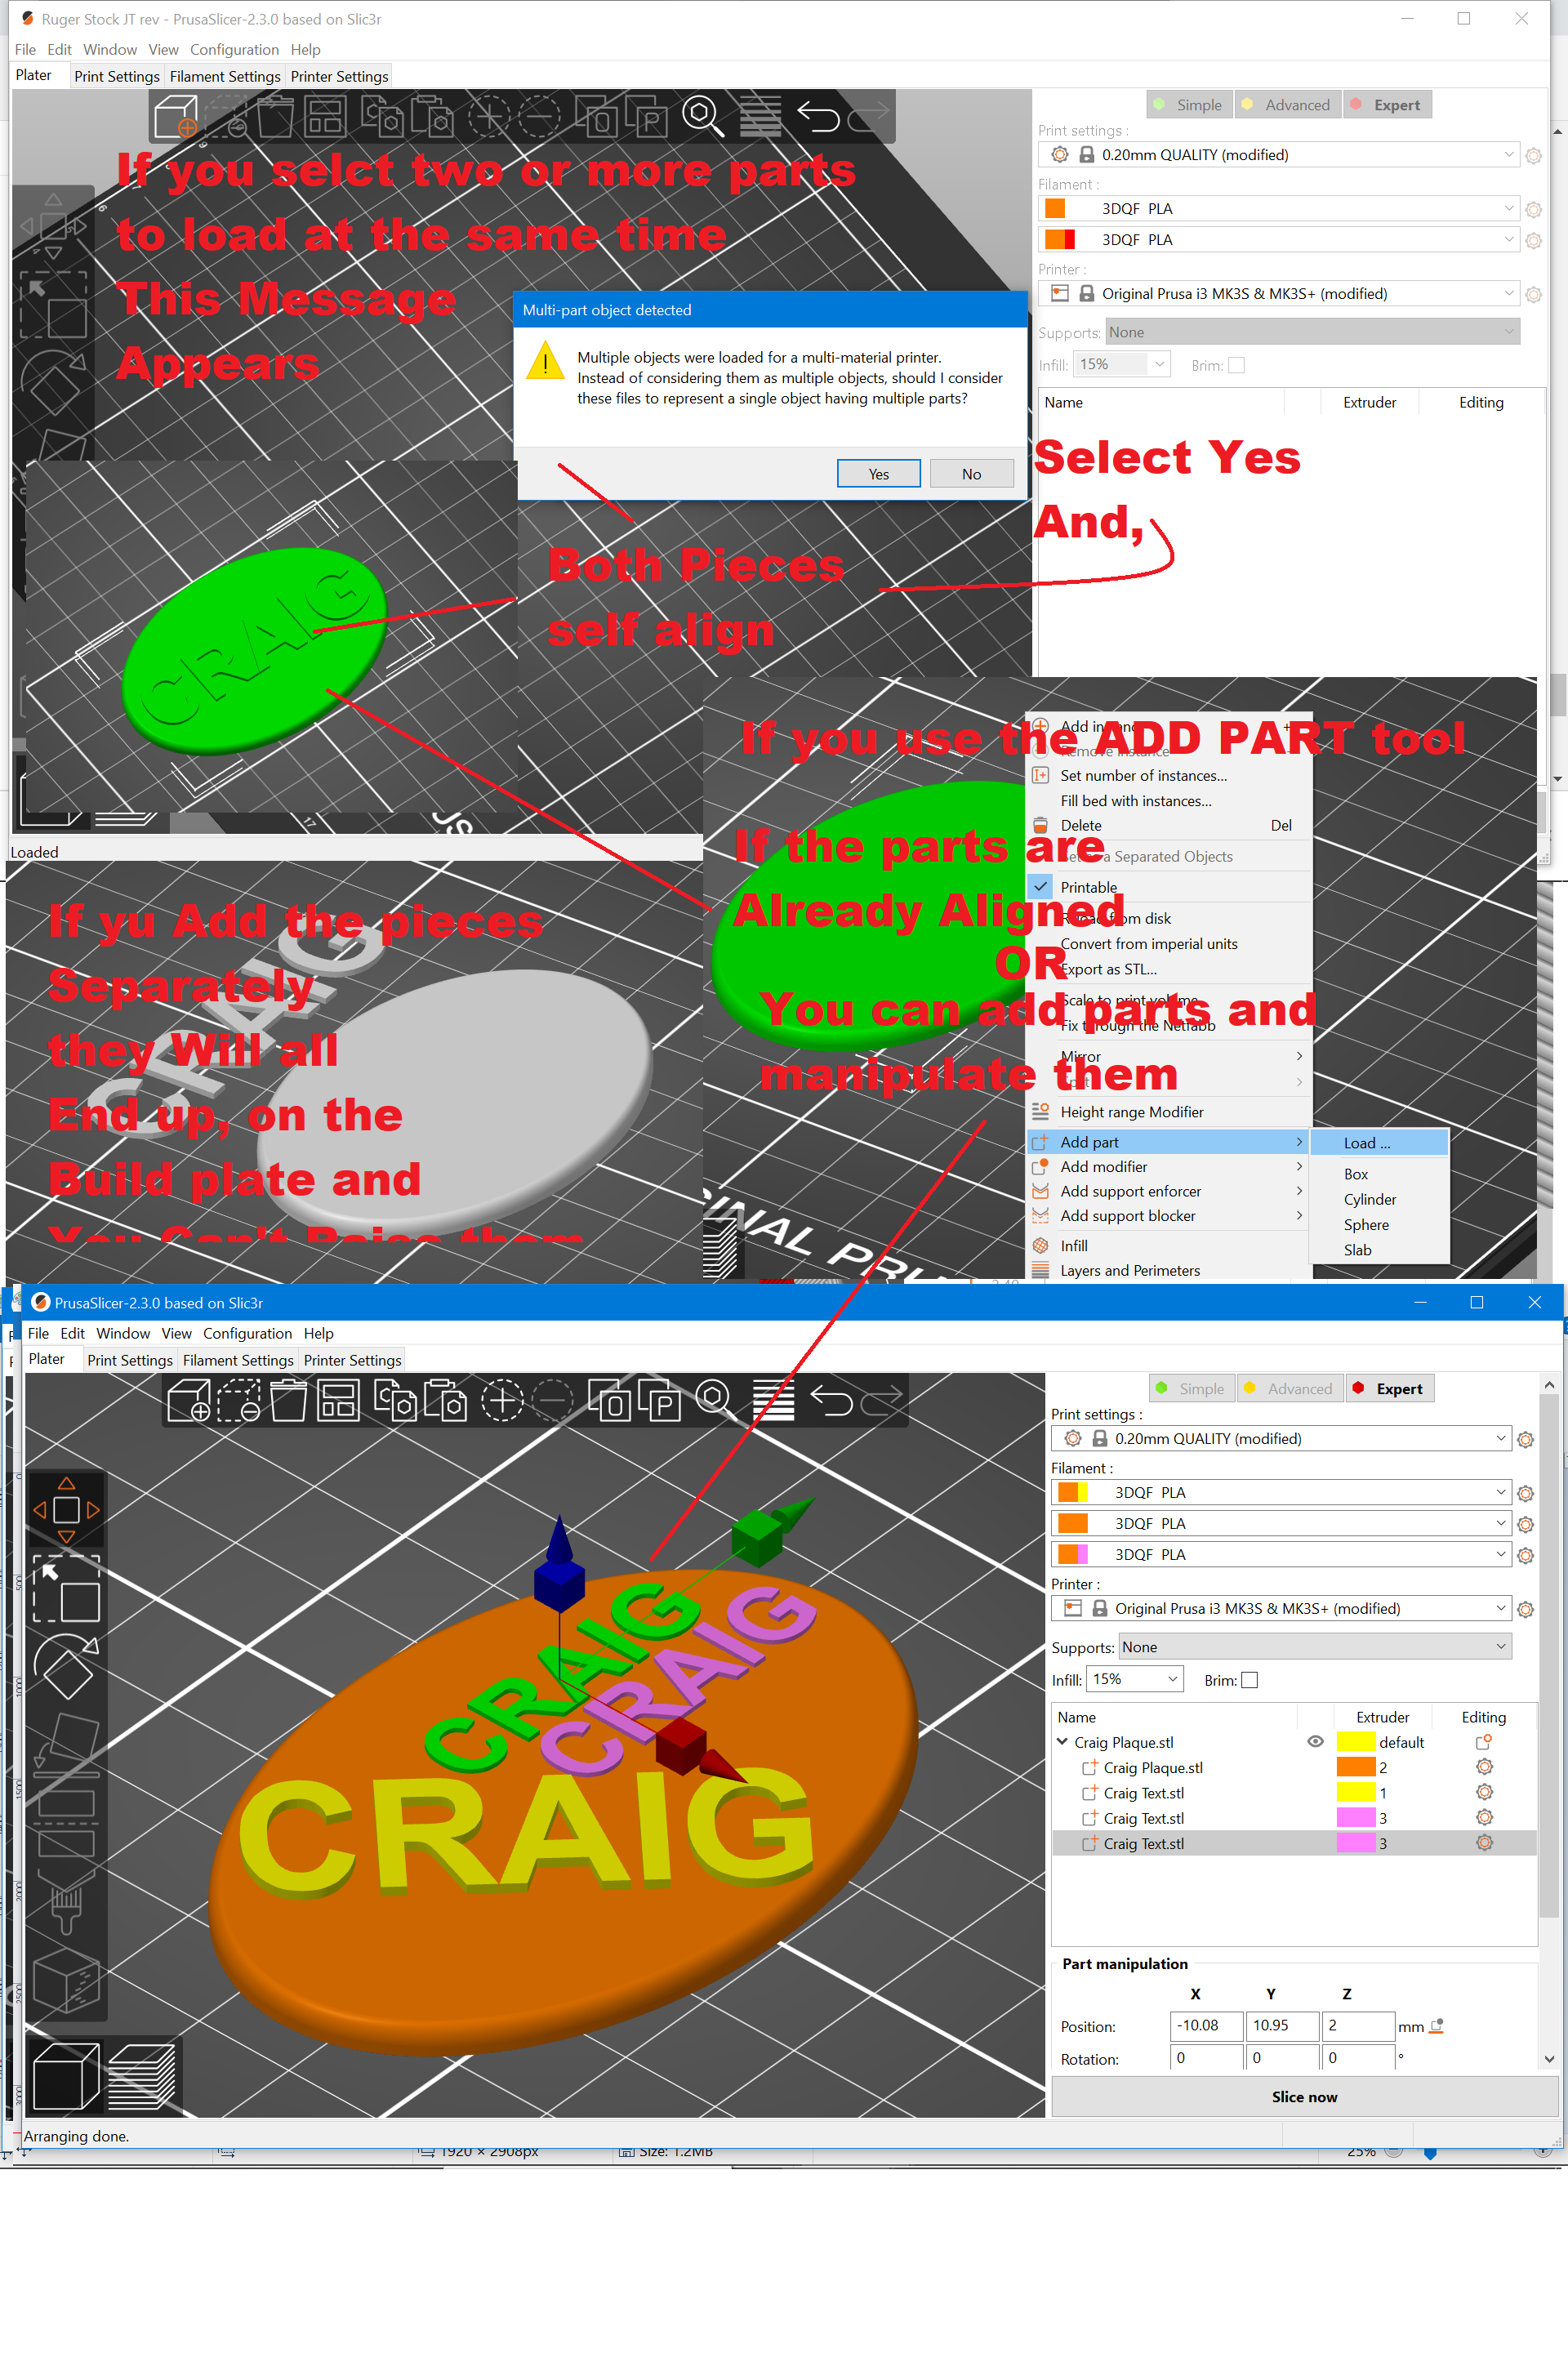
Top Left, when you are adding parts if you select both the text, and the Background, and they were aligned, in the 3D editing program, you will be asked if they are to be treated as a single model
If you add say the Plaque then right click on the plaque to get the drop down menu, you can choose Add Part > Load, and load the text, you can then use all of the manipulation tools to turn, lift, resize etc...
You don't necessarily have to cut STL's to make then different colours / filaments
you can use modifiers to do the job,
I will re use the 'Craig' Model
but allocate the colours using a modifier
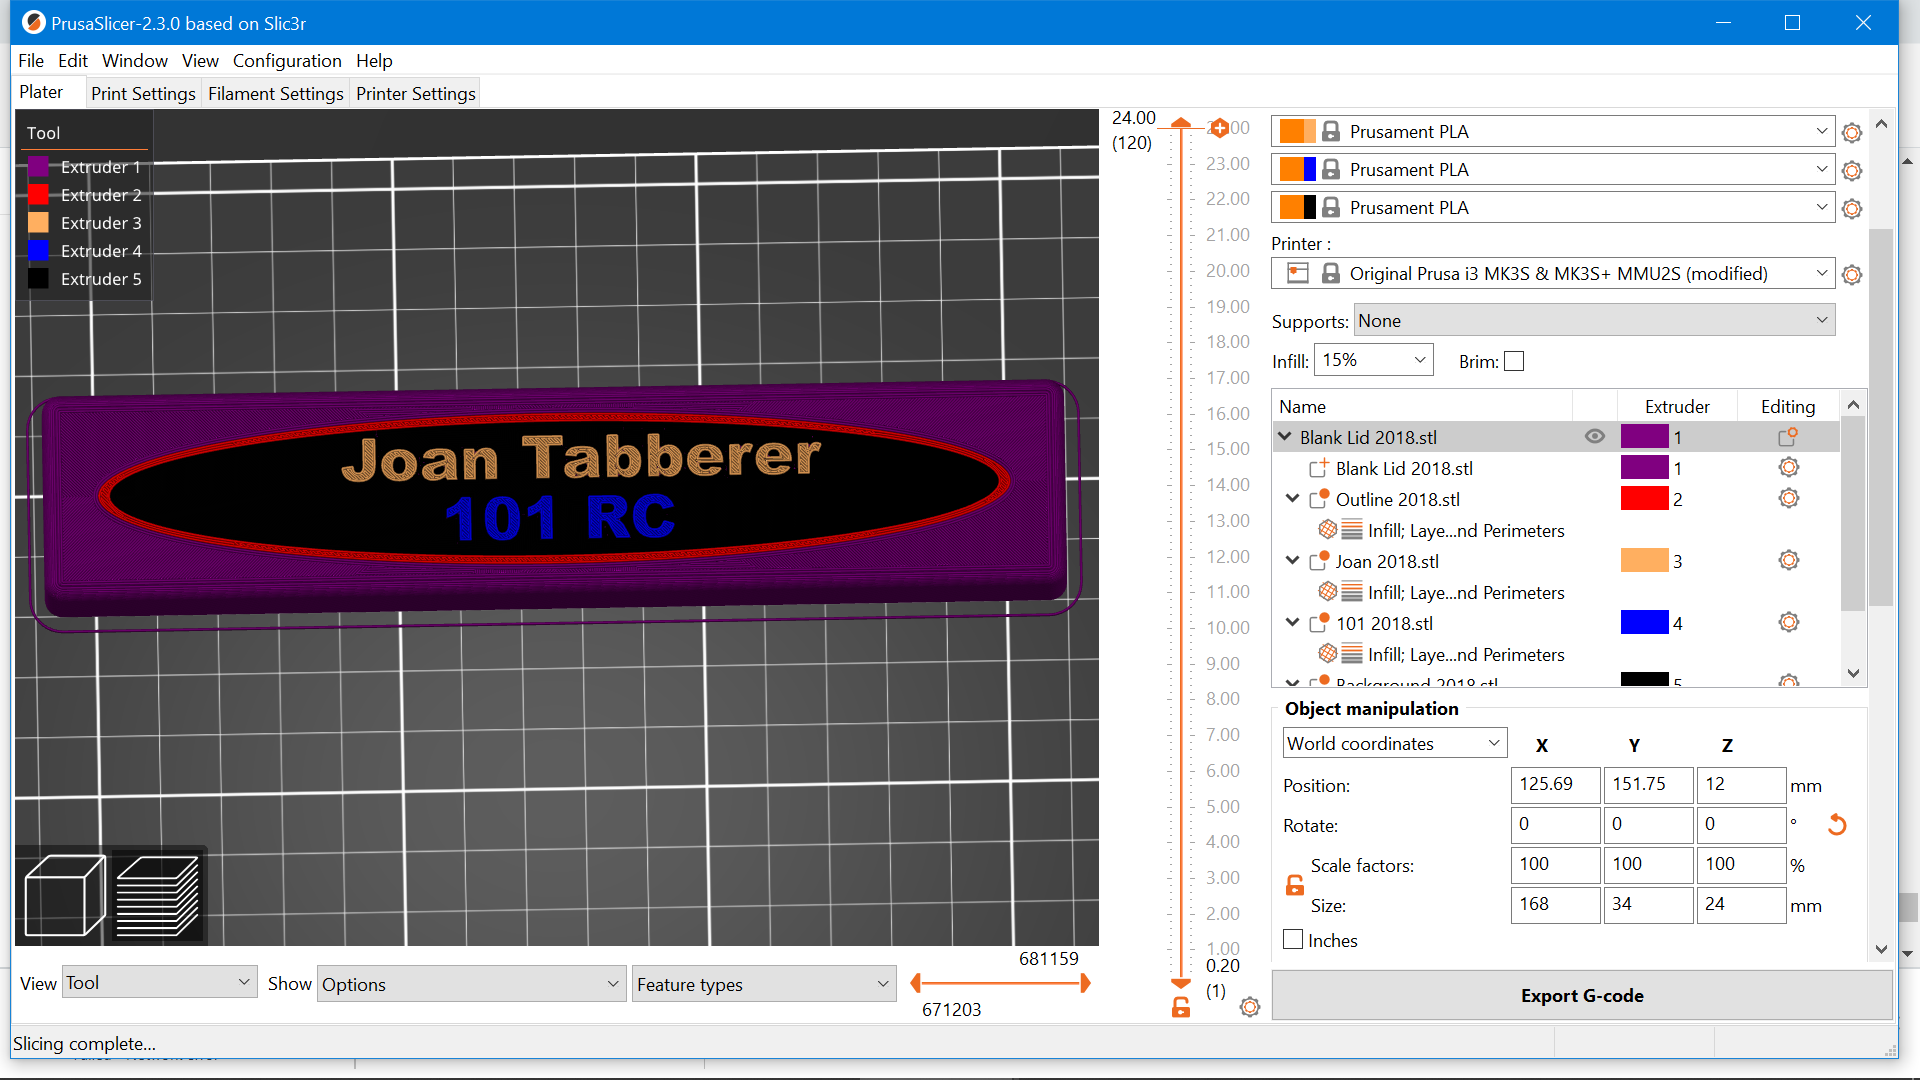
In the image below, the top part shows that I have added a modifier that covers the lower part of the model
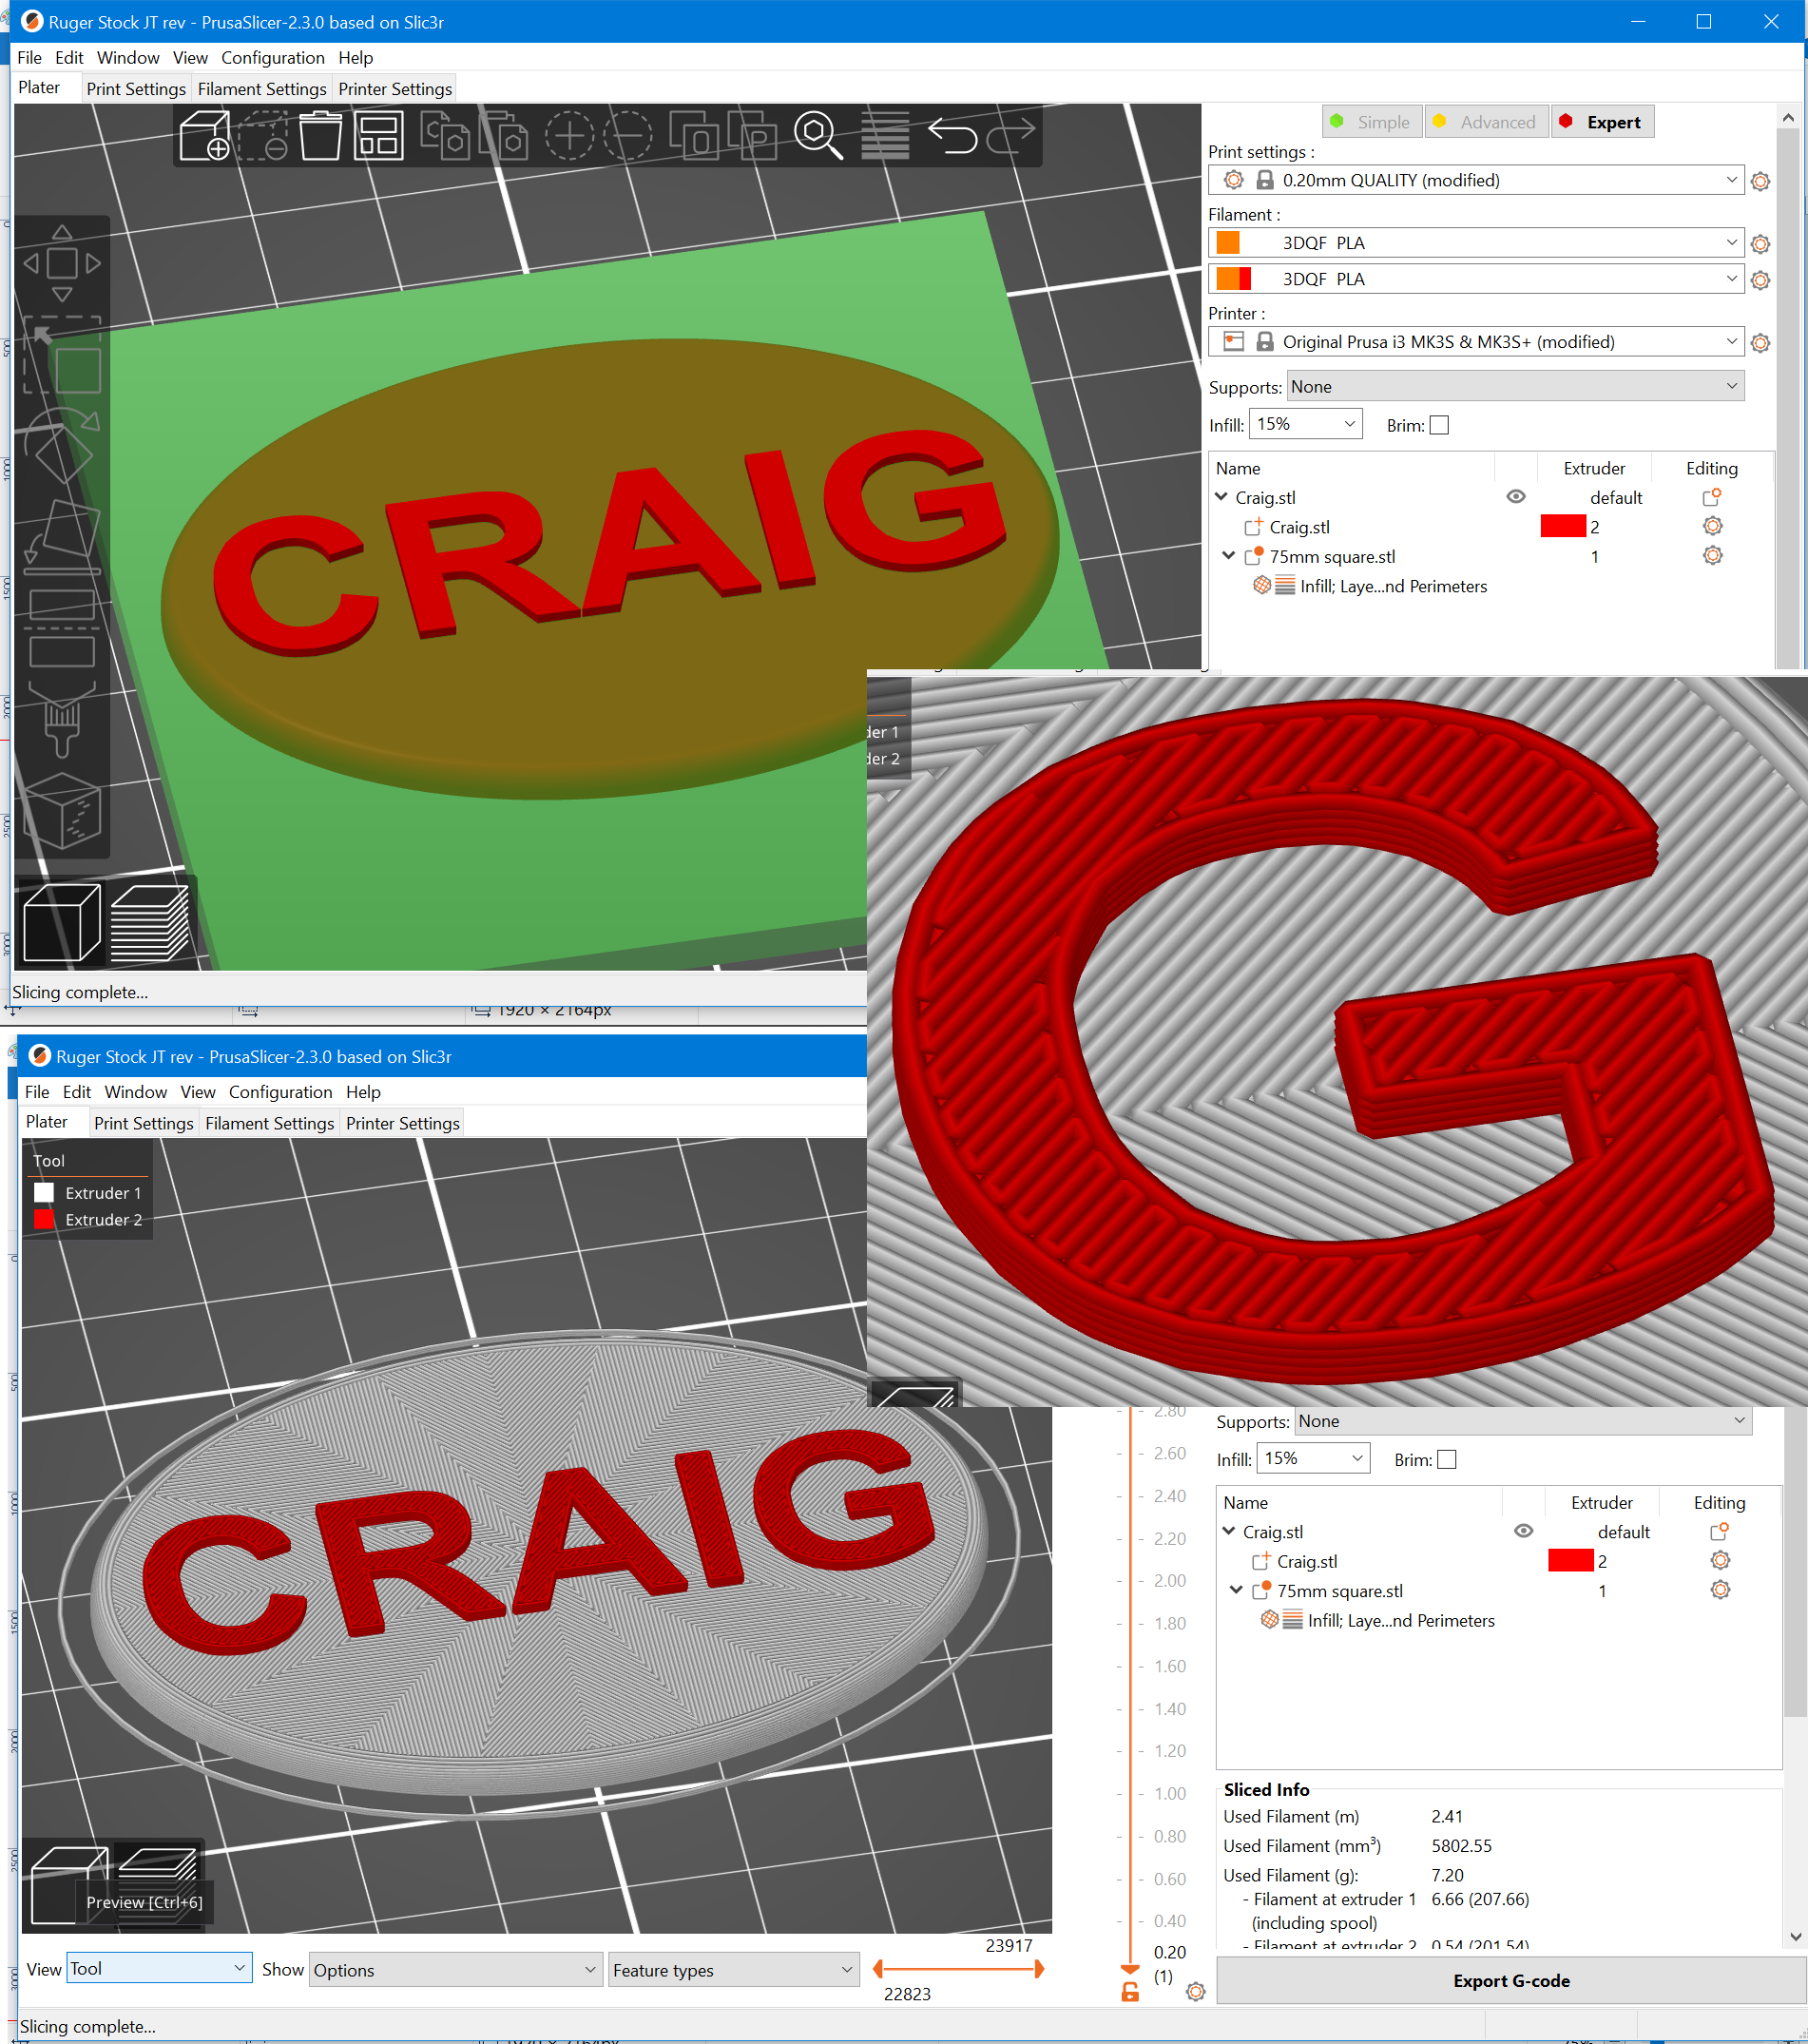
in the main Prusa slicer settings I have set the top infill to be Montonic with one perimeter
in the modifier settings I have set the top infill to be Octogram Spiral and 2 perimeters, to give a bit of texture to the top surface of the body
this instance of Prusa slicer is set up as a two filament virtual mmu, I have turned off the purge tower, and I have set M600 as the tool change code
the lower part of the image shows the effect of the colour change commands in the right hand dialogue box,
the modifier has over ridden the original colour choice for the model, and has over ridden the Monotonic top layer with the octogram spiral
the single perimeter on the letters leaves more space for infill and reduces the chance of gaps in the infill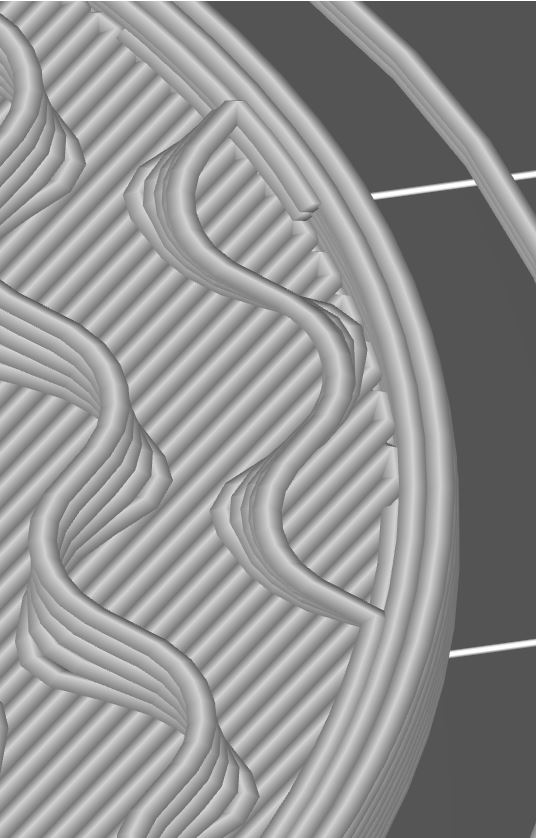
the image above shows the modifier has imposed 2 perimeters on the lower part of the model
I hope this makes sense
I try to make safe suggestions,You should understand the context and ensure you are happy that they are safe before attempting to apply my suggestions, what you do, is YOUR responsibility.Location Halifax UK
RE: "Manual" multicolor
@jpg_master
the situation can be confusing!
but once you understand, it's easier!
regards Joan
I try to make safe suggestions,You should understand the context and ensure you are happy that they are safe before attempting to apply my suggestions, what you do, is YOUR responsibility.Location Halifax UK
RE: "Manual" multicolor
@joantabb
do you normally print 2 colour that way up. I'd assumed the fair side would be where both colours where visible?
RE: "Manual" multicolor
@towlerg
It entirely depends upon what I am doing!

Nasty white filament, very low melting point... printed Face UP (Black is TPU) HAD TO PRINT AT 170c TO STOP THE WHITE STRINGING!
Face Up!
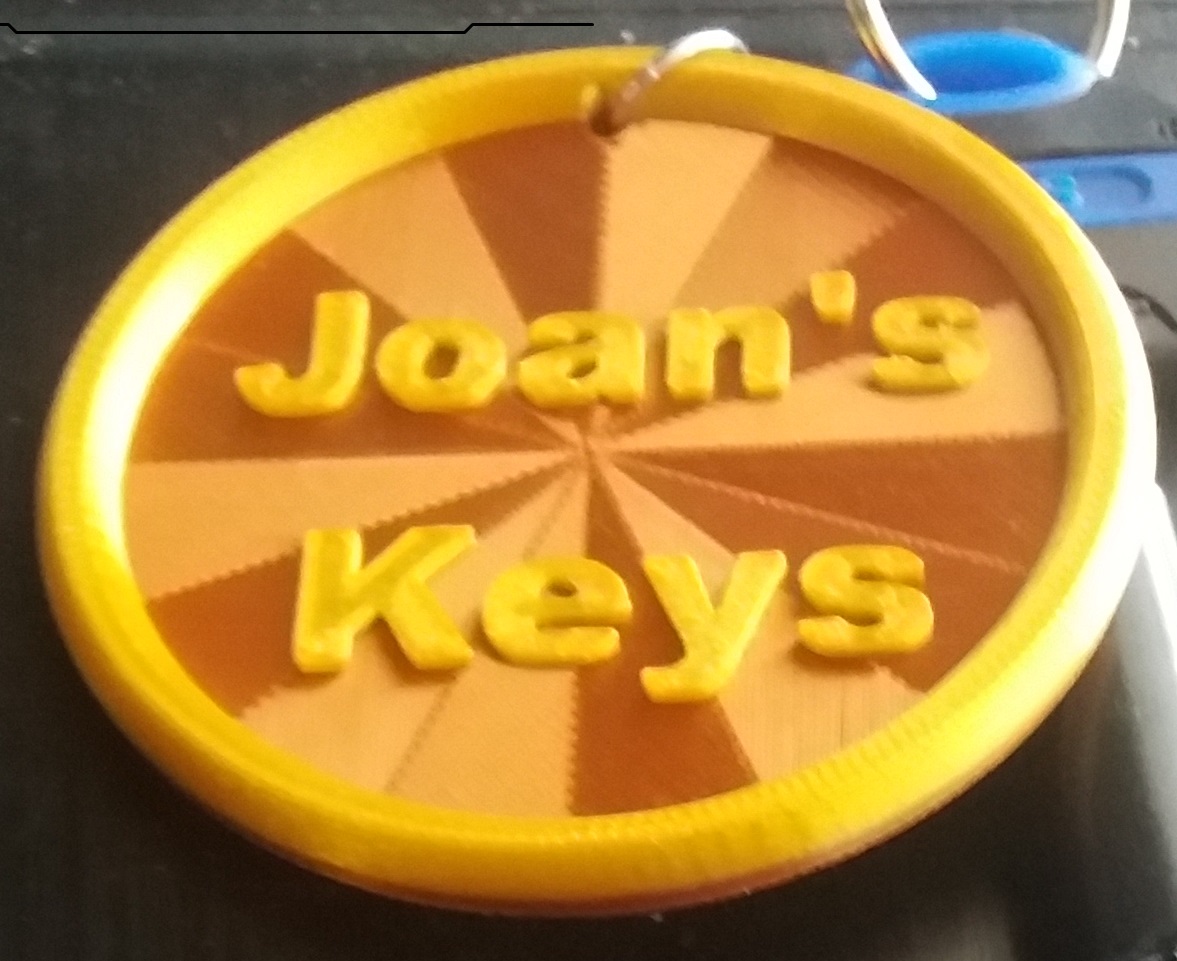
If the second colour is a different Layer, I print face up!
If the additional colours are on the same layer, I generally Print Face Down... preferably with MMU1, MMU2S or Palette2 Pro, rather than Manual MMU.
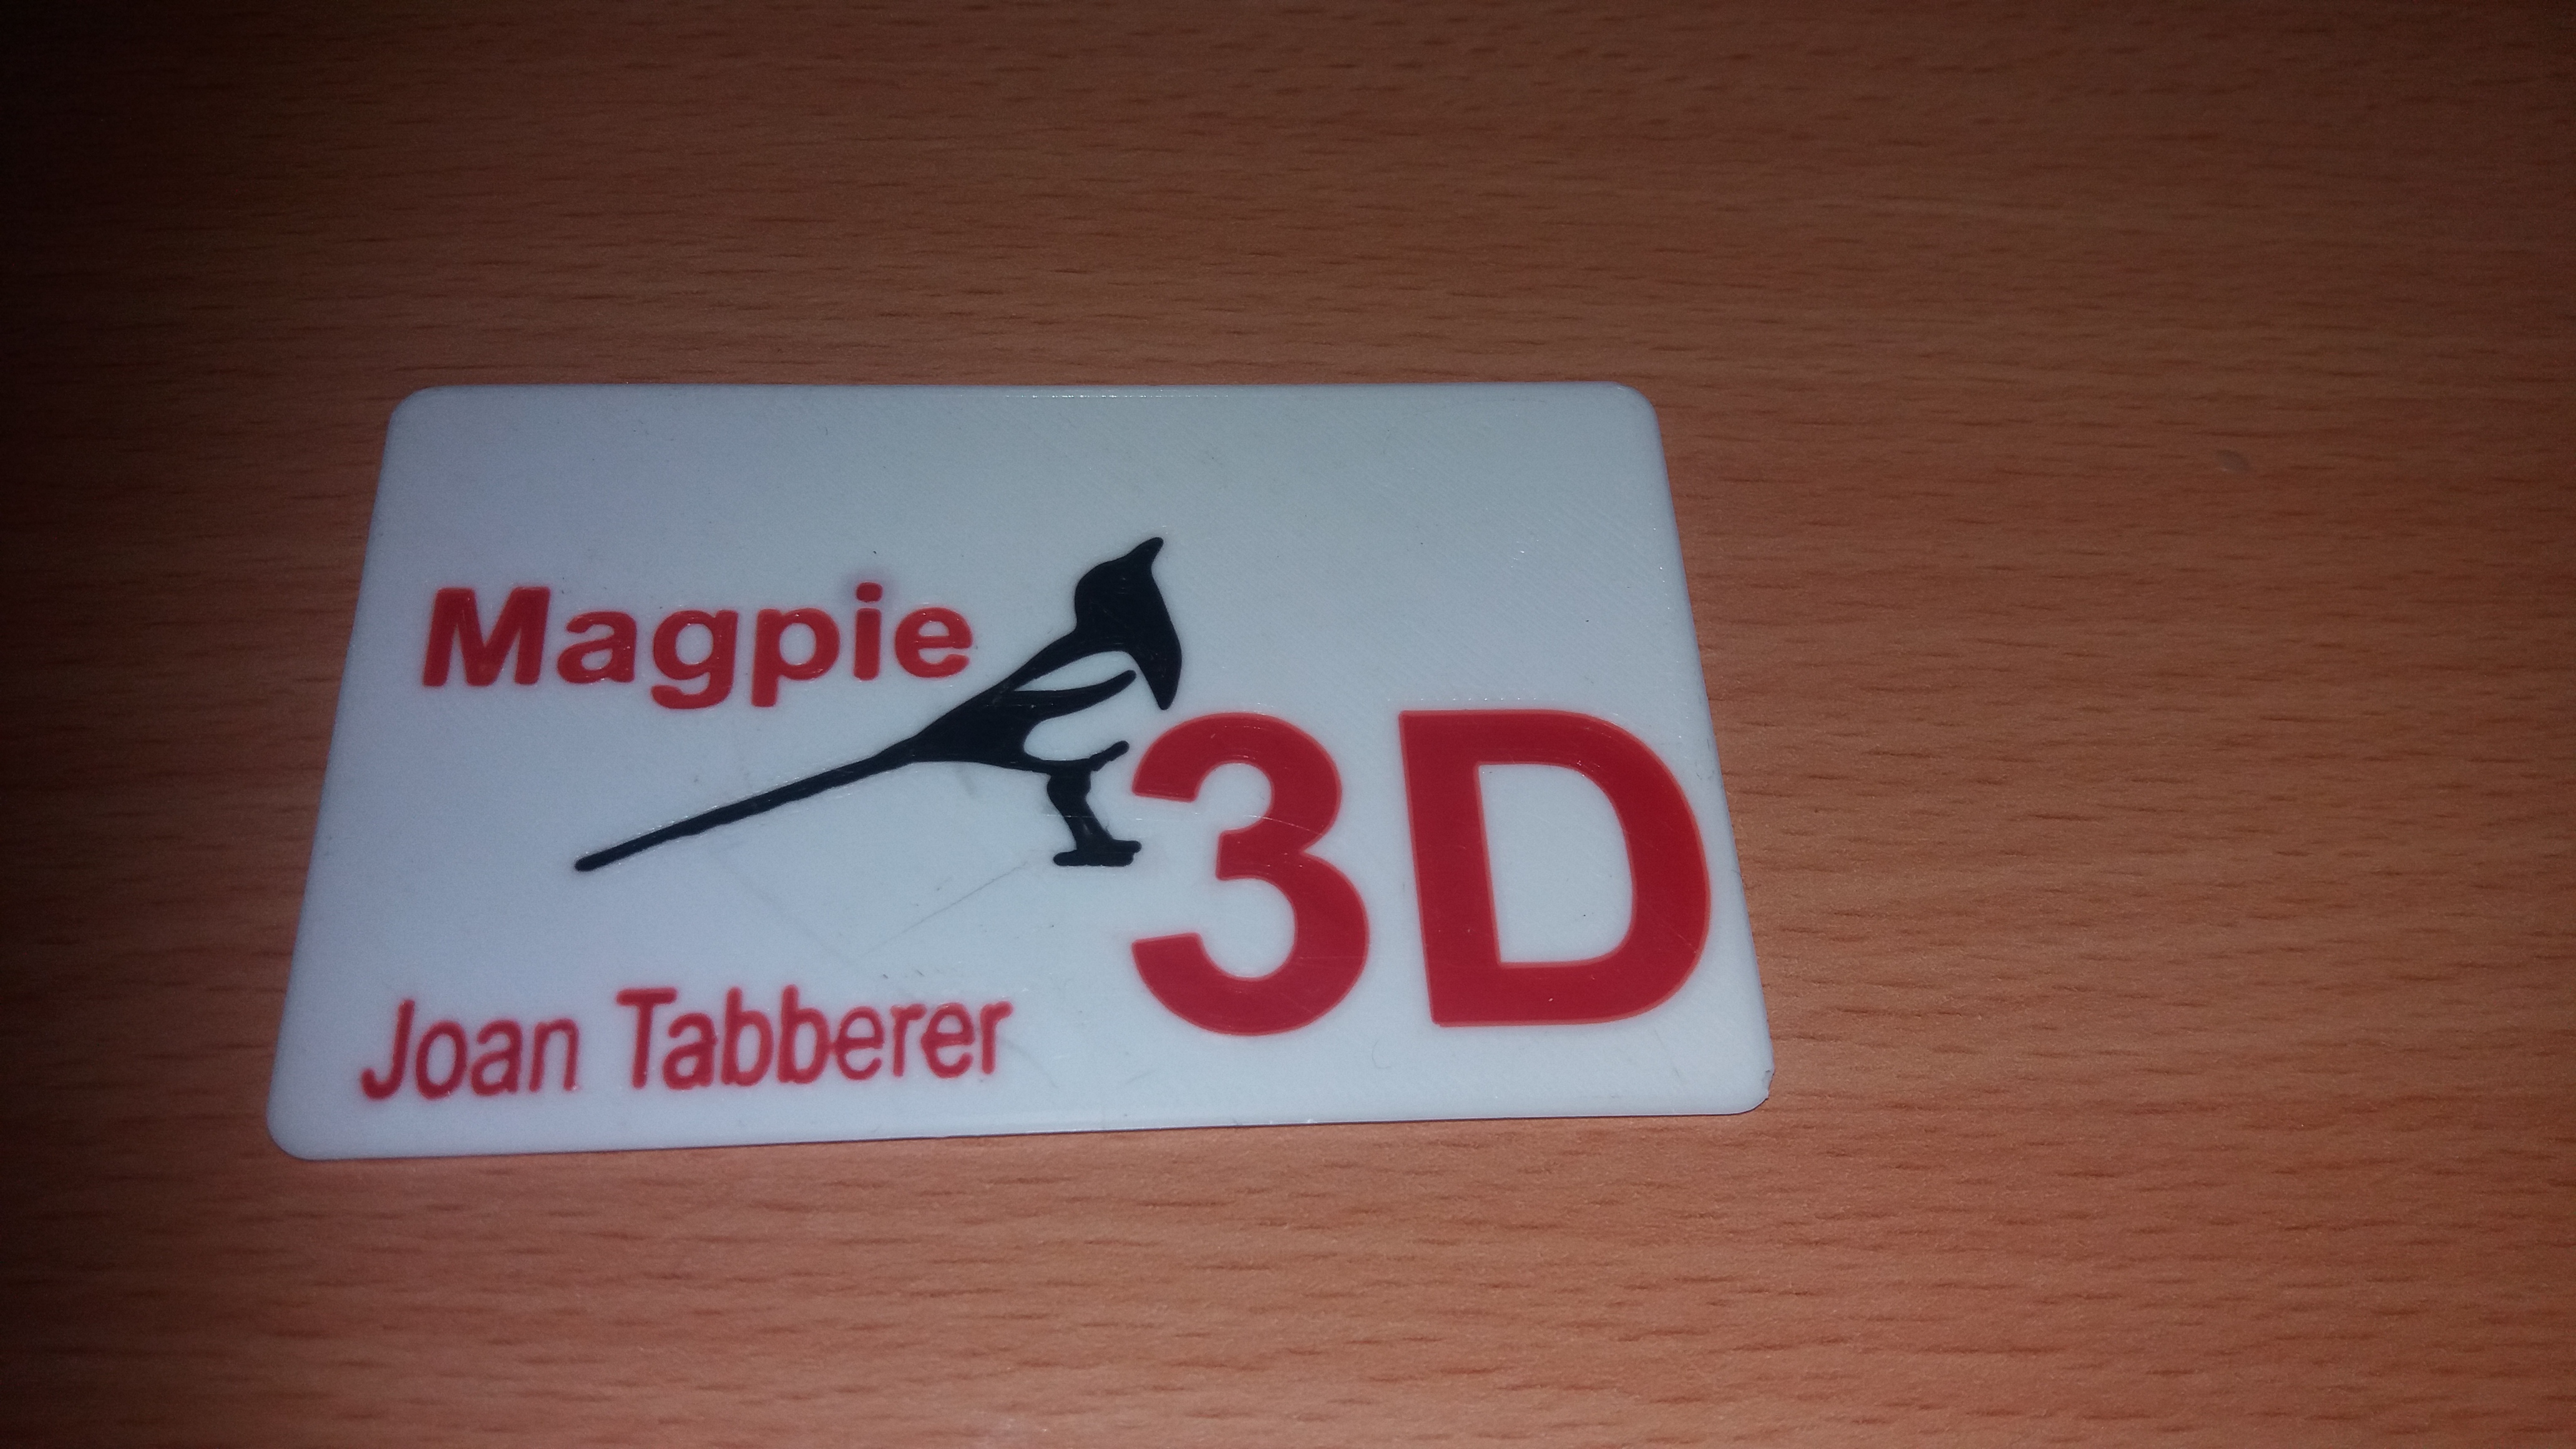
I have printed this business card using Manual MMU, and MMUv1, And MMUv2S and Palette2S Pro with Canvas, and Palette2S with P2PP (Palette2 Post Processor)
Face Down
Face Down
Both sides of this print show as face sides...
regards Joan
I try to make safe suggestions,You should understand the context and ensure you are happy that they are safe before attempting to apply my suggestions, what you do, is YOUR responsibility.Location Halifax UK
RE: "Manual" multicolor
@joantabb
Goddes of slicer .. thx .. I got it.
RE: "Manual" multicolor
@joantabb
one more question: in your examples above, you did Same Layer integration of different colors.
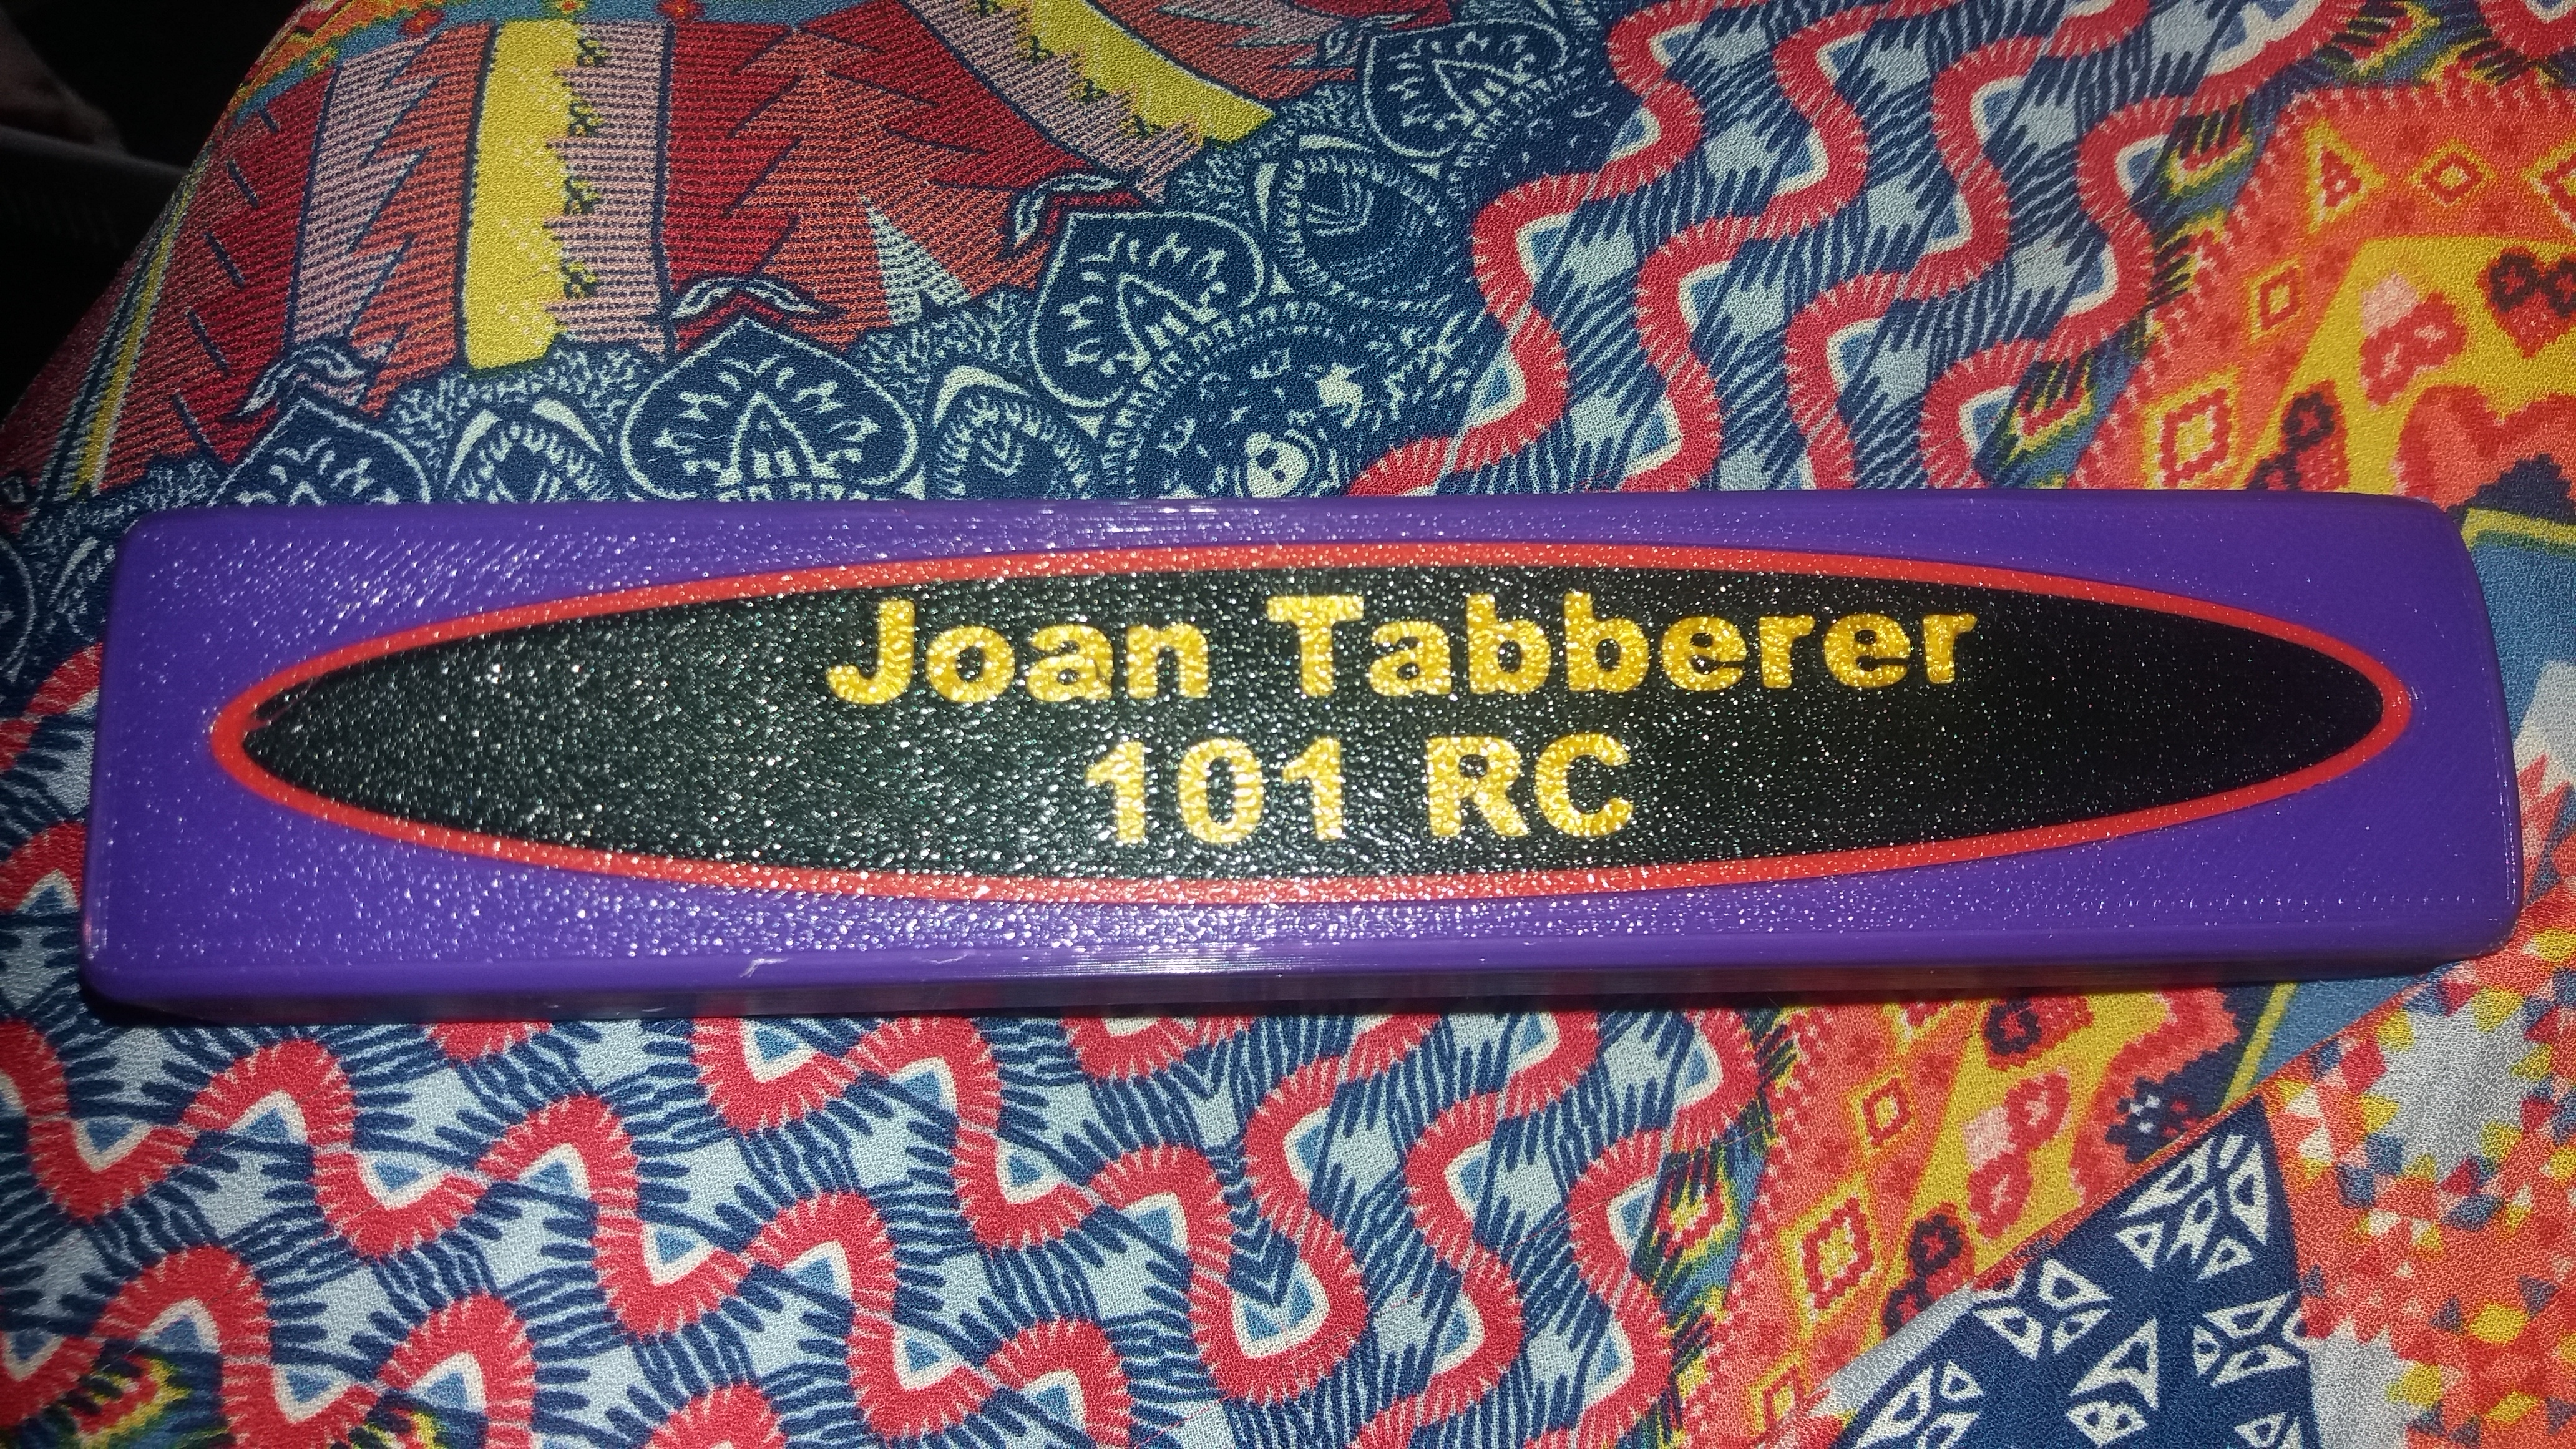
How do you prep the models e.g. for the 101 RC text?
Because I would assume you would need a postive and a negatived ( punched out) where the 2nd color gets embedded in???
and do you do this in a CAD tool or in Slicer???
let us know some more of your magic 😉
RE: "Manual" multicolor
@jpg_master
Hi JPG Manager,
the Magic of Modifiers means that you can get away with near murder at times
the Magpie3D card has cutouts for the insets, 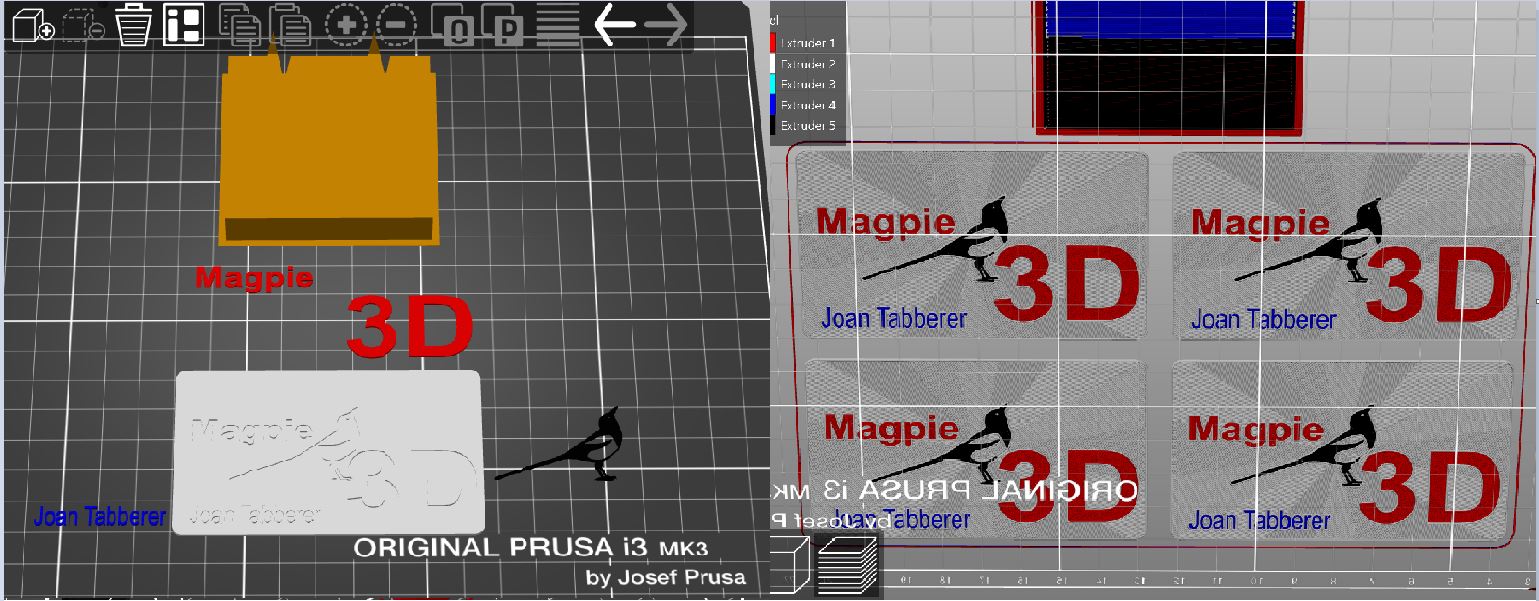
the 101 RC box lid, is inset on a blank surface!
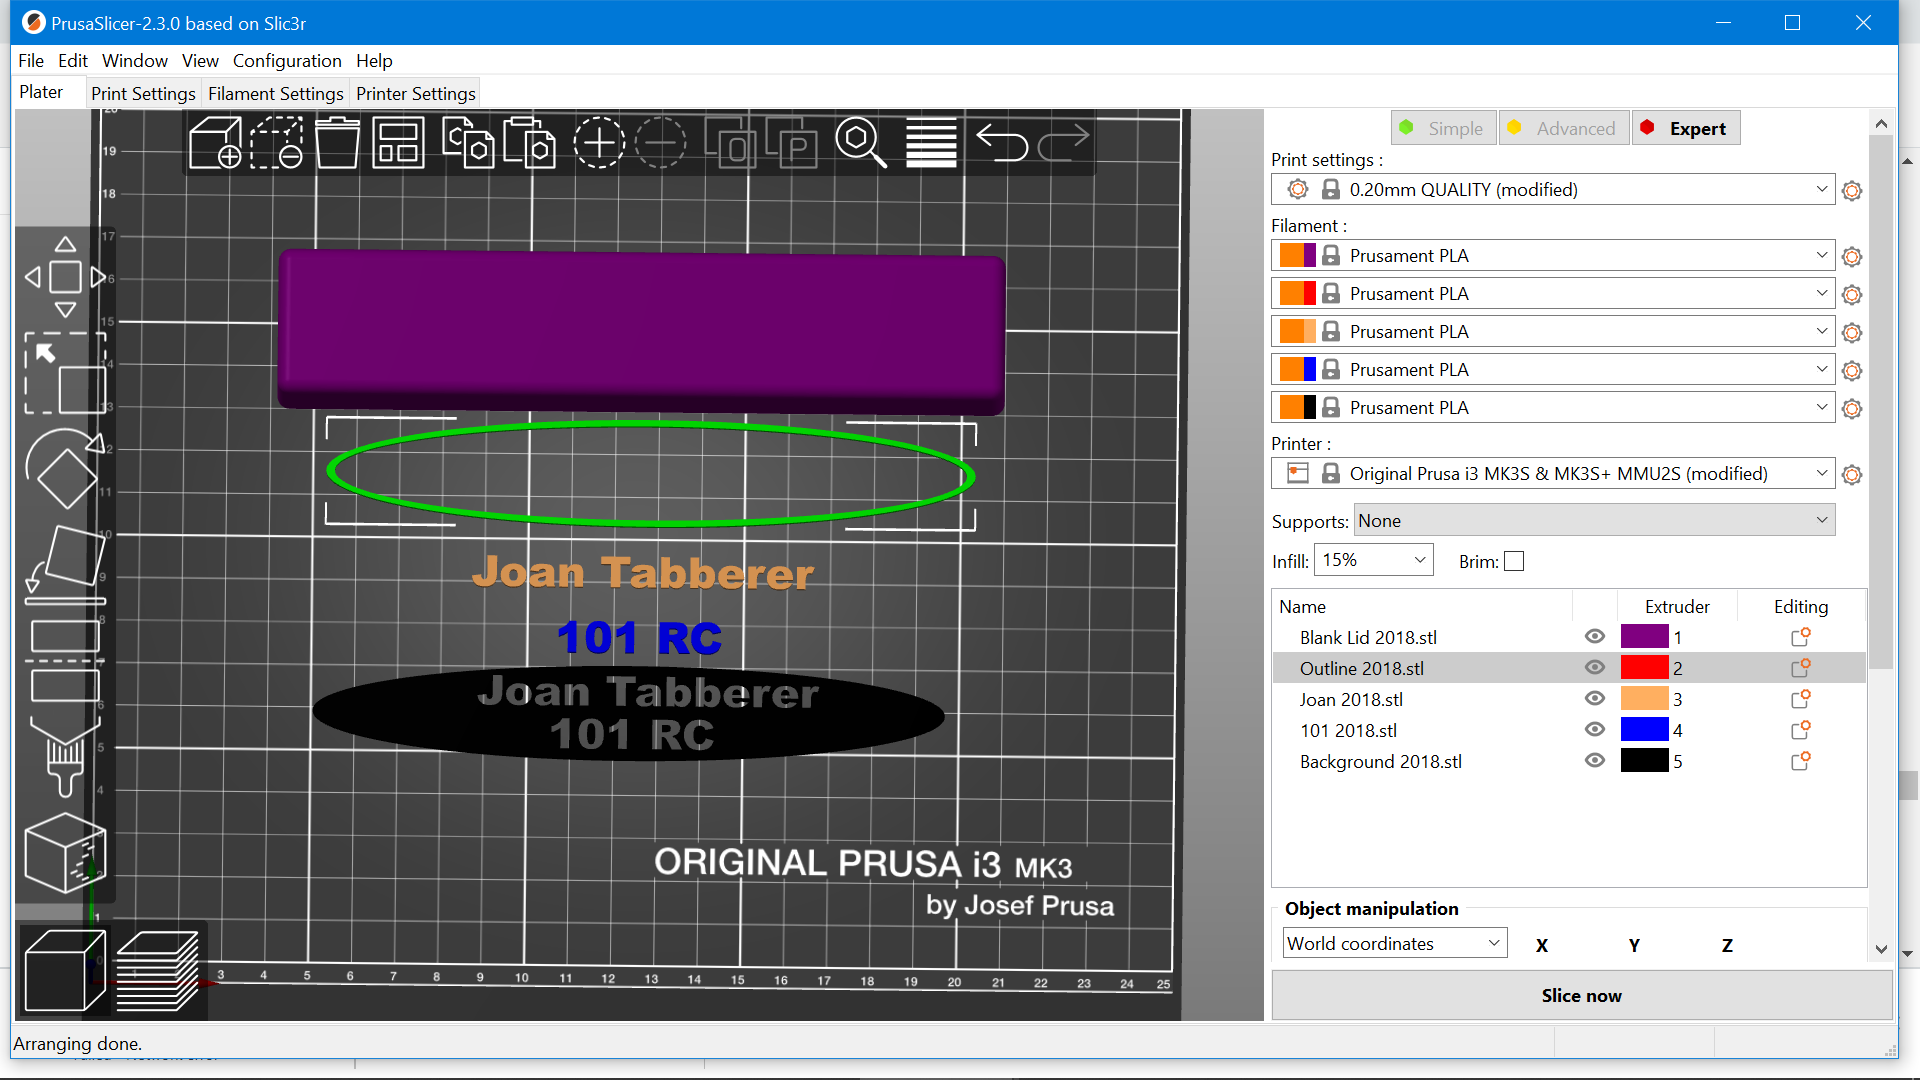
the Blank lid is added to the Build plate first, then the other items are added as Modifiers, they are created and saved in the 3D design program, so they normally maintain their physical relationship automatically... I have forced the items to add as separate entities for this picture.
I generally assemble a print like this, Face up, then when I am happy that the parts are the right colour and position, I turn the blank lid over and the modifiers go with it...
the next image is ready to turn over in the slicer to prepare for printing, but I have left it this way up, for ease of viewing
I keep the box lid, blank, because I use the same box lid for other people, and it saves messing about...
the order of the modifiers and box lid in the right hand panel, is important, the modifiers MUST come before the solid part, otherwise it will not work!
Note, the 3D view with modifiers looks crap... but 'Use the force', 'Believe in yourself, my son!...' which may have been influenced by a space film!
it will work out in the end...
I have enclosed a .3mf file for you to play with
regards Joan
I try to make safe suggestions,You should understand the context and ensure you are happy that they are safe before attempting to apply my suggestions, what you do, is YOUR responsibility.Location Halifax UK
RE: "Manual" multicolor
@joantabb
Hi,
that answers all. I was afraid of that answer, because ... prepping wit CAD tool from the scratch provides the better handling.
I hoped for a magic trick, when embedding text in e.g. completed STLs like when picking a design from thingiverse.
I will try out a way that results in a repeatable approach and then let you guys know how to.
Current challenge is a foldable thing, where both relevant surface lay on the bed.
Joan, thanks so far and a nice wekend
Life without 3-D printing is ossible, but useless 😝
RE: "Manual" multicolor
@jpg_master
designs from Thingiverse and similar often have the parts ready prepped
here's one, I prepared earlier, from a download from the internet!
NOTE one of the parts needs fixing through Netfabb
It's a bit complicated for manual MMU...
regards Joan
I try to make safe suggestions,You should understand the context and ensure you are happy that they are safe before attempting to apply my suggestions, what you do, is YOUR responsibility.Location Halifax UK