How do you actually use variable infill - going from 0% to some other %
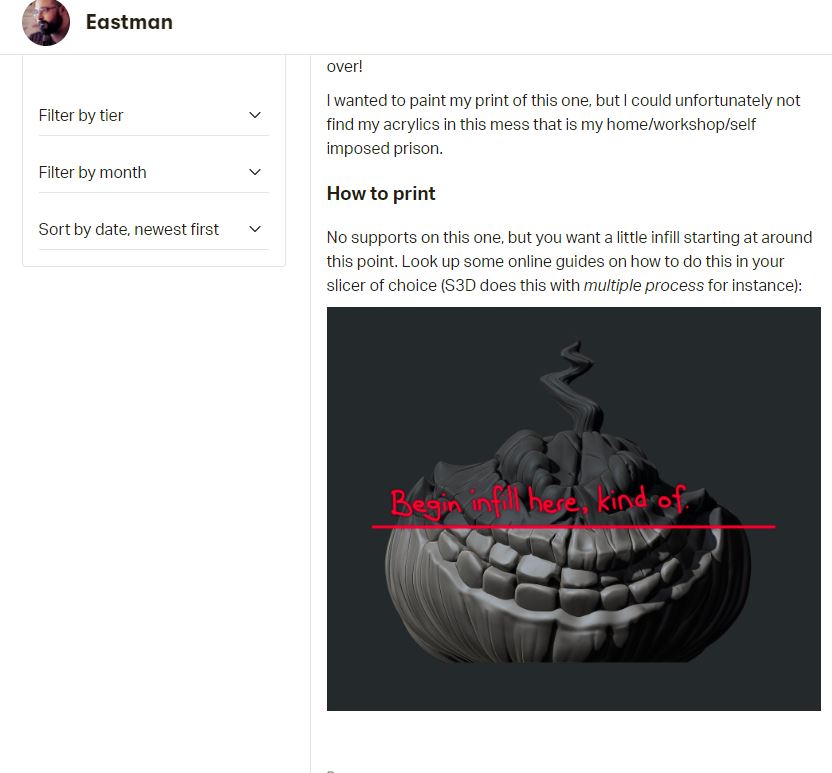
I support a gentleman on Patreon (Eastman) who develops amazing models. He always recommends how to print his models without supports or how to save time/filament by printing without infill in certain locations. Usually I ignore and just print the whole model with some low infill like 5-10%. However, with this latest model (a pumpkin), he advised that no infill was needed up until about 50% up in "Z". I figured I'd try it.
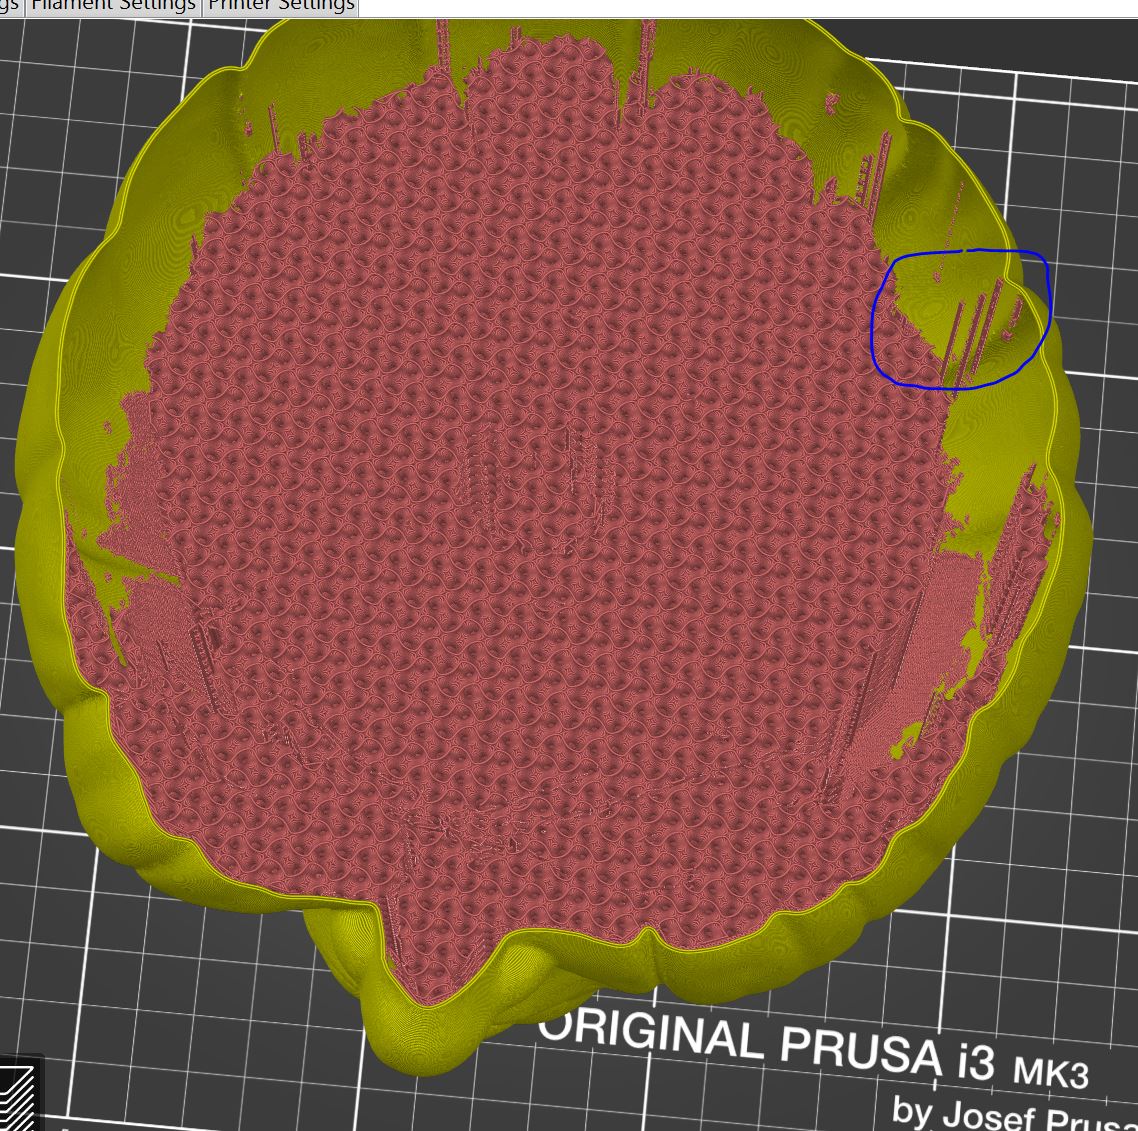
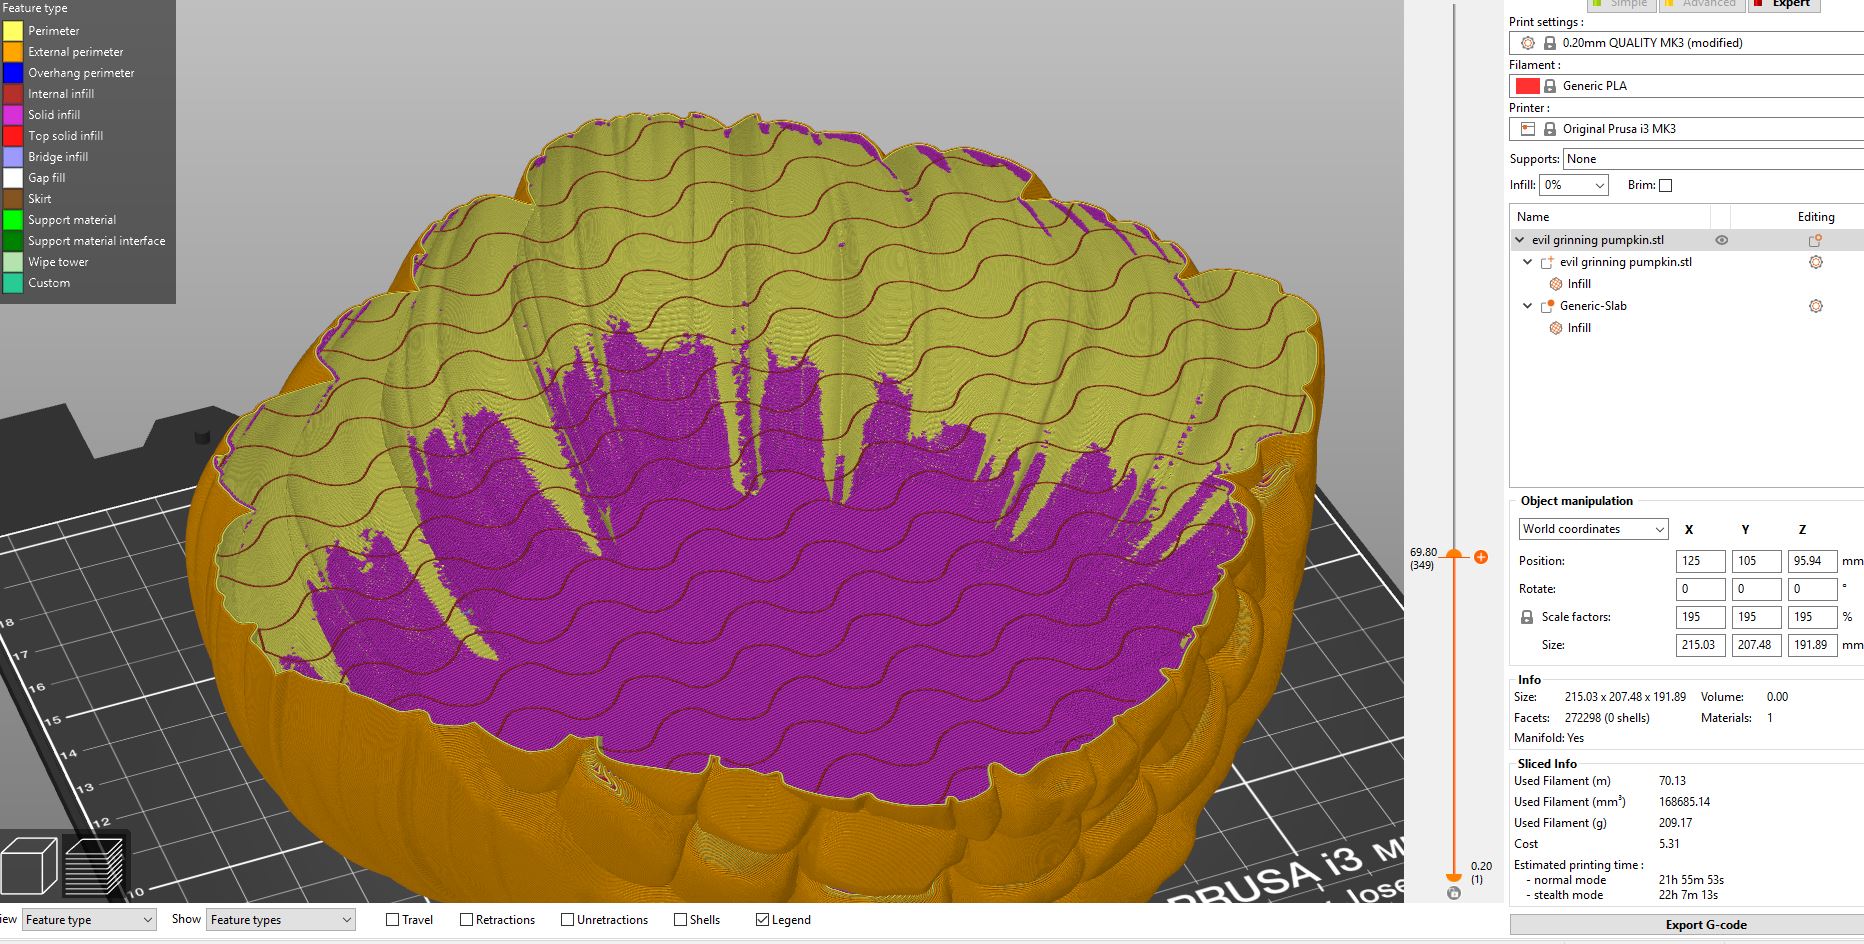
So I created a modifier mesh and chose a 0% infill for the bottom and a 5% infill for the top. But I'm confused because this looks like it will never work. I don't see how to transition from a 0% infill (i.e., just a perimeter) to some kind of infill. It would require a huge bridge on the first layer of the infill which I don't think is possible.
Maybe the answer is that you just can't. But hopefully I'm missing something and someone can help me learn something new here. I've included some pictures which show's right at the transition point between 0% and 5% infill.
RE: How do you actually use variable infill - going from 0% to some other %
Note that he's mentioning different slicers (Simplify 3D), so techniques will vary. Cura has some interesting gradual infill options. S3D's approach (processes) is much like the modifier approach you used. You're correct that you need "something" below a layer. Unless you can bridge the distance, some sort of sparse support is needed to avoid literally printing in air. Unfortunately, this is a bit of a "try it and see" situation. 0% infill might work if you're OK with depending on some very sketchy bridging. I'd go with your original instinct of using a low (but non-zero) percentage and gradually increasing it further up the model. I would definitely want denser support near the top as it goes out more horizontally.
Nice model by the way. Do you have a link to Eastman's stuff?
RE: How do you actually use variable infill - going from 0% to some other %
@bobstro
Thanks for the quick reply. I did notice he is using other slicers, but I sort of made the assumption that all slicers have an analogous feature in some respect. I'm committed to Prusa Slicer for the most part as it's been great for me and my MK3. I think bridging is out of the question for this model. The print I'm showing in the picture is close to 180 mm wide. So that would be one heck of a bridging attempt 🙂
Ultimately, like you suggested, the simple answer here is just to do low % infill throughout the whole model. However, what I was hoping to do, since this is a model that doesn't need infill for about 50% of the way up, was to just have 0% infill half way up and then switch to maybe 5-10% for the rest. I was hoping there would be some kind of feature where if I choose to transition from 0% to 5%, that the slicer would automatically place supports inside the model to help with the transition point from 0% to 5%. I might just stick to doing an infill all the way through.
Regarding his models, yeah I have some links. The easiest way is just go to his Patreon page https://www.patreon.com/eastman. If you support him with his $10 a month plan you literally get all of his models from the past in a download link, plus everything he does new. I found him originally because he put up quite a few models for free on MyMiniFactory. He does lot's of bust's of Marvel/DC/Star Wars, etc. I'm slowly printing all of them at 200-250 mm sizes and filling a wall with them. Here's some links to his free stuff: https://www.myminifactory.com/users/eastman
RE: How do you actually use variable infill - going from 0% to some other %
Sometimes you can do crazy things differently...
I printed
https://www.thingiverse.com/thing:159638
using Vase mode but had some issues on the higher layers so I increased the extrusion width to something like 1.2mm and it printed hollow without supports. so I was able to put LED's inside of it, for illumination
I made it nearly full volume on the Mk3
regards Joan
I try to make safe suggestions,You should understand the context and ensure you are happy that they are safe before attempting to apply my suggestions, what you do, is YOUR responsibility.Location Halifax UK
RE: How do you actually use variable infill - going from 0% to some other %
You can use modifiers in a manner analogous to Simplify 3D's processes to change infill and other settings at desired heights and for all or part of the model. Check out the infill only where needed option as well. I'm on mobile and can't check the specific setting, but it will minimize infill.
RE: How do you actually use variable infill - going from 0% to some other %
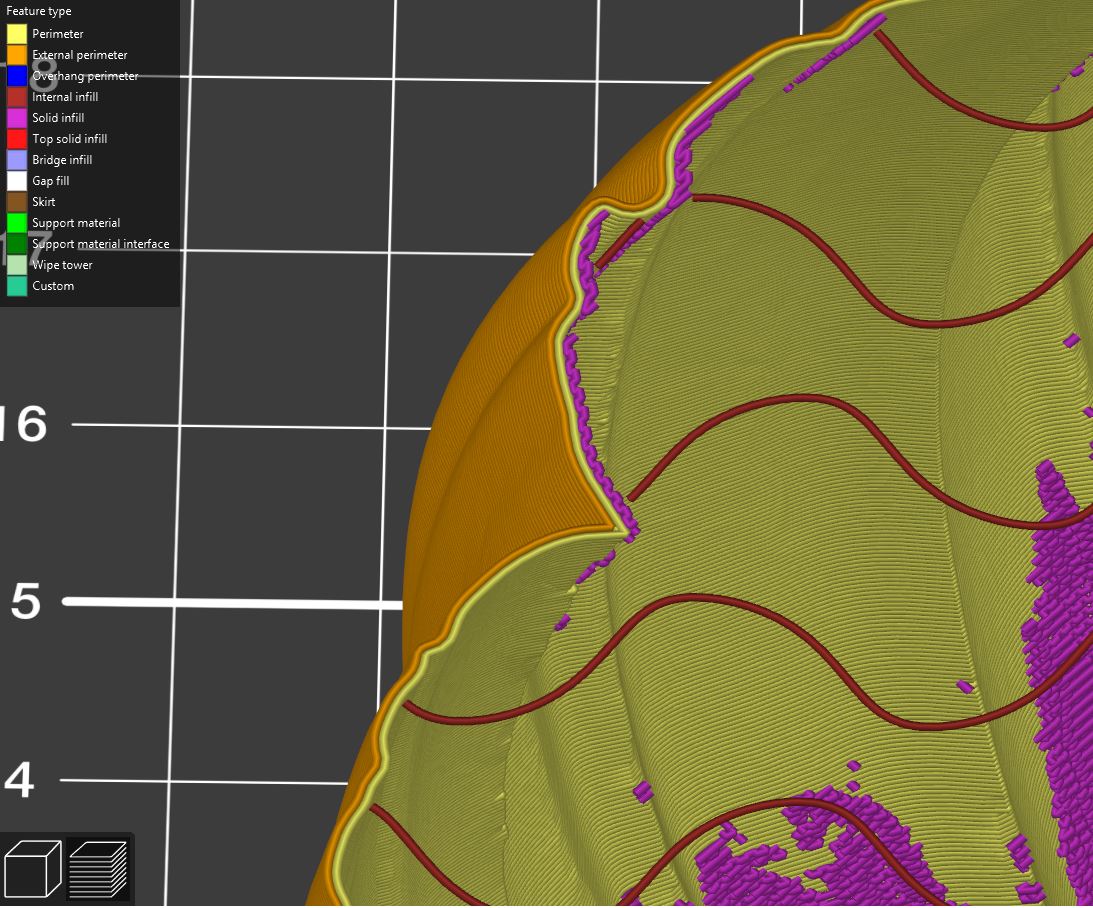
Plicer also has the ability to only do infill where needed. But there are caveats: you need to manage regions where it wants to insert tall certain-to-fail support towers like those shown here: