Gap fill does fill only half of model
Hi
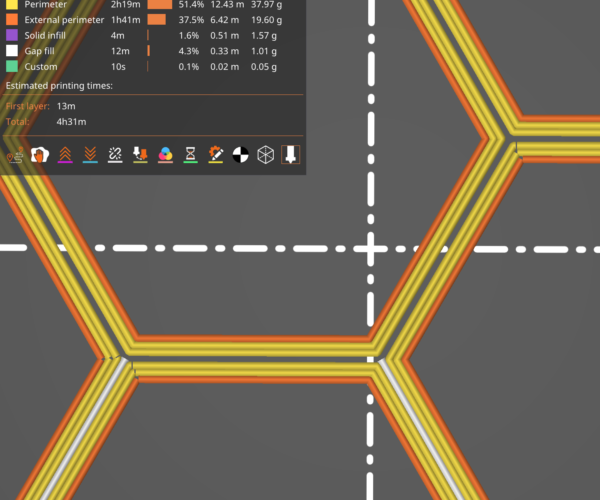
I am printing the Honeycomb storage wall (wall-honeycomb-part.stl) and my first layer shows some gaps in some of the combs. Looking at the slicer output, I see that only some combs are gap-filled.
Zooming out, the gap fills are in about half the model only. What is the reason for this? Is there another way to make sure the bottom layer is nice and smooth?
Some settings:
- Layer + First Layer height: 0.25
- Perimeters: 4
- Infill: 0
- Fill Gaps: yes
- Perimeter generation: Classic
Thanks.
Best Answer by JoanTabb:
Hi Toby,
Use a Height Range Modifier, to create a small zone of the model to have different parameters, so if you make the height range modifier active from 0mm to 0.2mm and set the perimeters to 1 you will achieve this setup.
if you wish, you can make the modifier thicker and make more layers single perimeter... or whatever settings that you wish to change
Modifiers can start at any level, and be any thickness you want.
Jess Zipped .3mf file
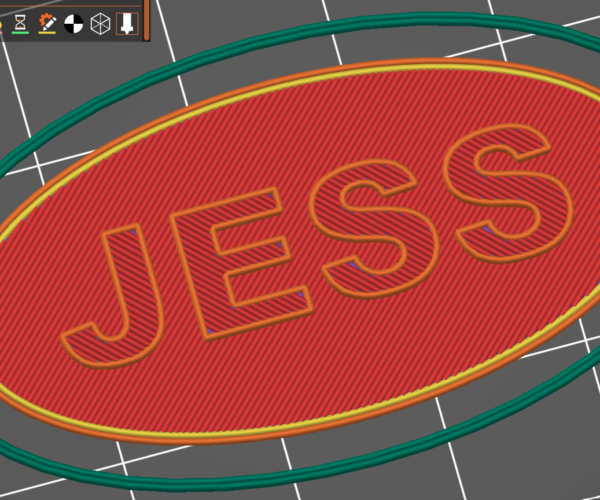
the image below, shows that one perimeter leaves more space for infill, giving a pleasing effect
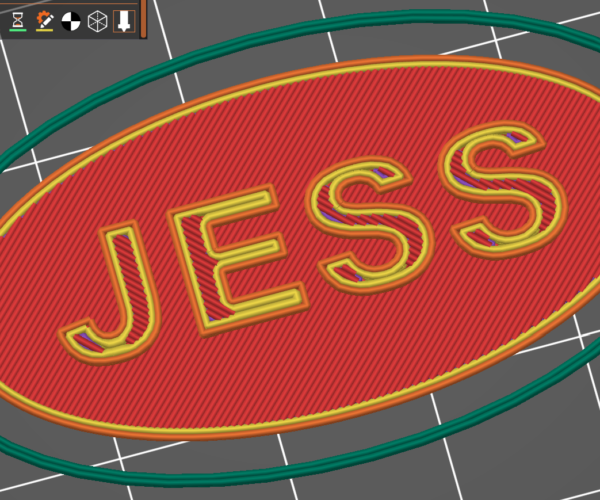
in the image below, there are two perimeters on the letters and that messes up the infill as you can see
this is a similar issue to your Hex outlines where there is insufficient space for infill
I hope these files help you see how the bottom layer and the top two layers were set for one perimeter
whilst the rest of the layers have more perimeters
regards Joan
RE: Gap fill does fill only half of model
Try adjusting extrusion width. Or try one perimeter for the first layer to leave space for solid infill
I try to make safe suggestions,You should understand the context and ensure you are happy that they are safe before attempting to apply my suggestions, what you do, is YOUR responsibility.Location Halifax UK
RE: Gap fill does fill only half of model
Maybe you want to upload your 3mf project file? That way we can see your settings. I don't see any of this slicing the file with standard print profiles and adjusted for what you mentioned before.
Formerly known on this forum as @fuchsr -- https://foxrun3d.com/
RE: Gap fill does fill only half of model
Try adjusting extrusion width. Or try one perimeter for the first layer to leave space for solid infill
I adjusted extrusion width and that worked quite well already, thanks! I'd like to try your second suggestion too, but I can't find where to adjust perimeters for only the first layer.
RE: Gap fill does fill only half of model
I tried attaching the .3mf but I couldn't figure out how to do it. It allows me to upload images, but no .3mf.
RE: Gap fill does fill only half of model
The *.3mf file must be packed in *.zip file, otherwise the forum will not accept it!
RE: Gap fill does fill only half of model
Hi Toby,
Use a Height Range Modifier, to create a small zone of the model to have different parameters, so if you make the height range modifier active from 0mm to 0.2mm and set the perimeters to 1 you will achieve this setup.
if you wish, you can make the modifier thicker and make more layers single perimeter... or whatever settings that you wish to change
Modifiers can start at any level, and be any thickness you want.
Jess Zipped .3mf file
the image below, shows that one perimeter leaves more space for infill, giving a pleasing effect
in the image below, there are two perimeters on the letters and that messes up the infill as you can see
this is a similar issue to your Hex outlines where there is insufficient space for infill
I hope these files help you see how the bottom layer and the top two layers were set for one perimeter
whilst the rest of the layers have more perimeters
regards Joan
I try to make safe suggestions,You should understand the context and ensure you are happy that they are safe before attempting to apply my suggestions, what you do, is YOUR responsibility.Location Halifax UK
RE: Gap fill does fill only half of model
Thanks for taking the time to write such an extensive answer! I finally got around to try this, and it improved my print quite a bit, but didn't make it perfect. But what I learnt from your post will help me many times n the future.
In the end, I printed the whole thing upside down and enabled ironing, which gave me the best result. I am happy how 🙂

