Experimenting with a 'wood' fuzzy skin texture
Hi there,
A little while ago I came across a post on reddit on how to add wood grain to 3d prints.
That made me wonder whether the a similar effect could be achieved by modulating the noise used for the fuzzy skin effect. From a quick glimpse at the prusa slicer source code that seems to be possible.
In order to prototype the idea I built a little web app that applies the effect to G-code from prusa slicer (or stl files). The web app can be found here: https://29a.ch/sandbox/2021/3d-print-texturizer/
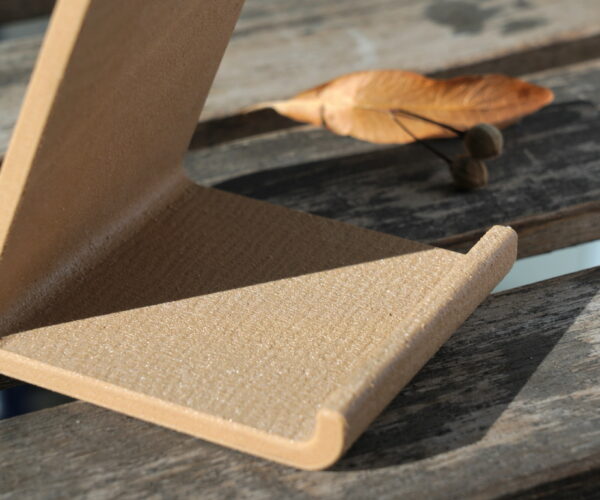
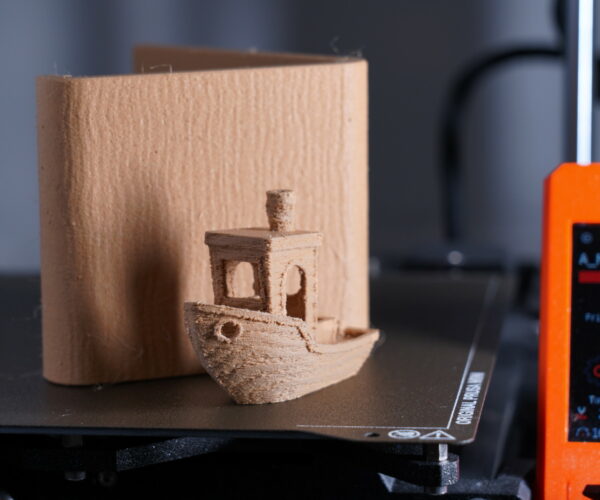
The results I got using this approach look quite appealing to me:
I'd be curious to hear whether people would be interested in having different 'fuzzy skin textures' available directly in the Slicer.
If any of the devs are around I'd also be curious whether such a feature would be considered to be in scope for the slicer since it exists (at least in my opinion) in the space somewhere between what should be handled in the slicer and what should go into modelling software.
I like it!
That would be pretty interesting as an option on some prints!
Needs to be in slicer...
Would be great if one could choose which surfaces have it and which don't...
Really like the idea though...
Having problems with bed adhesion every morning...
Modifiers
Would be great if one could choose which surfaces have it and which don't...
Really like the idea though...
That would be a benefit of integrating it into the slicer. The modifiers in prusa slicer are sweet and easy to use. The only option I have in right now is to ignore top and bottom surfaces.
Personally I think this should be a function of CAD because it would allow different textures for different surfaces of the part. That said I suspect few CAD programs allow even one texture. I wonder if a more flexible way to add texture might be embossing in association with negative space.
Having said that, I suspect the OP's technique will be widely used. I can't wait to give it a spin. If we're allowed to request textures, I'd vote for one that aids grip in combination with softer filaments TPU etc.
BTW is it possible to control the number and placement of "knots".
Knots
Having said that, I suspect the OP's technique will be widely used. I can't wait to give it a spin. If we're allowed to request textures, I'd vote for one that aids grip in combination with softer filaments TPU etc.
I guess the white noise the fuzzy skin uses does a really good job at providing more grip. Maybe a "leather" effect could be something a bit more visually interesting to do a similar job.
BTW is it possible to control the number and placement of "knots".
There are no knot holes at the moment. The texture is just based on the rings, grain and the 'cut' of the wood. I do like the idea of adding some. I'm not quite sure how well they'd work on the scale of most 3d prints. I think most prints would end up being either no hole or all hole. 🙂
On a slightly different track...
..... I really like the fuzzy skin option! Can we now have top and bottom layer patterns to match?
Hear ye, Hear ye! Step right up folks and get your Government salvation here! Less than $.002 per word! Amazon.com/dp/B0B8XMMFP4
Textured bump maps
[...] That made me wonder whether the a similar effect could be achieved by modulating the noise used for the fuzzy skin effect. From a quick glimpse at the prusa slicer source code that seems to be possible.
Raise 3D's ideaMaker now includes a texture feature for vertical surfaces. You can import a grayscale image and the slicer will map it to different heights. It's a different approach but a good example of what can be done in the slicer. Unfortunately, ideaMaker is closed source, so anything similar would have to be developed for PrusaSlicer.
and miscellaneous other tech projects
He is intelligent, but not experienced. His pattern indicates two dimensional thinking. -- Spock in Star Trek: The Wrath of Khan Unfortunately,…
Personally I think this should be a function of CAD because it would allow different textures for different surfaces of the part. That said I suspect few CAD programs allow even one texture...
I only (know how to) use two CAD software: Blender and FreeCAD (because both are free).
In Blender, one can do that of course (everything can be done in Blender). The problem for average 3D printer owner is, Blender is too complicated to use. That is, even if one is kinda familiar with it, it's quite complicated to properly apply 3D texture on a plane. Ok, those who work on Blender all the time, can manage this in 5 minutes, I guess.
FreeCAD, which is "closer" to 3D print way of thinking, and is in general easier to use, doesn't have that option -and probably won't have for quite a while.
If I would really need some plane textured on my print, then I would make the object in FreeCAD and then apply texture on desired plane with Blender. Yeah, is pain in the a**.
In that sense, I would very welcome, if there would be some simple texturing implemented in PrusaSlicer.
[Mini+] [MK3S+BEAR]
Knots or not (sorry couldn't resist it)
There are no knot holes at the moment. The texture is just based on the rings, grain and the 'cut' of the wood. I do like the idea of adding some. I'm not quite sure how well they'd work on the scale of most 3d prints. I think most prints would end up being either no hole or all hole.
Sorry, I assumed you'd figured out how to do knots by the picture you posted on Reddit

Knots, texturing top and bottom surfaces
Sorry, I assumed you'd figured out how to do knots by the picture you posted on Reddit
The post on reddit is by someone else. It's just what inspired me to experiment further with wood textures. The redditor (e1miran) used Blender and UV mapped (2d) displacement maps. I built the web based tool above that recreates the effect on an STL or directly on g-code without blender and uv maps.
I'm not sure if what's visible on that picture is a knot, could also just be the cut of the wood (live sawn?).
As Bogdan points out blender is fairly complicated. I've been using it since the NaN days and I still struggle. :))
As far as top and bottom layers go: I think fuzzy skin on the bottom just won't be possible at all because of gravity. I think the best option there is textured sheets. I guess that could be an interesting way to go though: try and replicate the texture of prusas textured sheet on the sides.
The top is difficult as well. It can be textured of course by essentially changing the layer height at every point (z offset, flow rate) but I think both of these changes are rather slow do I don't think it would be possible to recreate something like fuzzy skin. Another factor is that at least usually the width of the extrusion is wider (~0.4 width mm vs a ~0.2mm layer height with common 0.4mm nozzle settings) than the height so that reduces the resolution as well.
suggestion
This is amazing. One suggestion, is there a way to leave the bottom flat? Could you add an option to leave the bottom untextured?
Sides and top
This is amazing. One suggestion, is there a way to leave the bottom flat? Could you add an option to leave the bottom untextured?
You can use the 'sides only' option to do that but it will stop texturing top surfaces as well. I couldn't produce a print where the top looked good. If you manage to produce one I'd be happy to to add a 'sides and top' option. 🙂
I would like to have.....
.... some idea of how the fuzzy skin parameters ("skin thickness" and "point distance") affect the appearance of the finish. There is no "context explanation" when hovering the cursor over these parameters as is the case for most others. So far I have just accepted the default values. Are there minimum and maximum values? A "sampler" .STL or .gcode file would be helpful. Perhaps I'll do one (when I have time and a sense of the practical value range(s) and minimum change between values that produces a noticeable effect) unless someone has already done one. Anyone? Anyone?
Hear ye, Hear ye! Step right up folks and get your Government salvation here! Less than $.002 per word! Amazon.com/dp/B0B8XMMFP4
RE: Sampler
Working on my fuzzy skin sampler, I think it will be a useful reference. Basically, it will be a "field" of "tombstones" where each one has a different combination of skin thickness and point distance. My first thought was to put the "text" of each combination on the back of the slab, but I don't see a way to "inhibit" the effect on just one wall, say the rear one, leaving it smooth for the text. I'm thinking something like a "support blocker" that I can place so that it blocks the effect on any given portion of any given wall. I guess I could also put the individual slabs on a "ground slab" with enough separation that the text can be put on that horizontal surface. At least that way they would all stay together. Should I also include variations for layer thickness? There may be some combinations of large point distance and thick layers that would not work well. Or maybe not; I don't have a good feeling for how they may interact.
Hear ye, Hear ye! Step right up folks and get your Government salvation here! Less than $.002 per word! Amazon.com/dp/B0B8XMMFP4
RE: Experimenting with a 'wood' fuzzy skin texture
I tested this out on a few planters that are easy prints. It looks like the wood grain is applied to both outside and inside walls of the planter. I am guessing there is no way to currently turn off on the inside? Also, not sure what is going on however every time I print a model with the grain applied the model begins to warp and eventually smash into the printer head crashing the whole print. These models without the grain print fine. I would really like to get this to work as this looks amazing in the slicer, just not sure what is going on with the printing results. Regardless cool idea and nice work.
Hey Brian,
I'm sorry to hear that you are having warping issues.
Do you apply the effect to the STL or the G-Code?
Did you check 'sides only'?
RE: Experimenting with a 'wood' fuzzy skin texture
This sounds and looks great. Wood and leather grains would look great.
I assume you still can't get fuzzy skin on the top surface? If so, I'd also really like a fuzzy skin that would match a textured bed so the top surface (flipped onto textured bed) would match the sides and the print would look less 3D printed.
Can I fuzzy skin follow a fillet or champfer?
Thanks in advance!
vb3
RE: Experimenting with a 'wood' fuzzy skin texture
The tool can apply the texture on all sides, but it doesn't print well on the top or bottom. Maybe with arachne that got a bit better, didn't test that yet.
Fillet or Chamfer isn't an issue either but the closer to horizontal the surface get the worse it will look.
RE: Experimenting with a 'wood' fuzzy skin texture
Thanks 29a! The effect looks wicked. I'll try it when I get a chance! best!

