Designating the start point for layer printing.
Good afternoon After changing the filament using the M600 command, I need to indicate the location from which printing will continue. Is there such a possibility in the slicer? Best regards, Sebastian
RE:
Hi Sebastion,
M600 has a mind of it's own.
It depends what you are trying to do, and how you are trying to do it, as to what the answer to your question is.
with layer height colour change printing, if you action the colourchange on the layer where the new geometry starts, then the printer will finish the first colour, move the extruder to the filament change location, request a filament change, extrude a purge pile to change the colour in the nozzle, then ask you if the colour is clear...
At this stage many people pull off the waste and answer yes...
DON'T PULL THE WASTE OFF! instead, hold onto the waste and answer Yes.
As the extruder moves back towards the print, it Poops a cheeky little extra length that will remain attached to the waste that you are holding... (Saves you trying to catch the extra poop...
then the printer will return to the last print point, bop the nozzle onto the print surface, and then move tothe new start point, often leaving a tiny beauty spot in the wrong place.
If however you do the colour change one layer higher, the beauty spot will end up under the new colour and nobody will see it.
If you are doing colour change in layer then use a purge tower so that the beauty spot ends up outside the print area.
regards Joan
I try to make safe suggestions,You should understand the context and ensure you are happy that they are safe before attempting to apply my suggestions, what you do, is YOUR responsibility.Location Halifax UK
RE: Designating the start point for layer printing.
Hi Joan! Thanks for the detailed answer. Of course, this is what I do after changing the filament - I remove the extruded material and click continue 🙂 But my problem is not related to the beautiful dot at the beginning of printing, quite the opposite. When moving a new color to a layer with a new geometry, the start of printing is obtained with a gap, as if there is not enough material. And if the new geometry has small details, then they are lost. Then everything evens out, but it’s the beginning that turns out to be a marriage. Therefore, the idea arose to start printing on a new layer in a place where this defect would not be visible, for example, on a long border line. But the slicer itself chooses the starting point and I want to change this. Is there such a possibility or not? Best regards Sebastian.
RE: Designating the start point for layer printing.
Hi Sebastian
You don't say which Prusa Printer you actually have (It's not an issue anyway)
I checked this option on My Zaribo... using prusa slicer.
Please find enclosed a keytag that I Made for someone else as a demonstration of a different situation
the attached keytag is a three colour section keytag
in the original configuration It would print a prime line, then print the bottom face, with recessed characters,
then it would engage a layer height colourchange, and print the middle of the keytag,
then again, colourchange, and print the top raised letters
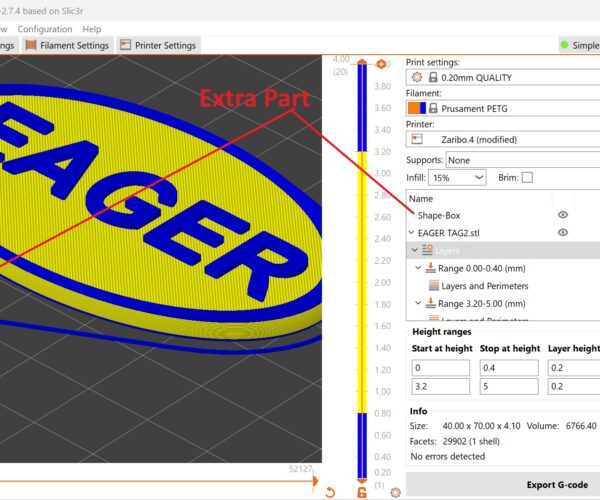
In order to try and force a layer start outside the main keytag,
I added a tiny extra part (Shapebox cube) , and moved that part above the keytag part in the right hand window so that it would print first
I think it should work for you as a demo
There are two .3mf files in the zipfile below, One is the actual Zaribo Configuration that I printed and the other should be set up for a Prusa Mk3s or Mk3S+
EAGER TAG plus Cube Prusa Mk3s - Mk3S+
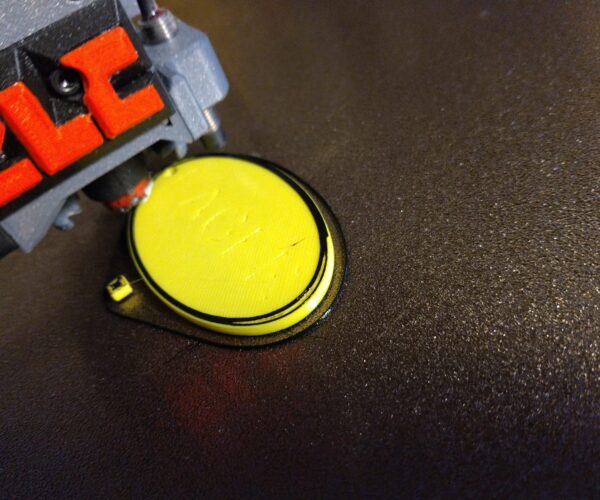
Below is a picture of the second colourchange, you can see the cube has black first and then the black moved onto the main keytag. 
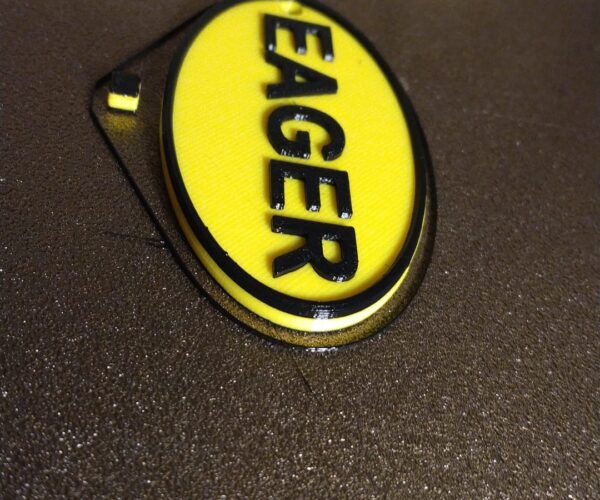
and below is the finished item itself
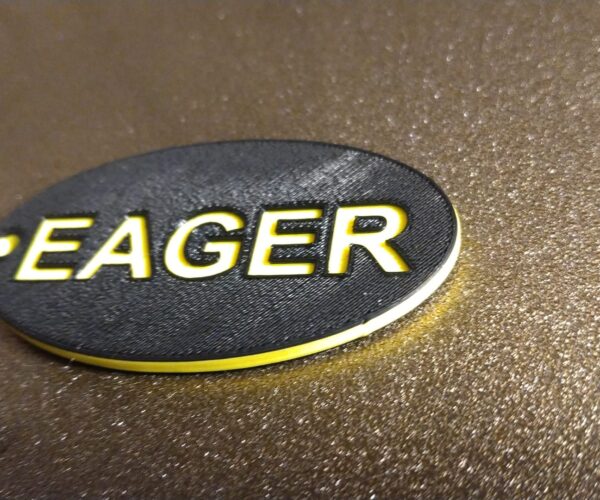
Plus the underside and sacrificial cube
regards Joan
I try to make safe suggestions,You should understand the context and ensure you are happy that they are safe before attempting to apply my suggestions, what you do, is YOUR responsibility.Location Halifax UK
RE:
Hi Joan! A very interesting method, I already realized that some kind of trick was needed. I will definitely try it, it seems that it should work on my Ender 3 s1.
Regards Sebastian.
RE: Designating the start point for layer printing.
Cheers Sebastian,
All that should be necessary, is to load the project into prusa slicer and change the printer type!
Most of the information in the post, is used to make the top and bottom surfaces have single perimeters to give nicer letters without weakening the model
regards Joan
I try to make safe suggestions,You should understand the context and ensure you are happy that they are safe before attempting to apply my suggestions, what you do, is YOUR responsibility.Location Halifax UK